


While drafting reports or proposals, enhancing the completeness of a document often necessitates settings for border configurations.
However, when it comes to creating or removing borders in Hangul, locating the menu options can be challenging, and editing table borders can often be confusing.
This article provides a step-by-step guide on creating, removing, and editing borders in Hangul documents.
With this information, you will no longer struggle with border-related issues in Hangul.
Basic Border Configuration Methods for Hangul Documents
Creating Borders in Hangul Documents
Click [Page] → [Page Border/Background] from the top menu.
The shortcut key is “ALT + W, B”.

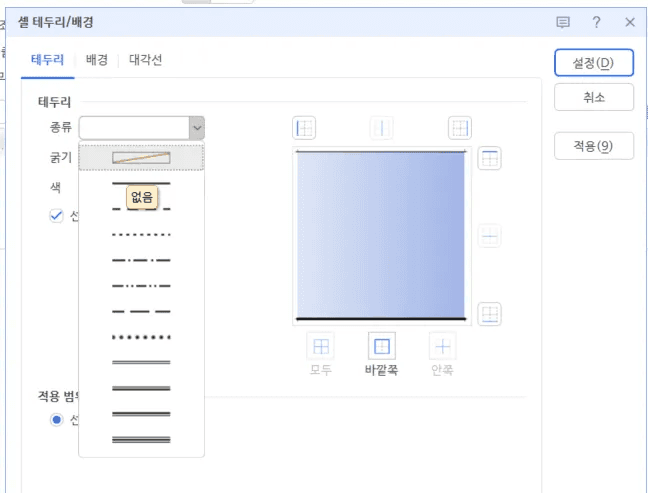
In the popup window, select the [Border] tab, and specify the desired border style (solid, dotted, double line, etc.) as well as thickness, color, and spacing.
You can apply borders to all four sides, or selectively one or two sides based on the purpose and usage.
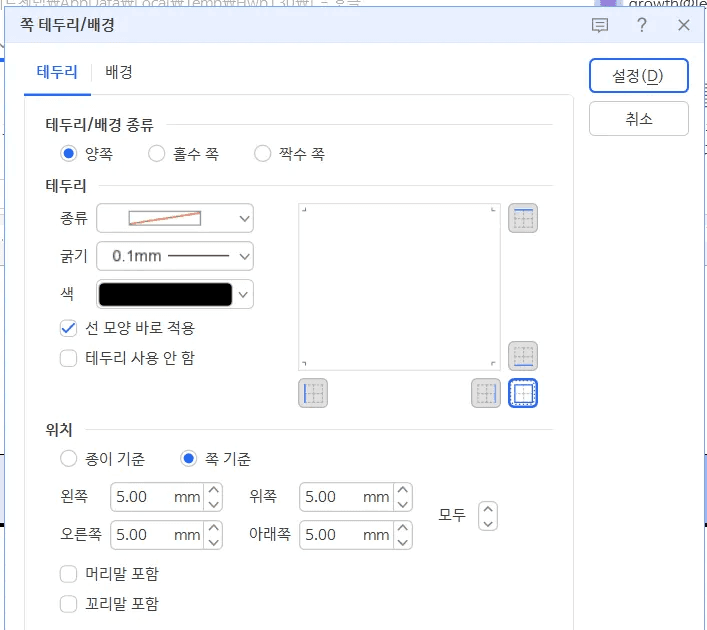
Set the position of the border. Since the area range of the page and the document’s paper are different, if you want to place the border on the inside of the page, set it to 'Page Basis', and if you wish to maximize the border on the edge of the document, set it to 'Paper Basis'.
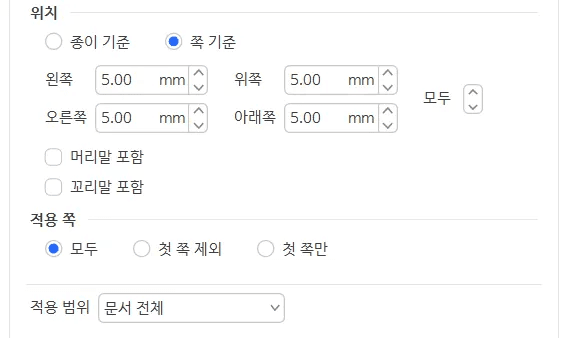
Select the application scope.
Once the configuration is complete, click [Set] to add the border to the document.
💡 Tip. Document borders are useful for neatly organizing the first page of a cover or report. Applying borders to pages containing company logos or document titles can visually provide a more professional impression.
Removing Borders in Hangul Documents
To remove already set borders, you can easily manage it through the same pathway.
Click [Page] → [Page Border/Background].
The shortcut key is “ALT + W, B”.
Select [Border] tab → Type → [No Line].
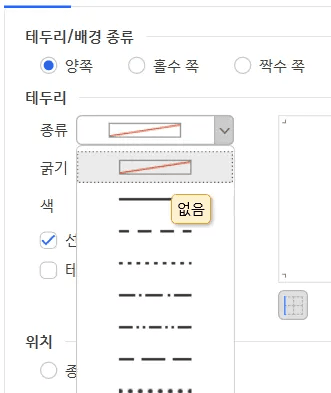
Click [Set], and all existing borders will disappear.
💡Tip. If you wish to keep only the background color, select “No Border” and specify the color in the [Background] tab, completing a neat document design.
Methods for Setting and Editing Hangul Table Borders
When crafting Hangul tables, border designs significantly impact readability and completion.
Follow the steps below to freely adjust table borders.
Editing Hangul Table Borders
Click on the table you wish to edit, then select the menu [Table Tools] → [Border/Background].
The shortcut key is to select the entire table (or the block needing border settings) + L key.In the [Border] tab, specify the line type, color, and thickness.
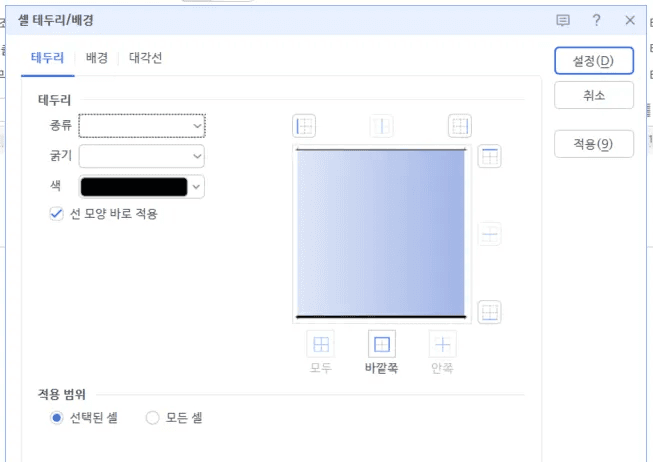
Select the application position (Top/Bottom/Left/Right/All, etc.) and click [Set] to apply the border settings.
💡 Tip. You can configure partial border settings by selecting only the desired cells and altering the borders.
For instance, setting only the top line of the table thicker can clarify the distinction between the table title and the main text.
Removing Hangul Table Borders
Select the area where you wish to remove borders by dragging.
In the [Table Tools] → [Border/Background] → [Border] tab, select ‘None’.
By pressing the [Set] button to apply, the borders in the specified area will disappear.
✅ Border Configuration Checklist for When Settings are Not Applied
If borders do not appear or print in Hangul, check the following items sequentially.
While the methods may vary based on version or settings environment, most issues can be resolved by the following methods.
[View] → [Show Table/Border] Option Check
If this option is unchecked, borders may not be visible on the screen.
As menu positions or names may differ depending on the Hangul version, first check the 'View Settings' section.
Ensure the ‘Print Borders’ Option in Print Preview
If borders or objects are not printed, verify that the ‘Print Borders’ or ‘Print Objects’ option is enabled in the [File] → [Print Settings] menu.
If the object print option is disabled in the printer driver settings, borders may be omitted.
Check for Nested Tables (Merged Tables)
Borders may not be fully applied to merged tables or tables within cells.
In such cases, directly select the internal cells and designate individual borders in [Table Properties] → [Border/Background].
💡 Tip. If the issue persists despite these methods, restoring the settings to default via [Tools] → [Configuration] → [Restore Default] may allow normal display.
Enhancing Hangul Document Completeness with Border Settings
Hangul document borders and table borders are not merely decorative; they are crucial elements in clarifying document structure and increasing readability.
Explore the methods introduced in this article for creating, removing, and editing borders freely.
Furthermore, if repetitive Hangul document editing becomes cumbersome, consider utilizing specialized AI tools like Inline AI for Hangul documents.
They support draft creation, summarization, and spell check at once, making document completeness smarter.


