Learn
Numbered List in Word: Restart, Continue, and Turn Off Auto

Typing "1." at the start of a line and clicking the Numbering button produce pages that look identical, but a numbered list in Word is a completely different object underneath. Typed digits are just characters, so inserting one item means renumbering everything below it by hand. Automatic numbers are a paragraph property, so Word recalculates the sequence for you. The catch is that it sometimes recalculates when you did not want it to, snapping back to 1 in the middle of a procedure or refusing to pick up where the previous list left off. This guide covers the basics, restarting and continuing numbering, switching off the automatic numbers and bullets you never asked for, and tightening up number position and spacing.
How Numbered Lists Work in Word
The Numbering Button in the Paragraph Group
Numbered lists come from the Numbering button in the Paragraph group on the Home tab. Its icon shows 1. 2. 3. stacked vertically, and it sits between the bullets and multilevel list buttons.
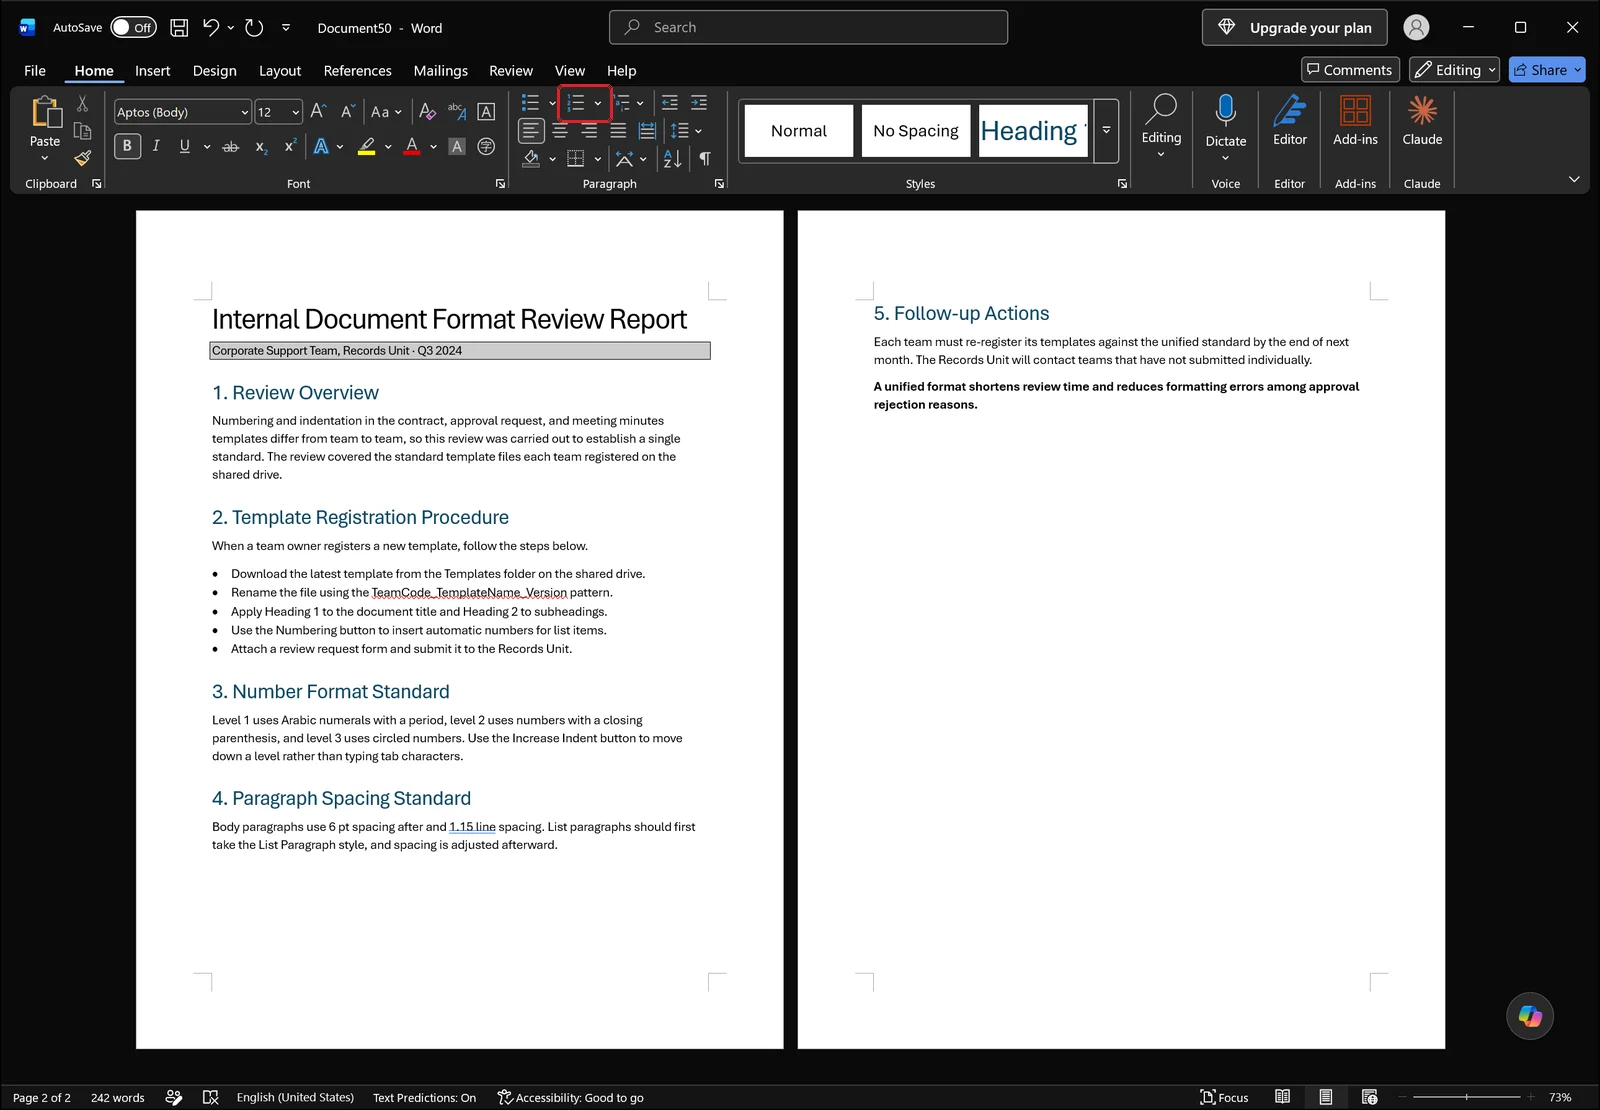
Put the cursor inside the paragraph you want numbered, or drag across several paragraphs, and click the button. If your selection covers multiple paragraphs, each one becomes a separate item in the list.
Automatic Numbers vs. Numbers You Typed
A number applied with the button is formatting attached to the paragraph, not text inside it. Add or delete an item in the middle and everything below renumbers on its own.
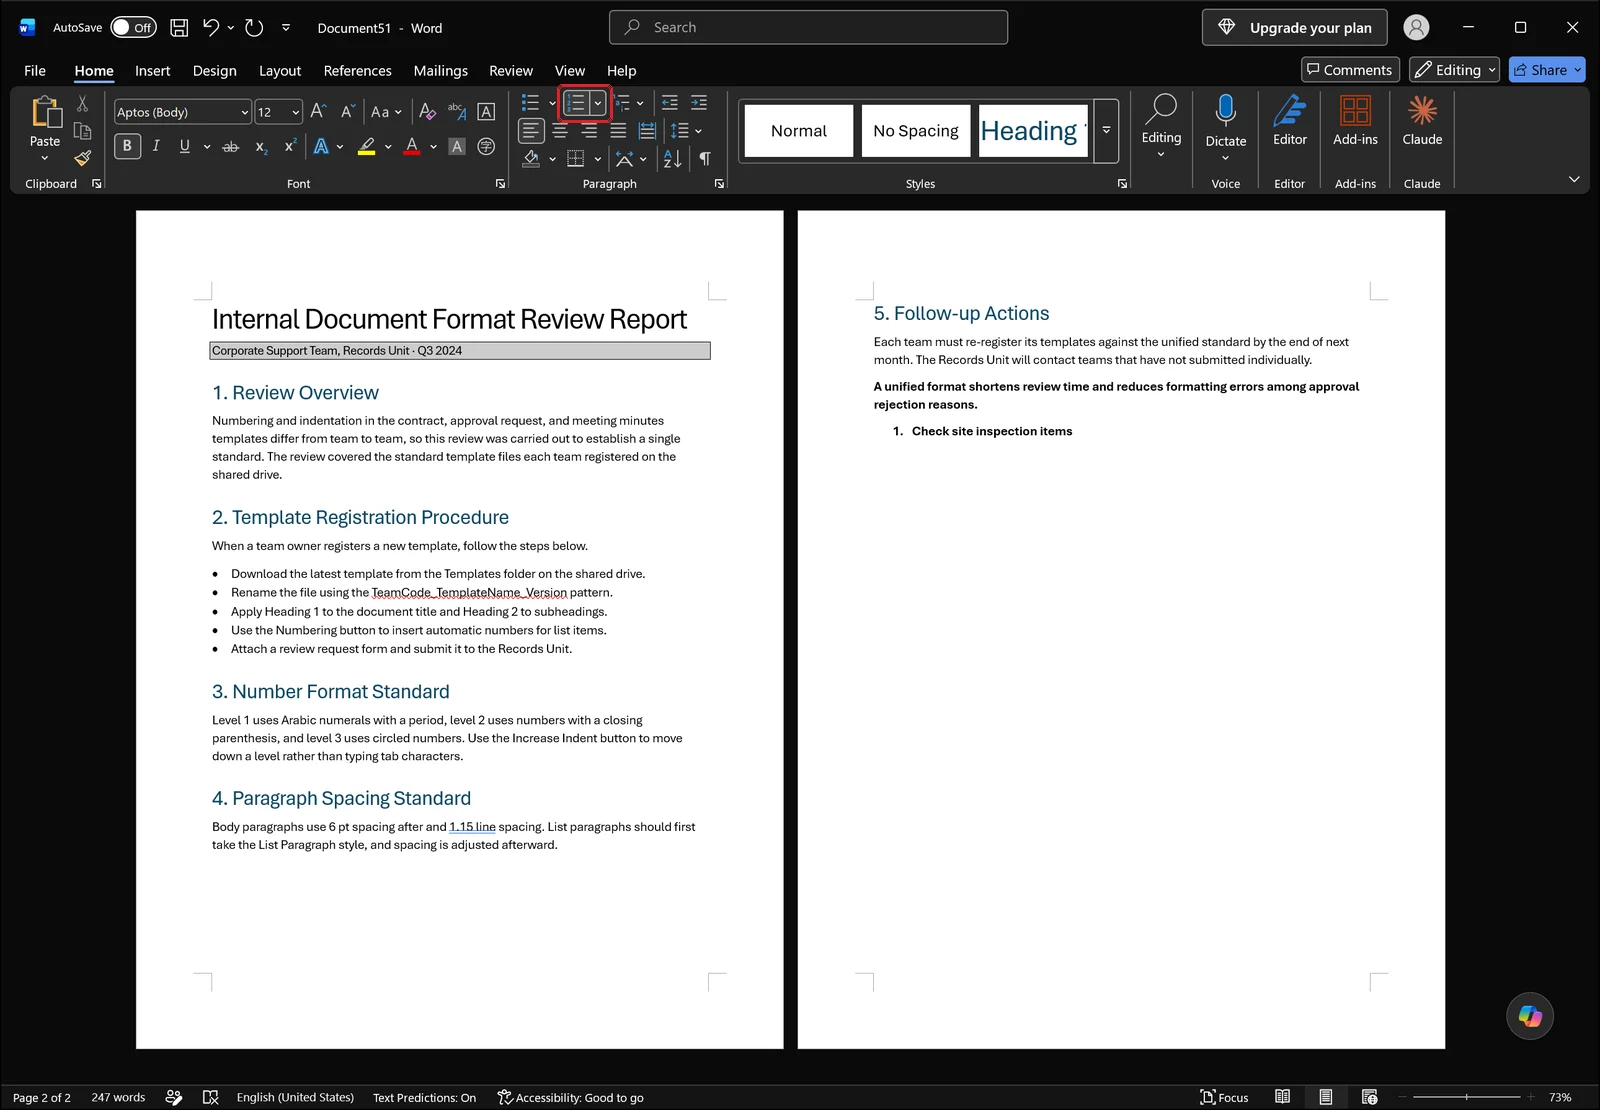
The quickest way to tell which kind you are looking at is to drag your mouse across the number. A typed number selects character by character like ordinary body text. An automatic number cannot be selected that way; clicking it instead flips every number at the same level to a gray highlight.
When Automatic Numbering Helps and When It Hurts
Procedures, contract clauses, and meeting agendas gain items and change order constantly, and that is exactly where automatic numbering pays off. Drag an item up two rows and you never touch the numbers.
It works against you when the numbers themselves are being referenced. If the body text says "see item 3," or you are filling in a form where the numbering is fixed by the template, an automatic list will silently rewrite those references the moment a paragraph moves. In documents like that, typing the numbers as plain text is the safer choice.
Building a Numbered List in Three Steps
Type the Text First, Then Number It
Numbering as you type tends to produce stray items and half-formatted paragraphs. Writing everything out first and applying the format in one pass is cleaner:
- Type each item on its own line.
- Select all the paragraphs that should be numbered.
- Click Numbering in the Paragraph group on the Home tab.
Choosing a Number Format
The default is 1. 2. 3., but a document may call for A. B. C., i. ii. iii., or I. II. III. instead. Click the small arrow next to the Numbering button to open the numbering library and pick a style from the thumbnails.
If nothing there fits, use Define New Number Format at the bottom of the menu. You choose a number style and then edit the character that follows it, replacing the period with a parenthesis or a space. The Set Numbering Value command in the same menu controls the starting number, and it comes up again in the next section.
Creating Sub-Levels with Tab
To demote an item, put the cursor at the very start of the line and press Tab. Word moves it in one level and switches to the number format defined for that level. Shift+Tab promotes it back. The Increase Indent and Decrease Indent buttons on the Home tab do the same thing.
If you need numbers that carry the parent along, like 1 / 1.1 / 1.1.1, pick that pattern from the Multilevel List gallery at the start instead of building it with Tab. Policy manuals and proposals that run three or more levels deep hold together much better this way when levels are rearranged later.
Restarting Numbering and Continuing from an Earlier List
Two Ways to Start Again at 1
The fastest route is the right-click menu. Right-click the number of the item that should become the new first item and you get both Restart at 1 and Continue Numbering. Choosing the first one makes that item number 1 and renumbers everything below it.
From the ribbon, open the Numbering dropdown and choose Set Numbering Value. Select Start new list, type 1 in the value box, and the result is identical.
Starting at a Number Other Than 1
There is no rule that a list has to begin at 1. If a procedure ran through step 4 in the previous chapter and the next chapter should pick up at step 5, open Set Numbering Value, choose Start new list, and enter 5. Appendices and continuation sheets rely on this constantly.
Rejoining a List That Got Interrupted
Drop an explanatory paragraph or a figure caption between two groups of items and Word treats the second group as a brand-new list. Number it and it starts at 1 again while the list above keeps its original numbers.
To rejoin them, right-click the number on the first item of the lower list and choose Continue Numbering. Picking Continue from previous list in the Set Numbering Value dialog does the same job.
One limitation is worth knowing: lists inside a table or a text box are tracked separately from body-text lists, so neither command will link them to the numbering in the main flow. For those, set the starting value manually and be done with it.
Turning Off Unwanted Automatic Numbering
Undo Once, Immediately
Type "1." followed by a space, write your sentence, press Enter, and Word converts the line into a numbered list. Typing "-" and a space triggers the bulleted version of the same behavior.
Press Ctrl+Z once right at that moment and only the list formatting is removed. The text you typed stays exactly where it is.
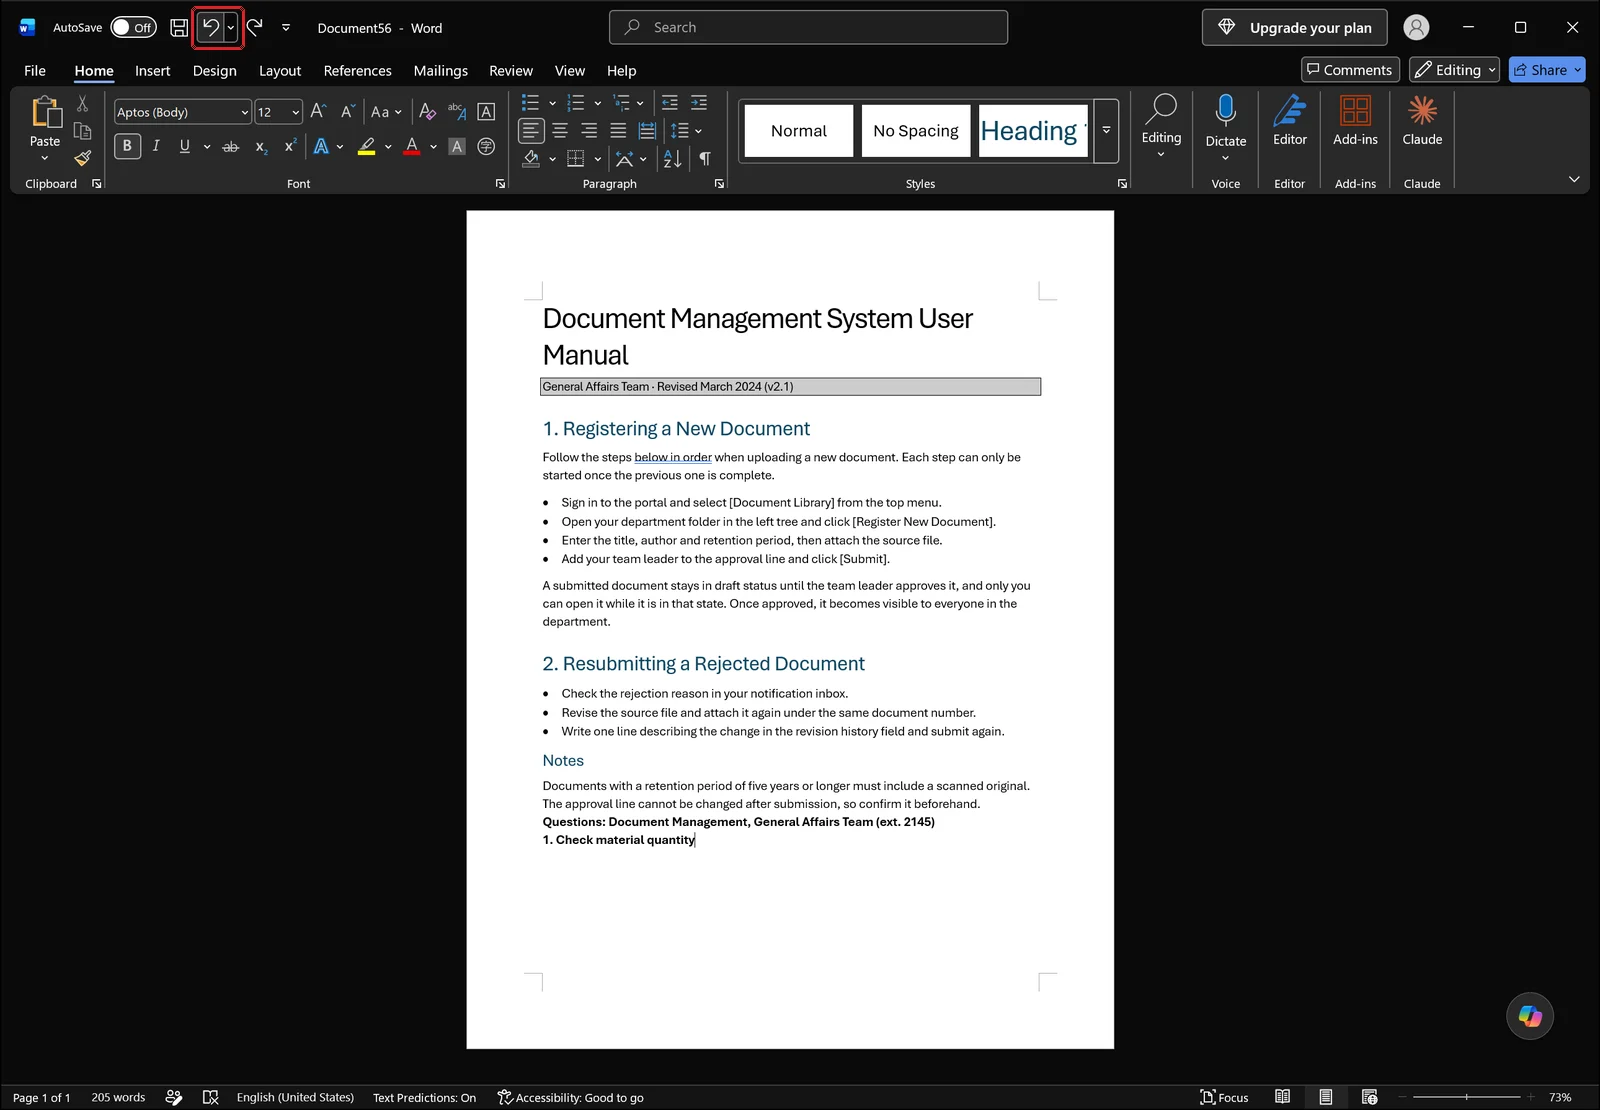
Press Ctrl+Z a second time and you start undoing your typing as well, so a single press is the trick here.
Switching the Behavior Off for Good
If undoing it every time is tiresome, disable the feature. Go to File > Options > Proofing > AutoCorrect Options, open the AutoFormat As You Type tab, and clear Automatic numbered lists and Automatic bulleted lists. From then on, "1." stays as the characters you typed.
Removing Bullets and Clearing Formatting
Bullets that are already applied come off by selecting the paragraphs and clicking the Bullets button again. The arrow beside that button opens the Bullet Library, where you can swap in a different bullet character instead.
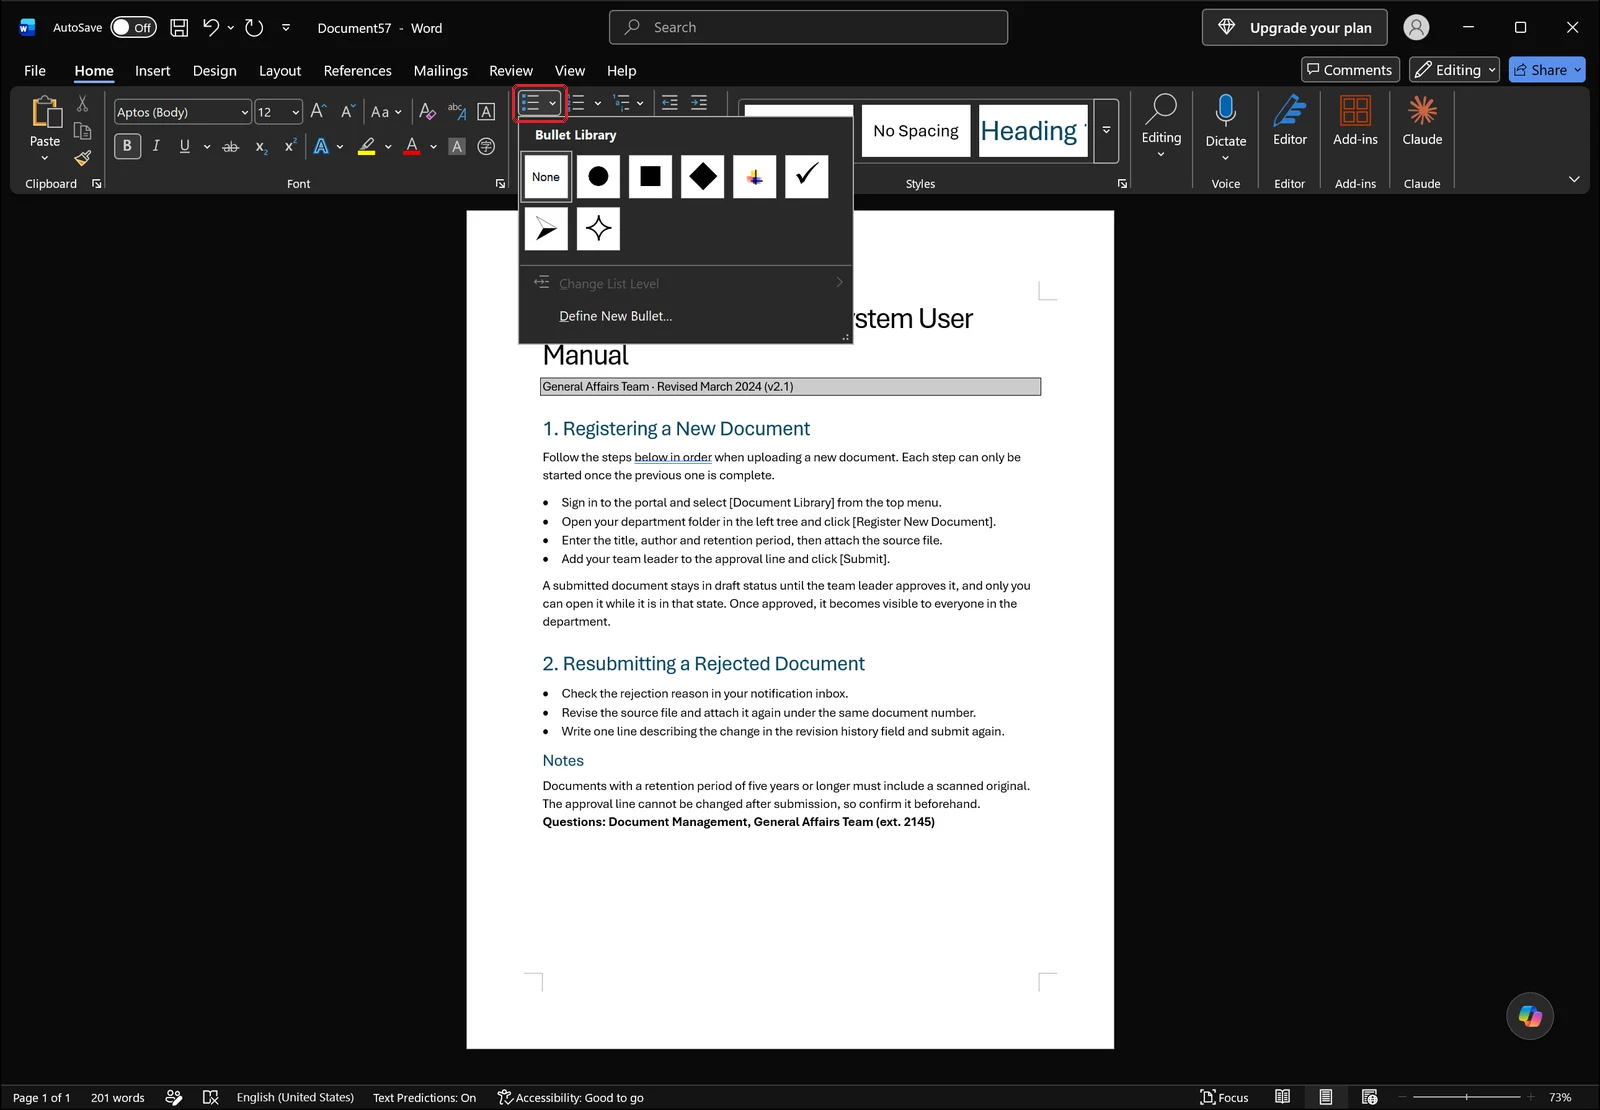
Numbering toggles off the same way, with a second click on the Numbering button. To wipe the indents at the same time, use Clear All Formatting in the Font group on the Home tab.
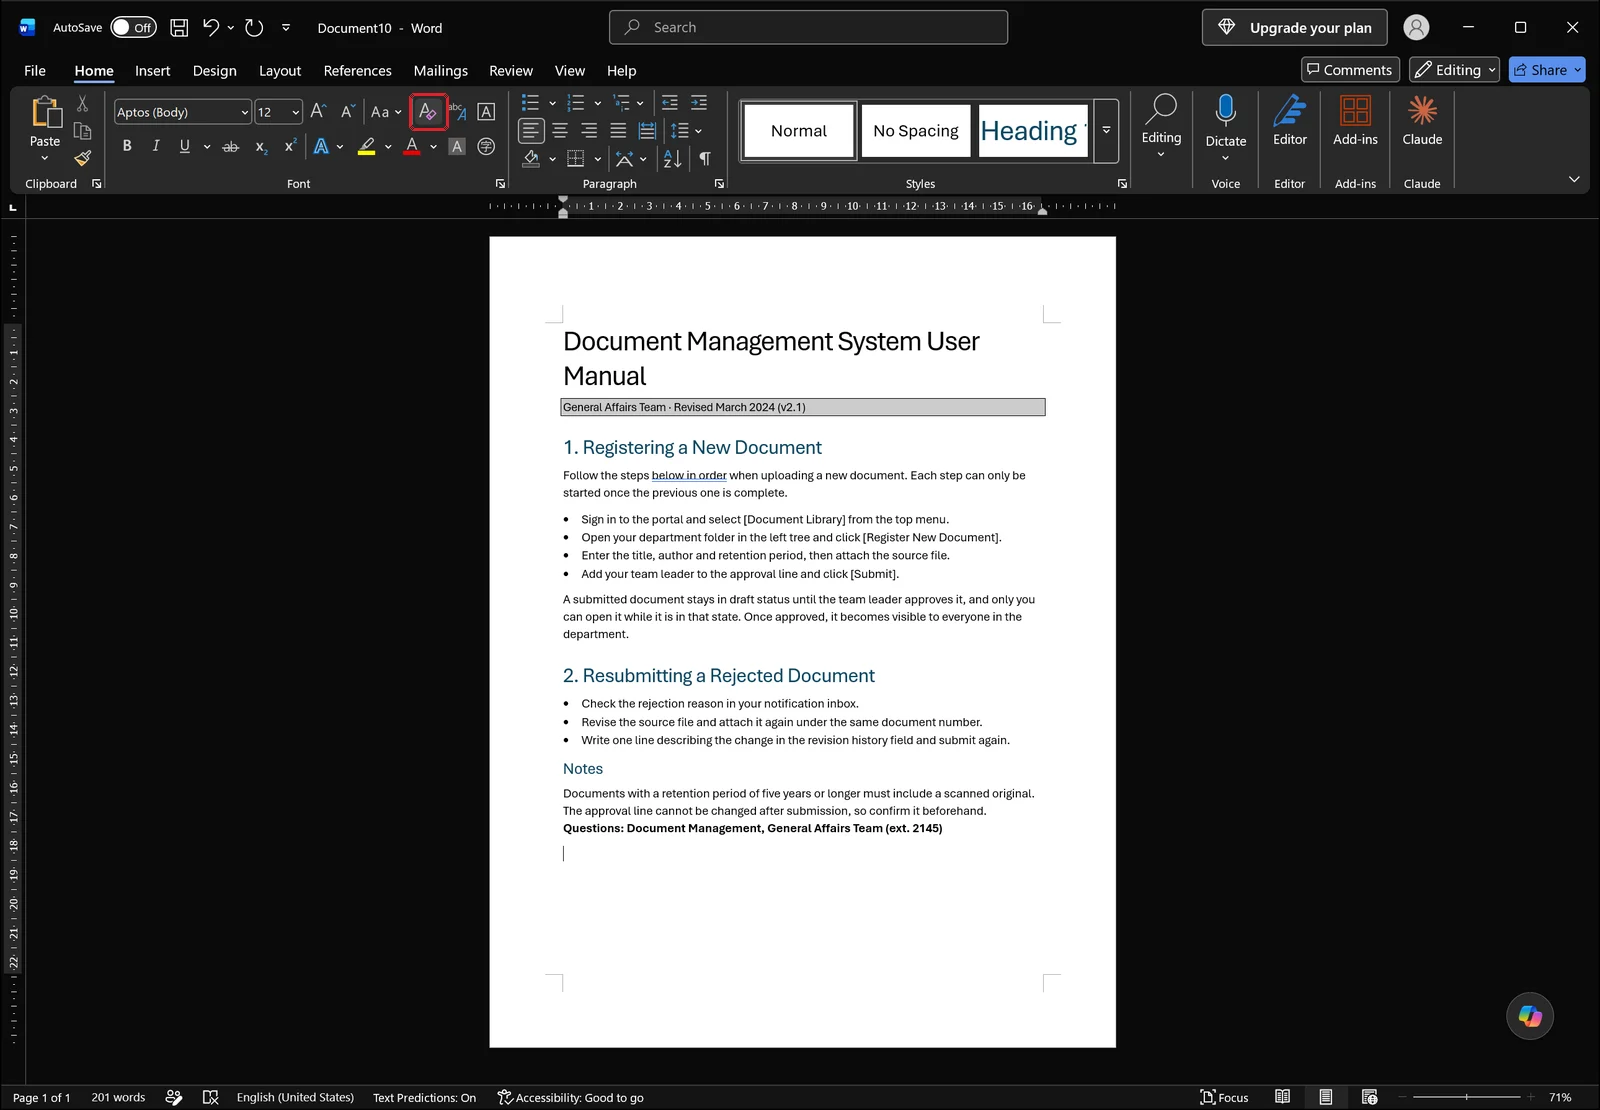
Be aware that Clear All Formatting removes far more than the list: bold, font size, and color go with it. When a paragraph carries emphasis you want to keep, toggling the list button off is the safer move.
Adjusting Number Position and Spacing
Indents and Hanging Indents in the Paragraph Dialog
Where the number sits is controlled by the paragraph's left indent; where the text after it begins is controlled by the hanging indent. Click the dialog launcher at the bottom right of the Paragraph group on the Home tab to set both as numbers instead of dragging.
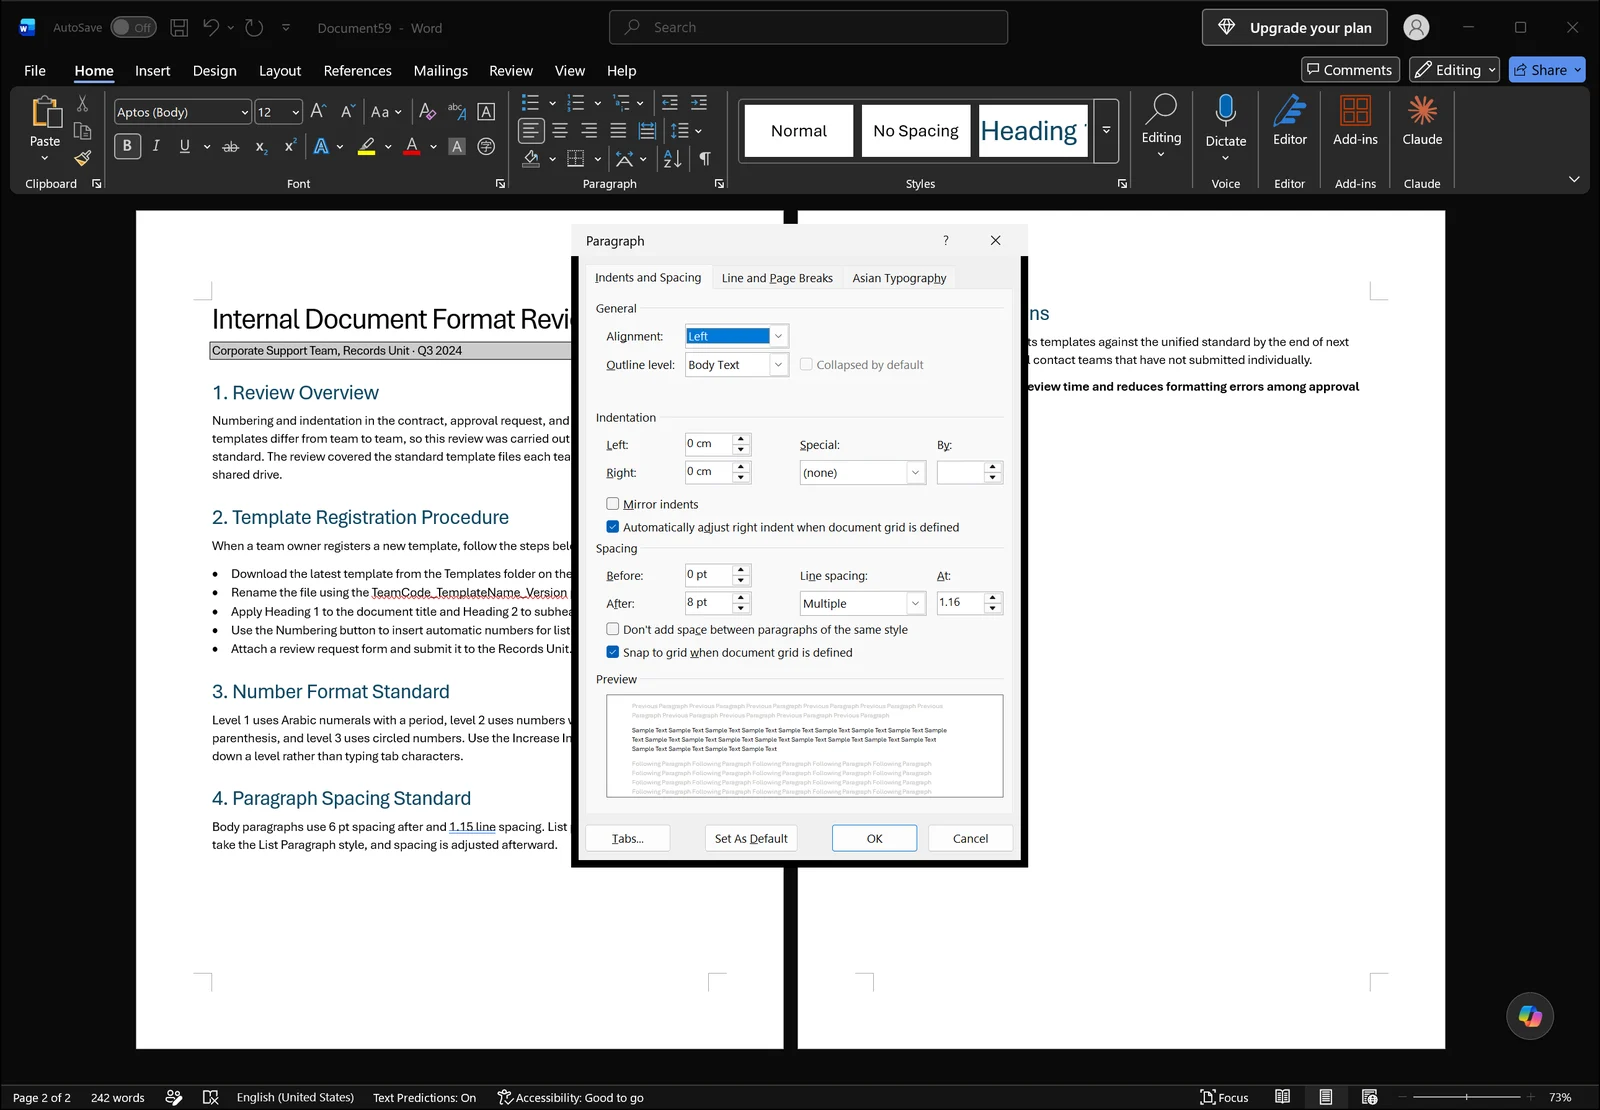
Give every list the same Left and Special values on the Indents and Spacing tab and lists scattered across the document line up vertically, numbers and text both. It is also far easier to reproduce than nudging the ruler by hand.
Closing the Gap Between Items
When list items look unusually far apart, the culprit is normally paragraph spacing rather than line spacing. On the Layout tab, in the Paragraph group, set the Spacing After value to 0 and the items pull together.
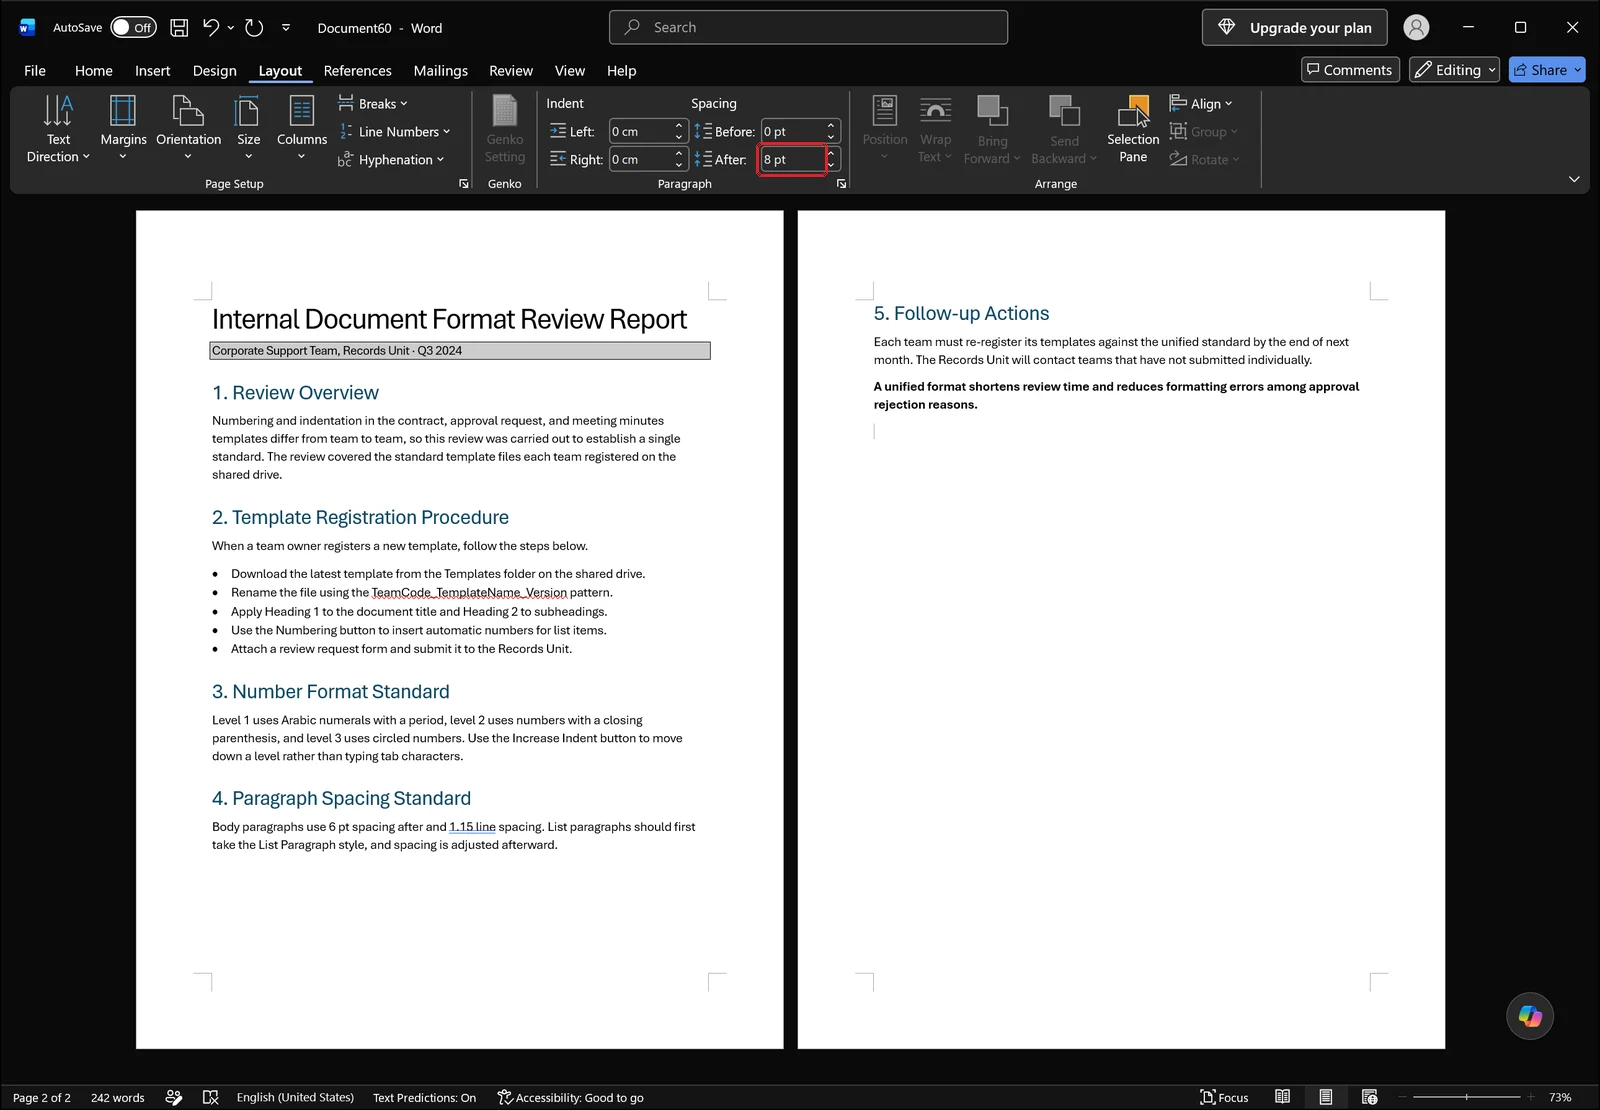
Type 0 into the boxed Spacing After field. Note that the List Paragraph style often carries spacing of its own, so if you fix one list and the same gap reappears in the next one, edit the style rather than the paragraphs. If the line spacing itself needs work, the guide below covers it.
👉 How to Change Line Spacing in Word: 1.5, Exact pt, and Fixes
Tightening the Space After the Number
A wide gap between the number and the first word usually means a tab character is separating them. Right-click a list item and open Adjust List Indents, then change the character that follows the number from a tab to a space or to nothing. Reducing the left indent and hanging indent in the same dialog pulls the text closer still. Turning on the ruler from the View tab lets you drag the markers and watch the result live.
Fixing Lists That Have Gone Wrong
Different Formatting on Every List: Use Styles
When indentation and spacing vary from list to list inside one document, reapplying the List Paragraph style is faster than repairing items individually. Modify the style itself in the Styles pane and every list using it updates at once.
Copying Formatting from a List That Works
If the document already contains one list formatted the way you want, the fastest fix is to spread that formatting around.
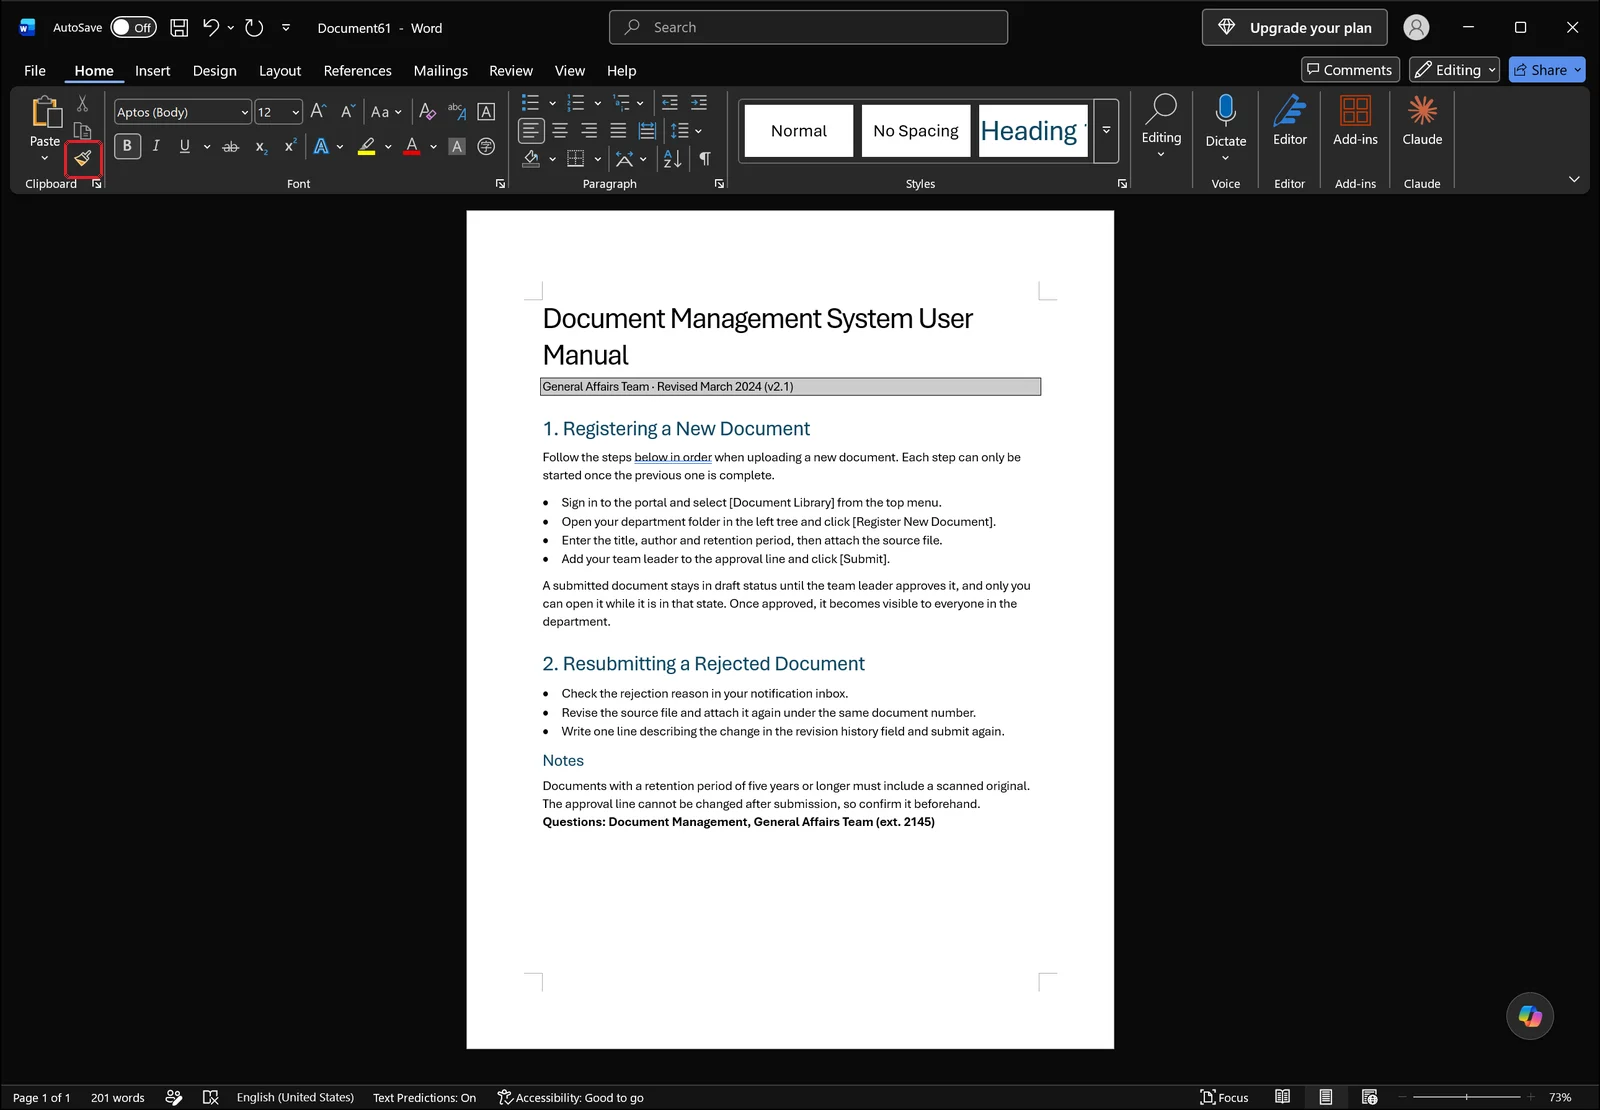
Place the cursor in the good item and click the Format Painter brush in the Clipboard group once to paint a single target, or double-click it to keep painting across several. Press Esc when you are finished.
When Pasted Lists Renumber Themselves
Numbers jump around after a paste because the source document's list definition travels with the text. This sequence clears it up in most cases:
- Use Keep Text Only in the paste options to strip the original list definition.
- Select the paragraphs and apply Numbering again.
- Set the starting point with Continue Numbering or Set Numbering Value.
If a blank page is still sitting at the end of the document after the numbering is sorted out, it may be an empty paragraph that came along with the list formatting.
👉 Delete a Blank Page in Word: Why Backspace Won't Work
FAQ: Numbered Lists in Word
Q. How do I restart numbering at 1?
Right-click the number of the item that should start over and choose Restart at 1. From the ribbon, open the Numbering dropdown, choose Set Numbering Value, select Start new list, and enter 1. Both routes give the same result.
Q. Can I turn automatic numbering off completely?
Yes. Open File > Options > Proofing > AutoCorrect Options, go to the AutoFormat As You Type tab, and clear Automatic numbered lists and Automatic bulleted lists. For a one-time fix, press Ctrl+Z once immediately after the number appears; the text survives and only the list formatting is undone.
Q. Can numbering continue across a paragraph that interrupts the list?
It can. Right-click the number on the first item of the second list and choose Continue Numbering, or select Continue from previous list in the Set Numbering Value dialog. Lists inside tables and text boxes are the exception, since they do not connect to body-text numbering.
Q. The gap between the number and the text is too wide. How do I shrink it?
Right-click the item, open Adjust List Indents, and change the character after the number from a tab to a space or to nothing. If it is still too wide, reduce the left indent and the hanging indent together on the Indents and Spacing tab of the Paragraph dialog.
Cleaning up Word documents with inline AI
Everything above assumes you have the document open and are clicking through it yourself, which is fine for one list and tedious for a policy manual with dozens, or a report assembled from sections several people wrote separately. inline AI is a local agent that reads and edits the Word and Excel files already on your machine. You can ask it in plain language to make the numbered list formatting consistent throughout a document, or to have the list in chapter 3 continue from the numbering in chapter 2, and it locates those paragraphs and edits them. Because it works on your PC rather than uploading files to a server, it can be used on internal manuals and contracts that are not allowed to leave the machine.
See what an agent could take over at your company in a 30-minute call.