Learn
Word Count in Word: Characters With and Without Spaces

There are two different word count readouts in Word, and they do not tell you the same thing. The strip at the bottom of the window tracks words as you type. The Word Count dialog on the Review tab breaks the document down further, including characters with spaces and characters without spaces. If you are writing to a hard limit, a cover letter capped at 1,500 characters or an abstract capped at 250 words, that difference is the whole game.
This guide covers both routes, how to count only a selected passage, when footnotes and text boxes get added in, and what to check when the counter disappears from the bottom of the window entirely.
The Two Places Word Reports Document Length
Word measures your document in two places: the status bar along the bottom edge of the window, and the Word Count dialog you open from the ribbon. They count different things, so it helps to decide up front which number you actually need.
The status bar: an always-on live counter
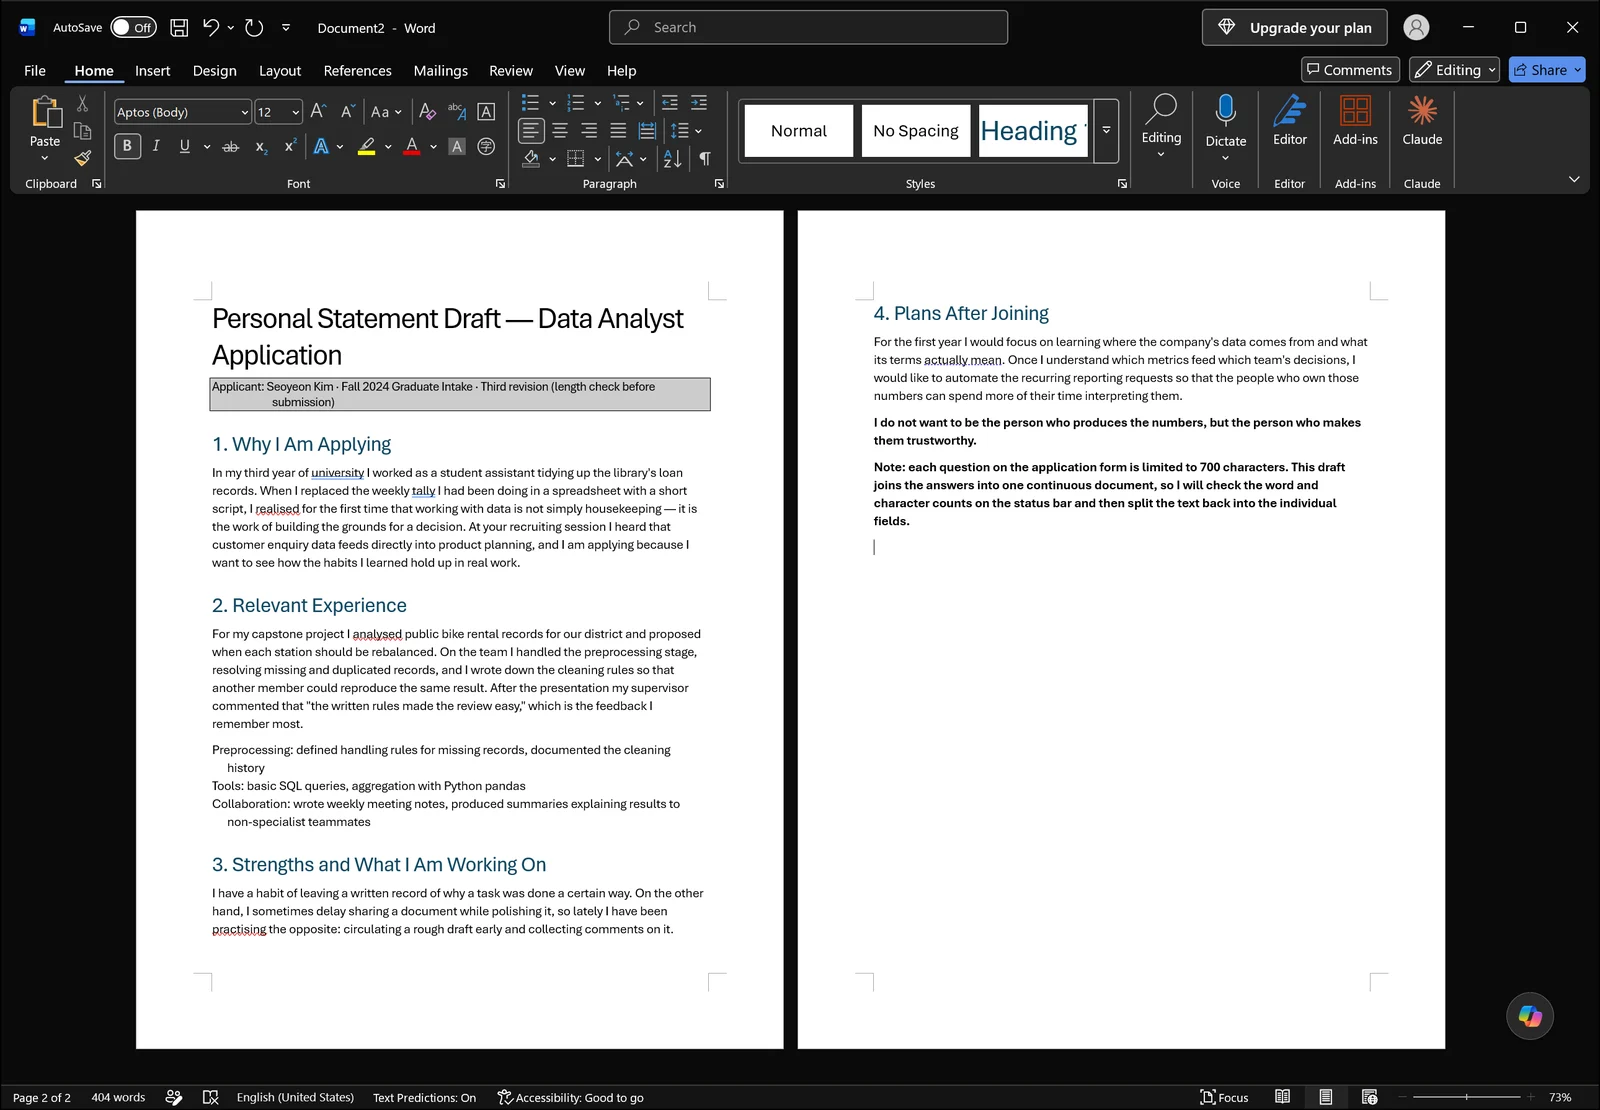
Open any document and the bottom-left corner shows the current page and the word count side by side. Nothing to switch on, nothing to click. Type a sentence or delete one and the number moves immediately. The catch is that the default readout here is words. Character counts do not appear in this spot.
The Word Count dialog: everything on one screen
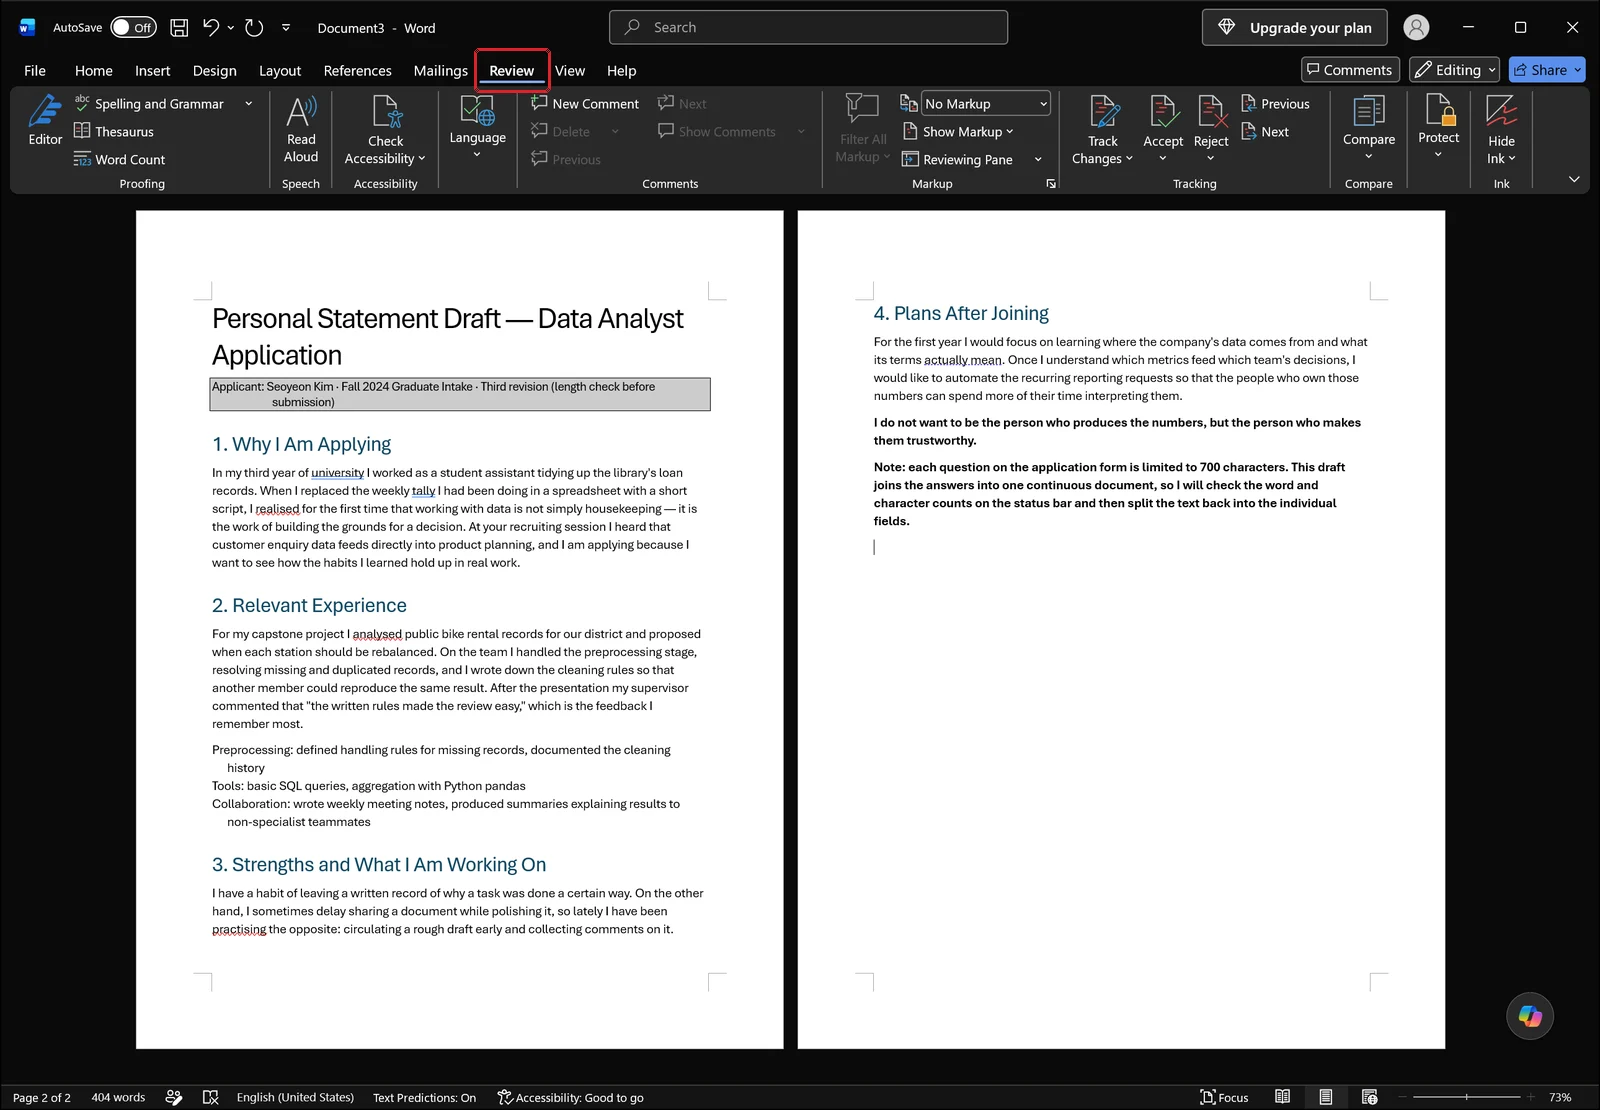
Character counts live on the Review tab. This is where Word groups its proofing commands, spelling and grammar, thesaurus, and alongside them the Word Count command. Click it and a dialog opens listing pages, words, characters (no spaces), characters (with spaces), paragraphs, and lines in a single view. Clicking the word count in the status bar opens the same dialog, and the keyboard shortcut is Ctrl+Shift+G.
Which number should you submit against?
Read the instructions before you read the counter. Application portals and course submission systems vary: some cap you at a character count including spaces, others at a word count, and a few count characters excluding spaces. Trusting the status bar figure alone is how people end up with the last paragraph silently truncated when they paste into the form. Find out which measure applies, then read that specific line in the Word Count dialog.
Reading the Live Word Count in the Status Bar
While you are still drafting, there is no reason to keep a dialog open. A glance at the bottom of the window is enough to tell you roughly how full the piece is.
The number updates as you type
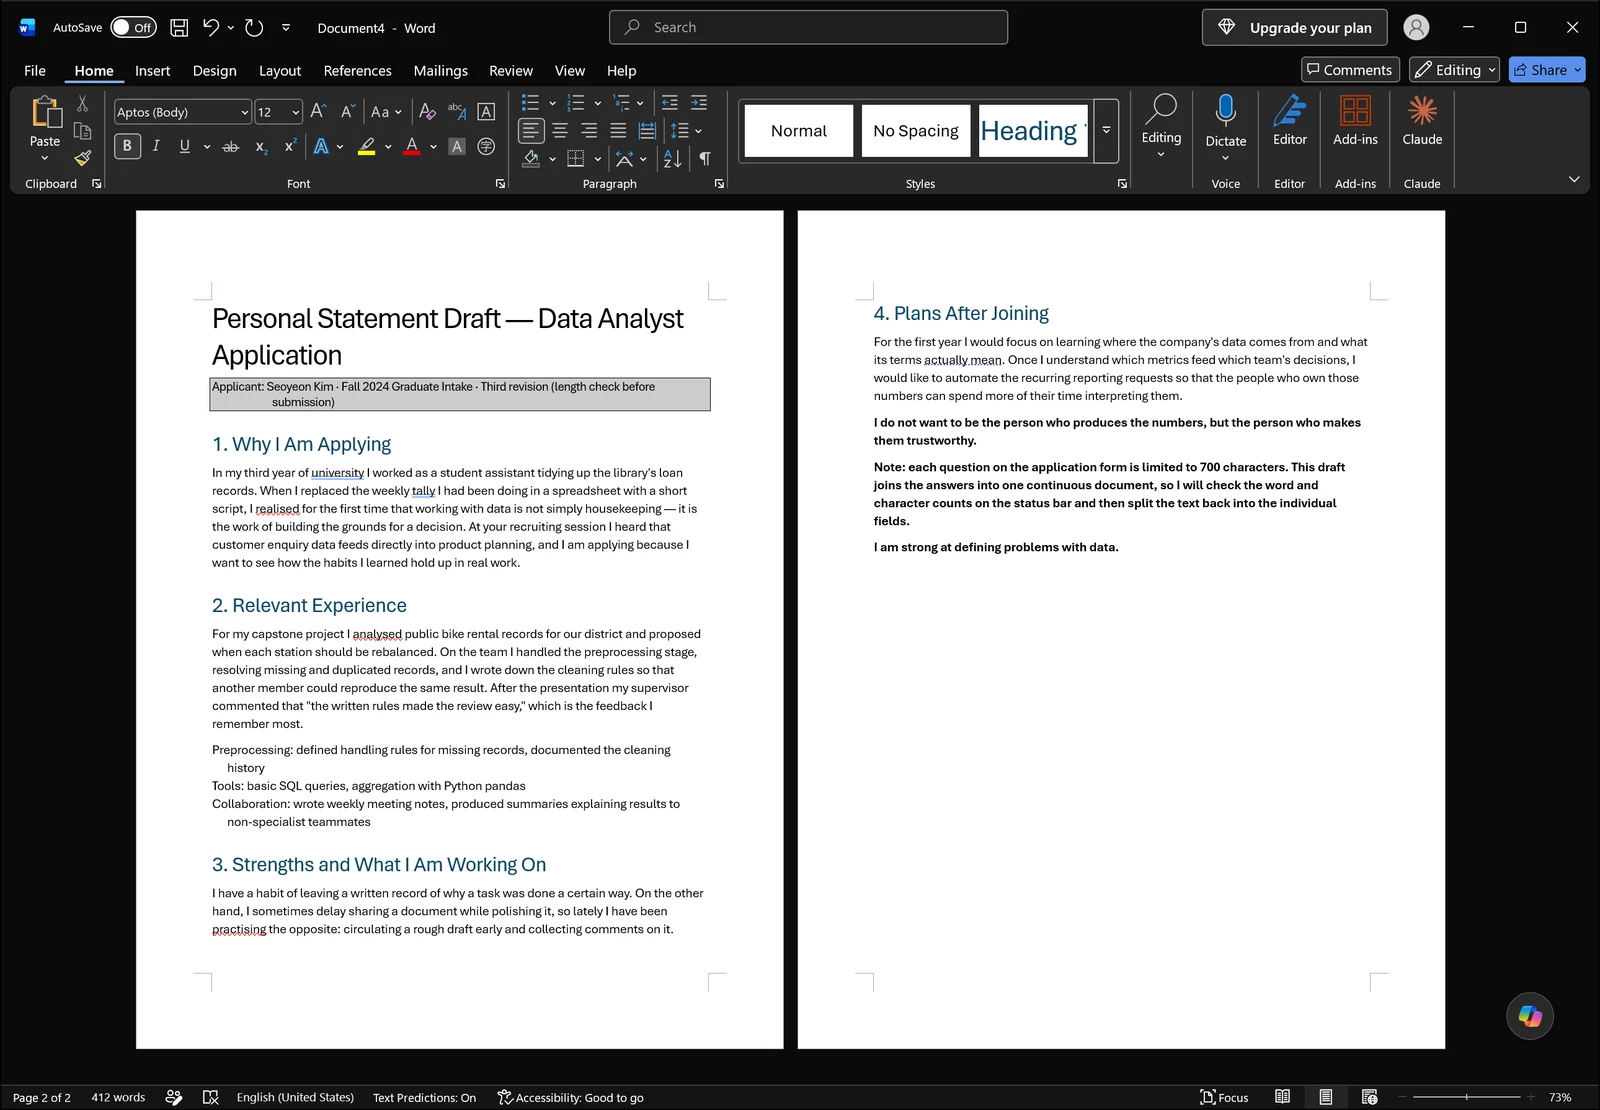
Add a sentence at the cursor and the count at the bottom climbs to match. There is no save or refresh step; the figure tracks your typing in real time. That makes decisions like "two more sentences and this section is done" something you can make while writing instead of afterwards.
Find One Page in the Zoom group on the View tab
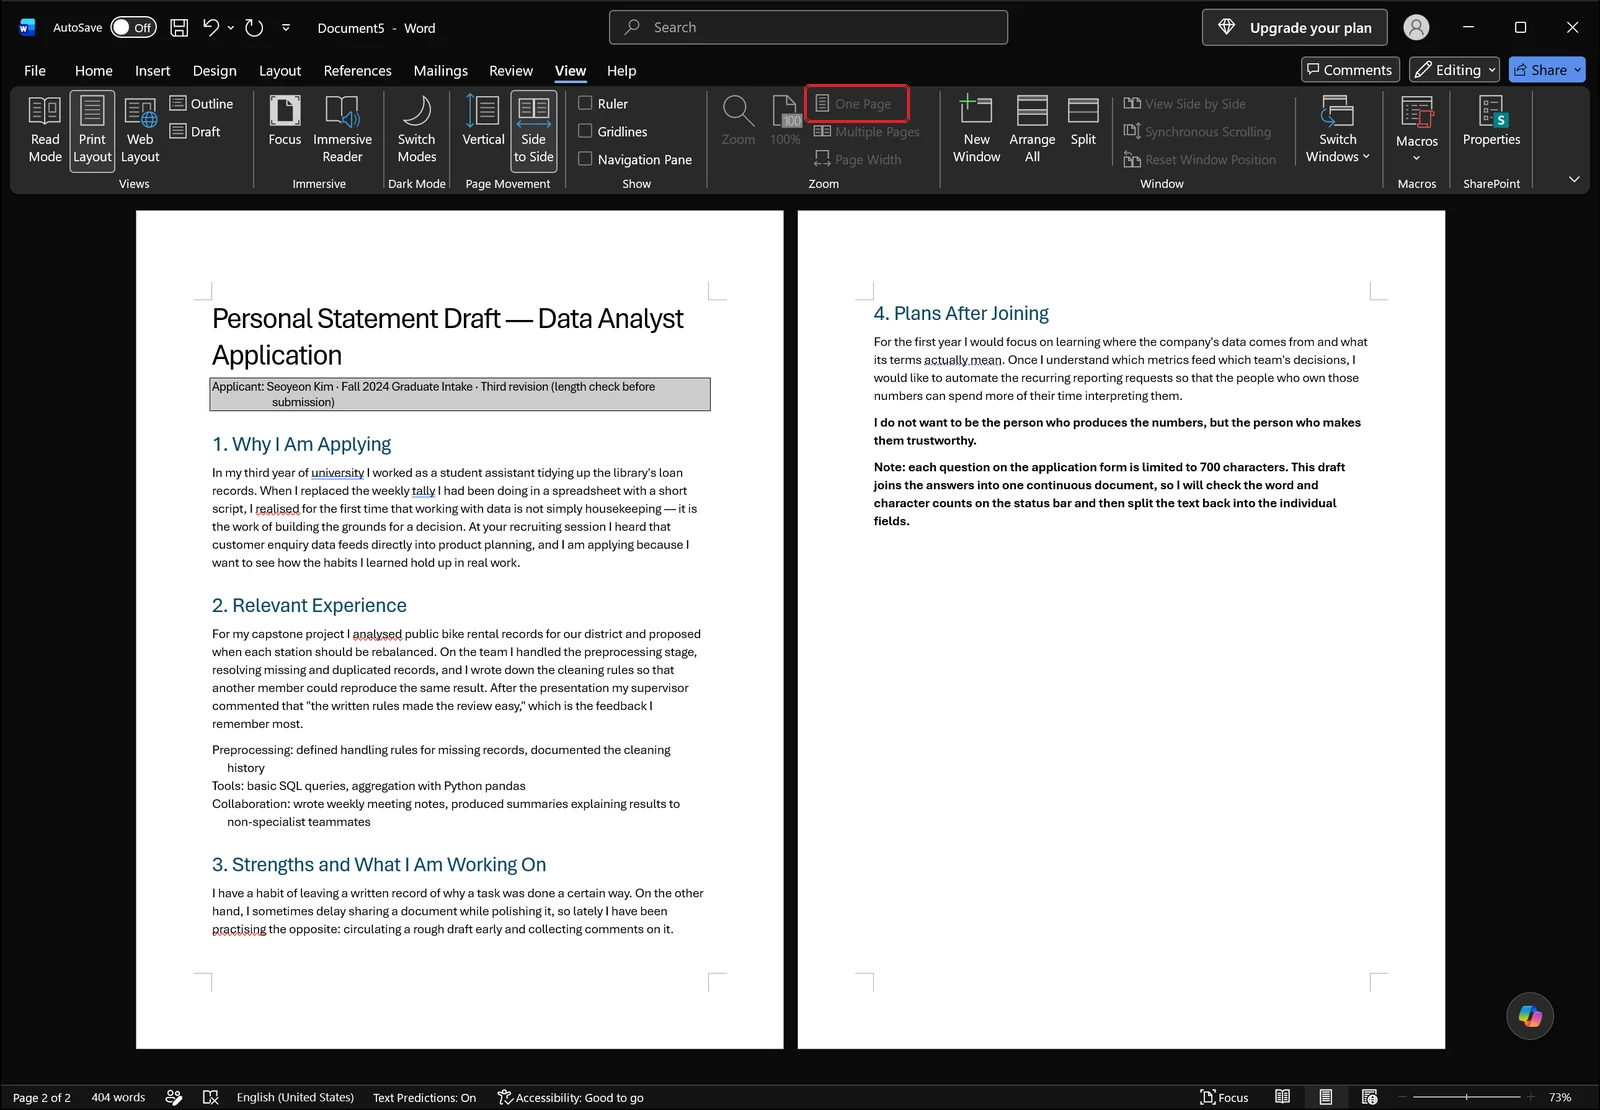
Page count is a shaky measure of length, because margins, font size, and line spacing all move it around. Still, if you want to see how much of a sheet the text actually fills, go to the View tab and look for One Page in the Zoom group. In the shot above the document is still spread over two pages side by side at 73% zoom, the layout you get from Multiple Pages; clicking One Page is what fits a single page into the window. Either way the counter keeps its usual place at the bottom of the window, reading 404 words here.
Draft view keeps the counter too
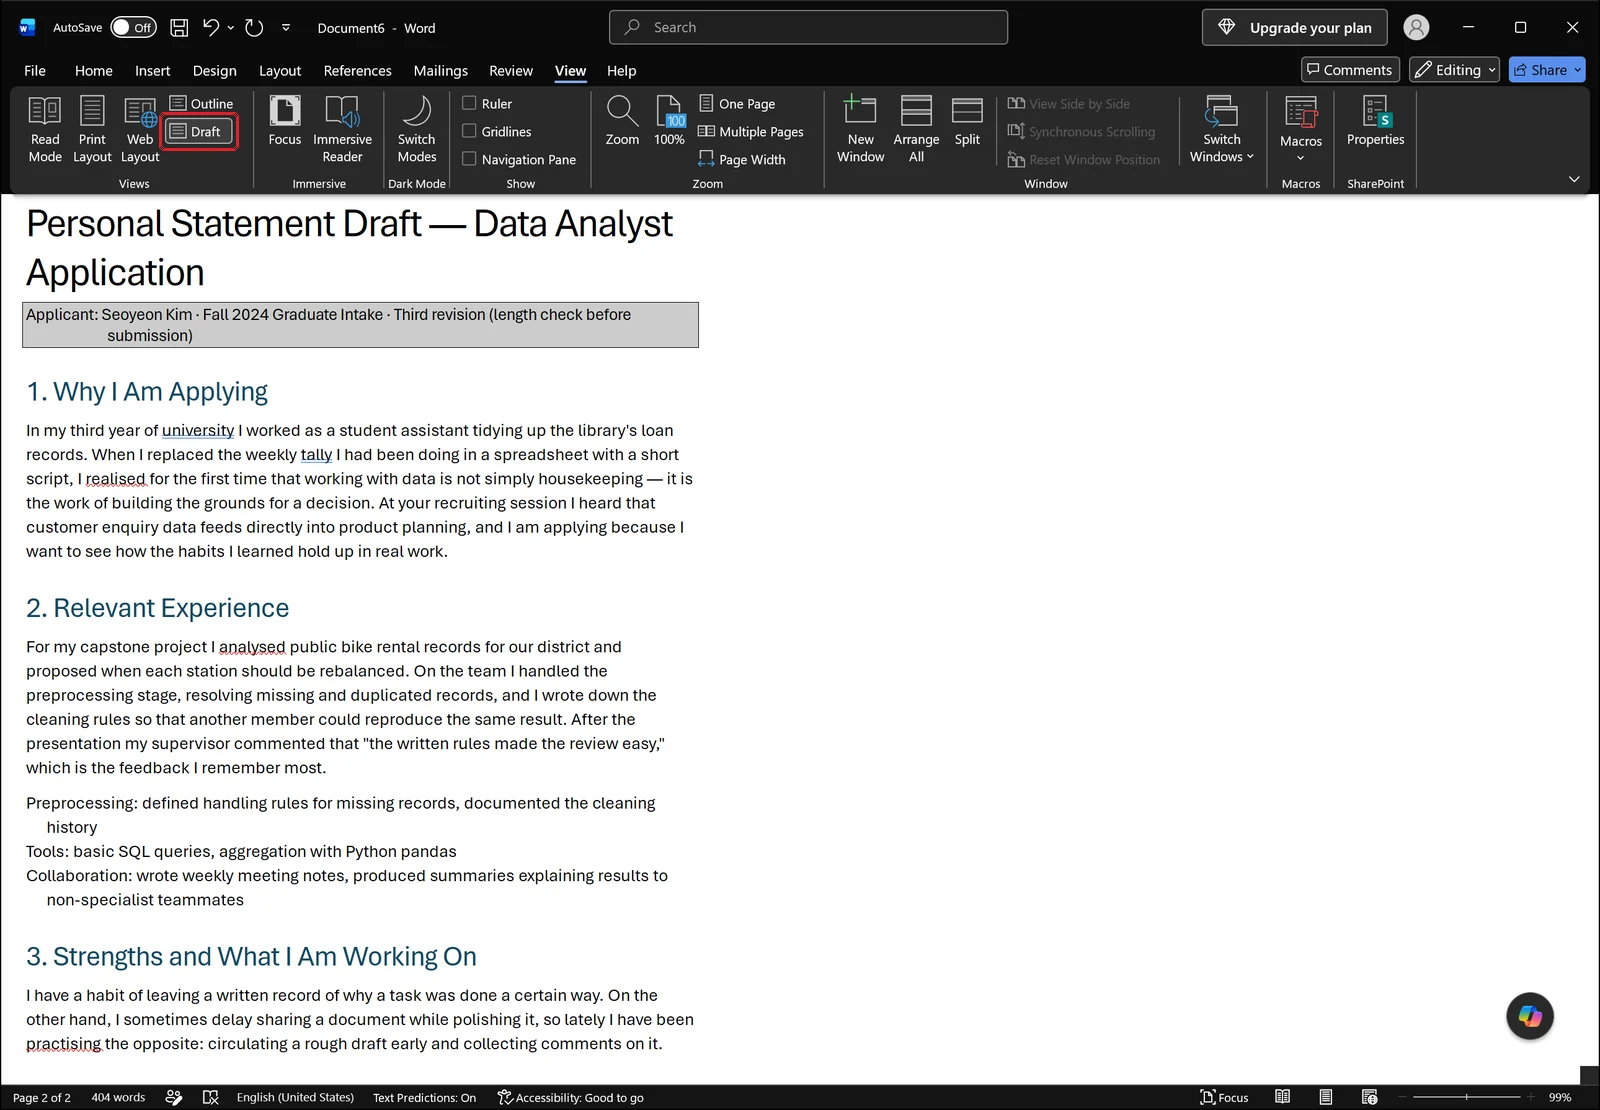
Choose Draft on the View tab and page edges and margins disappear, leaving the text running continuously. It is a comfortable view for checking how sentences flow, and the status bar counter survives the switch. The only view that removes the counter entirely is reading mode, which comes up later.
👉 How to Change Line Spacing in Word: 1.5, Exact pt, and Fixes
Characters With and Without Spaces on the Review Tab
If your limit is expressed in characters, this dialog is unavoidable. Learn where it is and which line to read, and the whole check takes about ten seconds.
Where Word Count sits, plus the shortcut
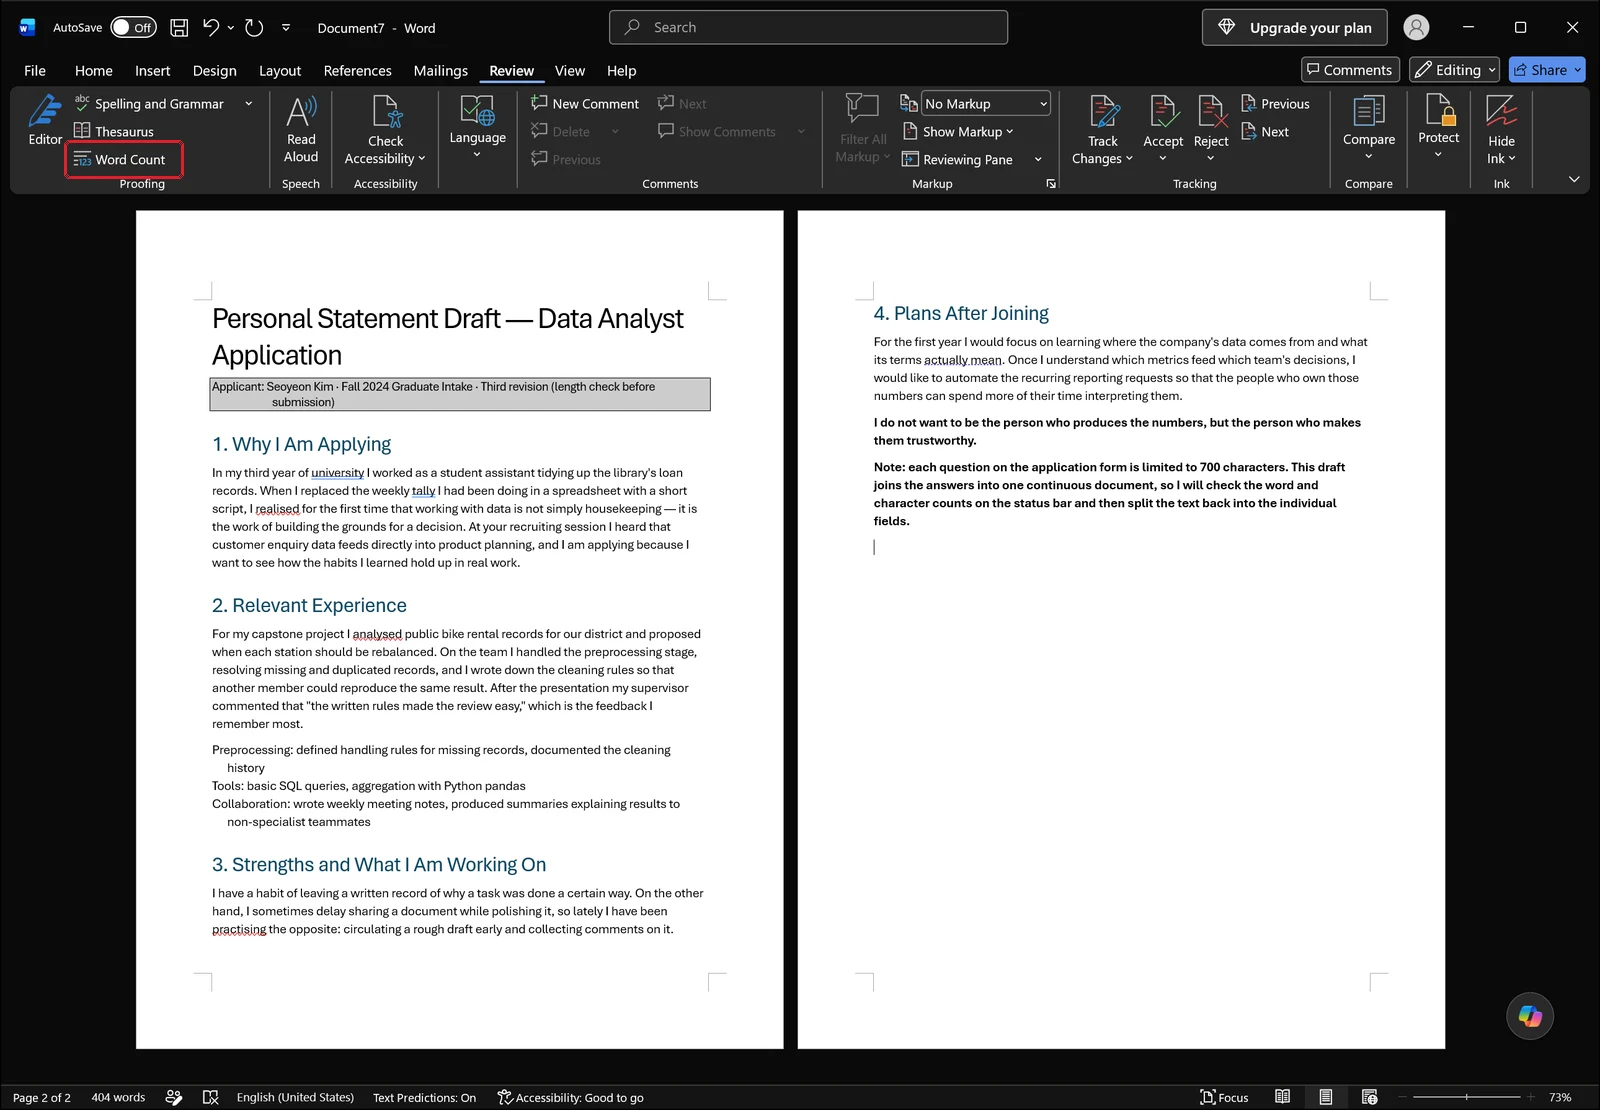
Open the Review tab and you will find Word Count in the proofing group. The name undersells it: the dialog reports characters, paragraphs, and lines as well as words. If reaching for the ribbon is a nuisance, Ctrl+Shift+G opens the same window from anywhere in the document.
The six figures in the dialog
The dialog lists pages, words, characters (no spaces), characters (with spaces), paragraphs, and lines, in that order. For a submission capped at characters including spaces, the "Characters (with spaces)" line is the only one that matters. For an essay or abstract capped at words, read the "Words" line instead.
At the bottom of the dialog is a checkbox labelled "Include textboxes, footnotes and endnotes." Tick it and text outside the main body gets added to every figure, so switch it on or off depending on what you are being asked to report. One thing to watch: if you leave the dialog open and keep editing, the numbers do not follow along. Close it and reopen it to recalculate.
The same routine on a long report
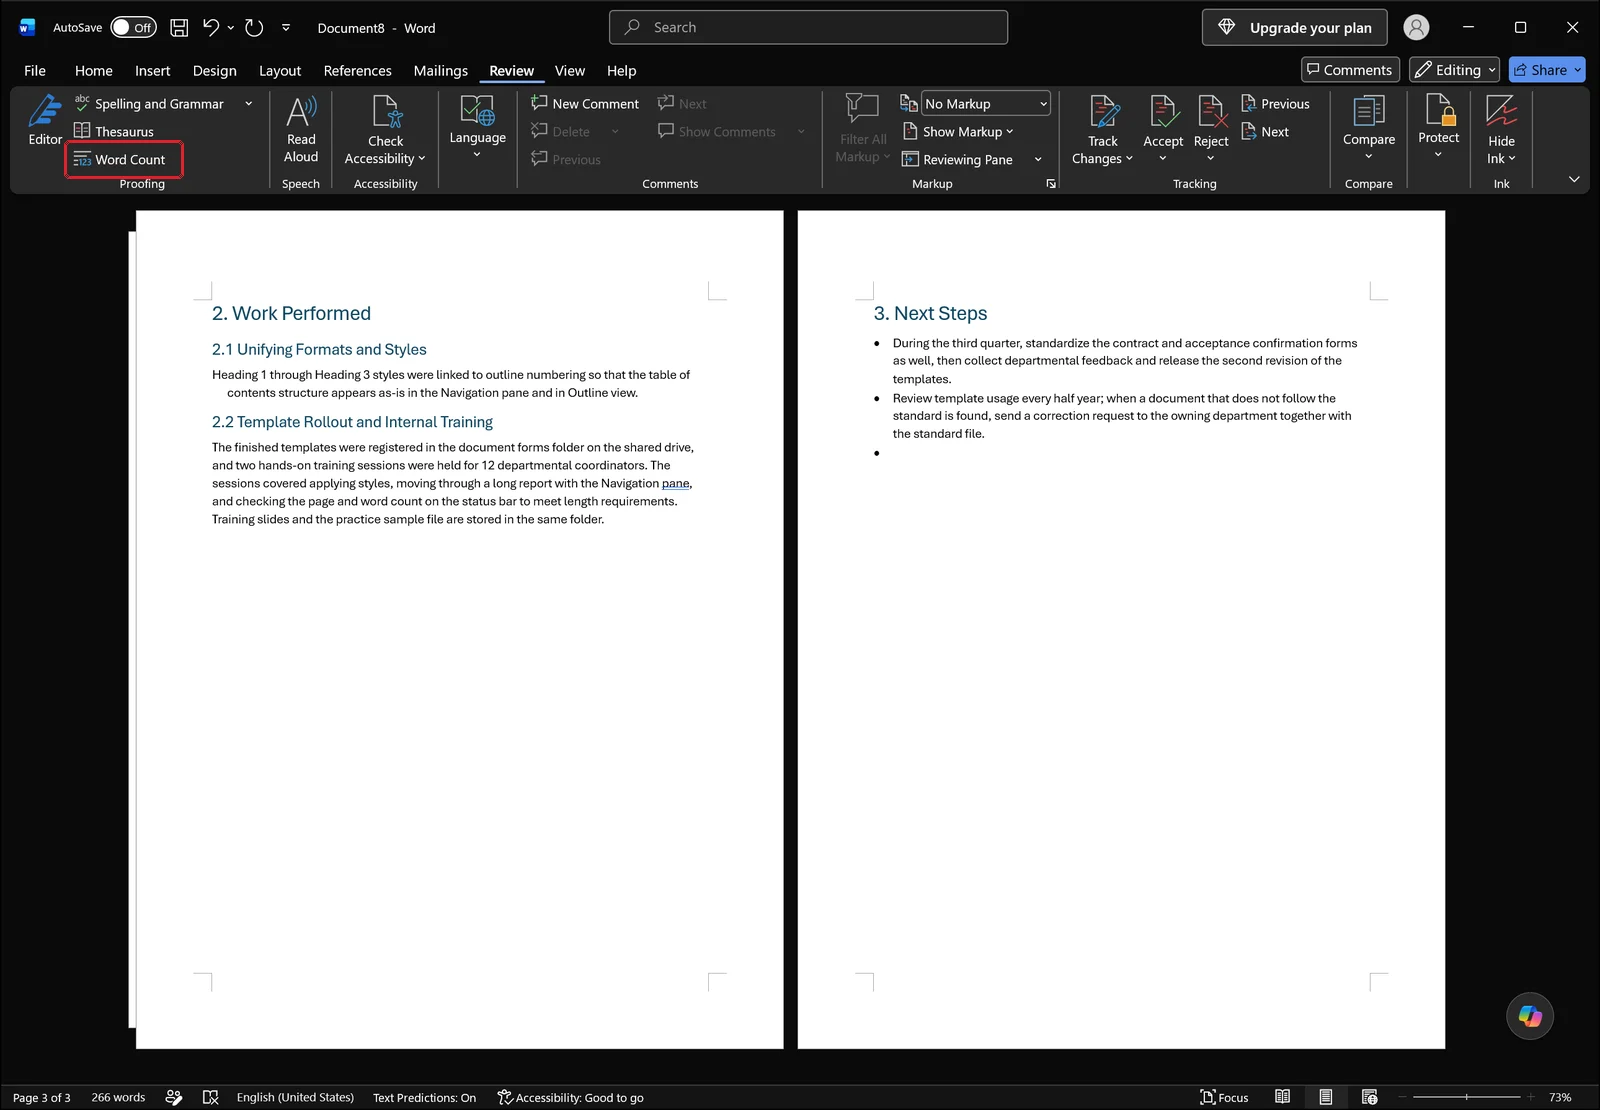
Length does not change the procedure. On a multi-page report with several heading levels, Word Count on the Review tab still returns statistics for the entire document. The page indicator in the status bar grows accordingly, which is useful when the requirement is written in pages, "roughly five A4 sheets," for example. When it is written in characters or words, ignore the pages and read the dialog.
Counting Only Selected Paragraphs or Pages
Application forms often set a separate limit per question, and a document-wide total tells you nothing about which answer went over. Counting a range is the fix.
Selecting text switches the readout to selection/total
Drag across the passage you want to measure and the status bar changes to show the selection alongside the document total, in the form "120 of 279 words". Press Ctrl+Shift+G while the selection is active and the Word Count dialog calculates for the selection only, so you can read the character count with spaces for that one answer directly.
Ctrl-drag to add up separated paragraphs
Drag the first passage, then hold Ctrl and drag another, and Word adds the two together even though they are not adjacent. That is handy for measuring the opening and closing paragraphs on their own, or for totalling the body while leaving block quotes out. To grab a whole paragraph, triple-click anywhere inside it; to grab several, click at the start and Shift-click at the end.
Jump to a specific section with the Navigation Pane
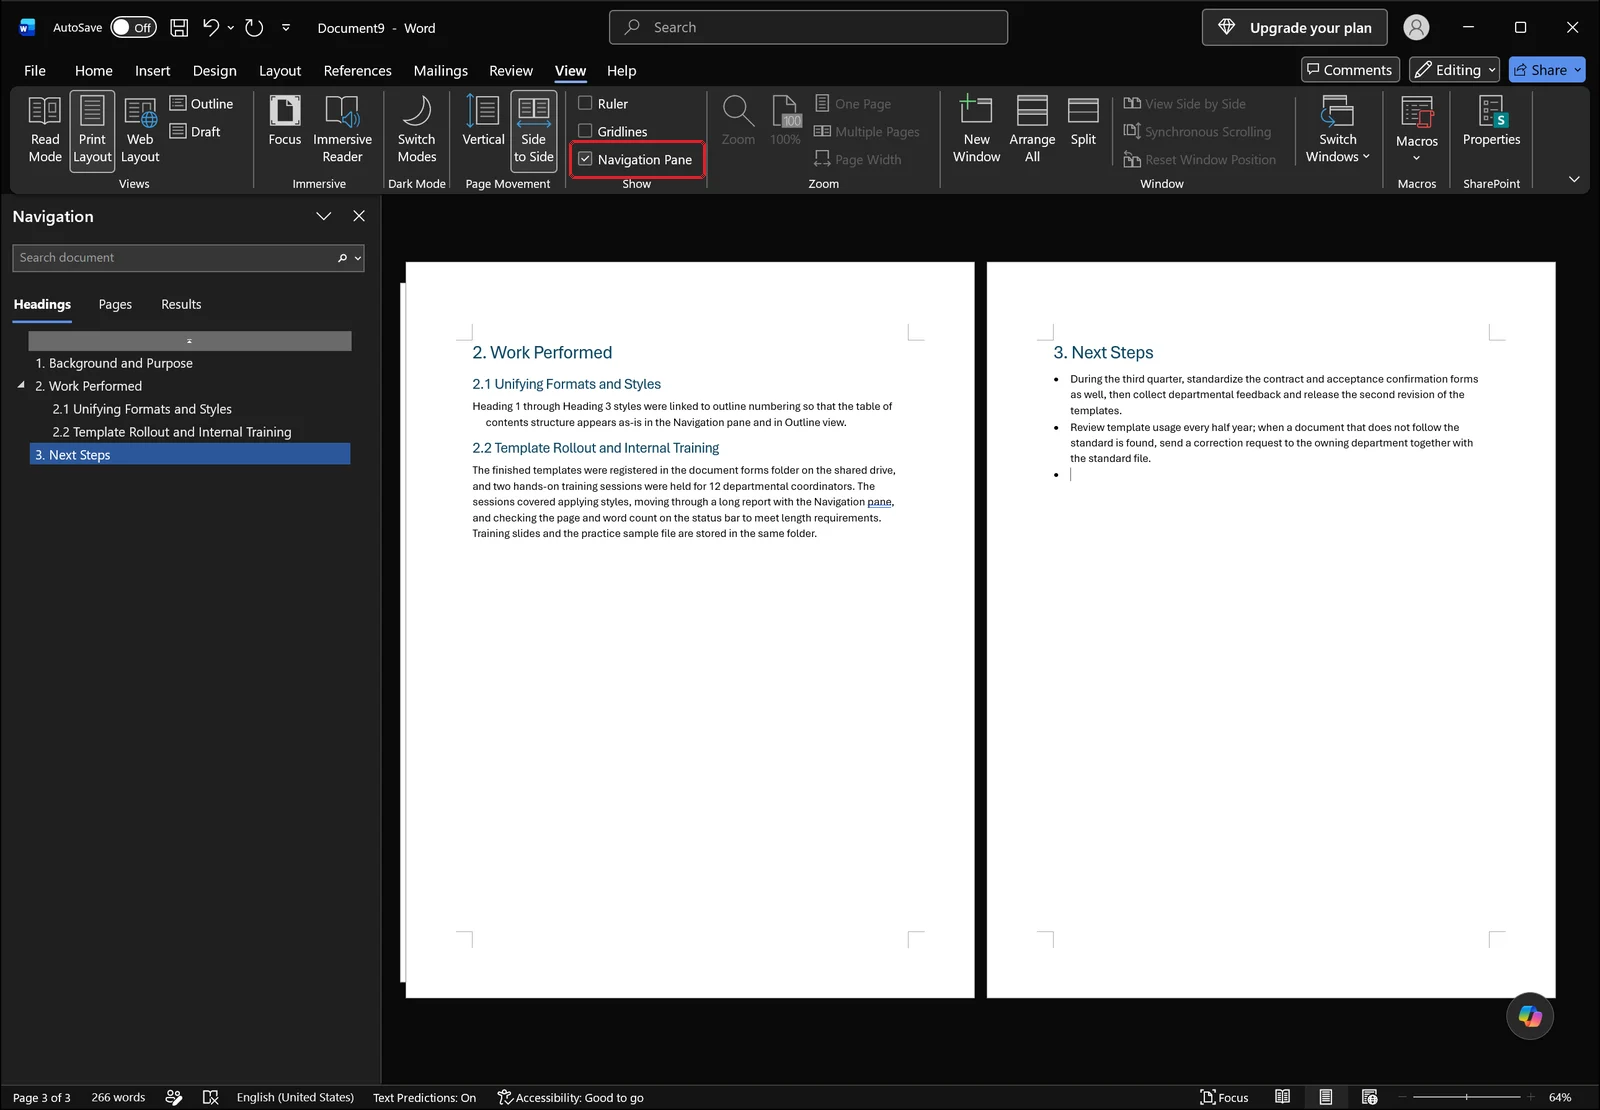
In a long document, finding the section is half the work. On the View tab, tick Navigation Pane and a list of headings appears on the left; click a heading to jump straight to that section. Once you are there, select from the start of the section to the end and you have a per-section count without scrolling around hunting for boundaries.
Deciding Whether Footnotes, Text Boxes, and Tables Count
Sometimes Word's figure and the submission system's figure disagree on the same document. The cause is almost always text that sits outside the main body.
Footnotes and endnotes need the checkbox
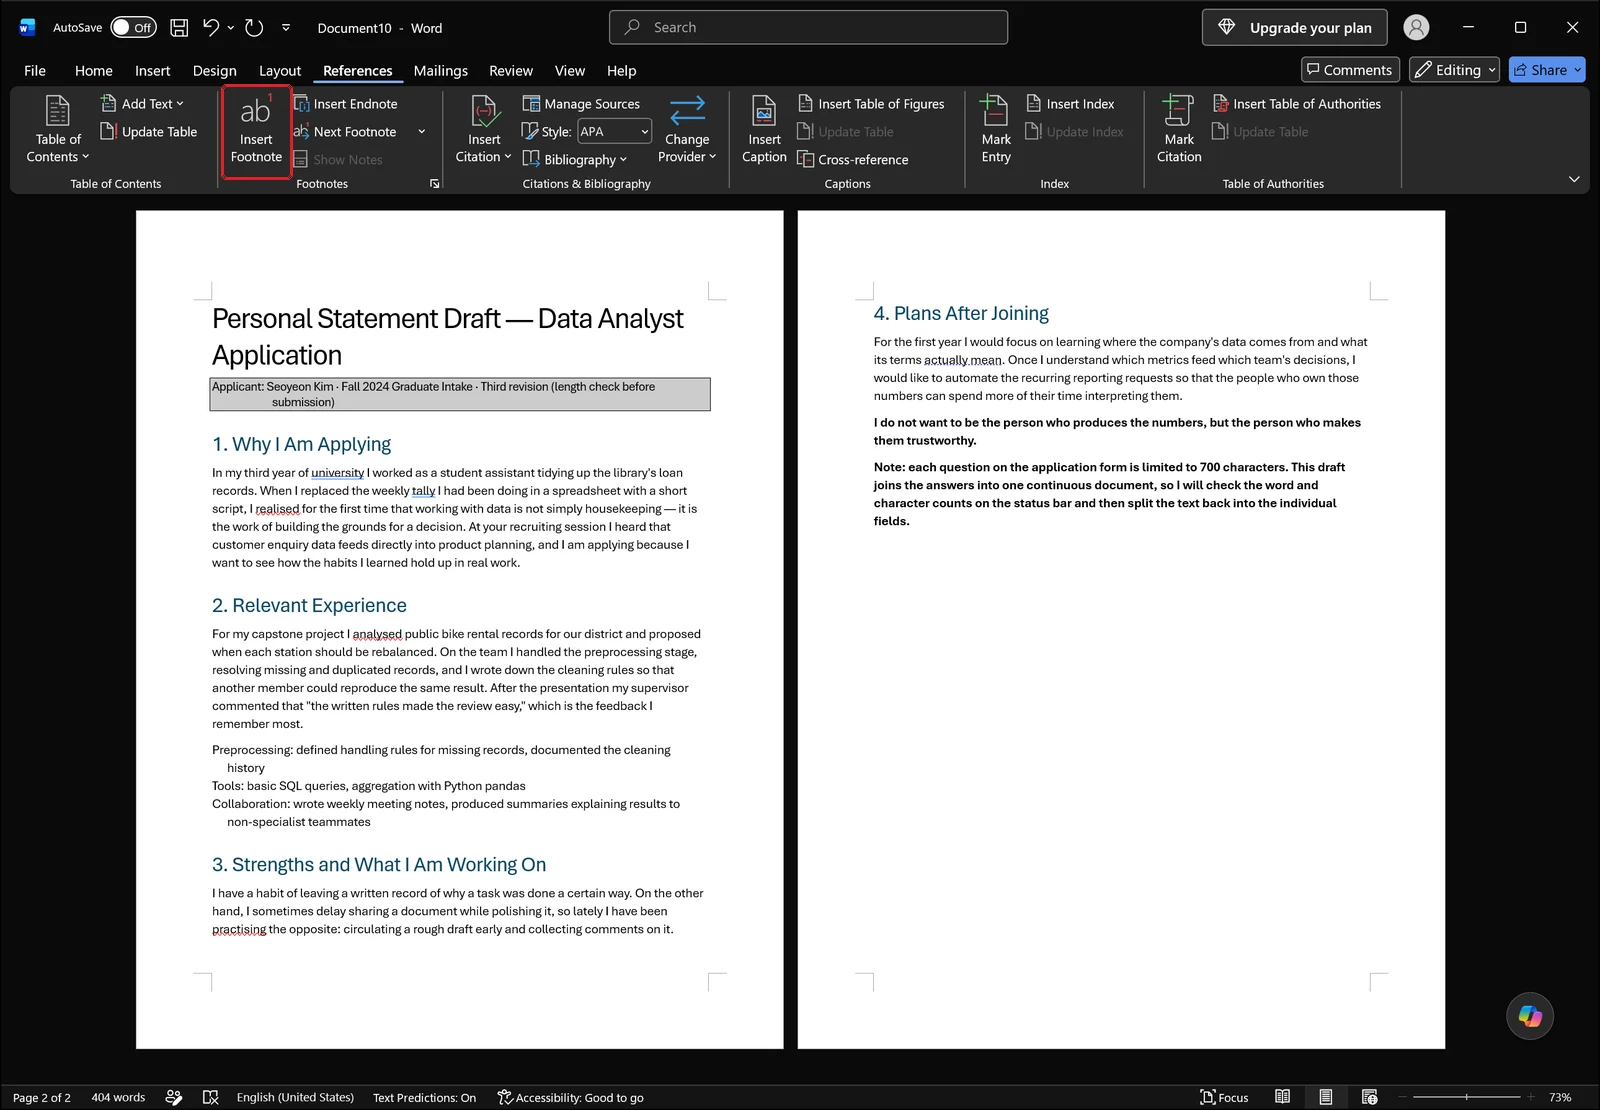
Click Insert Footnote on the References tab and Word drops a reference mark in the body and opens a footnote area at the bottom of the page. Text you write there is left out of the default totals. If your assignment counts footnotes toward the limit, report the figure with "Include textboxes, footnotes and endnotes" ticked. If only the body counts, report the figure with it cleared.
Text boxes and shapes follow the same rule
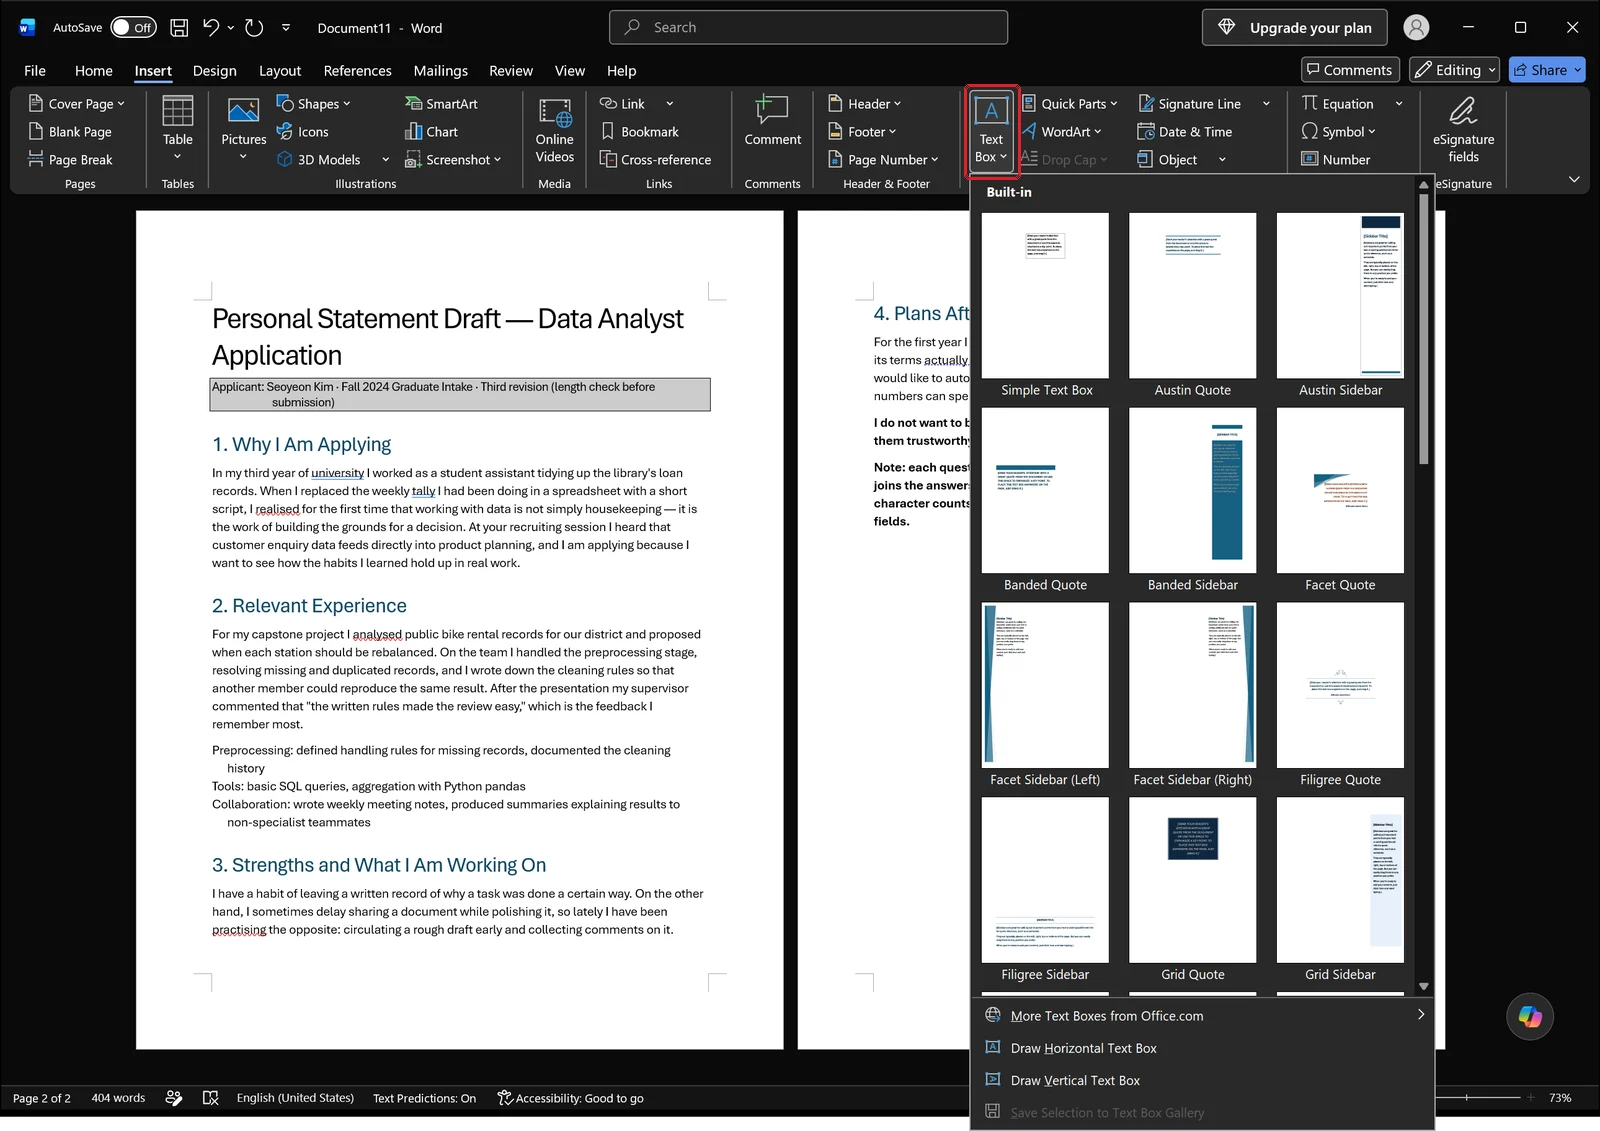
Anything you type into a box added from Text Box on the Insert tab behaves the same way. It is an object floating outside the flow of the body text, so it is excluded by default and only added in when that checkbox is on. Worth remembering if you build pull quotes or figure captions as text boxes: the page can look full while the number comes back lower than you expected.
Table text counts, headers and footers do not
Text typed into table cells is treated as body text and is included in the default totals. Headers, footers, comments, and hidden text are not counted at all, with or without the checkbox. So a table-heavy report tends to read higher than you would guess, and a document that carries a lot of information in the header reads lower.
👉 Delete a Blank Page in Word: Why Backspace Won't Work
When the Count Is Missing or the Numbers Disagree
If the figure that should be at the bottom of the window has vanished, the problem is nearly always a view setting rather than the document. Work through these in order.
Reading mode hides the counter
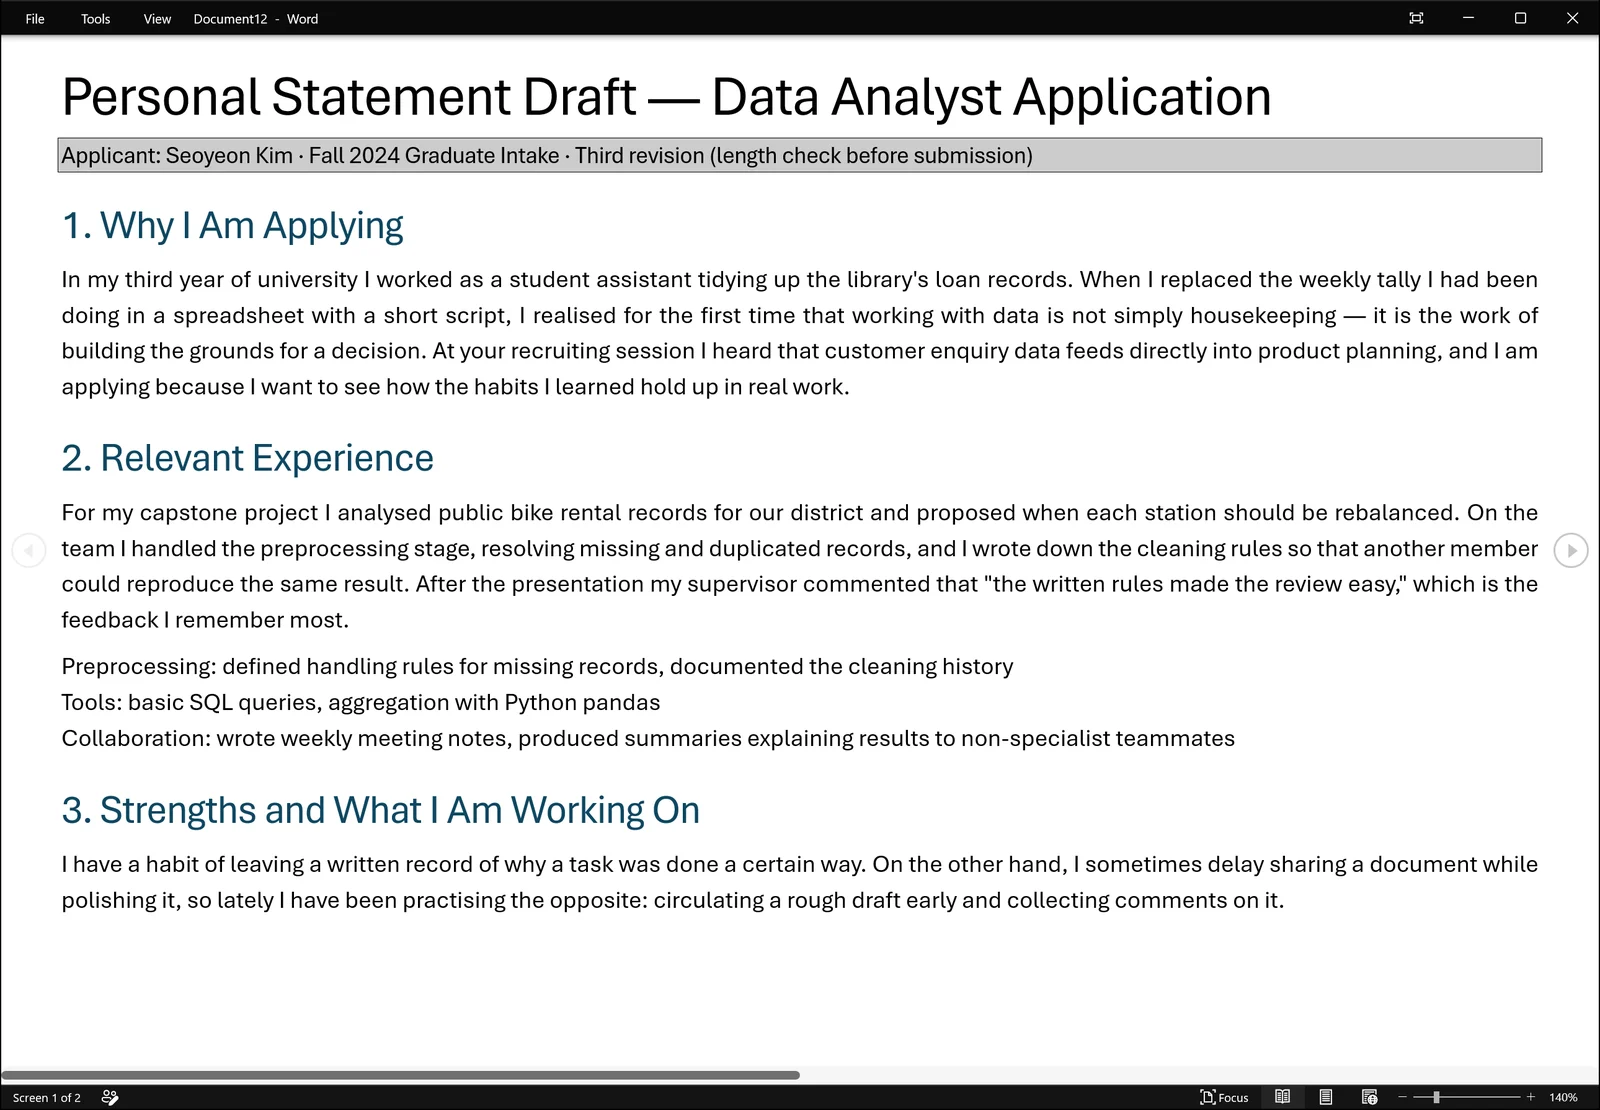
Switch to reading mode and the ribbon disappears while the text reflows into reading columns. The word count readout you were watching at the bottom is not shown here. Documents downloaded as email attachments often open in this mode, which makes it the number one explanation for "there is no word count at the bottom of my window."
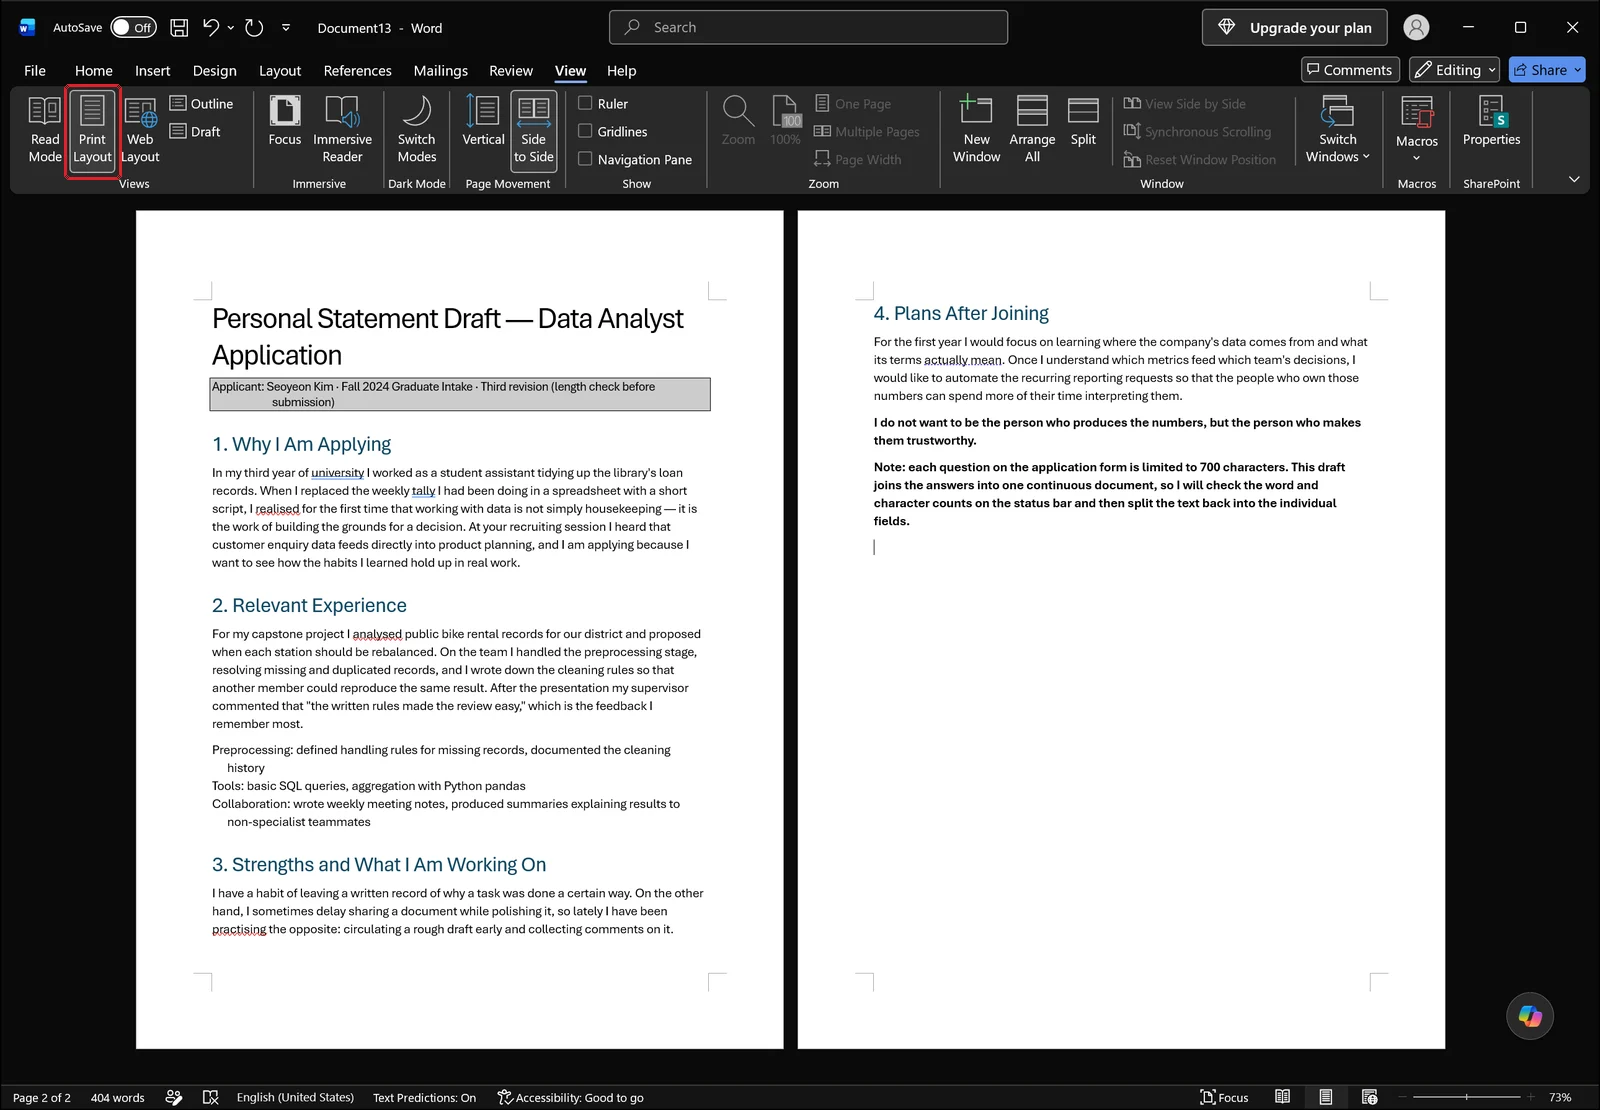
Go to the View tab and click Print Layout. Page edges and margins come back, and so does the counter in the status bar.
Check the status bar customisation list
If you are already in Print Layout and the number still is not there, the item has been switched off. Right-click an empty part of the status bar and a list of available items appears; tick Word Count and it returns. A narrow window can also collapse items out of view, so maximise the window before you conclude anything is missing.
Why Word and the submission site disagree
Text added through Header on the Insert tab is excluded from Word's statistics, but that stops being true the moment you paste your text into a web form. Submission systems generally count only what you pasted, and their rules for line breaks and runs of consecutive spaces differ from Word's.
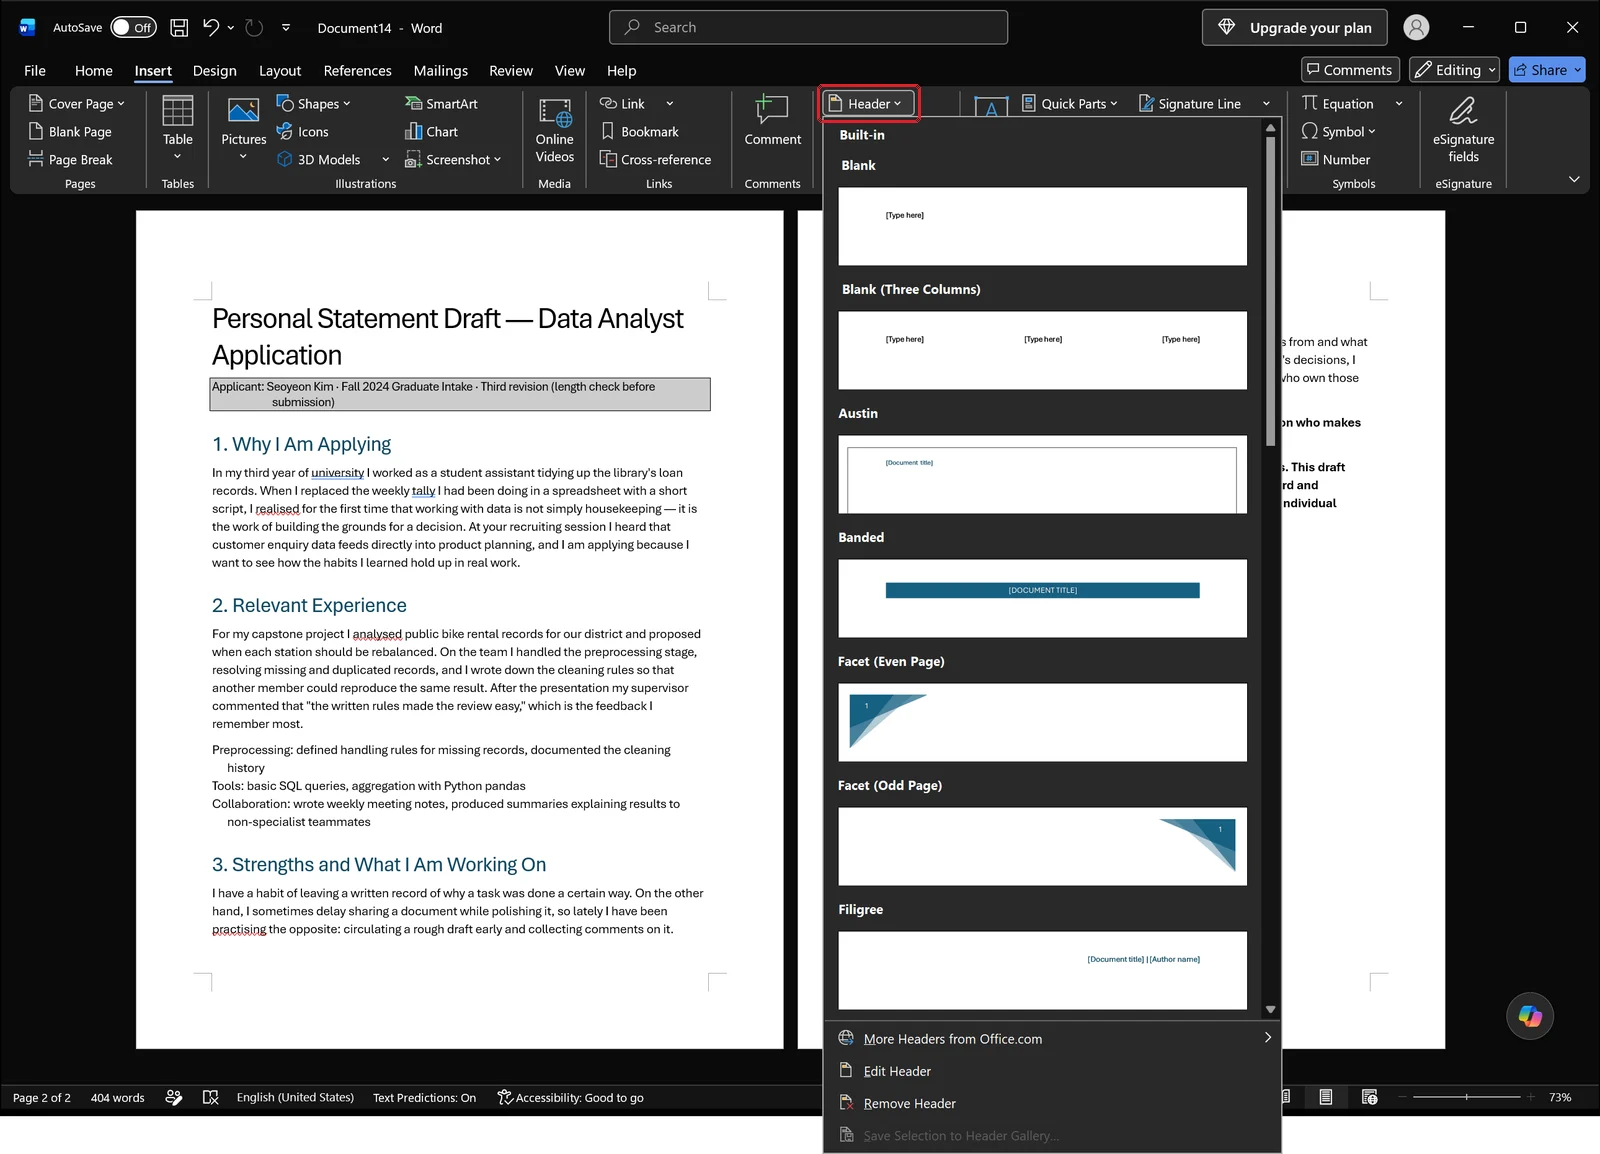
When the two figures are a few dozen characters apart, compare them in this order: whether footnotes and text boxes were included, whether headers and footers carry text, and how line breaks were handled. If your draft sits right on the limit, finish about 50 characters short and give yourself the margin.
Frequently Asked Questions
Q. Does Word count characters with or without spaces?
Both, and it reports them separately. The status bar shows words by default. Open Word Count on the Review tab and the dialog lists "Characters (no spaces)" and "Characters (with spaces)" on two separate lines. Most application portals that set a character limit use the with-spaces figure, so that is usually the line to read.
Q. How do I count only part of the document?
Select the range you want and the status bar switches to showing the selection alongside the document total. Press Ctrl+Shift+G with the selection still active and the dialog reports statistics for that selection only. Hold Ctrl and drag additional passages to total up paragraphs that are not next to each other.
Q. The word count is gone from the bottom of the window.
Check whether you are in reading mode first, and return to Print Layout on the View tab. If it is still missing, right-click an empty area of the status bar and tick Word Count, then maximise the window so the item is not collapsed out of sight.
Q. Are footnotes and text boxes included in the count?
Not by default. Tick "Include textboxes, footnotes and endnotes" at the bottom of the Word Count dialog to add them in. Table text is included either way, while headers, footers, and comments are never counted under any setting.
Trimming Documents to Length with inline AI
Everything above gets you as far as the number. Cutting a 1,600-character draft down to 1,500 still means rewriting sentences by hand, and on an application with several questions you repeat that work for every one of them.
inline AI is a local agent that reads and edits the Word and Excel files already open on your PC. Ask it something specific, like trimming answer 2 to under 1,000 characters, and it revises that section and applies the change to the document, with each edit presented for you to accept or reject before it is committed. Files are processed on your machine rather than uploaded to a cloud service, so a cover letter with your name and history in it, or an internal report, never leaves the computer.
See what an agent could take over at your company in a 30-minute call.