Learn
Hide Formatting Marks in Word: Turn Off ¶ and Space Dots

The arrow-shaped symbol sitting at the end of every sentence is not a character in your document. It is a screen-only marker showing where you pressed Enter, and the raised dot between words is the same thing for the spacebar. That means learning how to hide formatting marks in Word is not about deleting anything, it is about flipping a single display option. The reverse is also true: when paragraphs are spread apart for no obvious reason, turning those marks on is the fastest way to see why. This guide covers how to switch them off, how to read what each symbol came from, and what to check when dotted lines stay on screen after the marks are gone.
What Those Arrows and Dots in Word Actually Are
The pilcrow (¶) marks where you pressed Enter
Word calls the ¶ symbol at the end of a sentence a paragraph mark. One appears everywhere you pressed Enter to end a paragraph, so if you hit Enter three times to make blank lines, you get three pilcrows. Each one also carries that paragraph's formatting: alignment, line spacing, indentation. That is why deleting a paragraph mark pulls the paragraph below up into the one above and changes its formatting along with it.
Space dots and tab arrows belong to the same group
The paragraph mark does not switch on by itself. The centered dot for a space and the right-pointing arrow for a tab come along with it. Word treats all of them as one set called formatting marks. If only one of them bothered you and everything else disappeared when you turned it off, that is why: there is no separate switch per symbol on the ribbon.
They show on screen but never print
The reassuring part is that none of these symbols print. They do not appear in Print Preview, in the paper output, or in a PDF export. Nothing is wrong with the file.
The other thing worth knowing is that this setting lives in the Word application, not in the document. If a file someone sent you opened with the marks visible, that is your Word, not their file. Turn them on once and every document you open afterwards shows them; turn them off once and they stay off.
How to Hide Formatting Marks in Word: Show/Hide ¶ and Ctrl+Shift+8
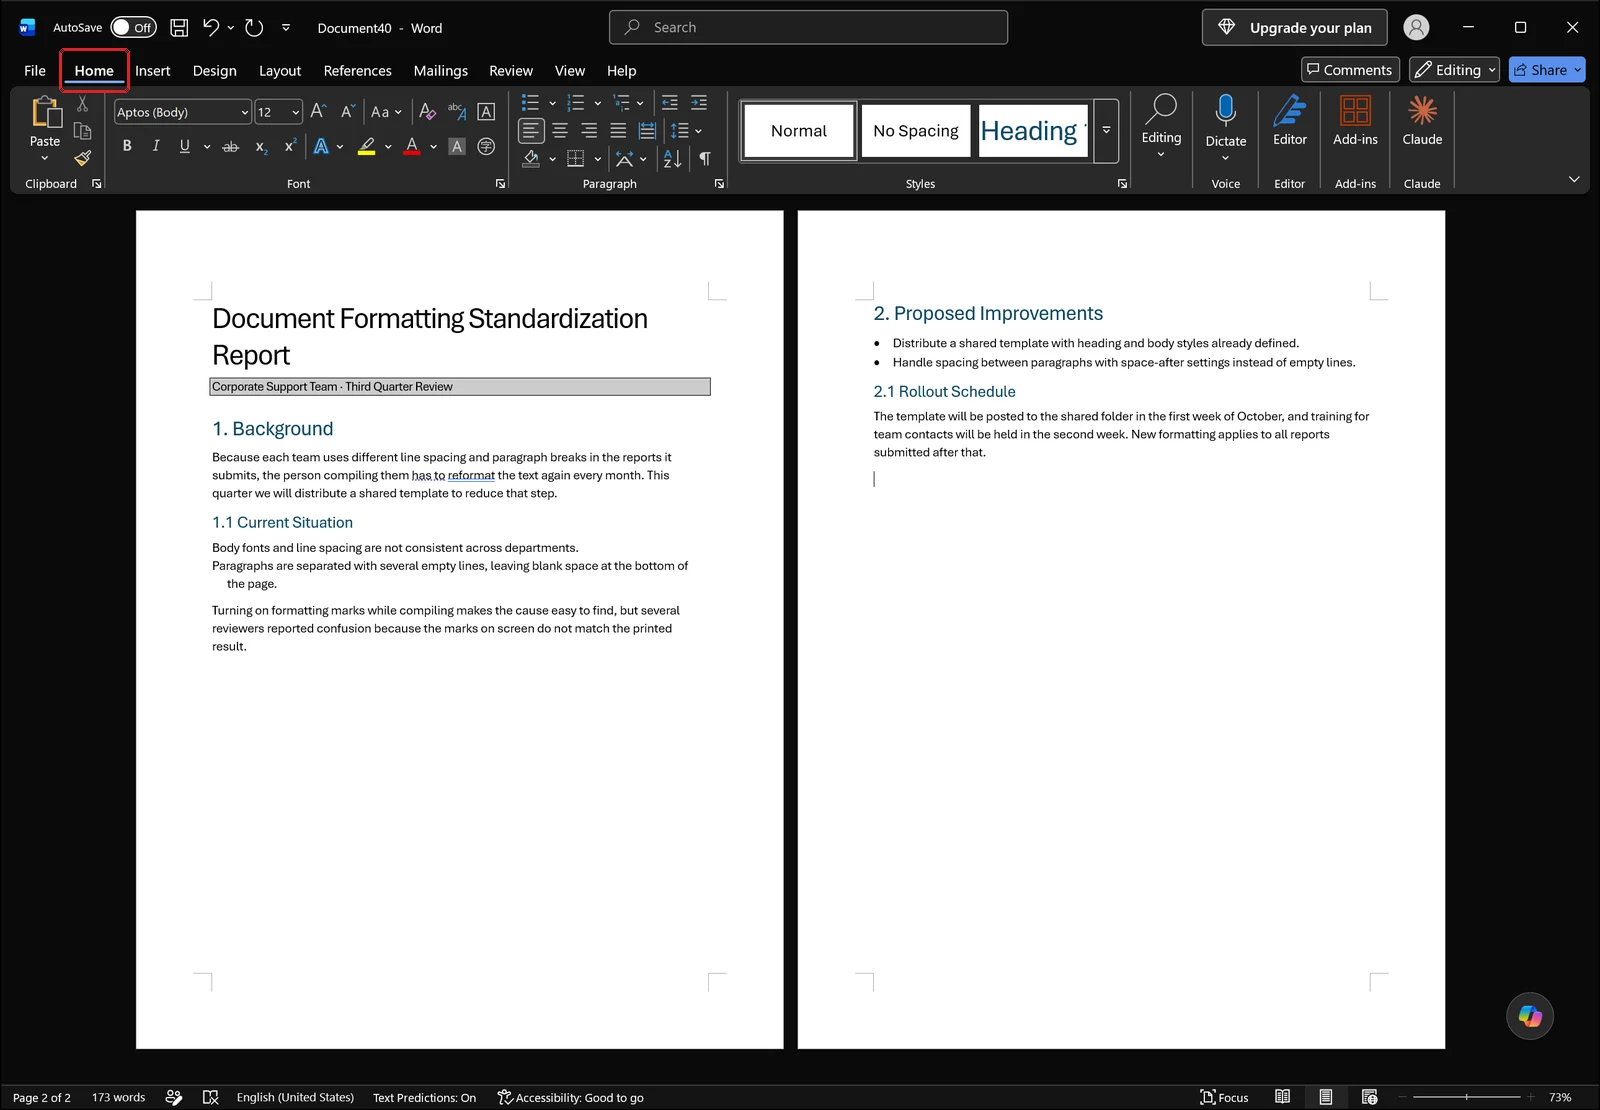
Click the ¶ button in the Home tab
The quickest route is the ribbon. Open the Home tab and click the ¶ button in the Paragraph group. It is a toggle, so one click hides the marks and another brings them back. In the screenshot below, the Home tab is marked, and the ¶ button sits in the same Paragraph group as bullets, numbering, alignment, and line spacing.
Ctrl+Shift+8 uses the 8 on the top number row
The keyboard shortcut is Ctrl+Shift+8. The 8 has to be the one on the top number row of the keyboard, not the 8 on the numeric keypad, which does nothing here. On a laptop you do not need to hold Fn along with it.
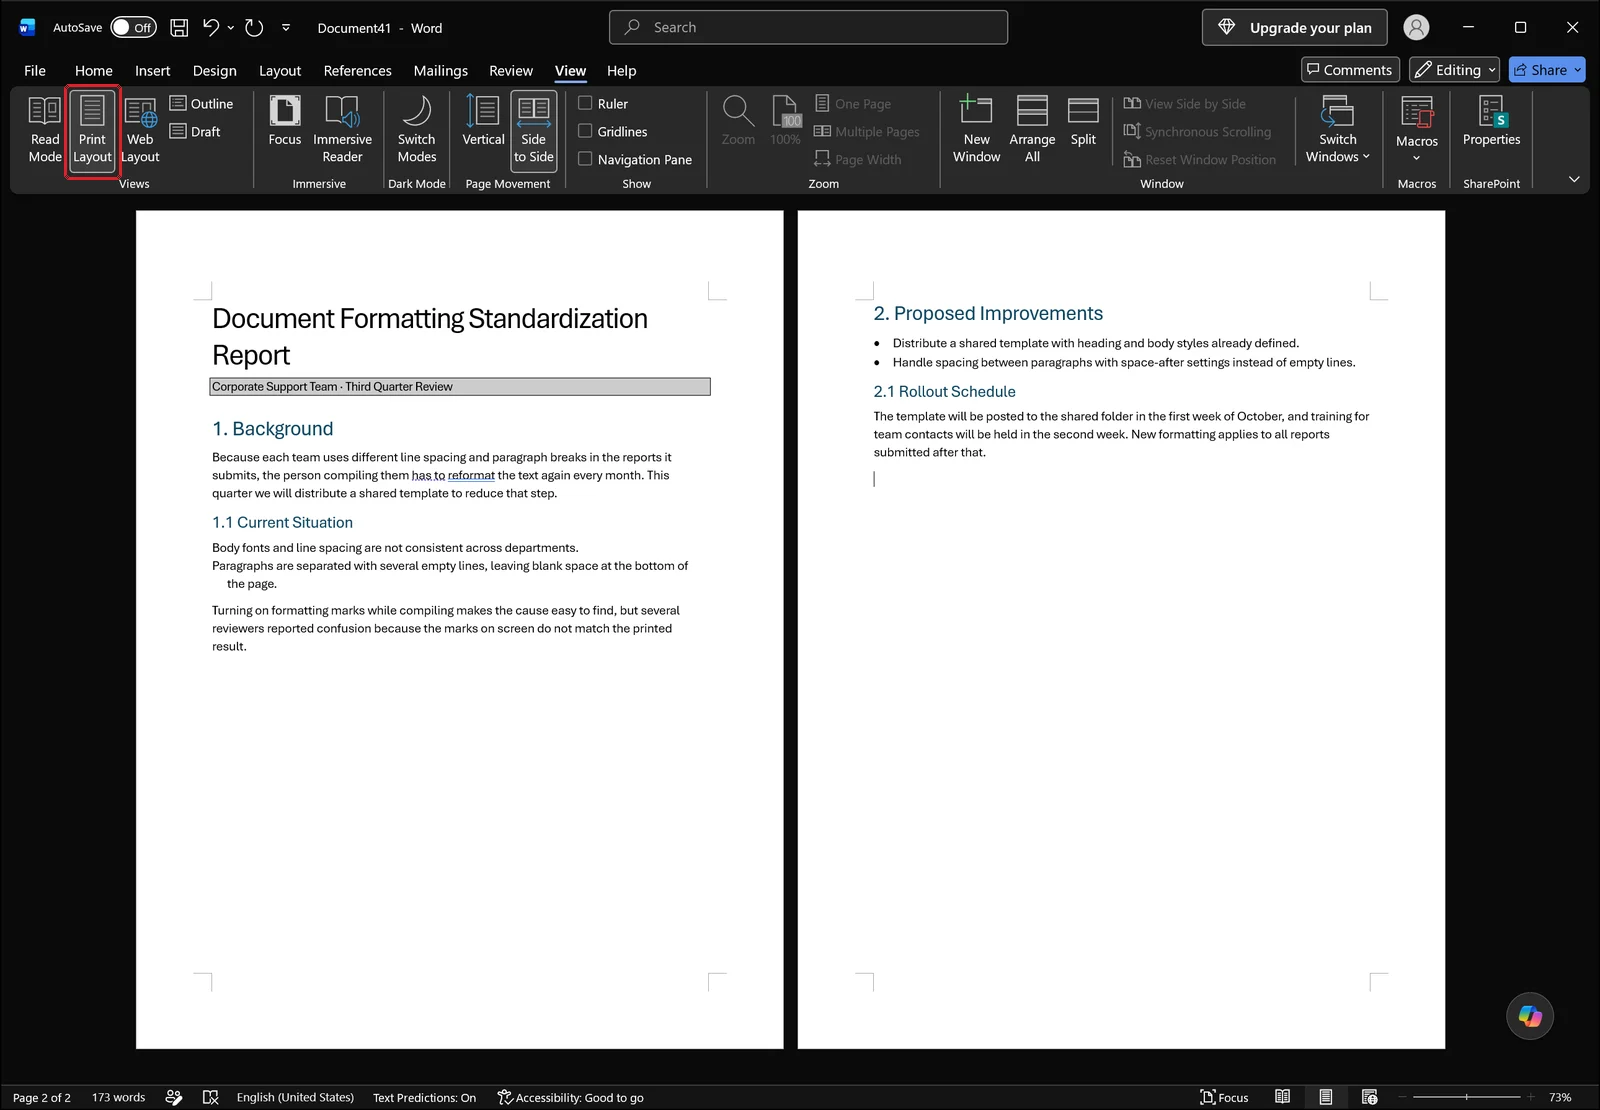
Check the result in Print Layout
When you want to confirm the marks are really gone, look at the document in Print Layout. Draft and Web Layout draw margins and page edges differently, so what you see does not match how the page will actually print. Choose Print Layout on the View tab and the page edges and margins are drawn around the body text, as below.
Reading Each Mark: ¶, Dots, Arrows, and Breaks
Once you get used to leaving the marks on, editing actually gets easier. You just need to know which key produced which symbol.
| Mark on screen | Created by | What it does |
|---|---|---|
| ¶ | Enter | Ends the paragraph here |
| Bent arrow ↵ | Shift+Enter | Breaks the line, keeps the paragraph |
| Centered dot · | Spacebar | One space |
| Right arrow → | Tab | Jumps to the next tab stop |
| Small circle ° | Ctrl+Shift+Space | Non-breaking space |
A paragraph end is not the same as a line break
The pilcrow and the bent arrow both look like the text moved to the next line, but they behave differently. A line break made with Shift+Enter stays inside the same paragraph, so no space-after gap is applied and a numbered list does not advance to the next number. The difference shows up most clearly when you add an explanatory line underneath a single list item.
A dotted line labeled Page Break
If you see a horizontal dotted line with the words "Page Break" in the middle of it, that spot is not a pile of Enters, it is a forced page break. The command lives on the Insert tab, in the Pages group, next to Cover Page and Blank Page.
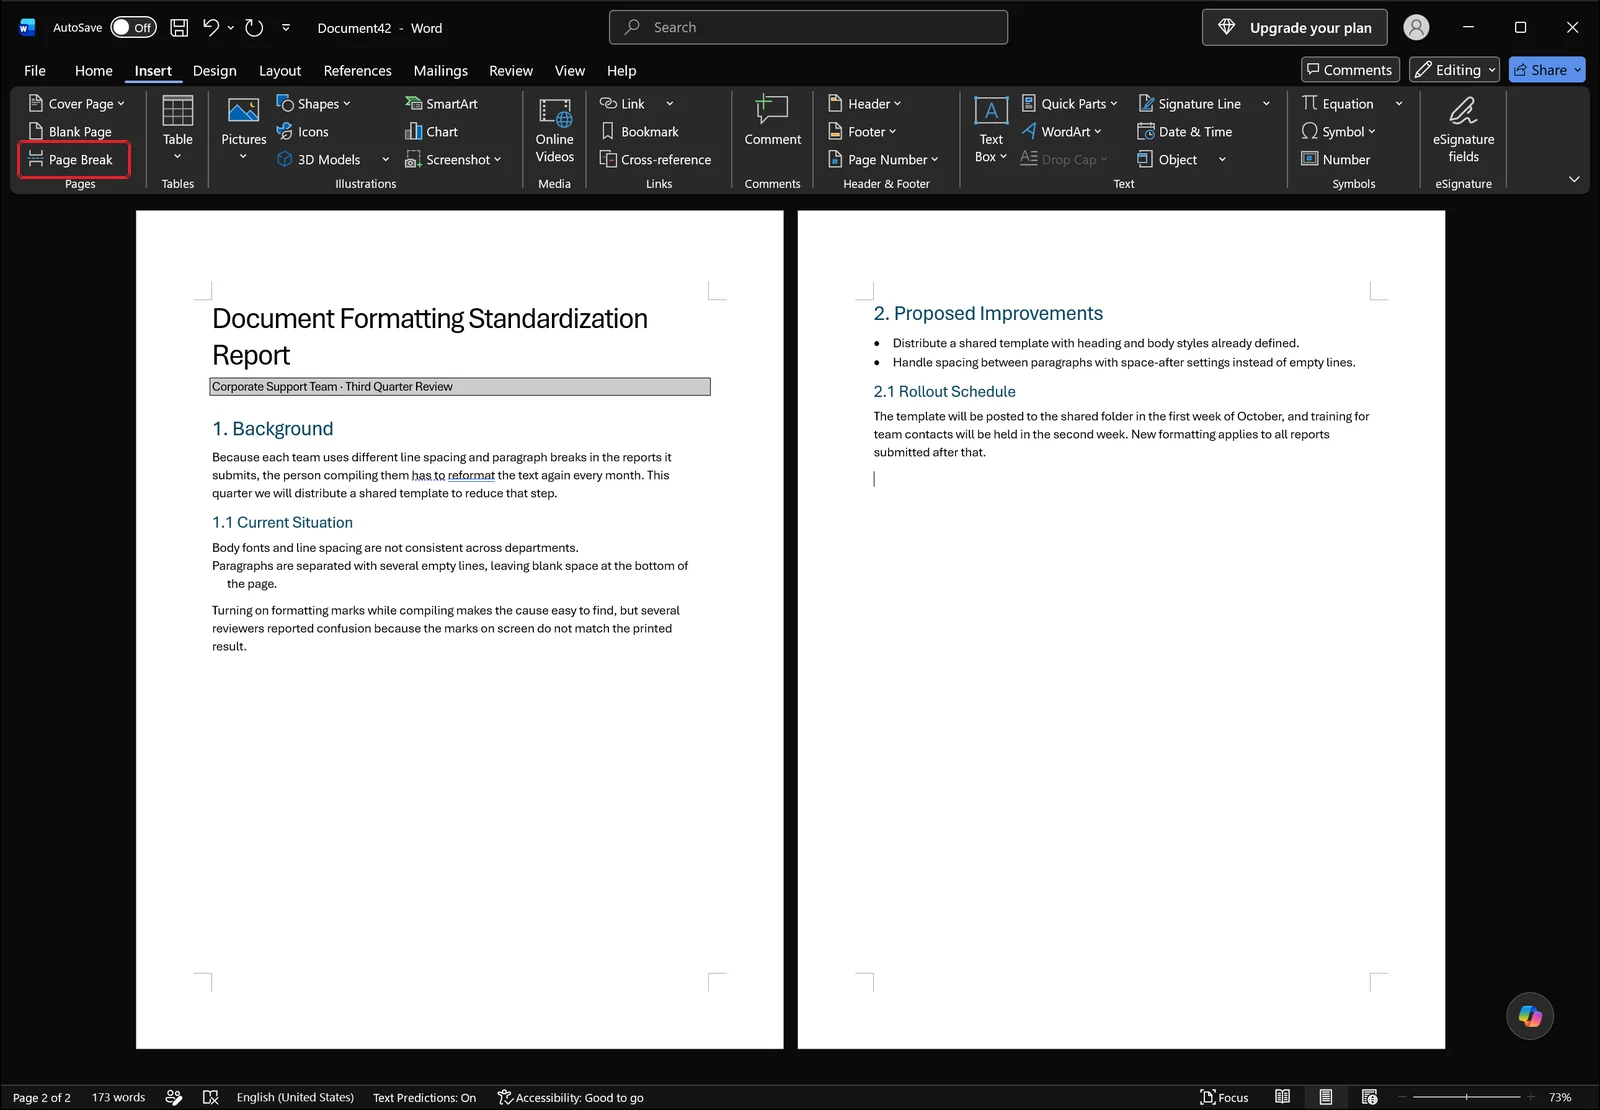
Click it and everything after the cursor moves to the next page, leaving empty space at the bottom of the previous one. To remove it, put the cursor on the line where the dotted marker sits and press Delete. With formatting marks turned off, that line is invisible, which is exactly how people end up deleting a line of body text while trying to remove a page break.
A double dotted line is a section break
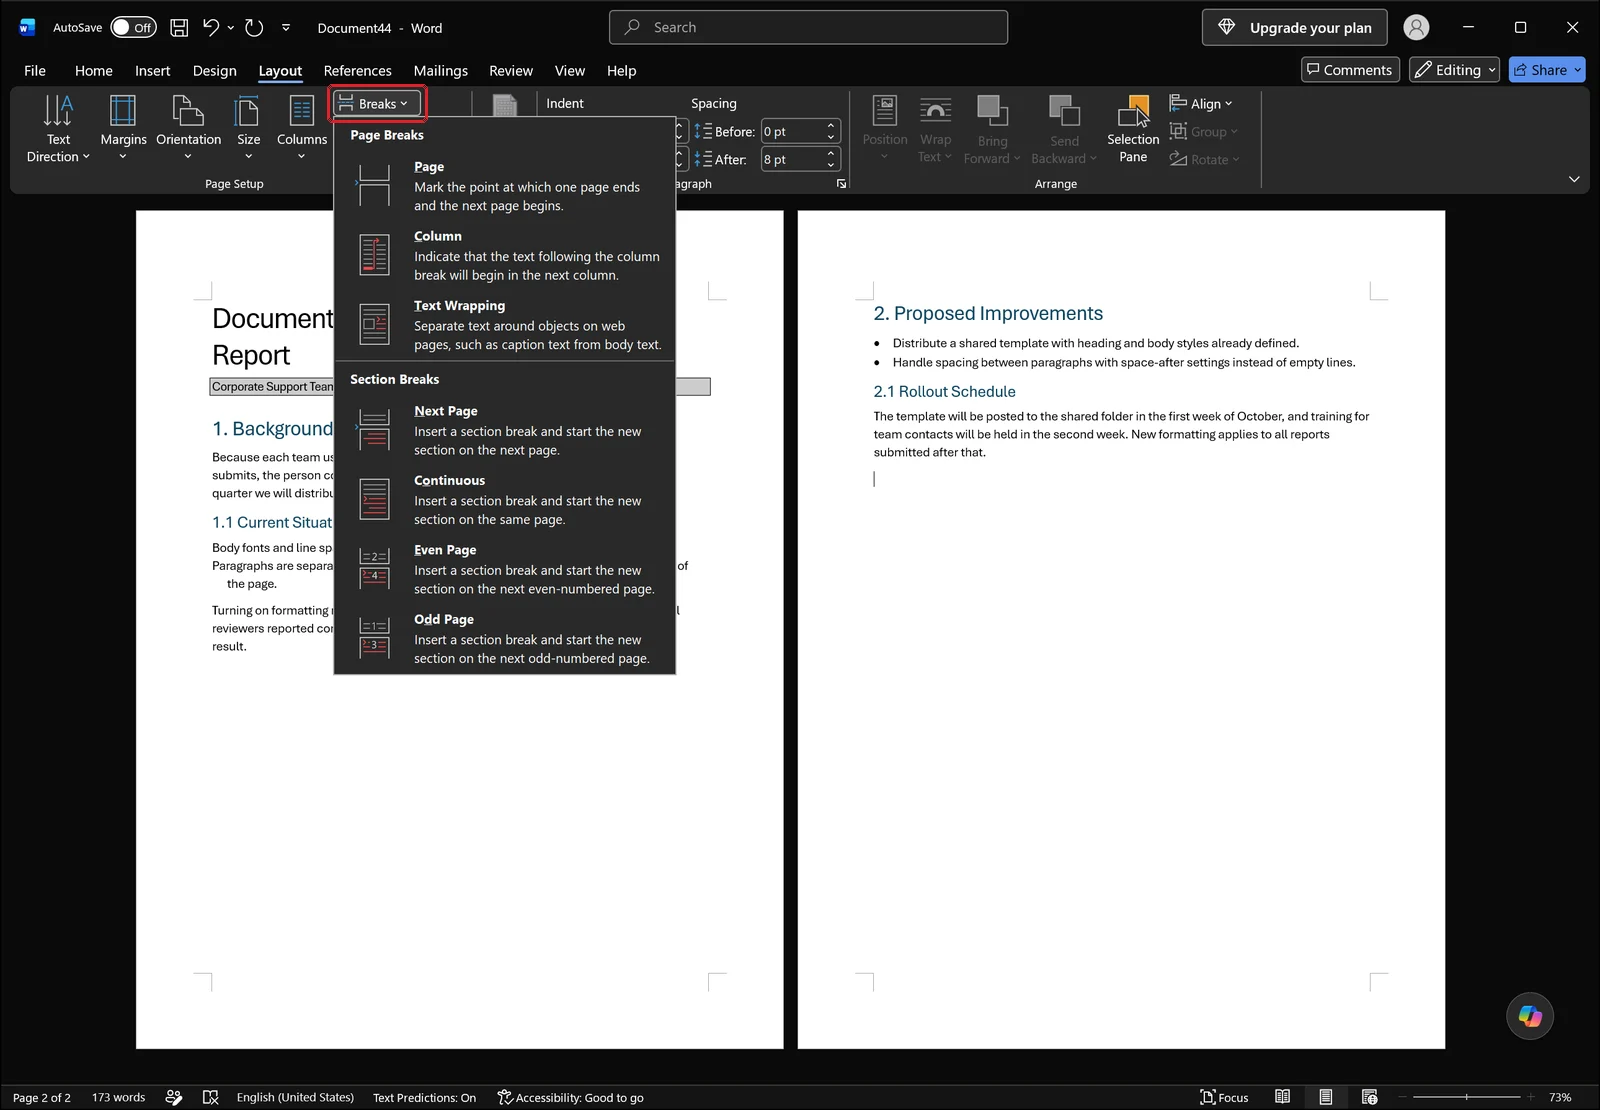
If the dotted line is doubled and labeled with a break type, a section ended there, not a page. To see which types are available, open the Breaks list on the Layout tab. The top of the list holds page-level breaks (Page, Column, Text Wrapping), and the group below holds section breaks: Next Page, Continuous, Even Page, Odd Page.
Delete section breaks carefully. Each section can carry its own page orientation, headers, and page numbering, so removing the break merges the two sections and the settings from the later section are absorbed into the earlier one. A landscape page that suddenly flipped back to portrait is almost always this.
Turn the Marks On to Find Why Your Spacing Is Off
When you cannot work out why the gaps between paragraphs are so wide, turning the marks on beats turning them off. The screen gets busier, but the empty space stops being a mystery.
Look for runs of empty pilcrows
Switch the marks on, look at the loose section, and you will usually find one of three things. A stack of pilcrows with no text between them means blank paragraphs made by repeated Enters. A dotted line labeled Page Break means the content was pushed manually. And directly under a table there is often a single ¶ that refuses to be deleted, which is a paragraph Word keeps for structural reasons. Shrink its font size or apply hidden formatting rather than fighting it.
Use Draft view to scan for breaks
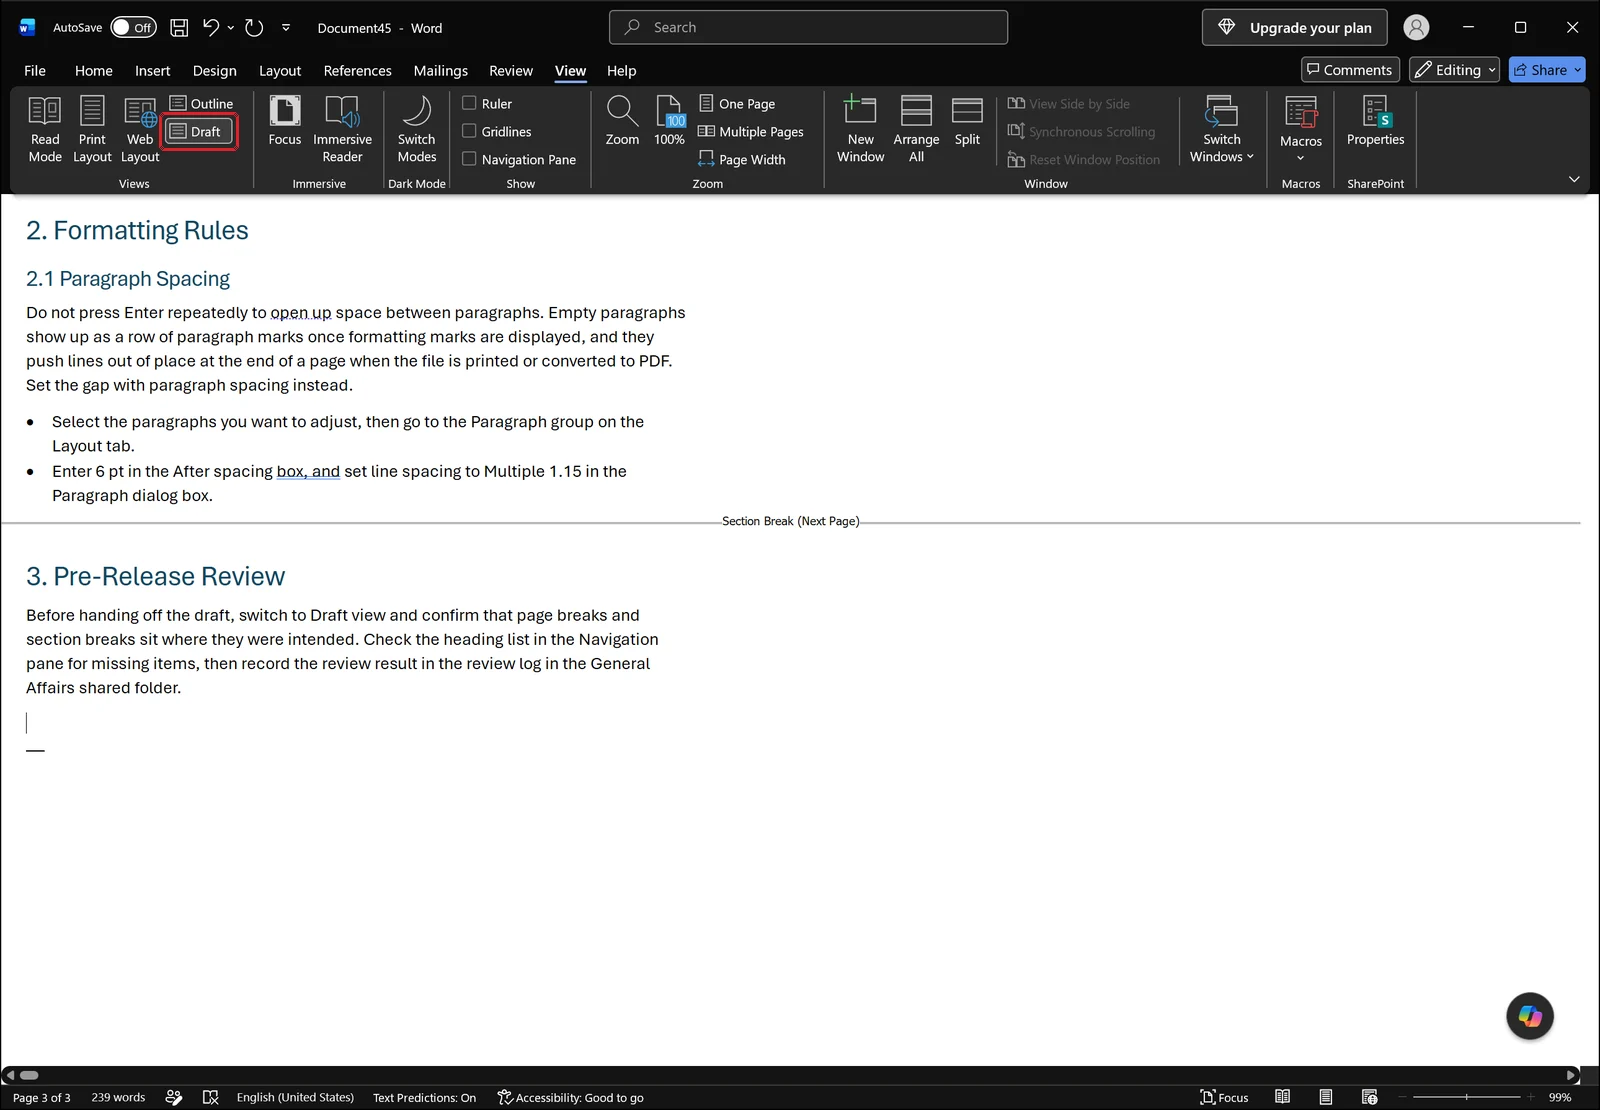
To see how many breaks a document contains and where they sit, switch to Draft on the View tab. Page edges and margins disappear and the text runs continuously, which makes each break stand out as a labeled horizontal dotted line.
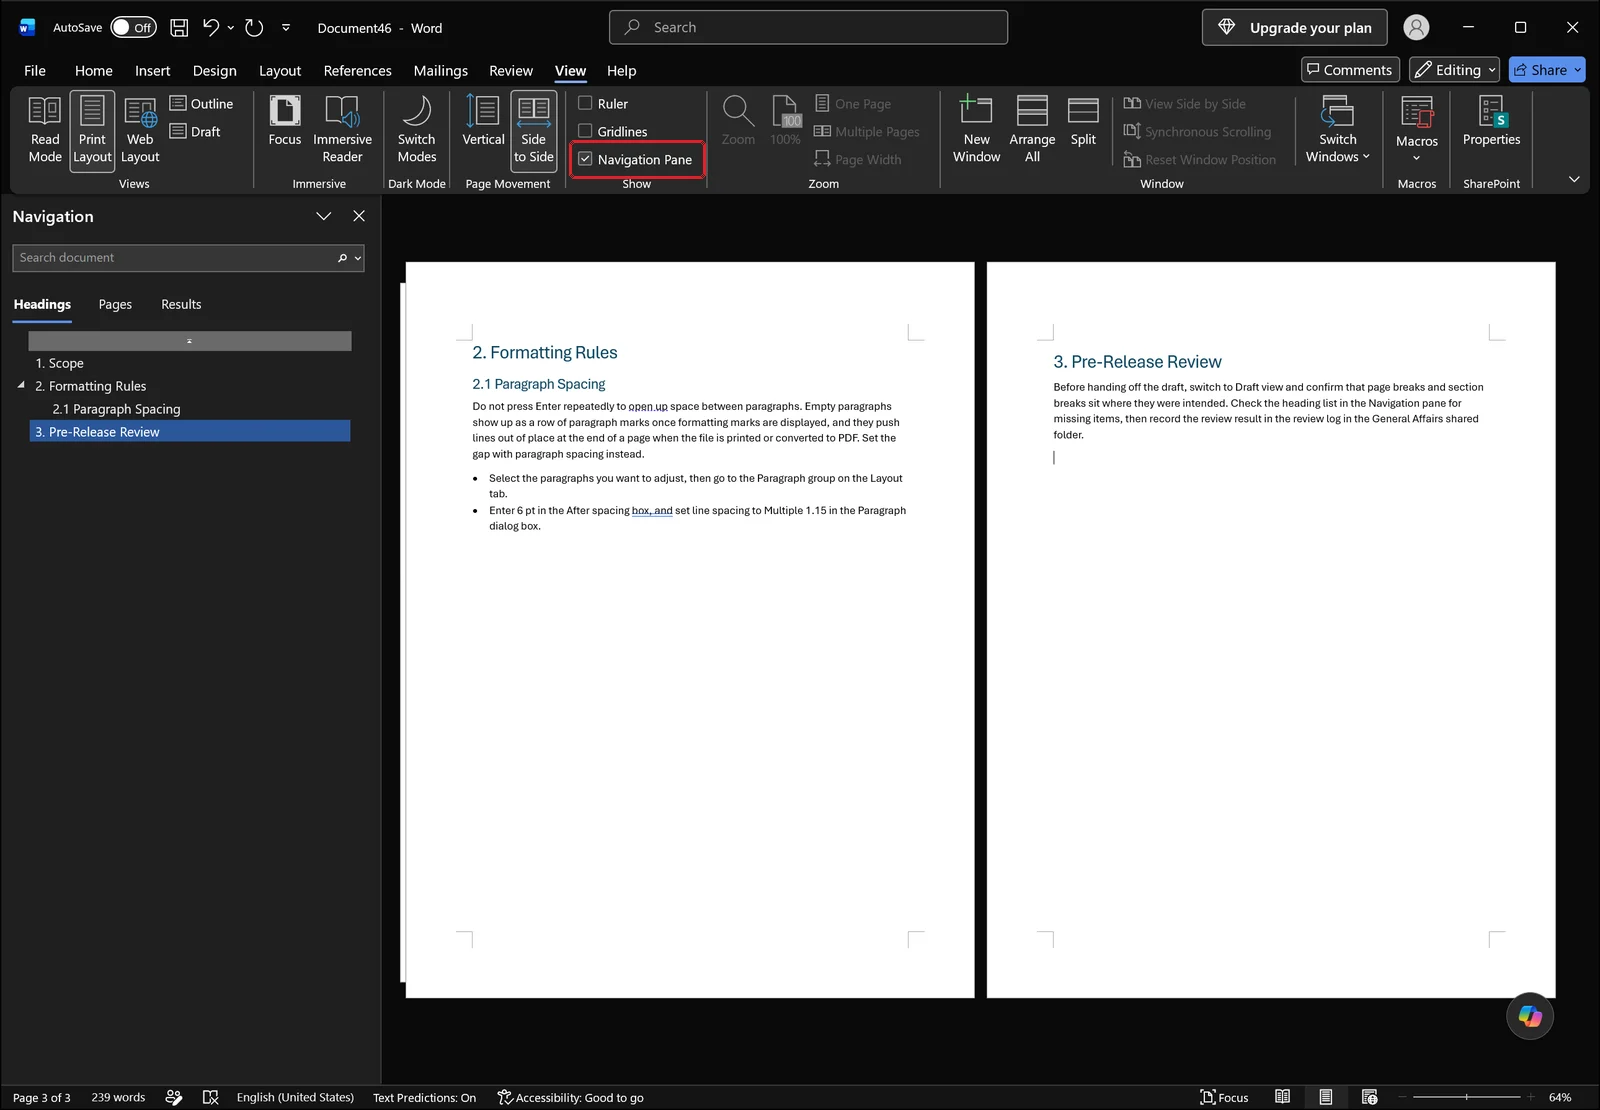
Find the problem page with the Navigation pane
In a long document, locating the bad page comes first. Tick Navigation Pane on the View tab and a panel opens on the left with a search box and a list of headings; click a heading to jump straight to it.
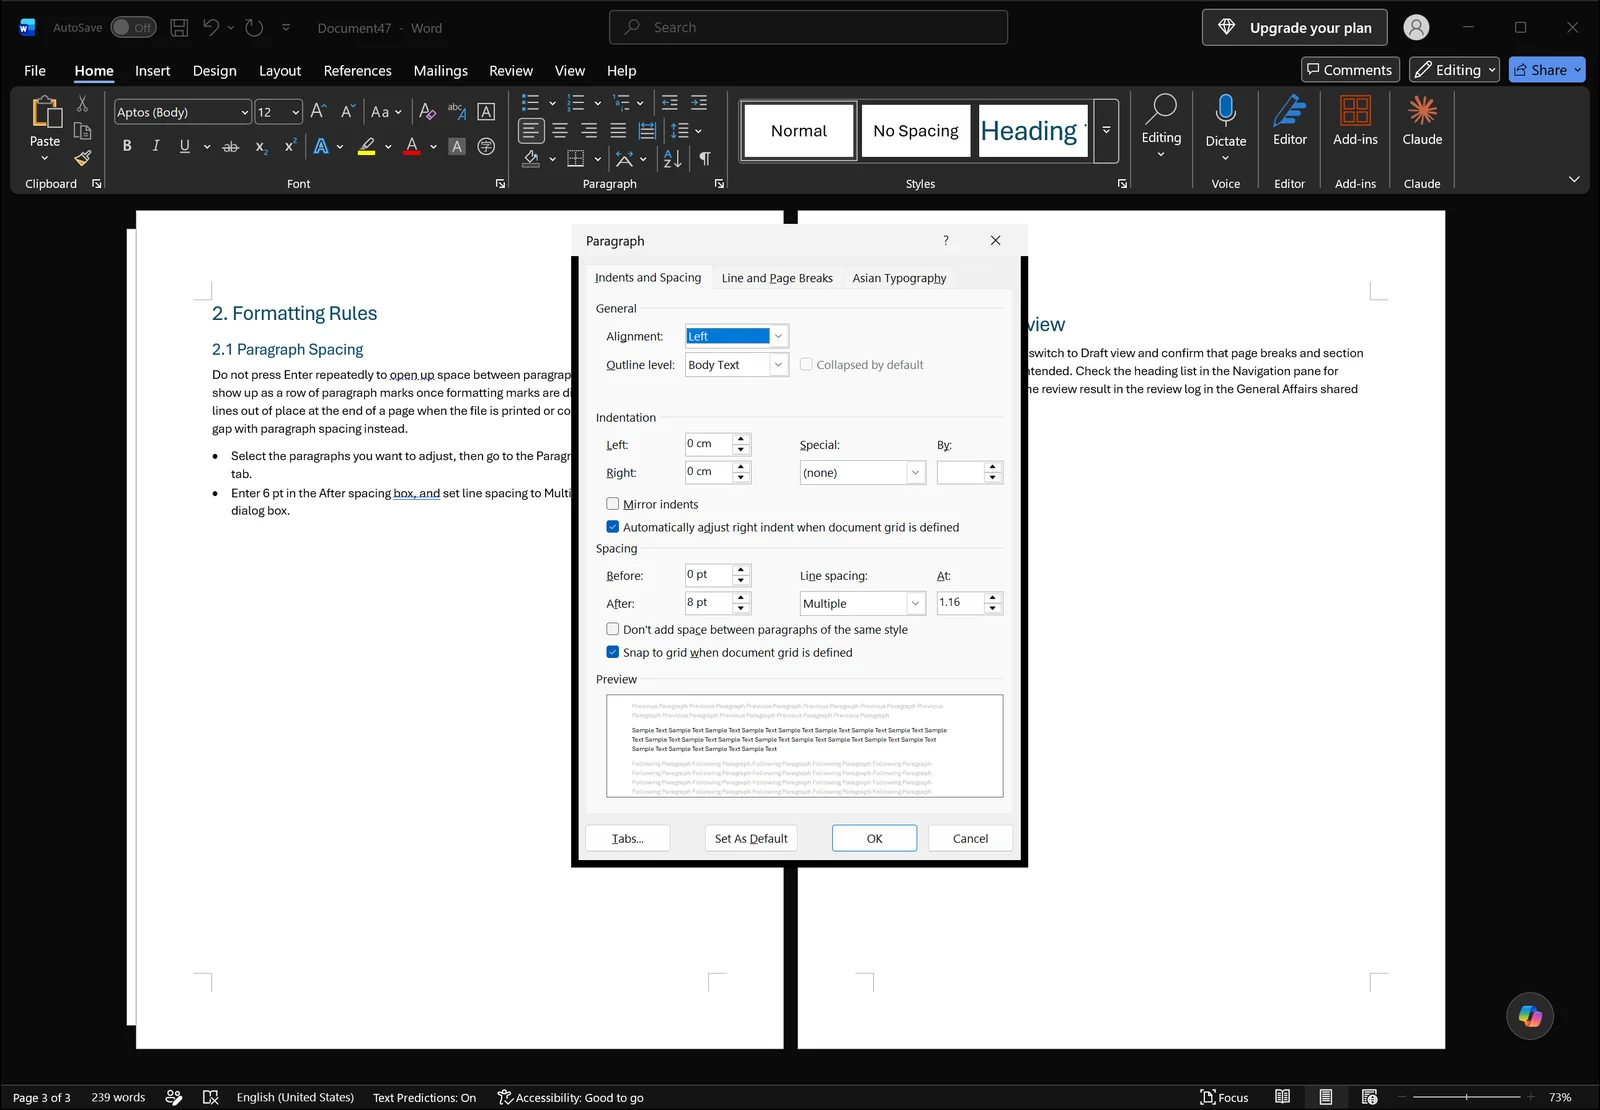
Check the spacing values in the Paragraph dialog
If there are no blank paragraphs and no breaks, the numbers are the problem. Click the small arrow at the bottom right of the Paragraph group on the Home tab to open the Paragraph dialog. The Indents and Spacing tab shows alignment, indentation, Spacing Before and After, and line spacing on one screen, with a preview at the bottom that reflects each change.
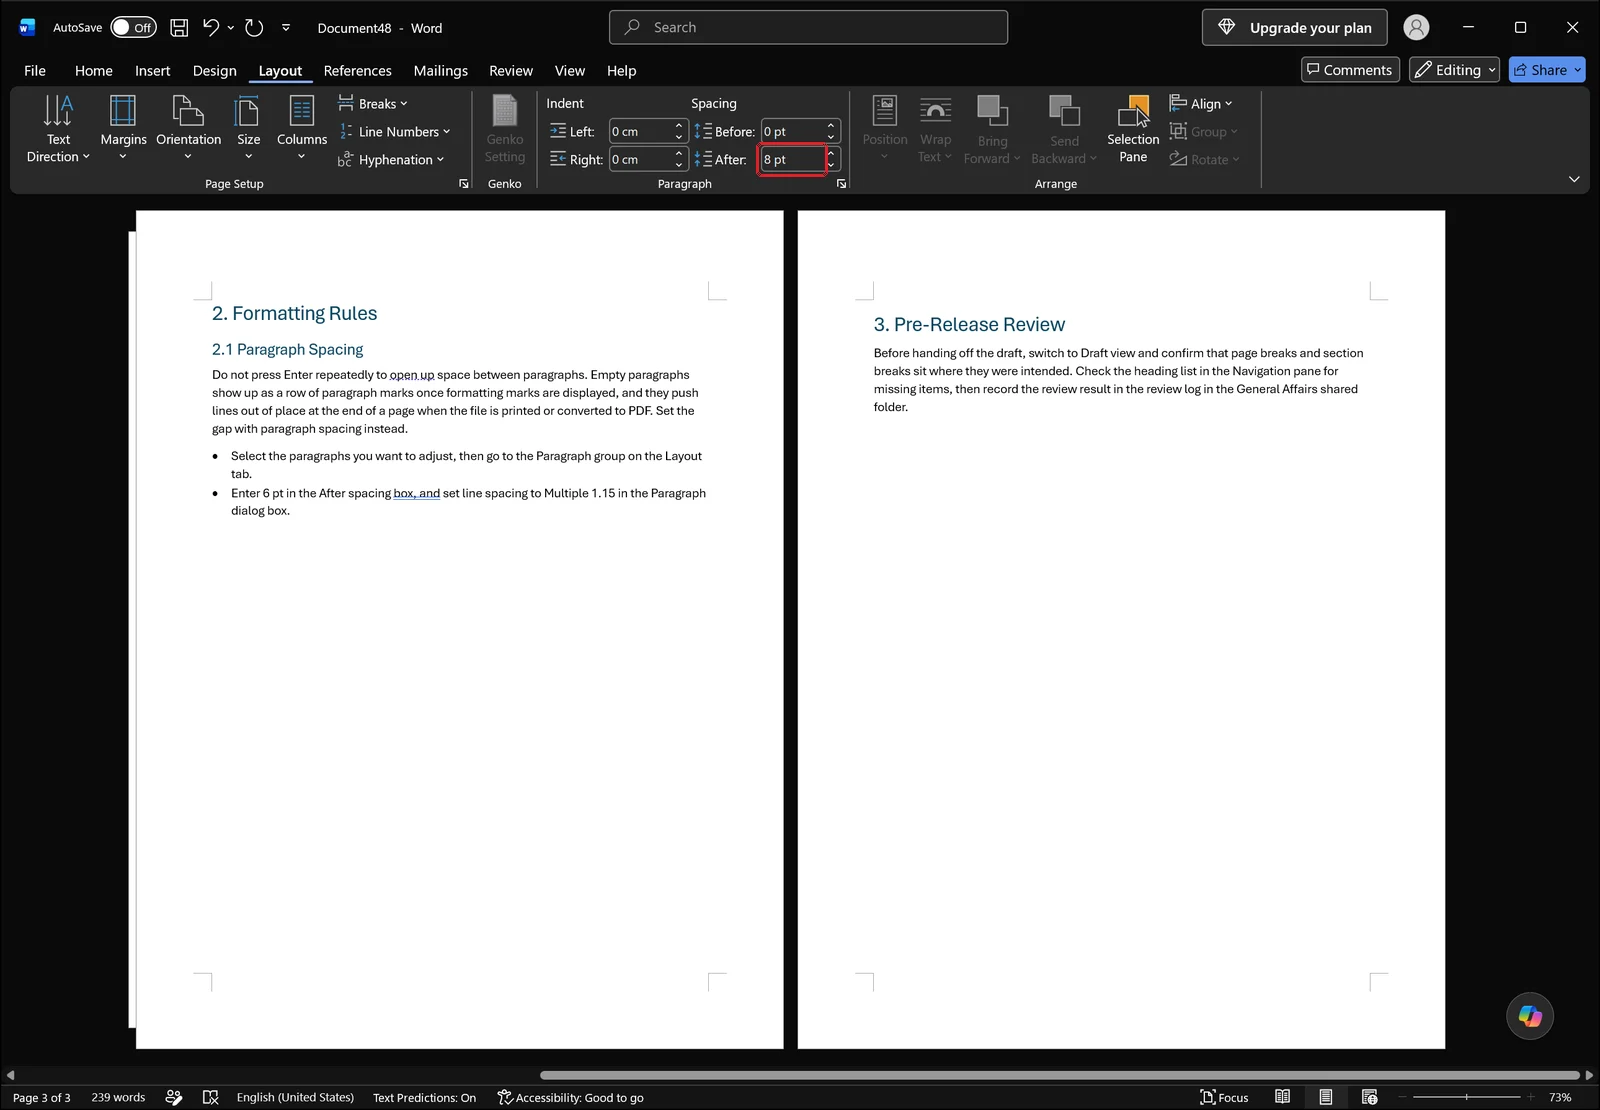
The same values are editable directly from the Paragraph group on the Layout tab. Next to the left and right indent boxes are Spacing Before and Spacing After spin boxes, which is the fastest way to drop the gap that follows each paragraph to 0.
One habit change removes most of this trouble. Instead of pressing Enter two or three times to separate paragraphs, set the Spacing After value. The gaps stay consistent when you later change fonts or edit the text, and you stop creating empty paragraphs that drift to the end of a page and generate a blank one.
👉 How to Change Line Spacing in Word: 1.5, Exact pt, and Fixes
When Marks Are Still There After You Turn Them Off
If you switched the ¶ button off and dotted lines or colored underlines are still on screen, those are not formatting marks. Work through the list below and most of them resolve.
Gridlines are a separate option
Thin dotted lines around a table, or a grid sitting behind the body text, are gridlines. They are controlled by the Gridlines checkbox in the Show group on the View tab and have nothing to do with formatting marks. Below, Gridlines is on and a faint grid covers the whole page area.
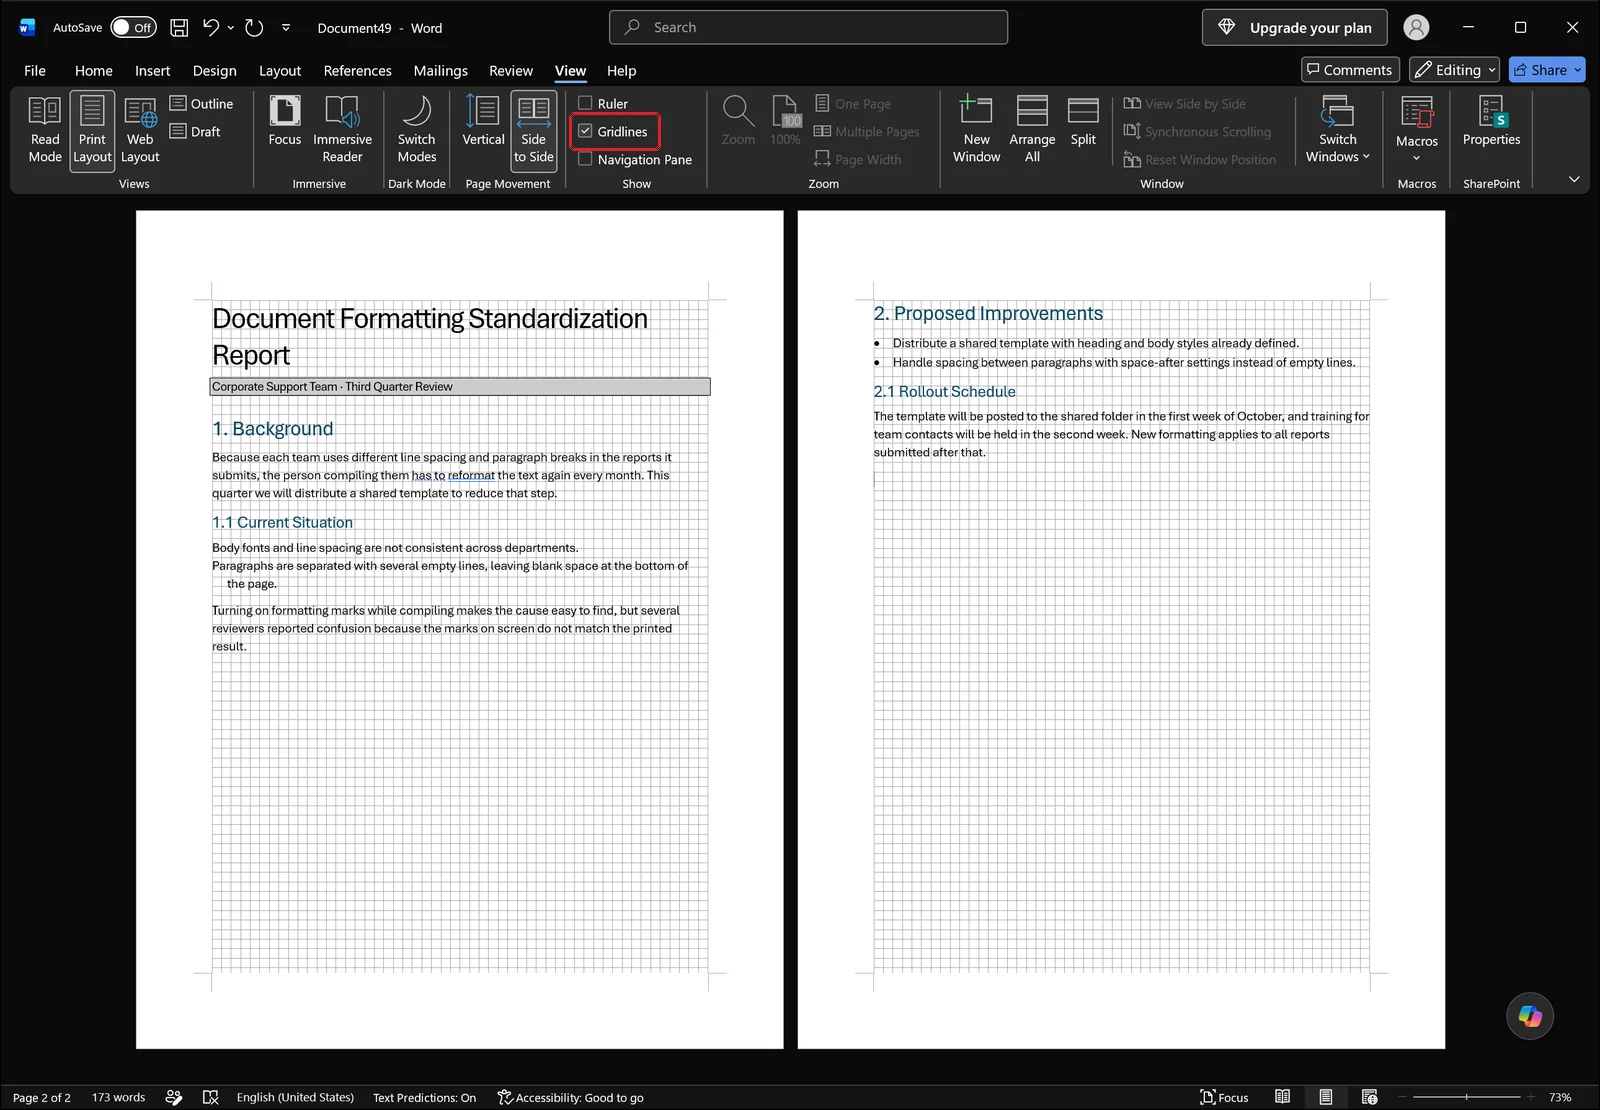
Table guide lines work the same way. They exist only on screen and never print, so if you want borders that actually appear on paper, set them separately from the Borders menu on the Home tab.
Colored lines and balloons from Track Changes
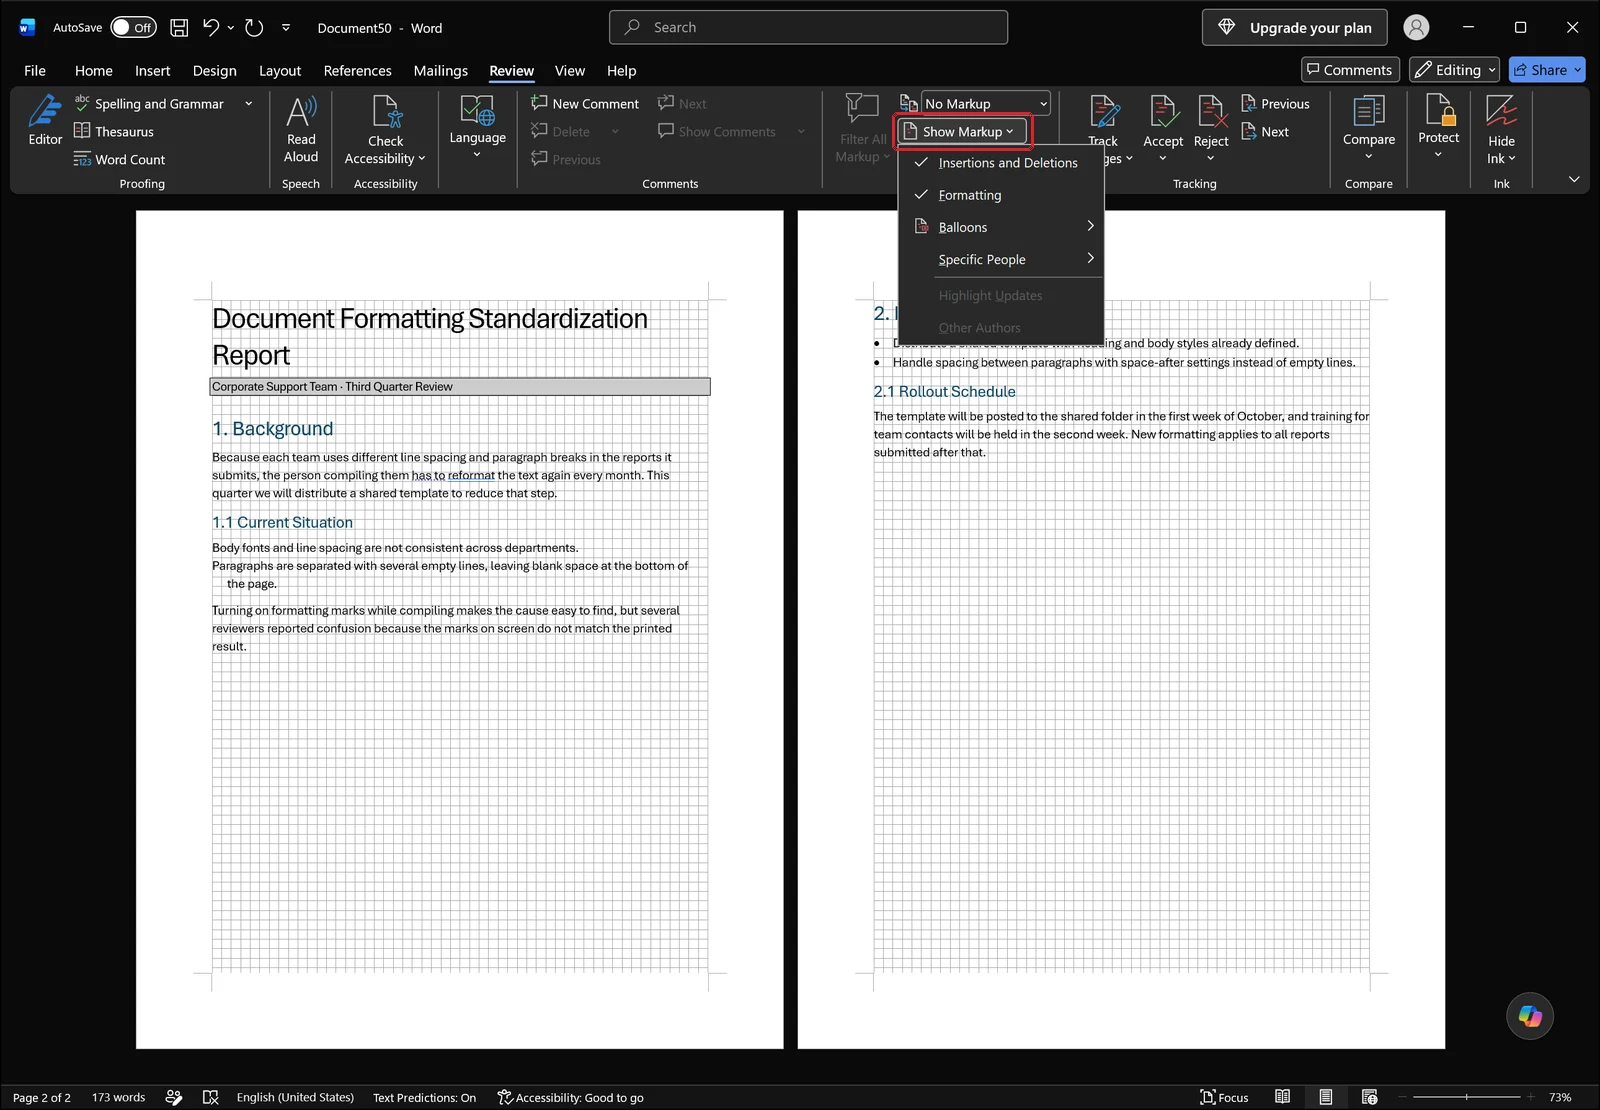
Colored underlines and strikethroughs in the body, plus balloons in the margin, mean the document has tracked changes in it. What appears on screen is decided by the Show Markup list on the Review tab, where insertions and deletions, formatting, balloons, and specific people can each be toggled individually.
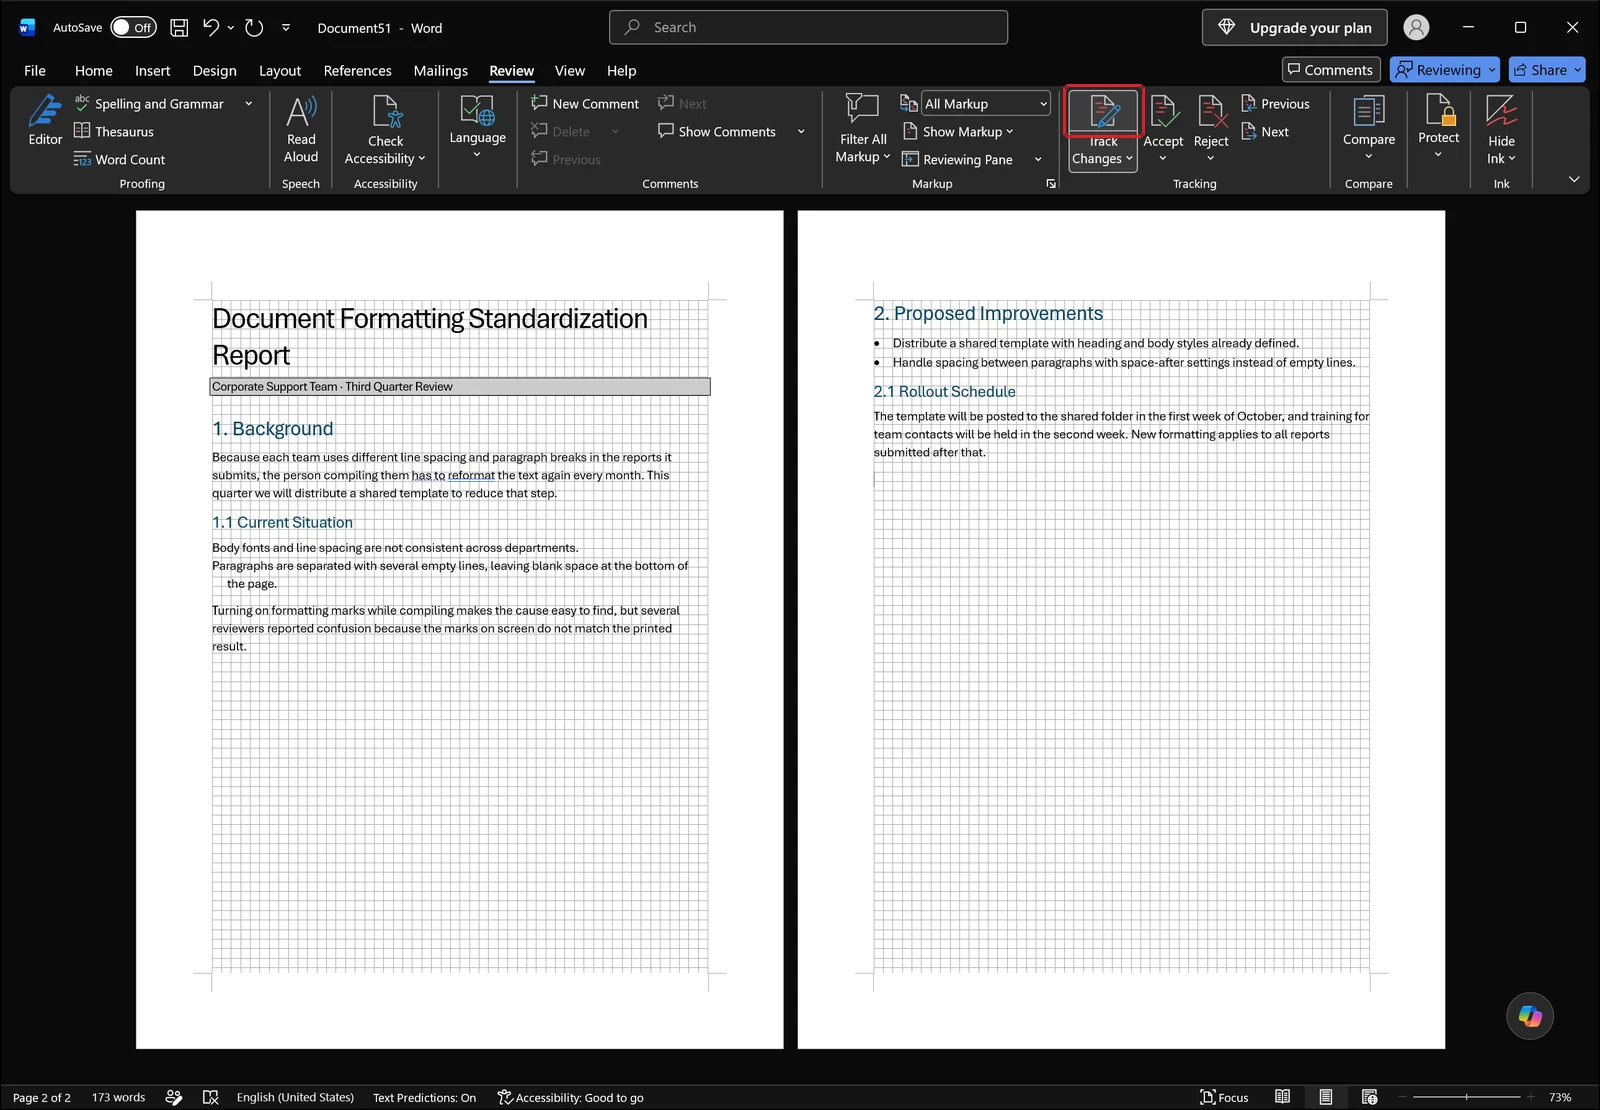
If every new edit keeps picking up a color, the tracking feature itself is running. Click Track Changes on the Review tab to switch it off, and edits from that point on are no longer marked.
One point matters here more than the rest. Changing the display to Original or No Markup only cleans up the screen; the recorded revisions are still stored inside the file. For a final version going outside the company, accept or reject all changes so the document is genuinely clean, then save.
Dotted underlines from hidden text
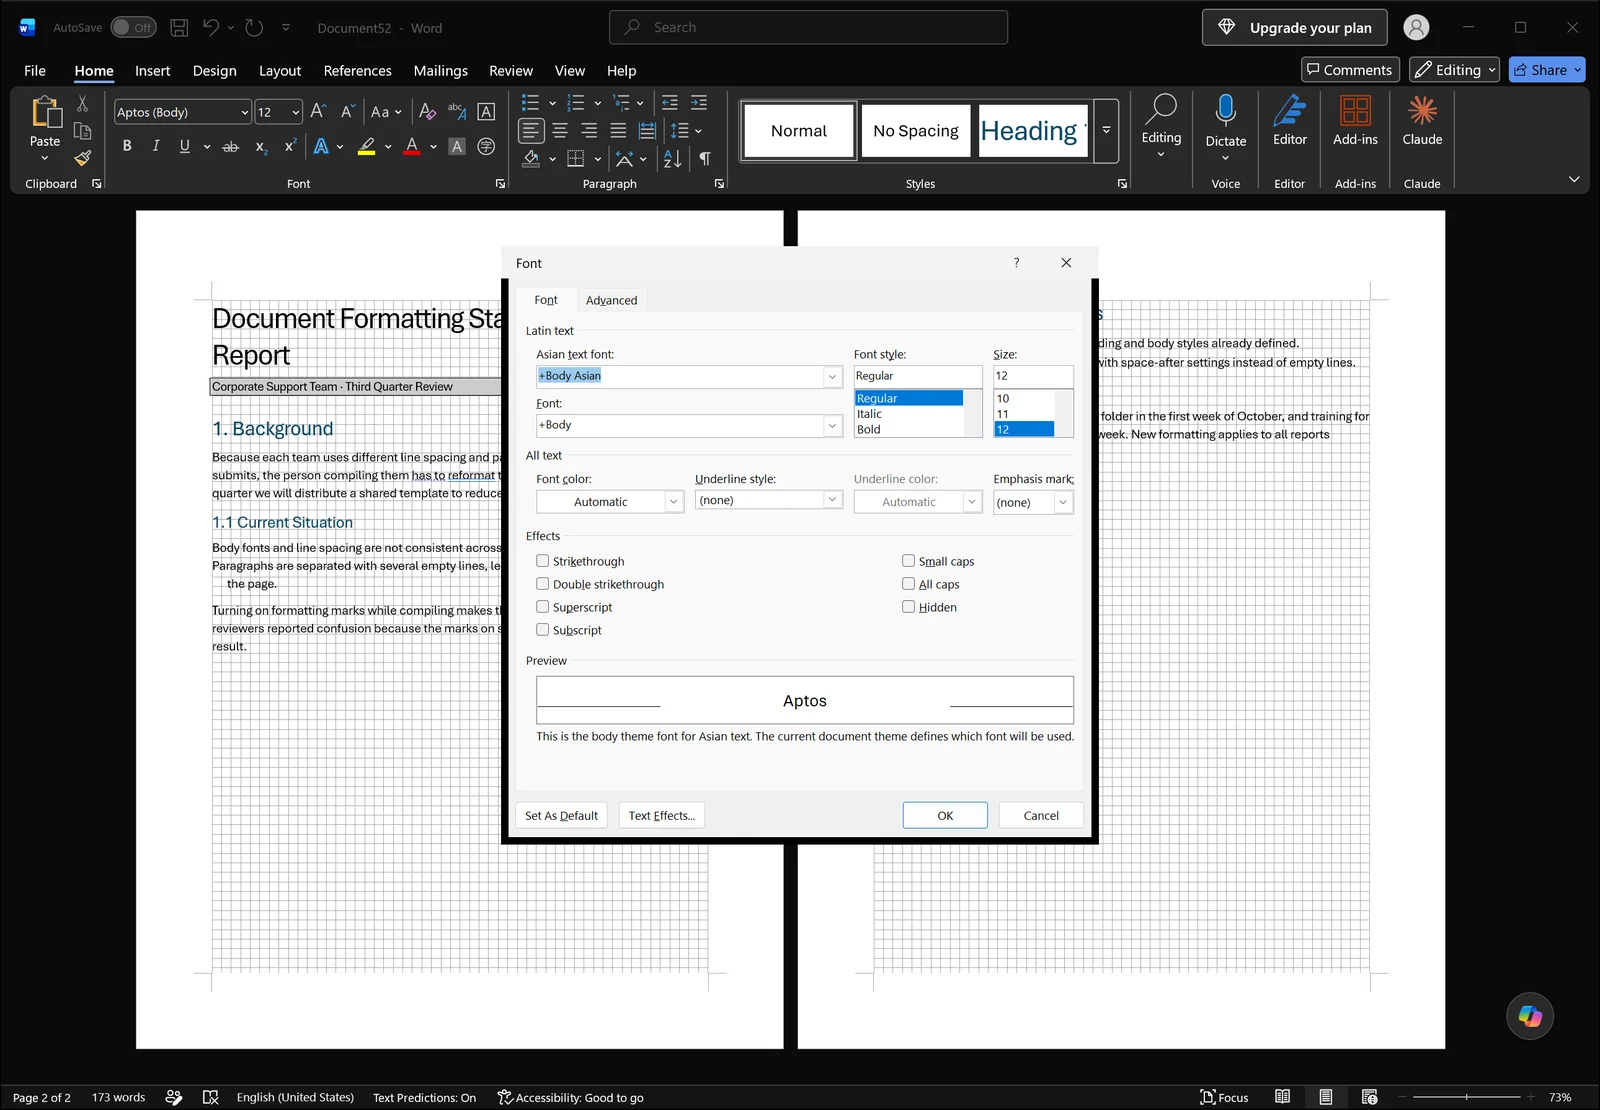
A dense dotted underline beneath a run of text means hidden formatting is applied. Select the text and open the Font dialog: the Hidden check box among the effects shows the current state and clears it.
By default hidden text only appears while formatting marks are displayed, so turning the ¶ button off can make the text look like it vanished. It has not been deleted.
Text boundaries and object anchors
A faint rectangle around the body area is the text boundaries display, and a small anchor icon beside a picture is an object anchor. Both are switched on and off under File → Options → Display.
Keeping Just One Mark Visible All the Time
Set them individually in File → Options → Display
The ¶ button is an all-or-nothing switch, but you can also control each mark on its own. Go to File → Options → Display and you can tick tab characters, spaces, paragraph marks, hidden text, and object anchors separately, with an option at the bottom to show all formatting marks at once.
Why the tab arrow survives when everything else goes
Anything ticked on that screen stays visible even after you turn the ¶ button off. If you clearly switched the marks off and a lone tab arrow or paragraph mark refuses to leave, this option page is nearly always the reason. No amount of pressing the shortcut will clear it, so you have to untick the box.
A practical setup: tabs only
You can also use that behavior deliberately. If you often align text inside tables or build dotted leader lines in a table of contents, leave tab characters permanently visible. The screen stays mostly clean while you can still tell which alignment was done with spaces and which with tabs.
Like the main toggle, this setting is stored in Word rather than in the document. It does not travel with a file you send to someone else, and it applies to every document you open on your own machine.
FAQ
Q. Ctrl+Shift+8 does not remove the Enter marks.
Check first that you pressed the 8 on the top number row rather than the one on the numeric keypad. If only certain symbols remain, they are almost certainly ticked individually under File → Options → Display. It is also worth checking whether a screen capture utility or similar tool has claimed the same key combination.
Q. Do these arrows and dots print?
No. Formatting marks are for on-screen editing only, so they do not appear in the printed page, Print Preview, or a PDF export. Hidden text is the exception: if the print options are set to include hidden text, that text itself can come out on paper.
Q. I hid the marks but the gaps between paragraphs are still wide.
The marks are only a display option and have no effect on spacing. In most cases an empty paragraph is still sitting there, Spacing After is set to 8–10 pt, or line spacing is set to Multiple at 1.08. Set the spacing values to 0 and line spacing to Single in the Paragraph dialog or on the Layout tab.
Q. How do I get rid of the dotted border around a table?
That is a table gridline, not a formatting mark. Untick Gridlines on the View tab and it disappears from the screen; the same option is available from the Table Layout tab while the cursor is inside a table. Borders that actually print have to be set separately from the Borders menu on the Home tab.
👉 Delete a Blank Page in Word: Why Backspace Won't Work
Cleaning up document formatting with inline AI
Everything above comes down to toggling a display option and then fixing, one at a time, the empty paragraphs and spacing values you spotted by eye. On a two- or three-page memo that takes a minute. On a fifty-page draft that several people wrote in turn, scanning for every stray blank paragraph and reconciling inconsistent spacing values takes considerably longer.
inline AI is a desktop tool that opens and edits Word and Excel files directly. Ask it something like "delete all empty paragraphs and set Spacing After to 6 pt for body paragraphs," and it works through the whole document, applies the changes, and marks what it changed so you can review before keeping them. The model runs locally, so the contents of a report or contract are never sent anywhere.
See what an agent could take over at your company in a 30-minute call.