Learn
Outline View in PowerPoint: Create Slides Fast from Text

Add a slide, pick a layout, click the title box, type, click the body box, type again. That loop is how most people build a deck, but it is not the only option. If you want to create slides fast with Outline View in PowerPoint, those four steps collapse into two keys: Enter starts a new slide, Tab pushes the current line down into body text. When the structure is already clear in your head, ten slides take a few minutes.
This guide uses a five-slide deck called New Hire Onboarding Redesign as the example. It walks through opening Outline View, the typing rules, how to check the result, and why the outline pane sometimes looks completely empty.
What Outline View Actually Shows
Outline View is a view mode that strips a presentation down to the text sitting in title placeholders and body (content) placeholders, then lists all of it in one editable pane. Instead of clicking around a slide canvas, you type in something that looks like a Word document, and what you type flows into each slide's title and body.
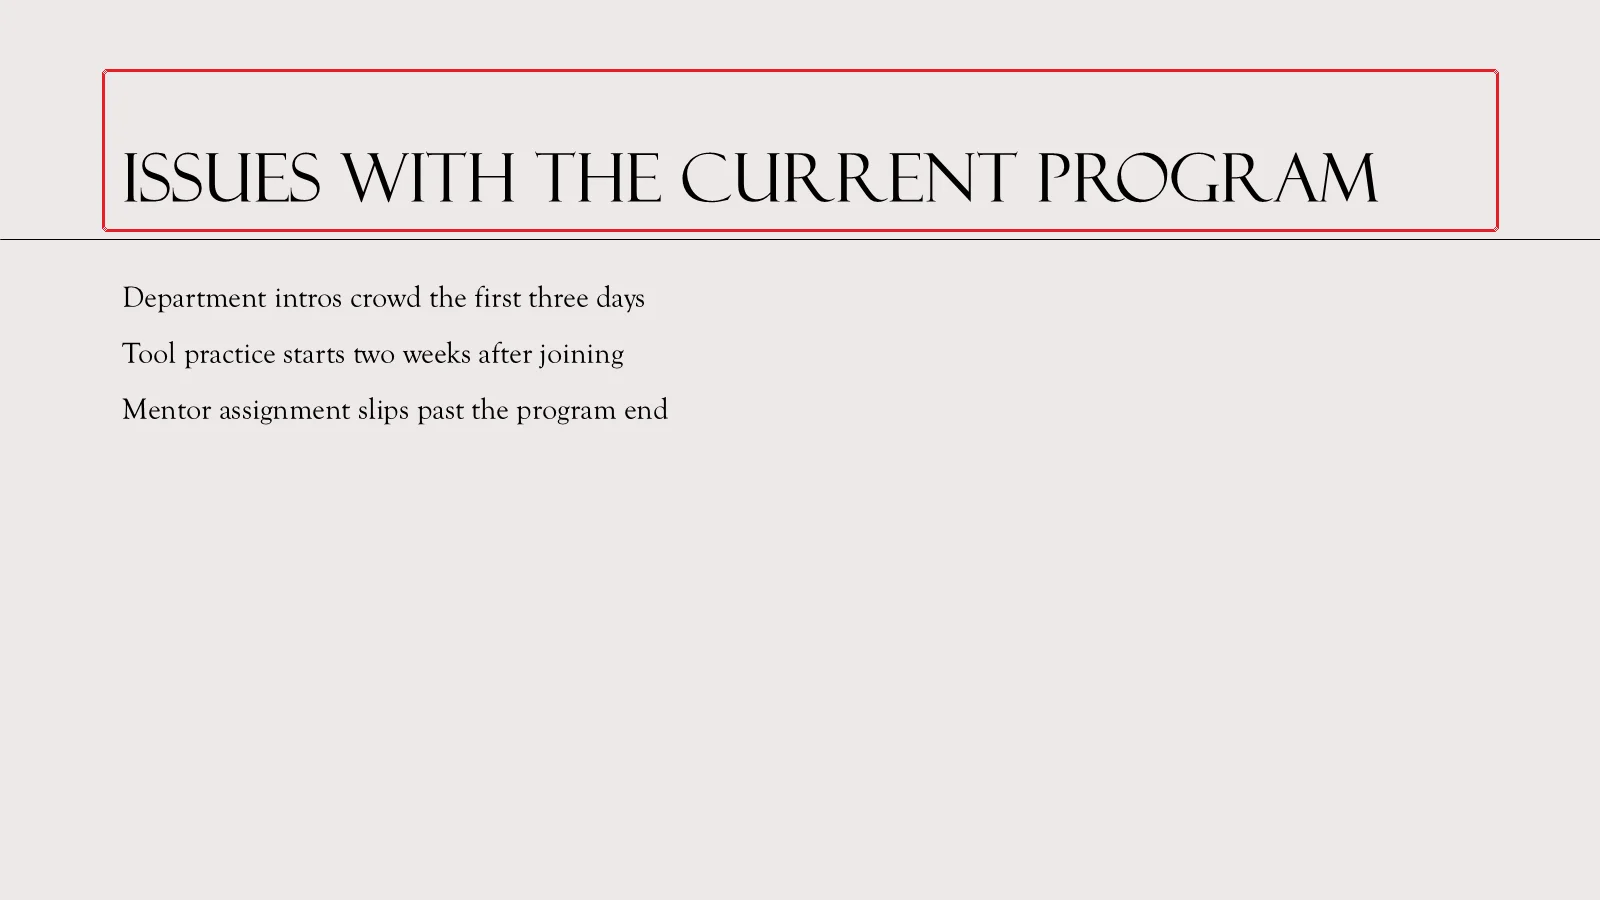
The red box marks the title placeholder; the block underneath it is the body placeholder. Every line you type in the outline pane lands in one of those two spots.
Text boxes vs. the outline method
The conventional route starts on the Home tab with New Slide.
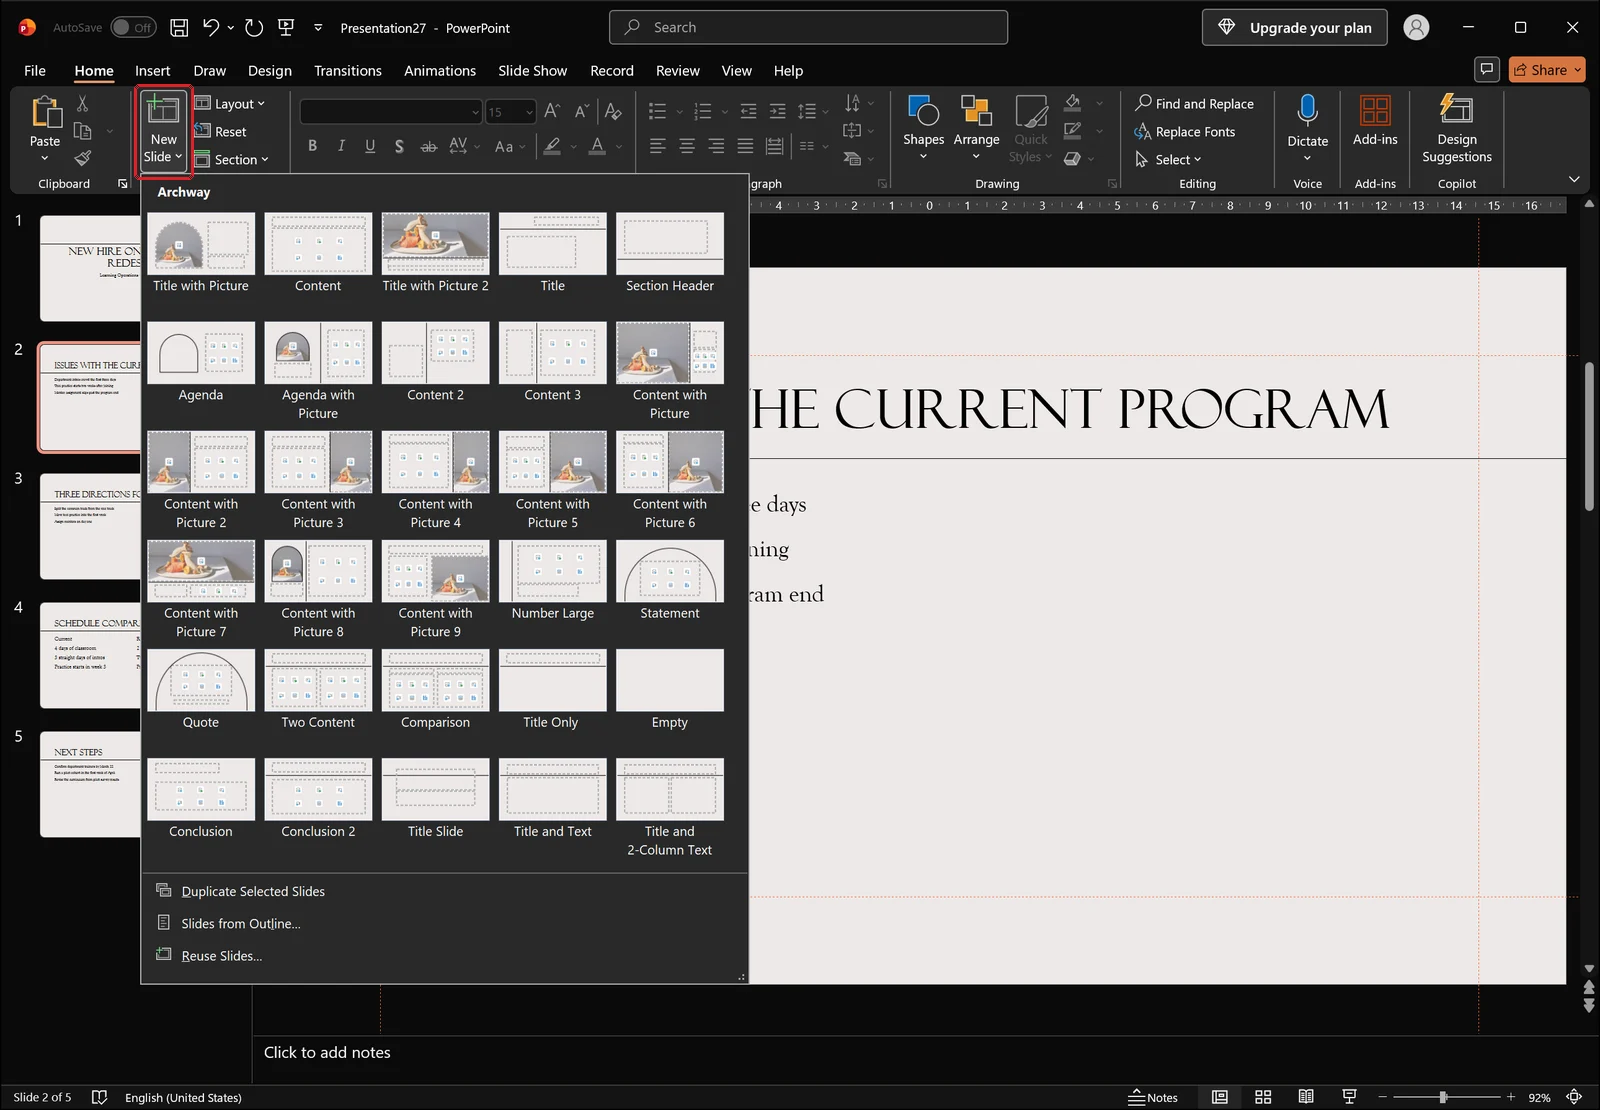
Pick a layout from that gallery, a slide appears, and then you click the title box and the body box separately to fill them in. For a five-slide deck, that is five rounds of the same motions. Outline View removes the round trip and lets you type the whole thing as continuous text.
What shows up in the outline, and what doesn't
Worth knowing up front: only placeholder text appears in the outline pane. Text boxes drawn from the Insert tab, words typed inside shapes, table cell contents, SmartArt labels, and captions attached to pictures are all invisible there.
So if you open someone else's file in Outline View and the pane is blank, the likely reason is that the deck was built with free-floating text boxes rather than layout placeholders.
When it saves the most time
Outline View pays off during the skeleton stage, not the design stage. Turning a report's table of contents into slide titles, splitting meeting items into one slide per topic, converting a written draft into a deck — those are the sweet spots. If your work is mostly arranging shapes and placing images, Outline View has little to offer.
Opening Outline View from the View Tab
View tab > Presentation Views > Outline View
Click the View tab and look at the leftmost group, Presentation Views: Normal, Outline View, Slide Sorter, Notes Page, and Reading View sit side by side.
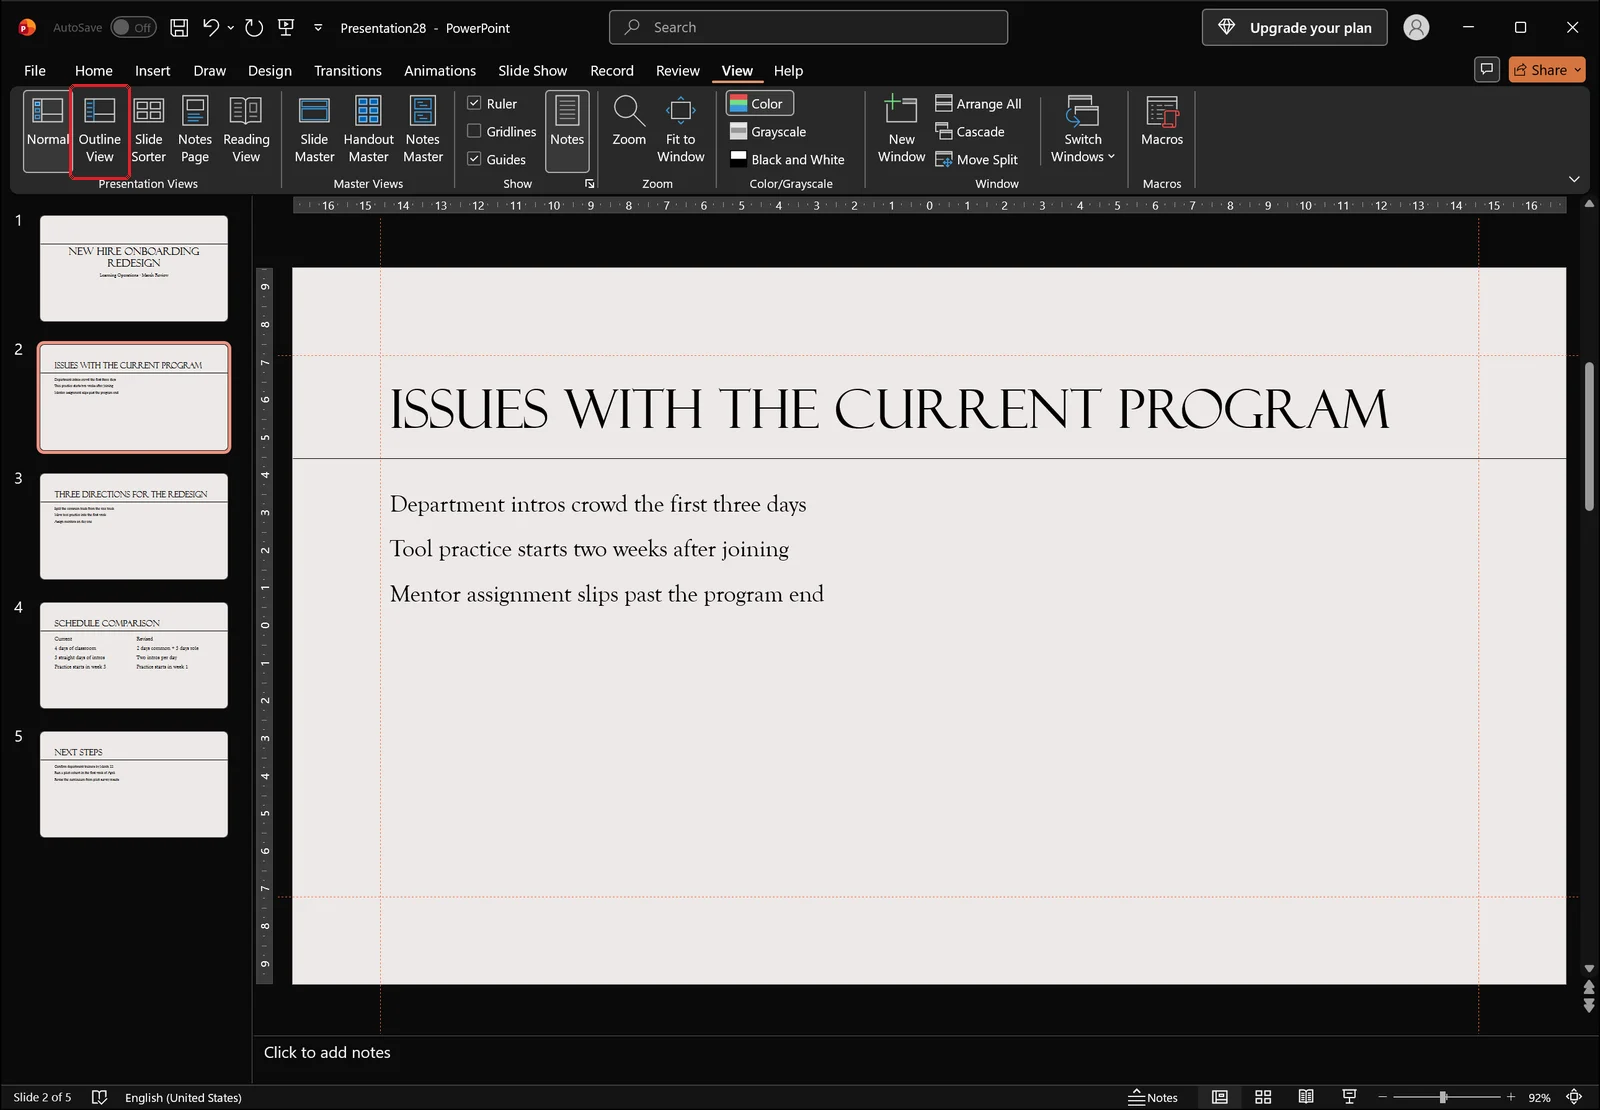
Click Outline View and the left pane turns into a text editing pane. Here is what that looks like once the switch is done.
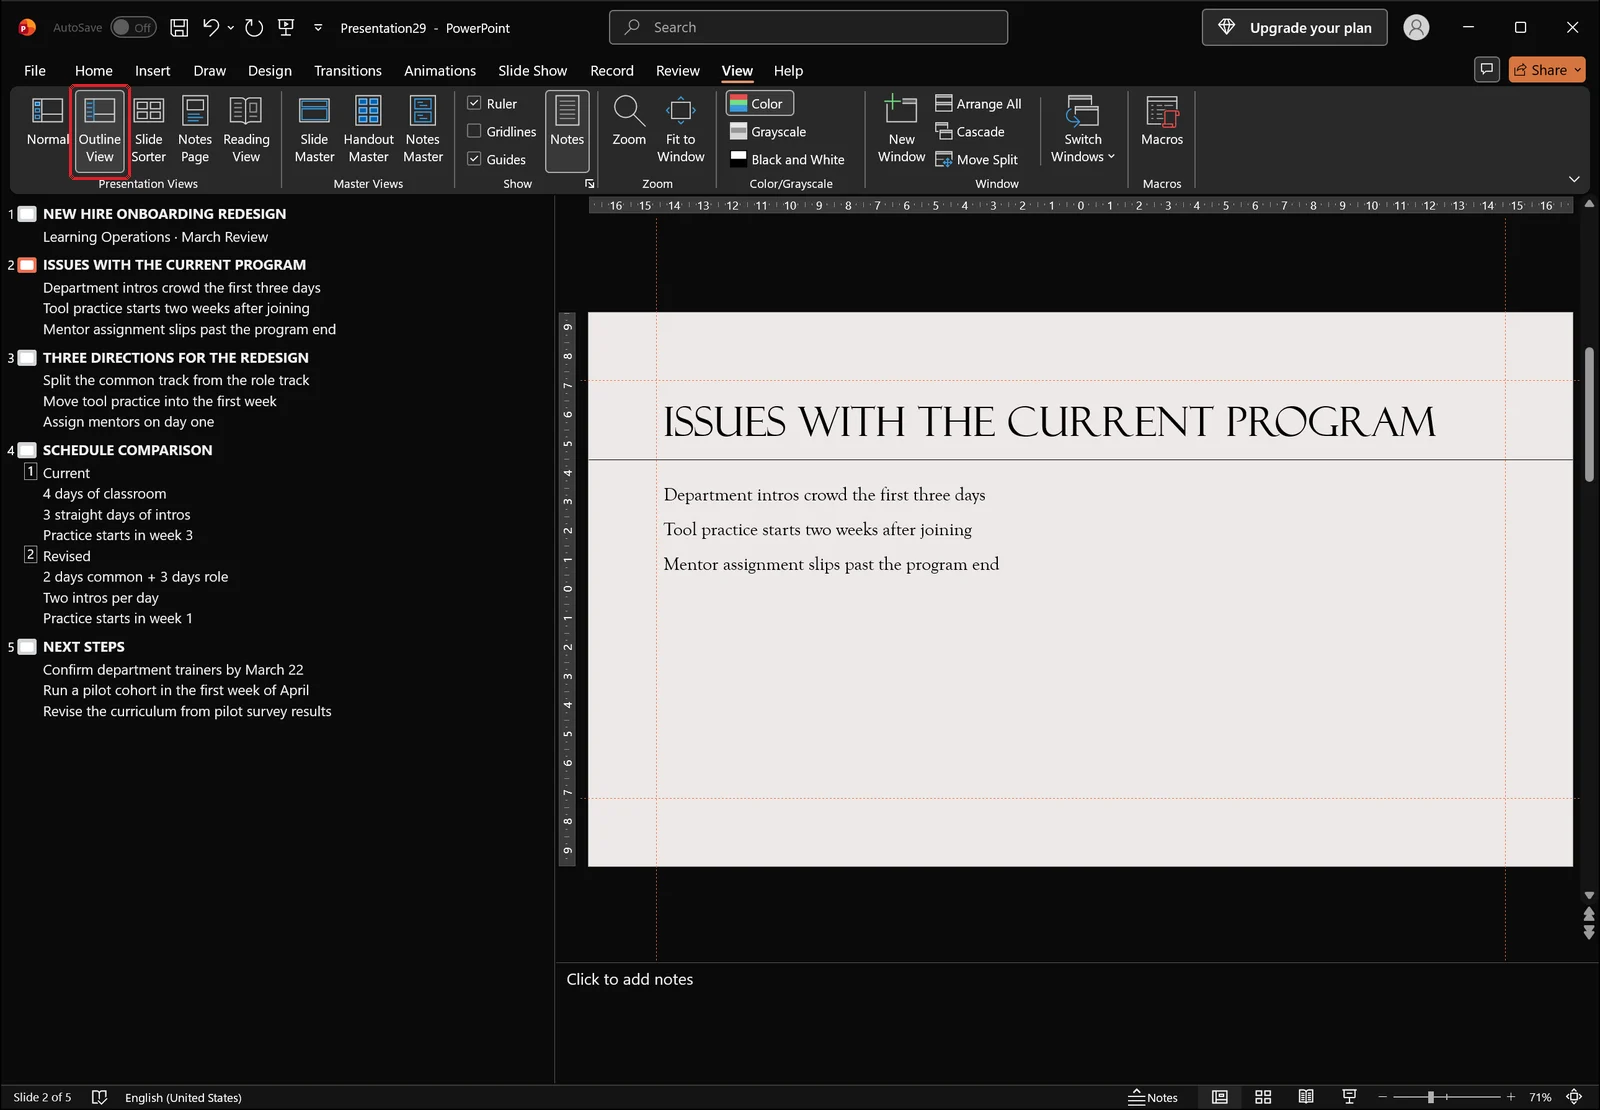
Each small slide icon in the left list represents one slide. The indented lines below an icon are that slide's body text.
Don't confuse it with the thumbnail pane
Normal view also has a tall pane on the left, but that one holds miniature pictures of your slides — clicking the text in a thumbnail never puts a cursor in it. To type directly, you have to be in Outline View. The two panes occupy the same spot on screen, which is exactly why they get mixed up.
If the outline pane looks empty
Reports of "no text on the left" almost always come down to one of three things.
- You are still in Normal view. Click Outline View on the View tab again.
- You are in Reading View or a slide show. Press Esc first, then switch.
- The window is narrow and the pane is nearly collapsed. Drag the divider between the outline pane and the slide to the right.
👉 How to Add Sections in PowerPoint: Group and Reorder Slides
Typing Several Slides at Once in the Outline Pane
One title line equals one slide
A line typed at the leftmost level of the outline pane becomes a slide title. Type the line, press Enter, and a new line appears at the same level — that new line is the next slide.
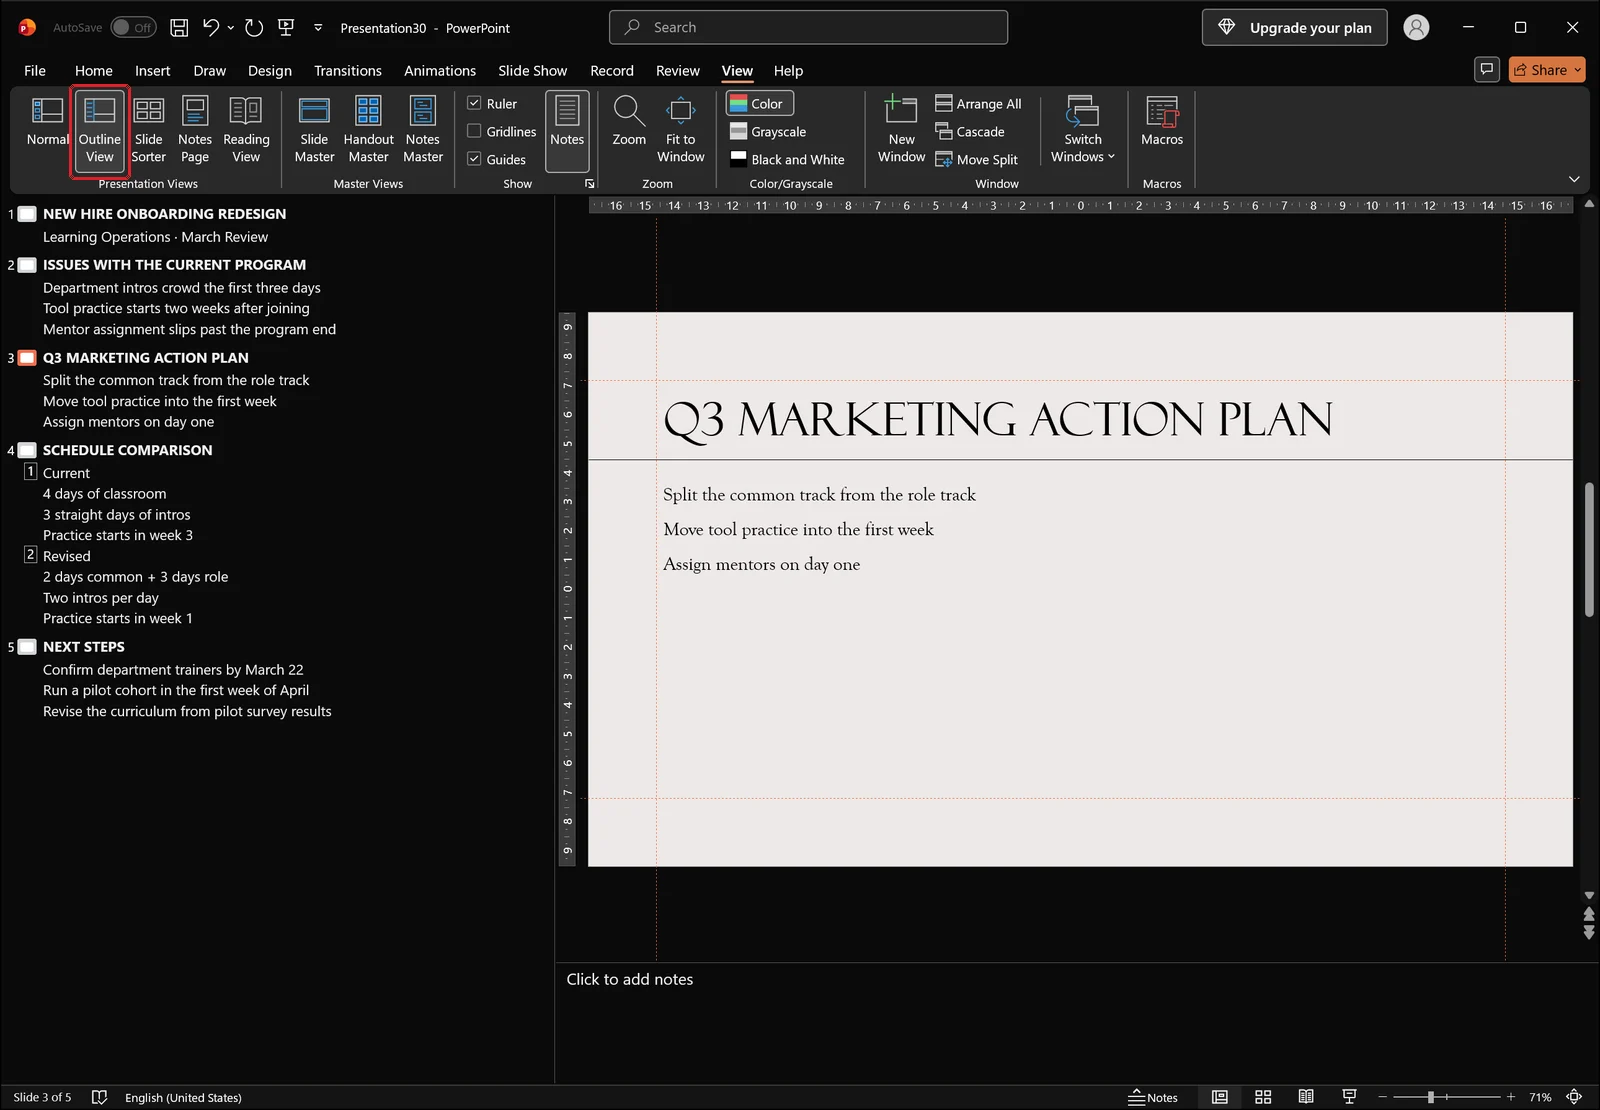
The third title in the outline appears in the title placeholder of the slide on the right. Type all your titles first and you have the deck's running order laid out before any body text goes in.
Tab demotes, Shift+Tab promotes
After a title, press Enter and then Tab. The line drops one level and becomes body text on that slide.
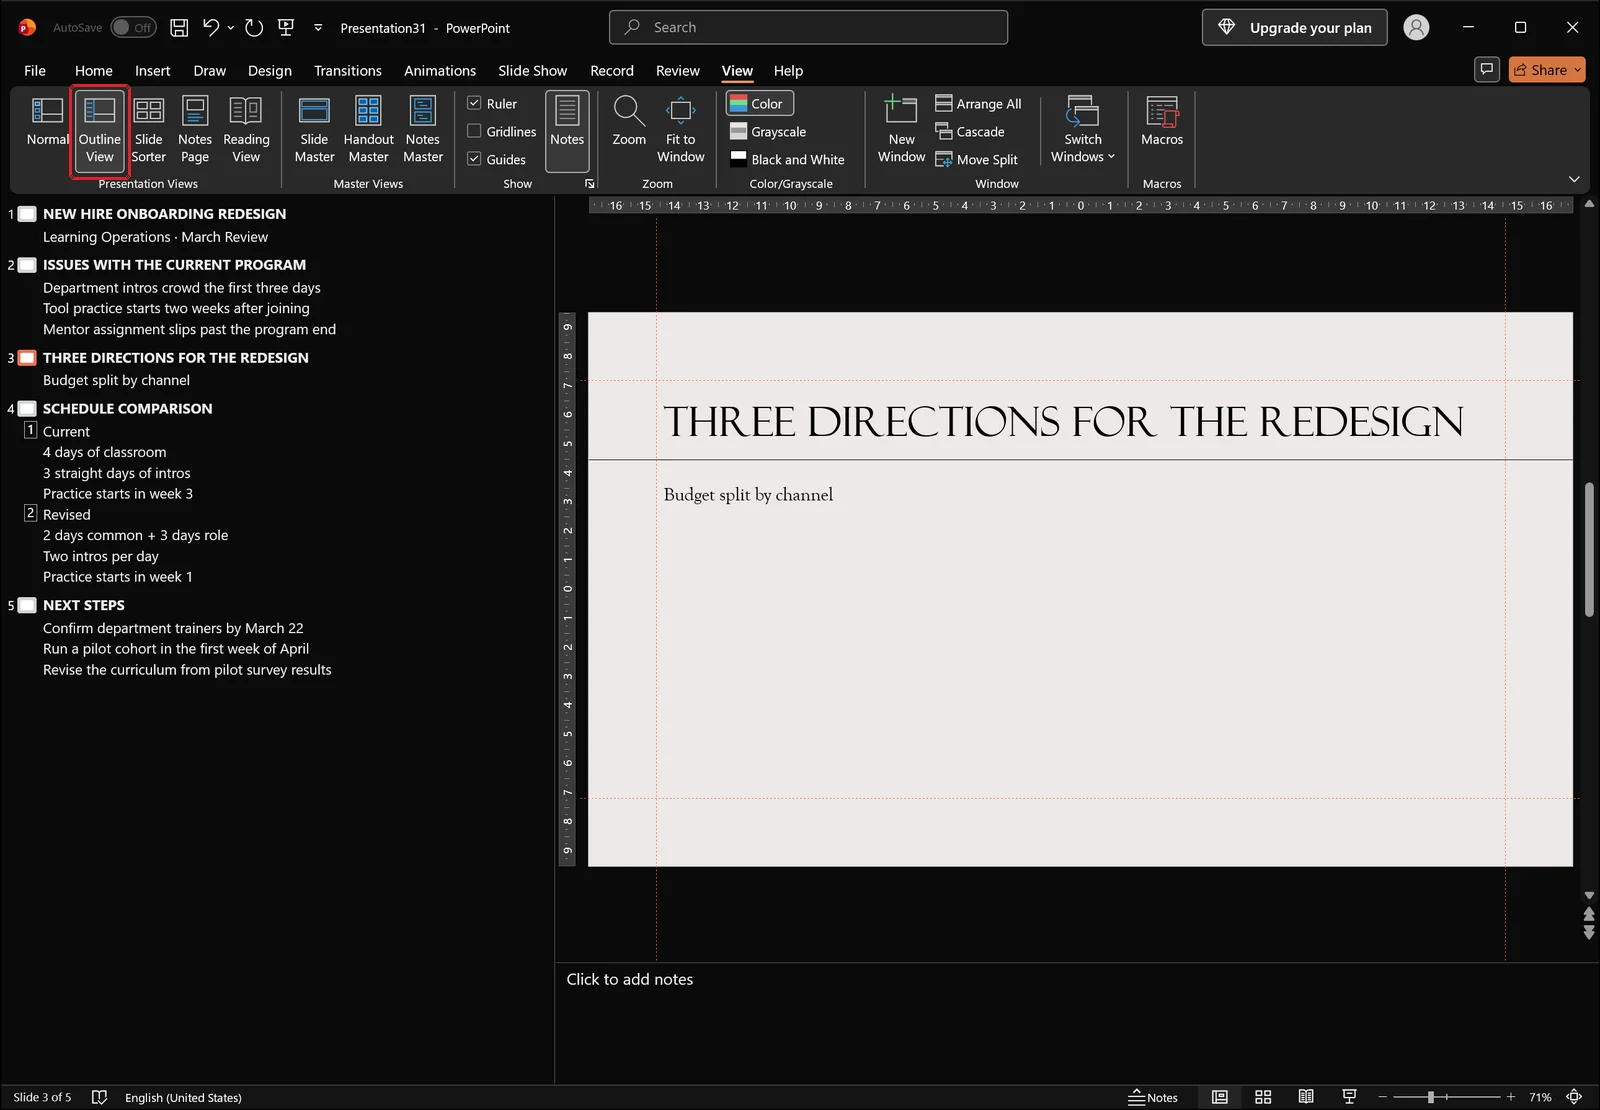
To turn a body line back into a new slide, press Shift+Tab. The line jumps to the leftmost level and becomes the title of a fresh slide. That is the entire mechanic: Enter adds lines, Tab and Shift+Tab move them up and down the hierarchy.
Sub-levels and how deep to go
Pressing Enter on a body line creates another line at the same level. Press Tab again and it becomes a second-level bullet, and you can keep going down to five levels. In practice the text shrinks noticeably from level three onward, so stopping at level two keeps a deck readable from the back of a room.
Pasting a list from Notepad or Word
When you paste external text into the outline pane, PowerPoint reads the tab characters at the start of each line as indent levels. So you can draft the whole structure somewhere else first:
Issues with the Current Program
	Everything is crammed into three days
	No department-specific practical training
Three Directions for the Redesign
	Spread the program across five days
	Add hands-on sessions per department
	Add a week-four review session
Lines with no tab become slide titles; lines with one tab become first-level body text. Copy the block, paste it into the outline pane, and several slides appear at once. Choose Keep Text Only from the paste options so the source formatting doesn't come along for the ride.
Reviewing the Slides and Cleaning Up Layouts
Back to Normal view
Once the outline is typed, click Normal on the View tab to return to the regular editing screen.
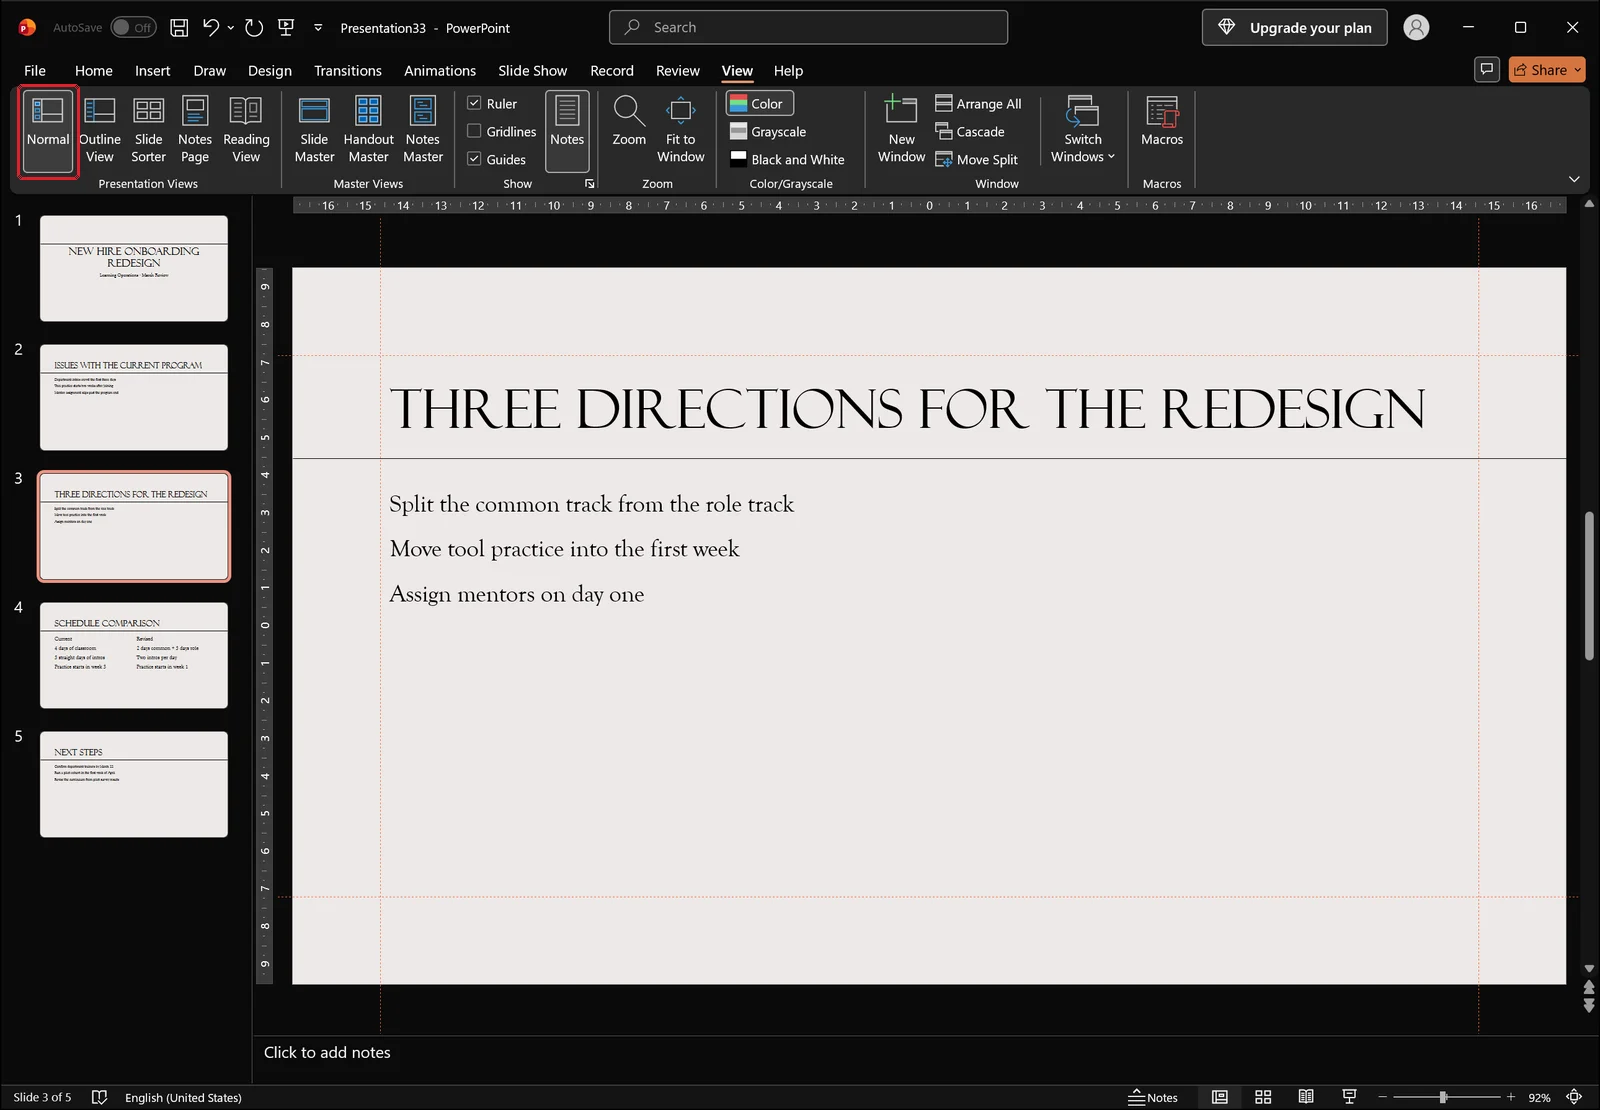
The left pane switches back to numbered thumbnails, so you can see how many slides your outline lines actually produced.
Check the whole flow in Slide Sorter
For longer decks, Slide Sorter is faster.
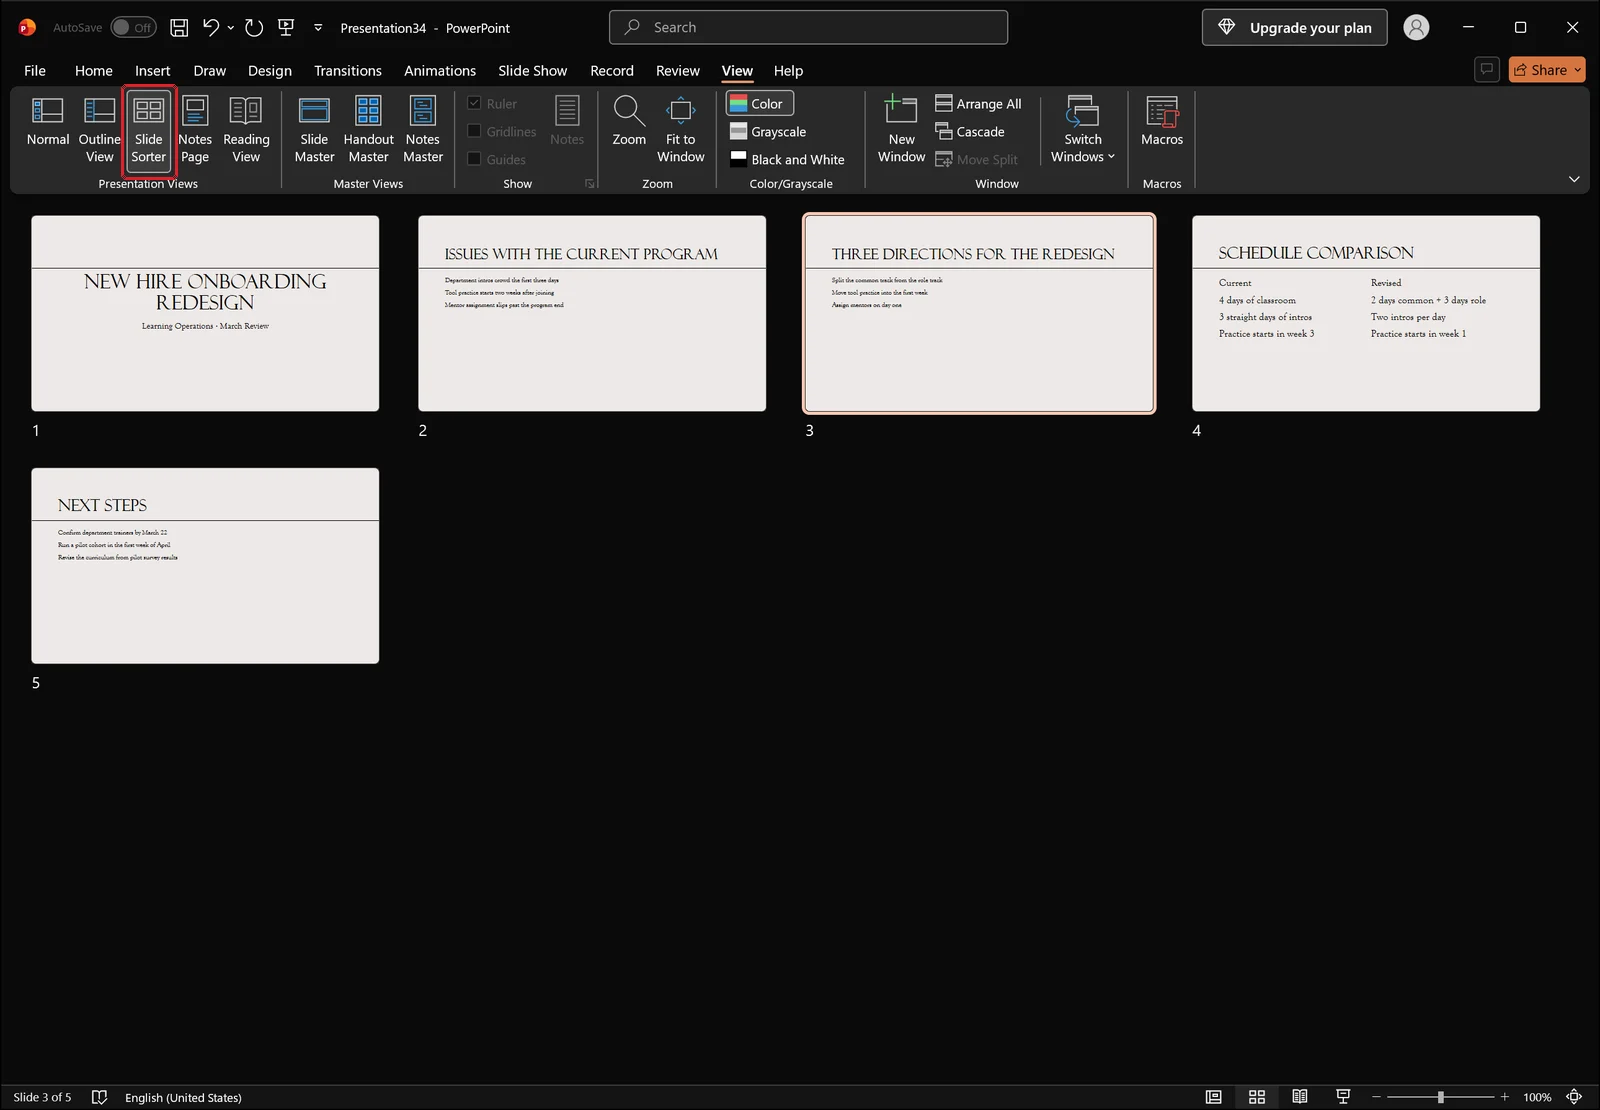
Here you can drag slides into a different order, which suits the stage right after dumping everything out as an outline. Slides with no content, or ones with a wall of body text, stand out immediately in this grid.
Assign layouts and handle overflow
Slides created from an outline use the Title and Text layout by default. Cover slides and dividers need something else, and you change those individually from the Home tab.
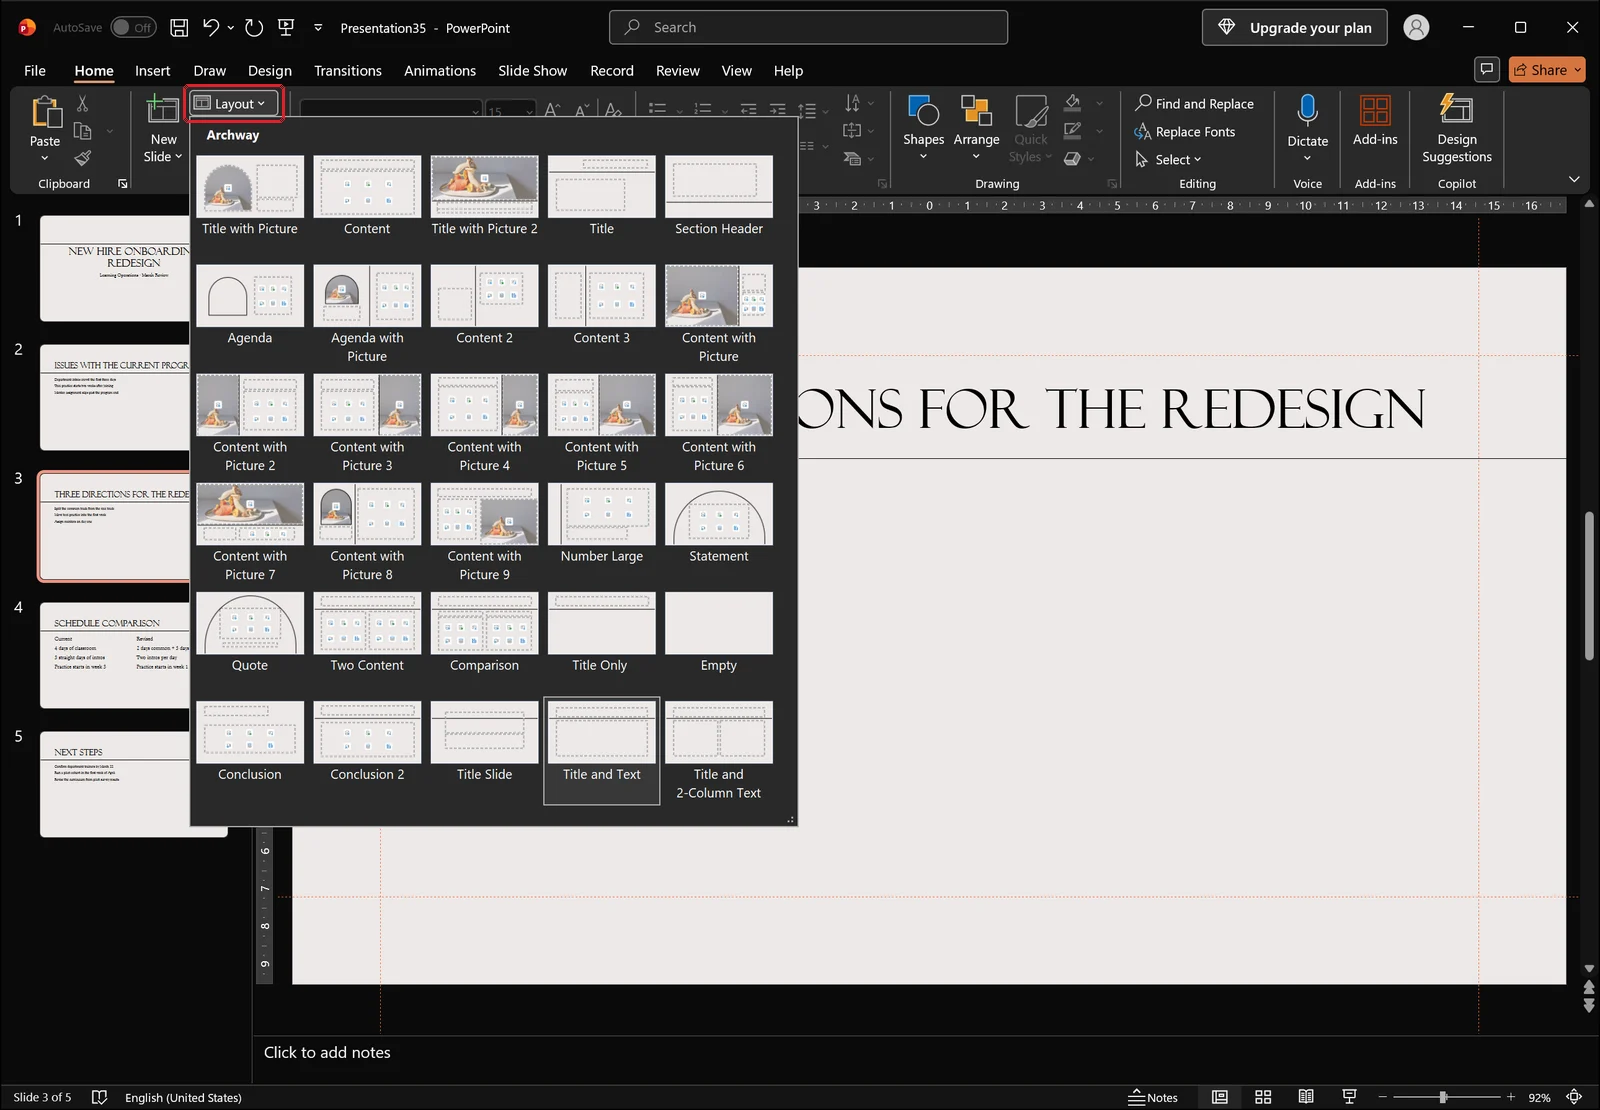
Use one of the Content layouts for slides that need an image, and Title and 2-Column Text for side-by-side comparisons. Keep an eye on body length: when a placeholder gets too many lines, PowerPoint shrinks the font automatically, and after a few slides the text sizes no longer match. Capping each slide at five or six body lines and pushing the rest to a new slide with Enter and Shift+Tab gives a cleaner result. If the font sizes have already drifted apart across the deck, the fix is a global font replacement rather than slide-by-slide editing.
When Outline Text Is Missing or Won't Type
Text box content never appears
This is the most common cause. Anything typed into a text box drawn from the Insert tab is not placeholder content, so it neither shows in the outline pane nor can be edited there. The fix is to switch that slide's layout to Title and Text, cut the text out of the text box, and paste it into the body placeholder.
Use Reset when a placeholder has been moved or deleted
If a placeholder was deleted by accident, or dragged far from its original spot, outline text can land somewhere off the visible slide area. That is what Reset on the Home tab is for.
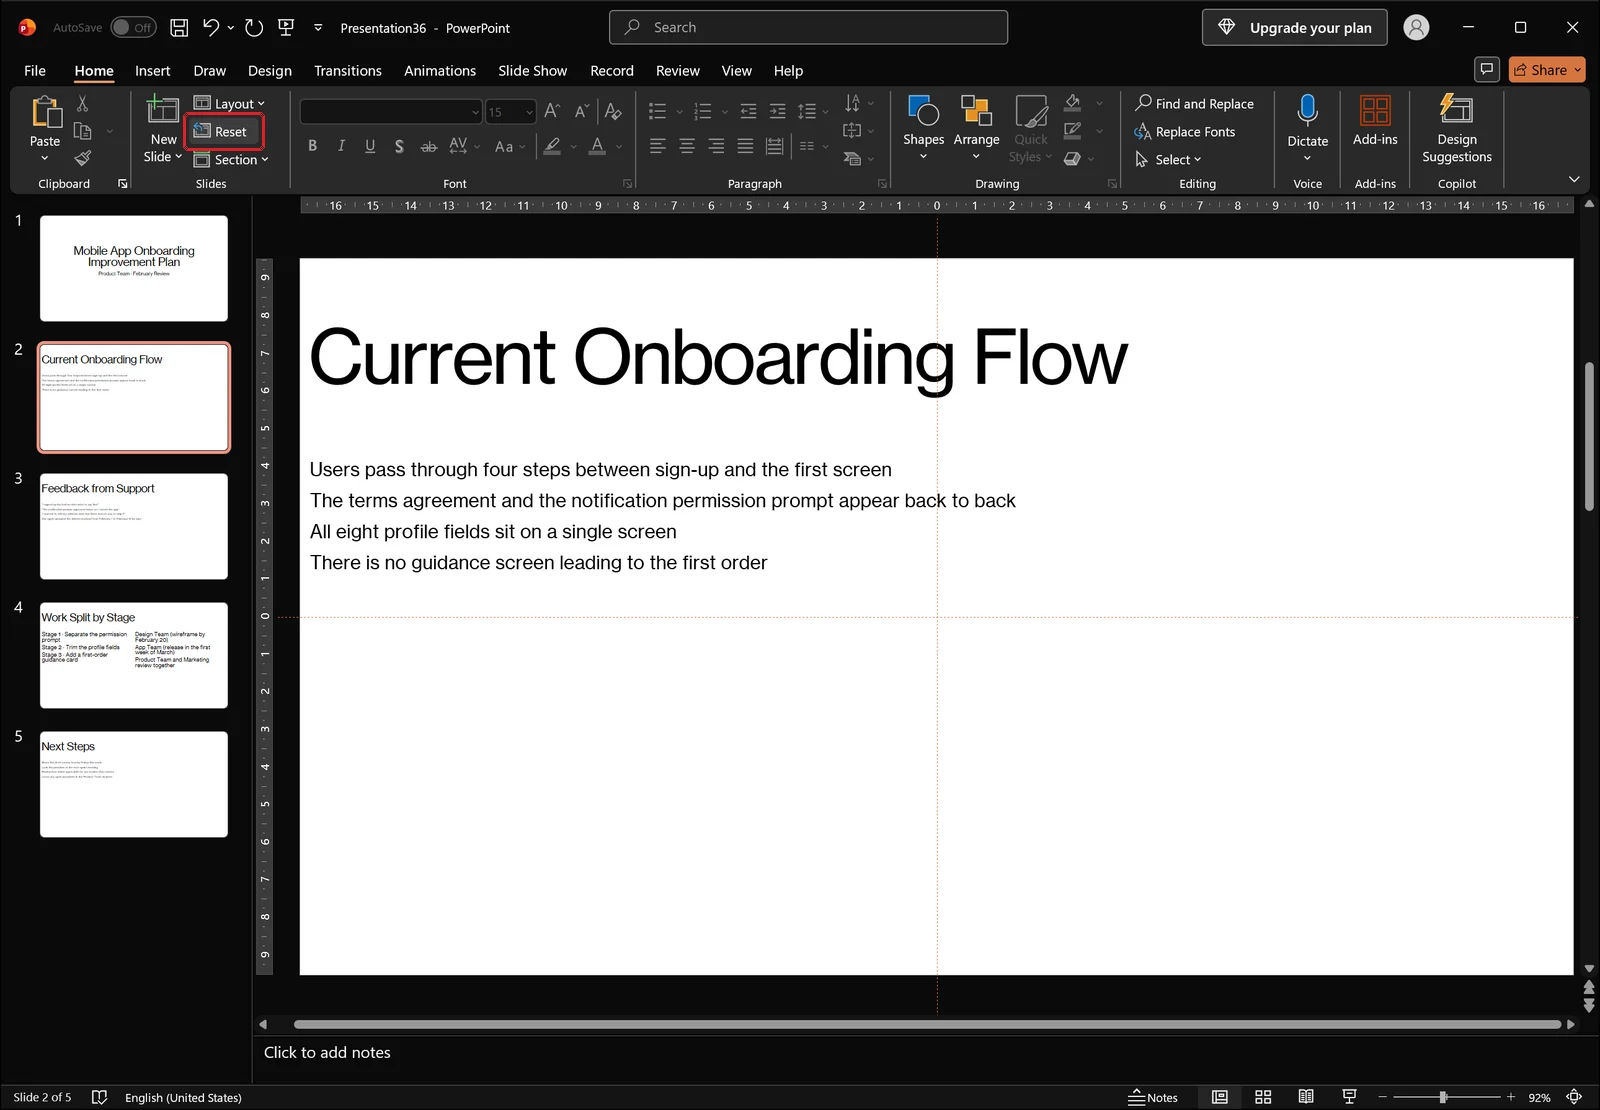
Clicking Reset snaps the current slide's placeholders back to the position, size, and formatting defined by its layout. Your typed text is not deleted — only its container moves — which makes it a safe first move on any slide whose formatting has gone sideways.
Enlarge the outline text when it's too small to read
Text in the outline pane follows the view zoom, not the slide's font size. If it is hard to read, raise the zoom level.
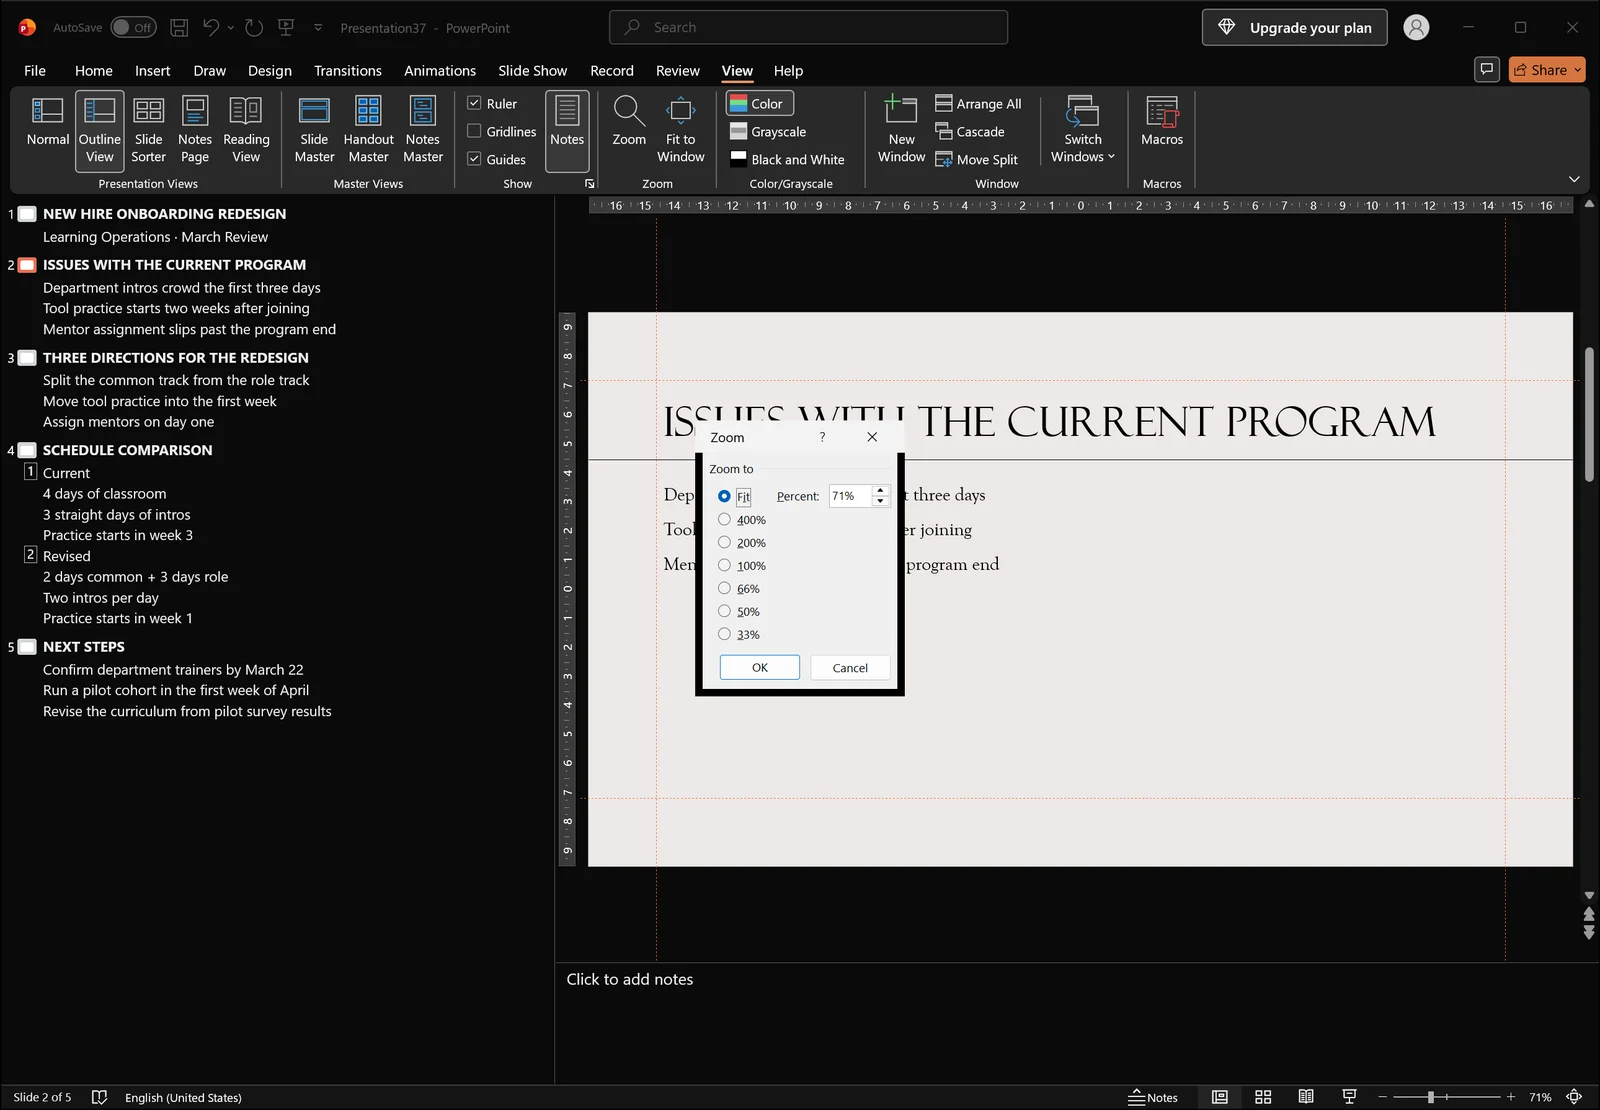
Click Zoom on the View tab to open this dialog, pick 100% or 200%, and confirm. The outline text gets larger on screen only; the actual font size in your slides is untouched.
One more limitation: pictures, tables, and charts are neither displayed nor insertable in Outline View. Building the entire title and body skeleton first, then returning to Normal view to add objects, is the fastest order of operations.
Getting More Out of Outline View
Move a whole slide with Alt+Shift+Up/Down
Put the cursor on a title line in the outline pane and press Alt+Shift+Up or Alt+Shift+Down. The slide moves, taking all of its body lines with it. With the cursor on a body line, only that line moves, and it stays inside its slide. No dragging thumbnails required.
Alt+Shift+Minus collapses a slide's body so only the title remains, and Alt+Shift+Plus expands it again — handy for skimming the title sequence of a long deck.
Draft speaker notes alongside the outline
The Notes button in the Show group of the View tab works while you are in Outline View too. With the notes pane open, you can read the outline on the left and write what you plan to say on the right, keeping the wording on the slide and the wording in your mouth in sync from the start.
Build slides from a Word outline, or export one
If you already have a Word document structured with Heading 1 and Heading 2 styles, open the New Slide dropdown on the Home tab in PowerPoint and choose Slides from Outline, then pick that file. Heading 1 becomes the slide title, Heading 2 becomes first-level body text, and Heading 3 becomes level two. A document typed without styles has nothing to split on, so everything piles into a single slide — tidy up the styles in Word first.
👉 Heading Styles in Word: Apply Heading 1 and 2, Then Edit Them
It works in reverse as well. File → Export, saved as Outline/RTF, pulls out just the titles and body text as a document, which is useful when you need to turn a deck back into a written draft.
Frequently Asked Questions
Q. Is there a keyboard shortcut for Outline View?
There is no default shortcut assigned to the view switch itself, so you click it on the View tab. You can reach it with the ribbon key tips by pressing Alt and following the letters, or add the Outline View button to the Quick Access Toolbar and use Alt plus its number. The keys you will actually use constantly are inside the pane: Tab to demote, Shift+Tab to promote, and Alt+Shift+Up/Down to move lines.
Q. I typed text in the outline but it isn't visible on the slide.
Outline text goes into title and body placeholders, so if a placeholder has been pushed off the slide area — or the slide uses a layout with no body placeholder, such as Blank — the text looks like it vanished. Switch the layout to Title and Text on the Home tab and click Reset to snap the placeholders back. And remember, text typed into a text box never appears in the outline to begin with.
Q. Can I turn a Word document straight into slides?
Yes. Structure the document in Word with Heading 1, Heading 2, and Heading 3 styles and save it, then in PowerPoint open the New Slide dropdown on the Home tab, choose Slides from Outline, and select the file. Heading 1 becomes each slide title and the lower headings become body lines. A plain document with no styles applied has no dividing points, so it all arrives on one slide.
Q. Can I insert pictures or tables in Outline View?
No. Outline View is text only — pictures, tables, charts, and SmartArt are neither shown nor insertable. Finish the title and body skeleton in the outline, switch to Normal view, and add objects from there.
Drafting slides with inline AI
Outline View is fastest when the structure is already settled in your head. When all you have is a meeting record or a report file, and the first decision is how to break it into slides at all, someone still has to read the source and pull the title lines out of it.
inline AI is a desktop AI you install on your PC. It can open Word and Excel files directly, read what is in them, and write the title and body structure into PowerPoint slides for you. Ask it in plain language — "split these meeting notes by agenda item and give each one a slide title plus three body lines" — and it reads the file and saves the result.
Because the processing runs on your own machine, unreleased plans and internal review material never get uploaded to an outside server.
See what an agent could take over at your company in a 30-minute call.