Learn
How to Use Slide Master in PowerPoint: Format Every Slide

Opening forty slides one at a time to change the title font is not a slow job, it is the wrong job. Learning how to use Slide Master in PowerPoint means setting the title font, body text formatting, logo position, and slide number style once and having every slide pick them up. This article covers what separates a master from a layout, how to enter Slide Master view and edit it, what to check when some slides refuse to follow the change, and how to get back out.
What a slide master is, and how it differs from a layout
The master is the source formatting for every slide
Formatting in PowerPoint runs top down. The theme sits at the outside, the slide master sits under it, several layouts sit under the master, and the actual slides sit under the layouts. Change the title font on the master and that change flows down to every layout in it and every slide built on those layouts.
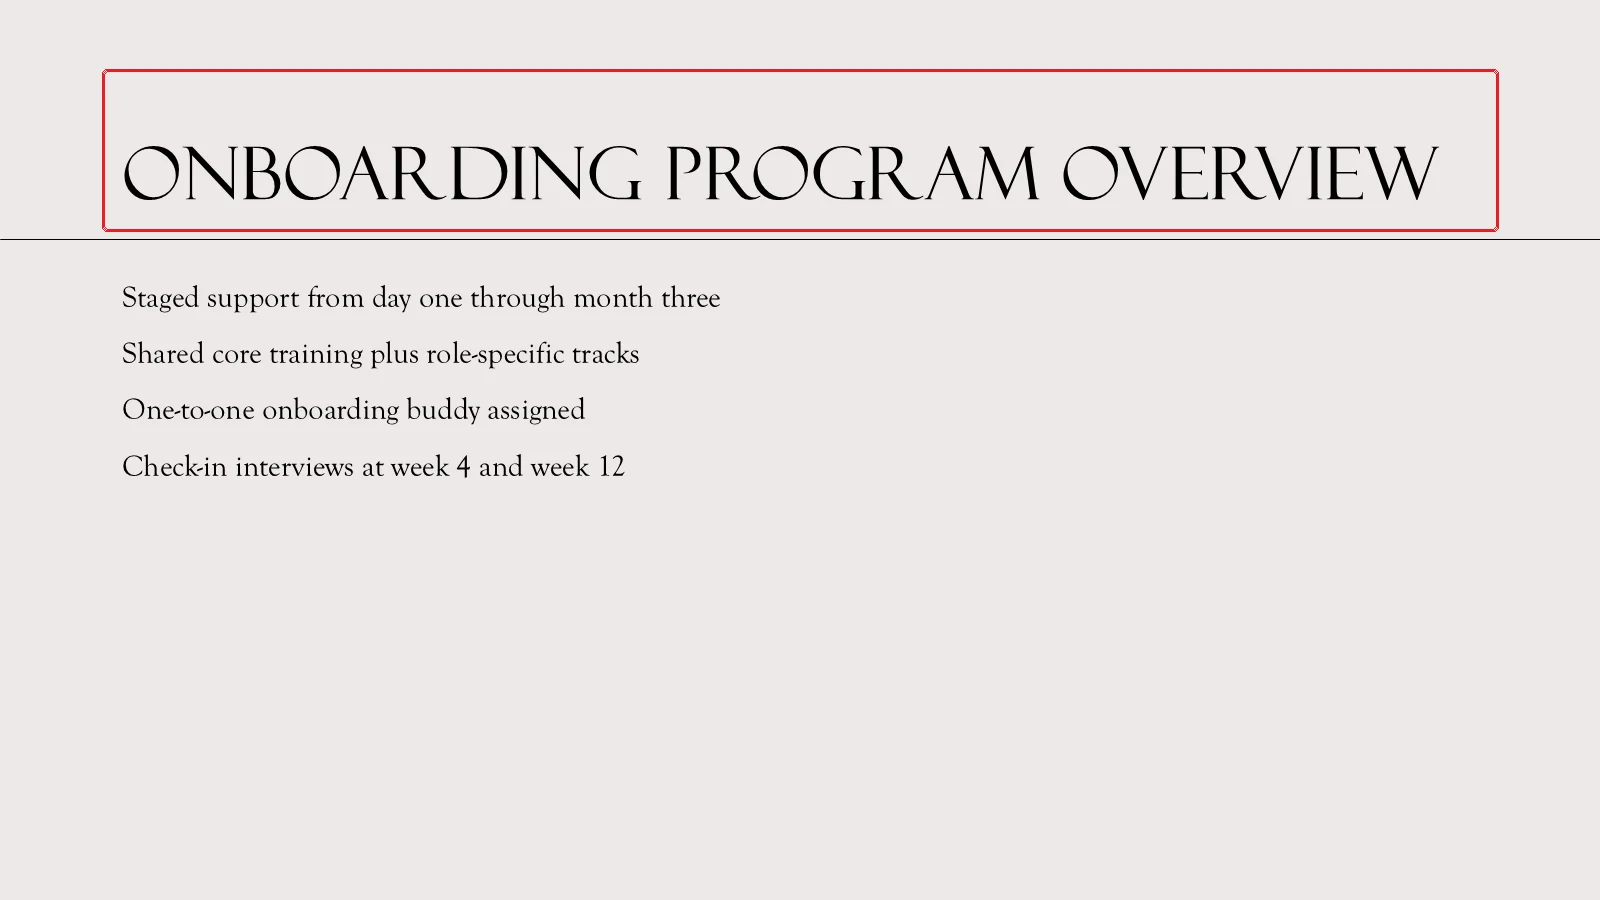
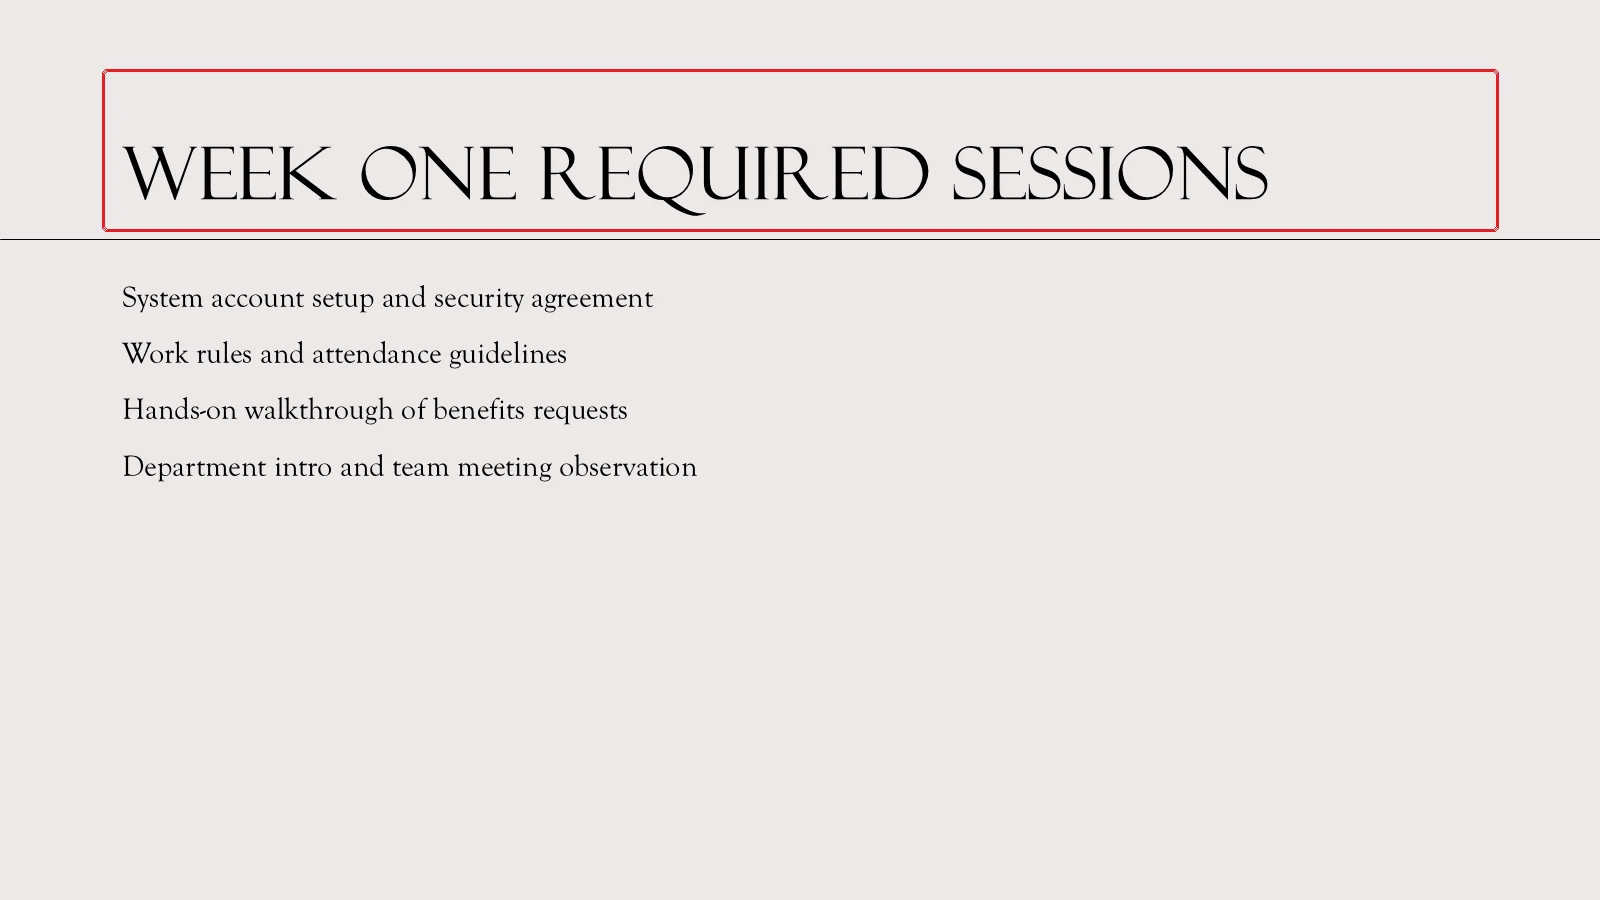
What the formatting actually attaches to is a placeholder. In the slide below, the red box marks the title placeholder, and the four plain text lines underneath it sit in the body placeholder.
A layout inherits the master and defines one slide type
A layout starts from whatever the master says and then arranges placeholders for one kind of slide: a title slide for the cover, a section header, title and content, two content, blank. Edit something on a layout and only the slides using that layout change.
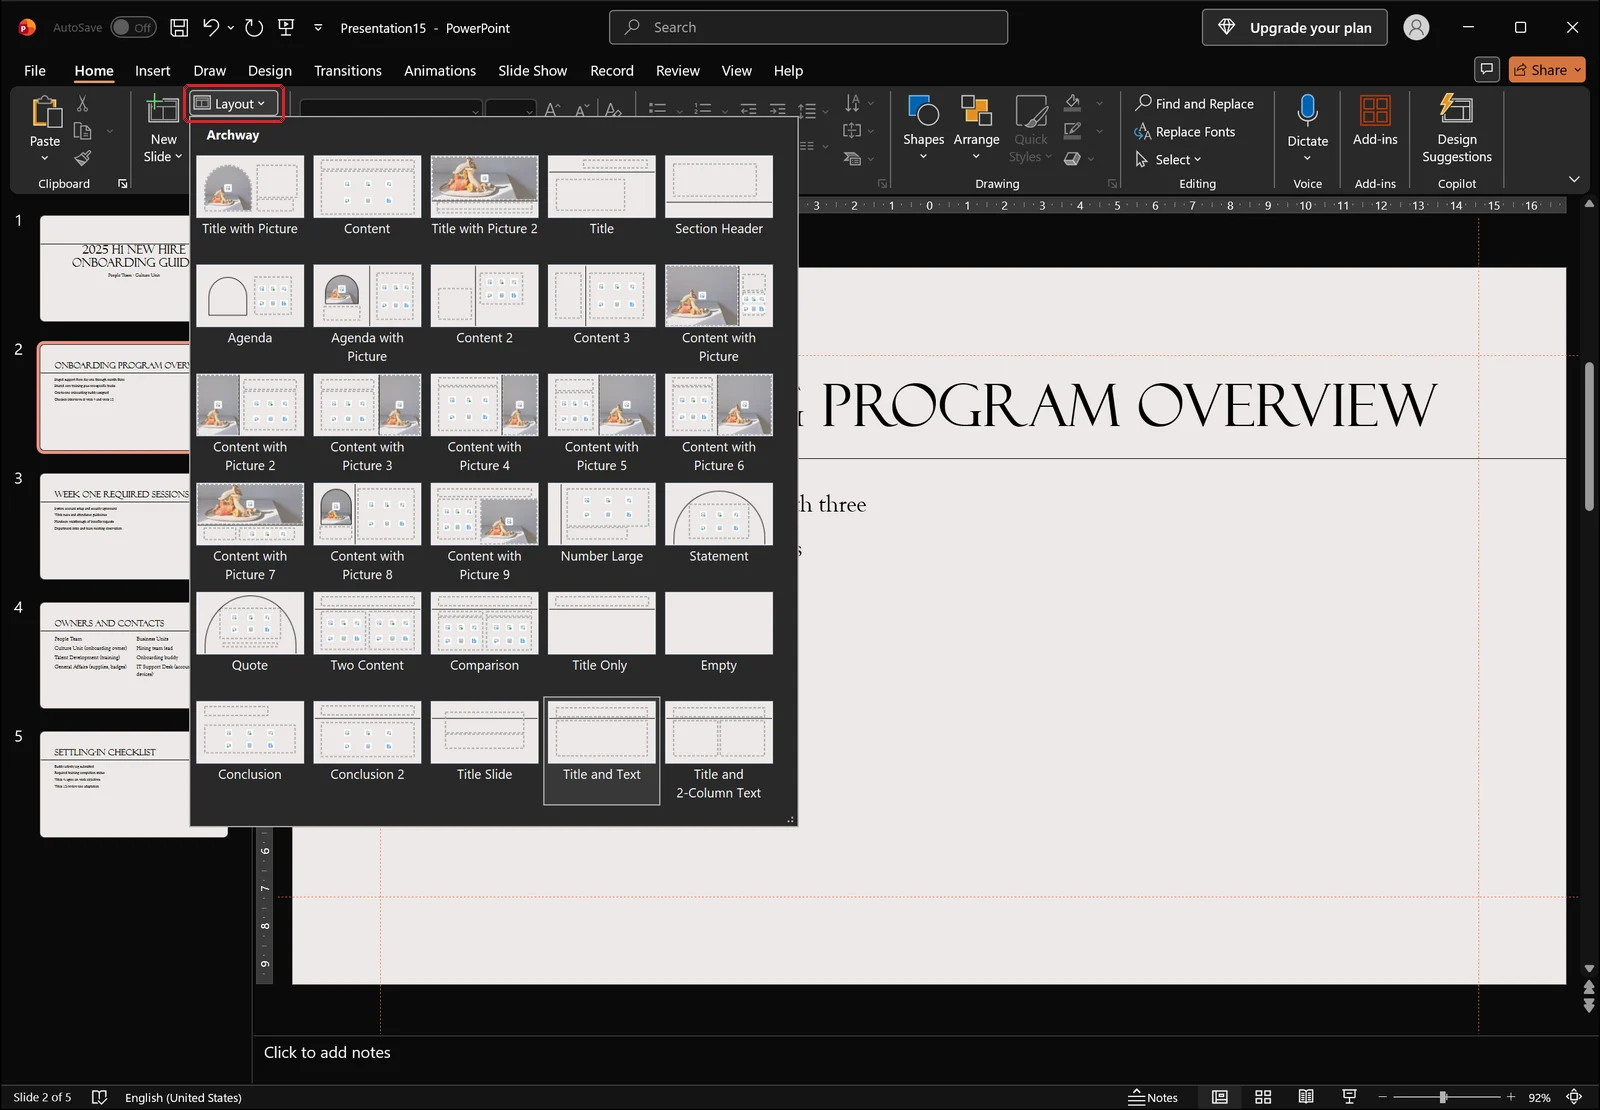
To see which layouts the current file has, open the Home tab and click Layout in the Slides group. The gallery that drops down is the layout list belonging to the current master.
When the master is the right tool
If any of these describes your file, stop editing slides and open the master instead.
- Every title needs the same font, size, or color
- Bullet shapes and per-level indent formatting need to be consistent
- A logo or department name has to sit in the same spot on every slide
- Slide numbers need a new position or font across the deck
One thing to know up front: any font or color you applied directly on an individual slide outranks the master. That slide will keep its own formatting no matter what you do upstream. The checklist later in this article deals with that.
Entering Slide Master view
View tab, Slide Master
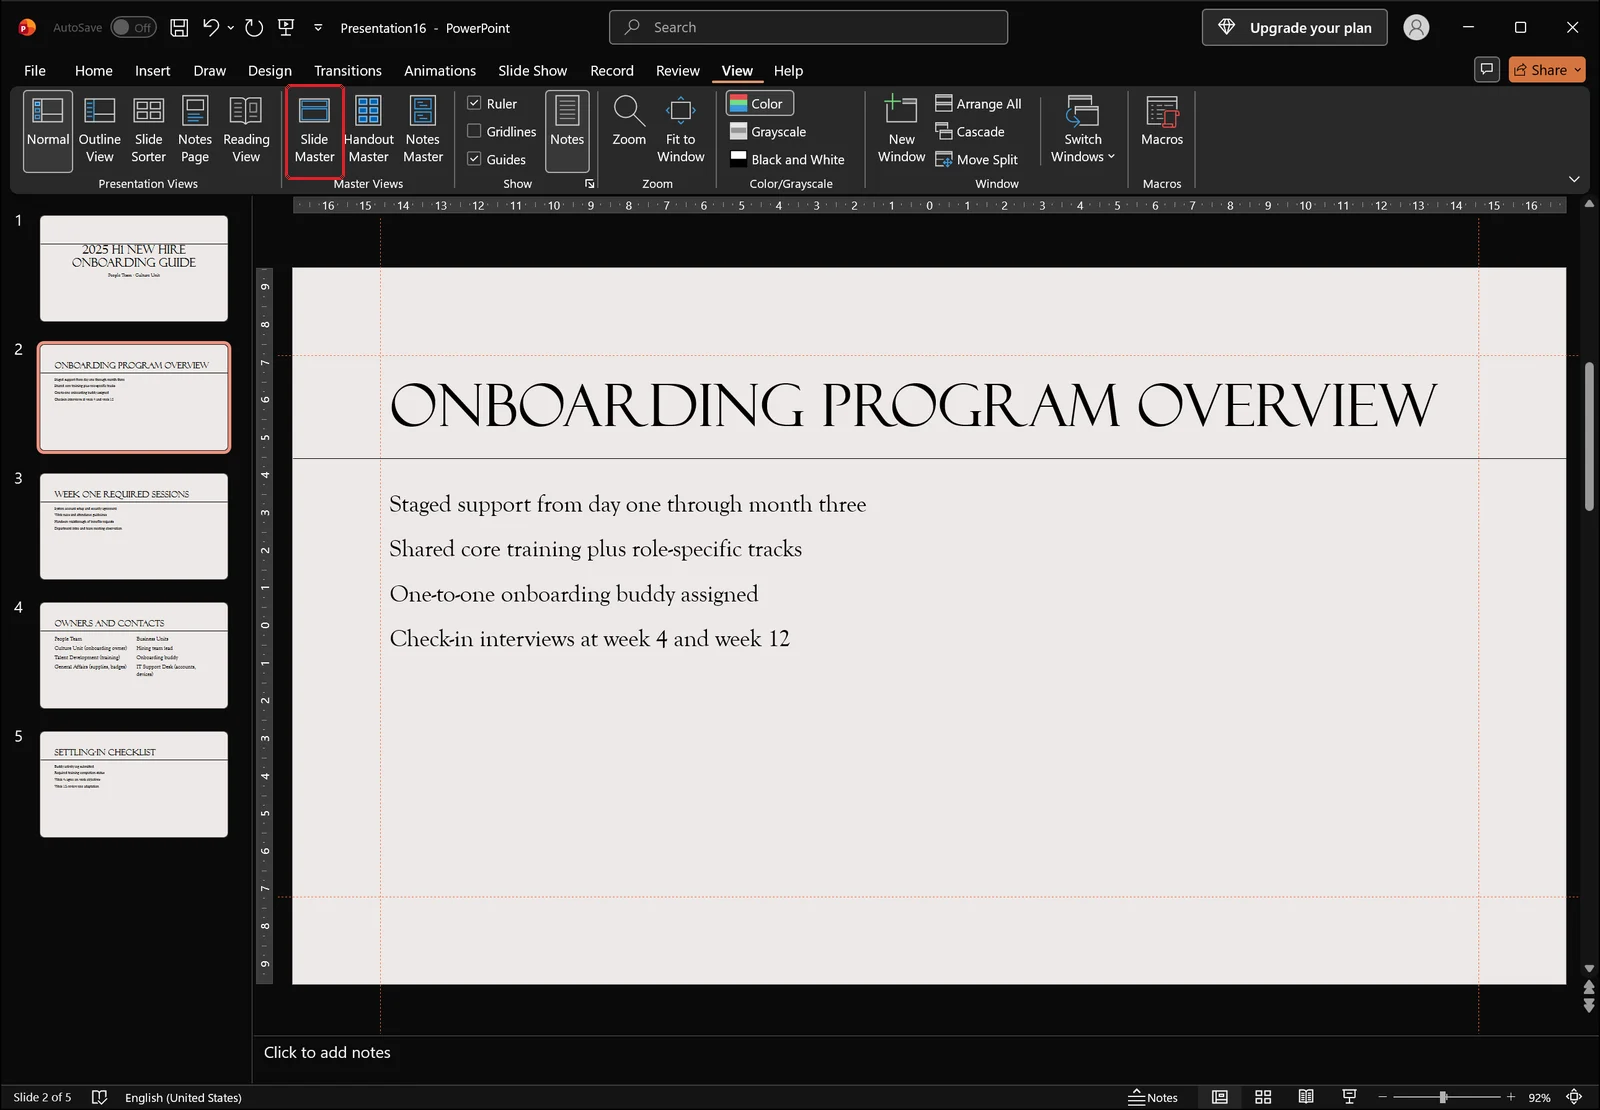
Master editing happens in a separate view. Open the View tab and the Master Views group holds Slide Master, Handout Master, and Notes Master. Click Slide Master.
Reading the master view screen
A Slide Master tab appears at the front of the ribbon, and the left pane switches from a list of slides to a list of masters and layouts. The large thumbnail at the top is the master. Every smaller, indented thumbnail below it is a layout belonging to that master.
Hover over a layout thumbnail and a tooltip gives you the layout name along with the slide numbers that use it. When you are not sure which layout controls the slide you want to fix, that tooltip is the fastest answer.
Three things to settle before you edit
First, decide whether the change is for the whole deck or one slide type. Common to everything means the master at the top; cover-only means that specific layout. Second, check how many masters the file has. A deck that absorbed slides from another theme can carry two or more, and editing only the first one leaves half the deck untouched. Third, keep a copy of the original file. Master edits reach the entire document, and undoing them selectively is awkward.
Note that the Design tab disappears while you are in master view. Theme fonts and colors are handled from the Slide Master tab instead.
Changing the whole deck's formatting from the master
Title and body placeholder fonts
The sequence is short: select the master thumbnail at the top of the left pane, click the title placeholder in the editing area, then set font, size, and color on the Home tab.
How you select matters more than what you set. Dragging across the text inside a placeholder formats only those characters. Click the placeholder's border once so the frame itself is selected, and the formatting applies to every piece of text that lands in it.
Character spacing through the Font dialog
The small arrow at the bottom right of the Home tab's Font group opens the Font dialog. Beyond font and size, it covers style, underline type, and character spacing in one pass. If titles keep wrapping onto a second line, tightening the character spacing usually holds the deck together better than shrinking the font size for everyone.
Bullets and line spacing, level by level
A body placeholder stores separate formatting for levels one through five. Changing the body font means placing the cursor in each level and setting it there, otherwise the deeper levels quietly keep the old font. Bullet shapes are normally set per level too.
For line spacing, type a value into the Paragraph dialog rather than nudging things by eye. Multiple spacing produces a different real gap depending on font size, so if body density varies from slide to slide, a fixed value is worth considering.
If some slides look untouched after this step, keep going. Text that was already edited on an individual slide survives a master change, and the fix comes later.
👉 Replace All Fonts in PowerPoint: Unify Every Slide at Once
Setting things differently per layout
Splitting work between the master and each layout
The rule of thumb is simple. Anything that appears on every slide goes on the master; anything that changes by slide type goes on the individual layout. Logo position, footer formatting, and the slide number spot get fixed once on the master, while the oversized title on the cover or the two-column split on a content slide gets adjusted on its own layout.
To suppress the master's background elements on one layout only, use Hide Background Graphics on the Slide Master tab. That is handy for a cover layout that fills the frame with its own image.
Slide numbers, dates, and footers
Visibility and appearance for these three are controlled in different places. Visibility comes from Header & Footer... in the Text group on the Insert tab.
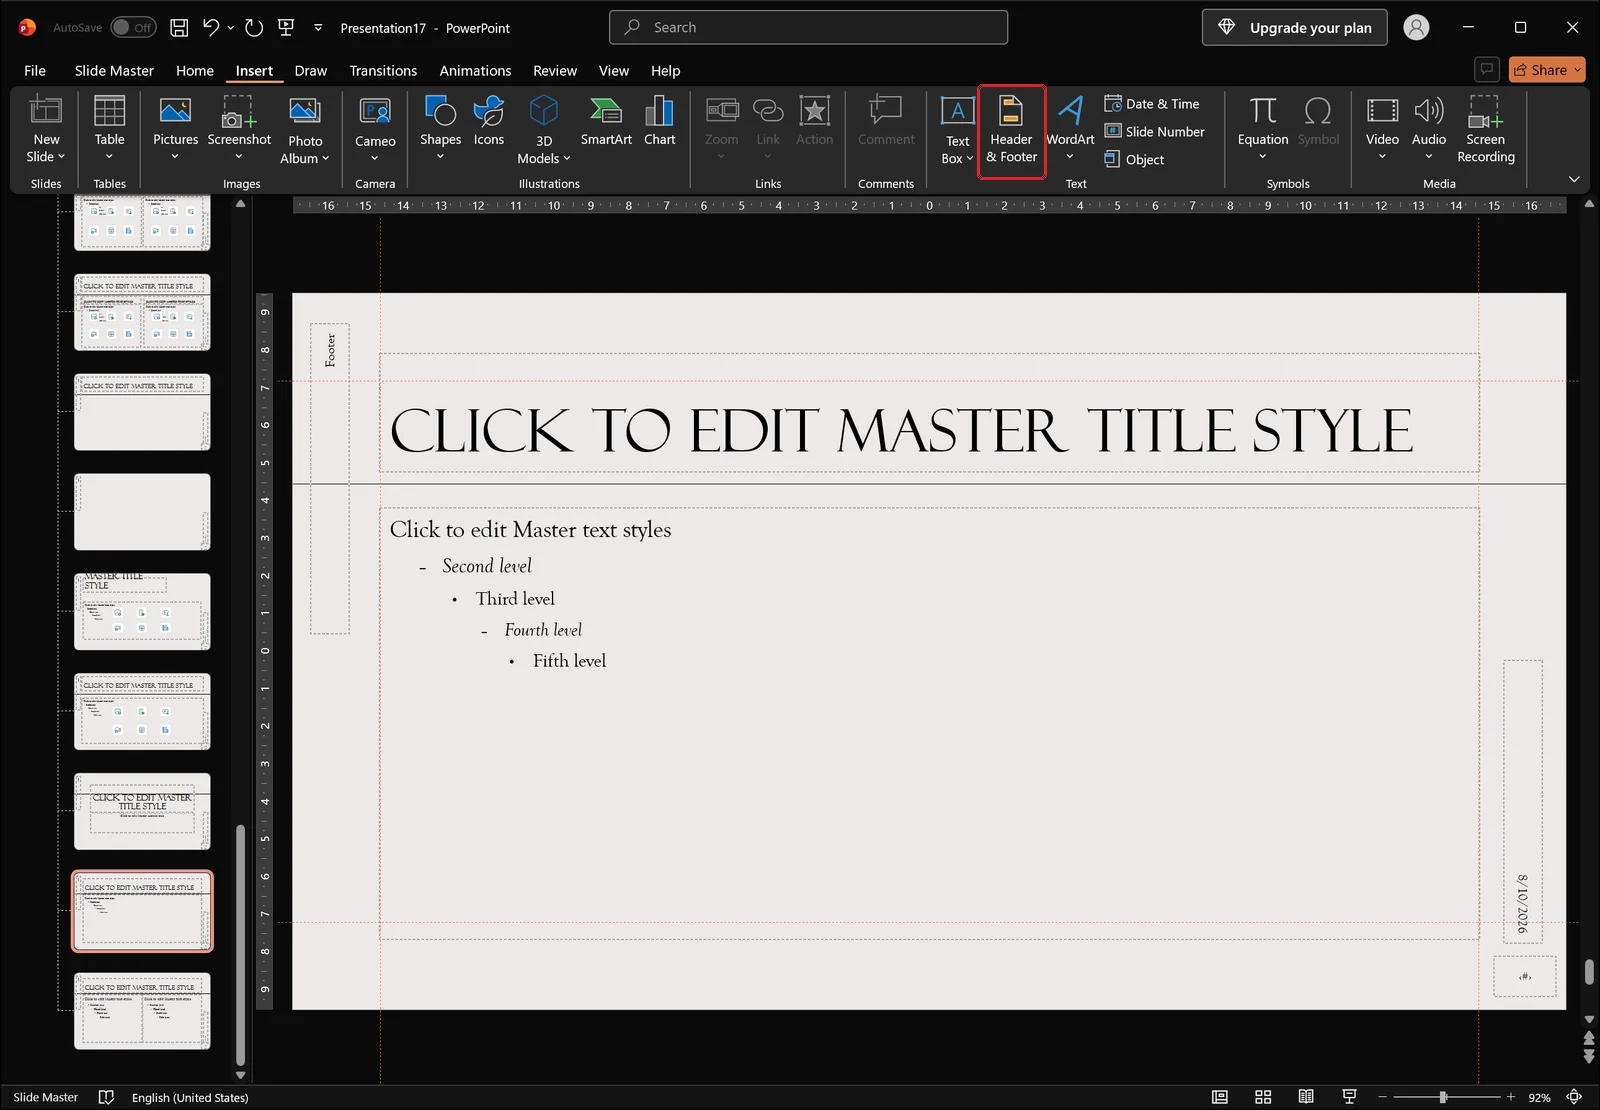
The dialog that opens lets you switch date and time, slide number, and footer on or off. Apply to All pushes the setting across the whole deck, while Apply limits it to the selected slides. The font and position of those placeholders, on the other hand, are set on the master. Visibility on the Insert tab, appearance on the master — split it that way and it stops being confusing.
Aligning placeholders with guides and the ruler
When title positions drift by a few pixels between layouts, the title appears to twitch slightly as you advance through a slideshow. Turn on Guides in the Show group of the View tab and snap the placeholders to the same lines.
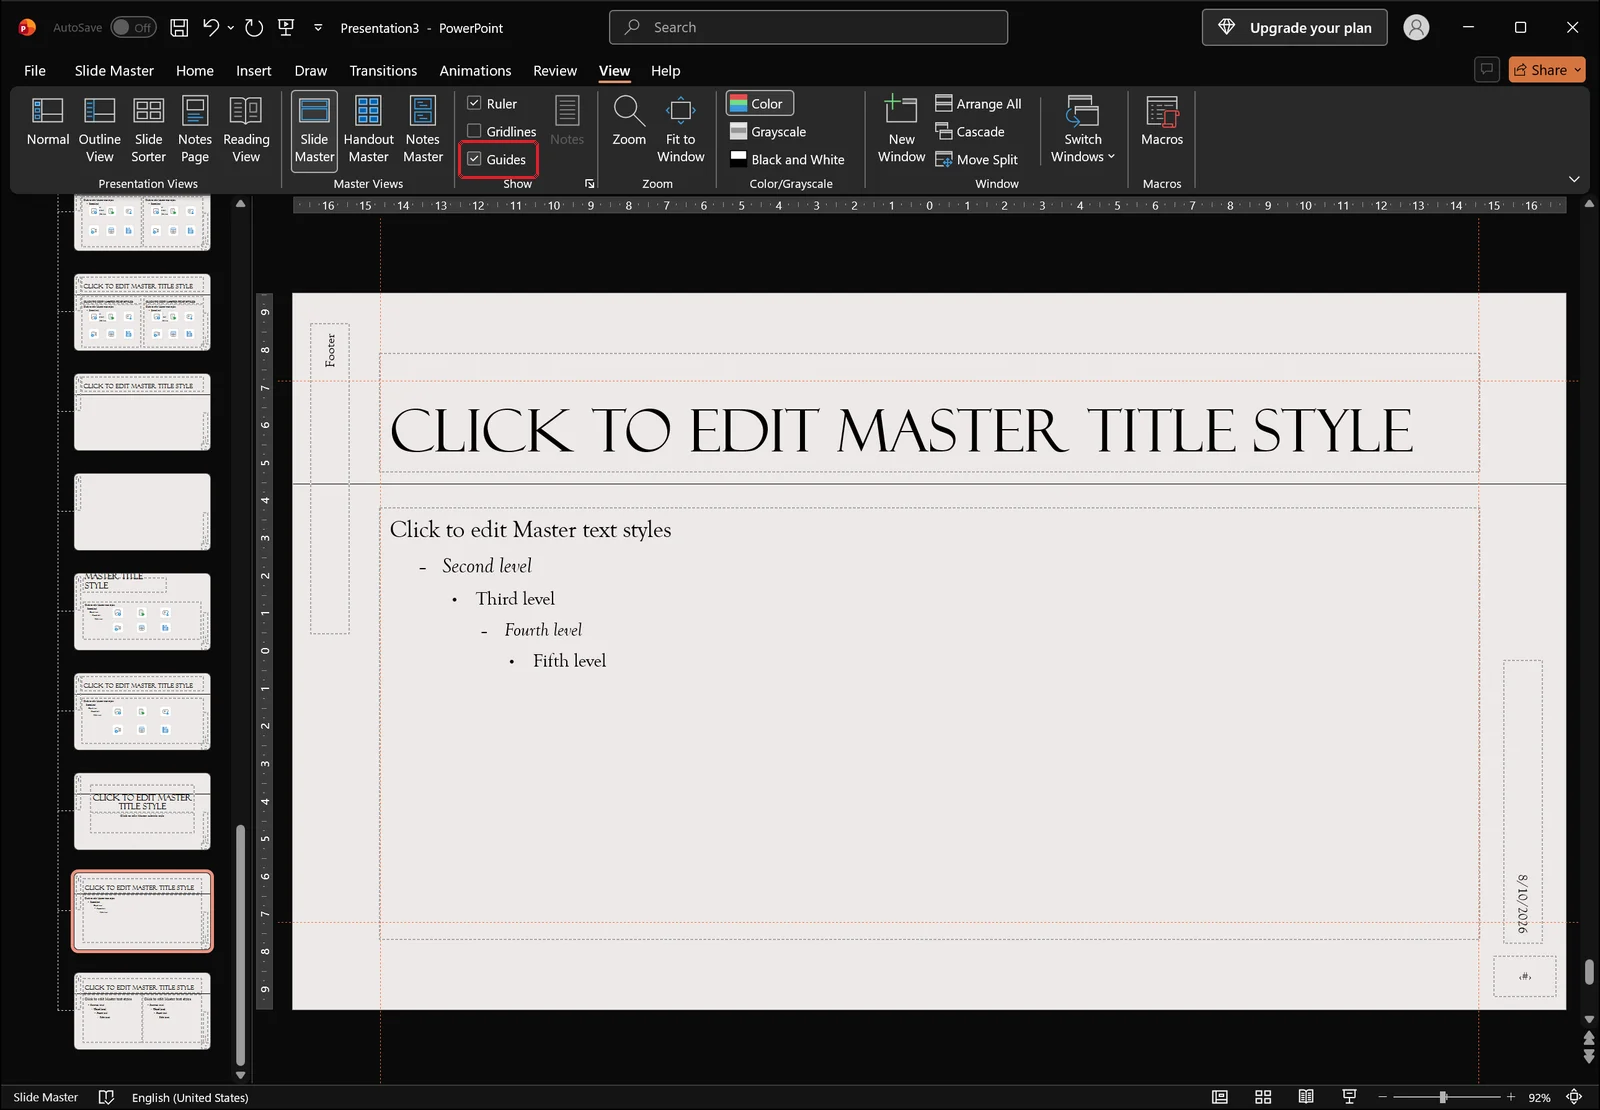
Turning on Ruler in the same group lets you check left and right margins as numbers while you align. Set the guides once on the master, pull each layout's placeholders onto those lines, and the title height stays constant regardless of slide type.
Checklist for when the slide master will not apply
You edited the master, and a handful of slides kept their old formatting anyway. The cause is almost always one of four things.
Manual formatting is overriding it — use Reset
This is the common one. If someone changed the font, size, or color on that slide's placeholder, or dragged the placeholder to a new spot, those choices beat the master. Select the problem slide, then click Reset in the Slides group on the Home tab.
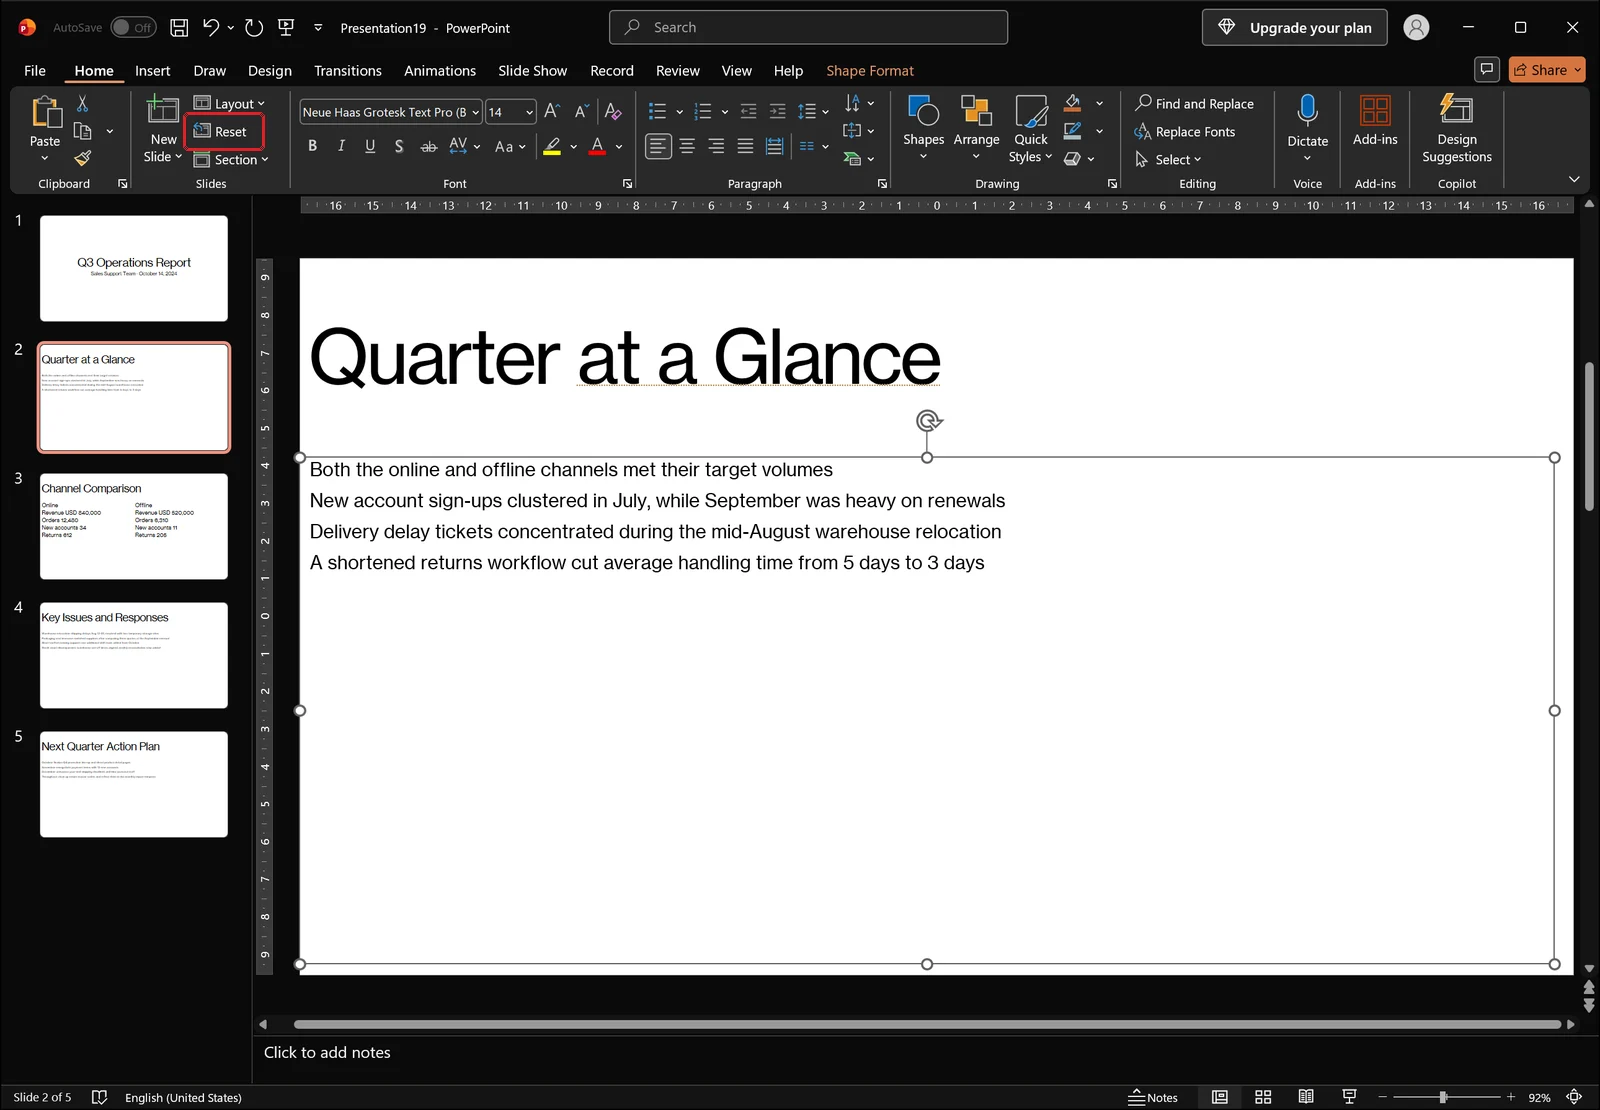
The placeholder has to be selected for Reset to do anything useful. Once you click it, position, size, and formatting all snap back to what the layout specifies. Text content is not deleted, only the formatting returns, so there is no risk in trying it.
Clear All Formatting for stubborn text
If Reset leaves the characters looking the same, the formatting is sitting on the text itself. Select that text and click Clear All Formatting in the Font group on the Home tab, and direct formatting such as bold, color, and size is stripped back to the default.
Slides built by pasting text from another document are nearly always this case. The source formatting rides along with the paste and masks whatever the master says.
Text boxes you drew yourself inherit nothing
The third cause is a text box drawn from the Insert tab rather than a real placeholder. Text boxes do not inherit the master's title or body formatting, so editing the master changes nothing about them. The fix is to delete the text box and move its content into a placeholder the layout provides. Placeholders are easy to spot before you click into them: they show prompt text such as "Click to add title".
More than one master in the file
Copying slides in from a deck built on a different theme adds that theme's master to your file. From then on, different slides look at different masters, and editing the first one leaves the rest alone. Enter Slide Master view, scroll the left pane down, and if you see two or more large thumbnails, this is your problem. To clean it up, decide which master to keep, then reassign the affected slides with Layout on the Home tab, picking layouts that belong to the surviving master.
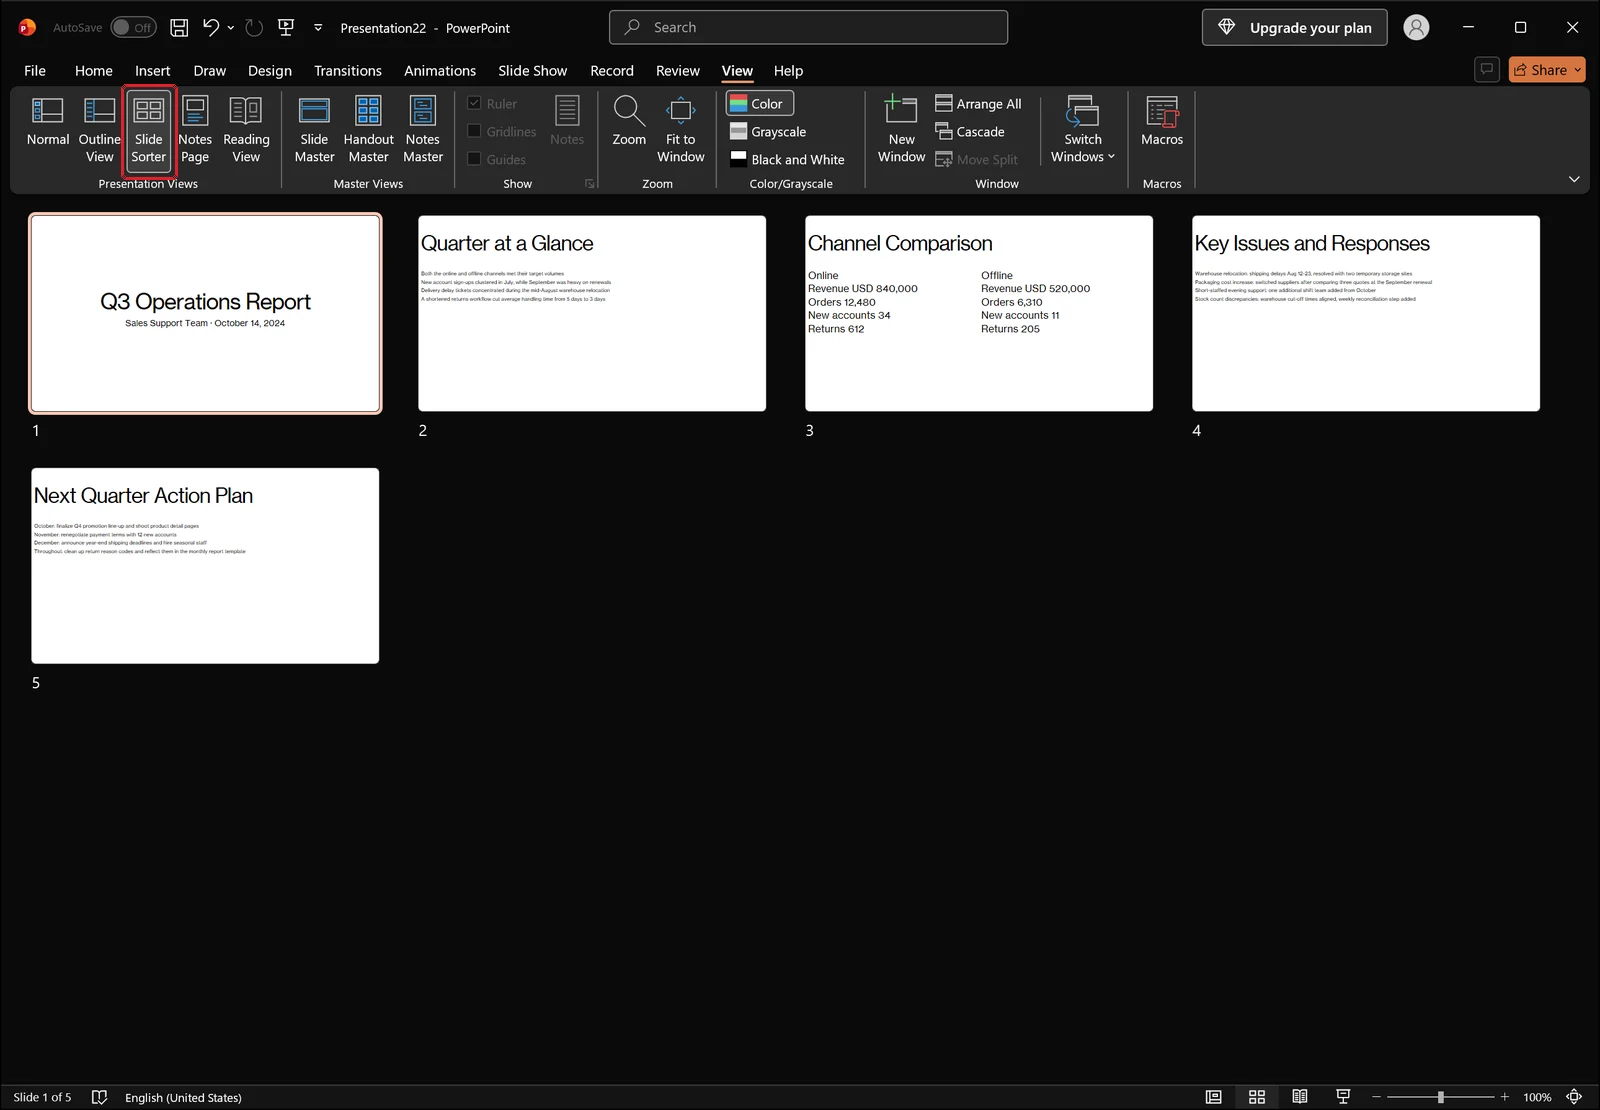
To compare slides at a glance, Slide Sorter on the View tab is the quickest check. Thumbnails sit side by side, so a slide with an off title position or a different text size stands out immediately.
👉 How to Change Line Spacing in Word: 1.5, Exact pt, and Fixes
Leaving master view and checking the result
Close Master View, or switch to Normal
When the editing is done there are two ways out. One is Close Master View at the right end of the Slide Master tab. The other is the route pictured below: open the View tab and click Normal in the Presentation Views group.
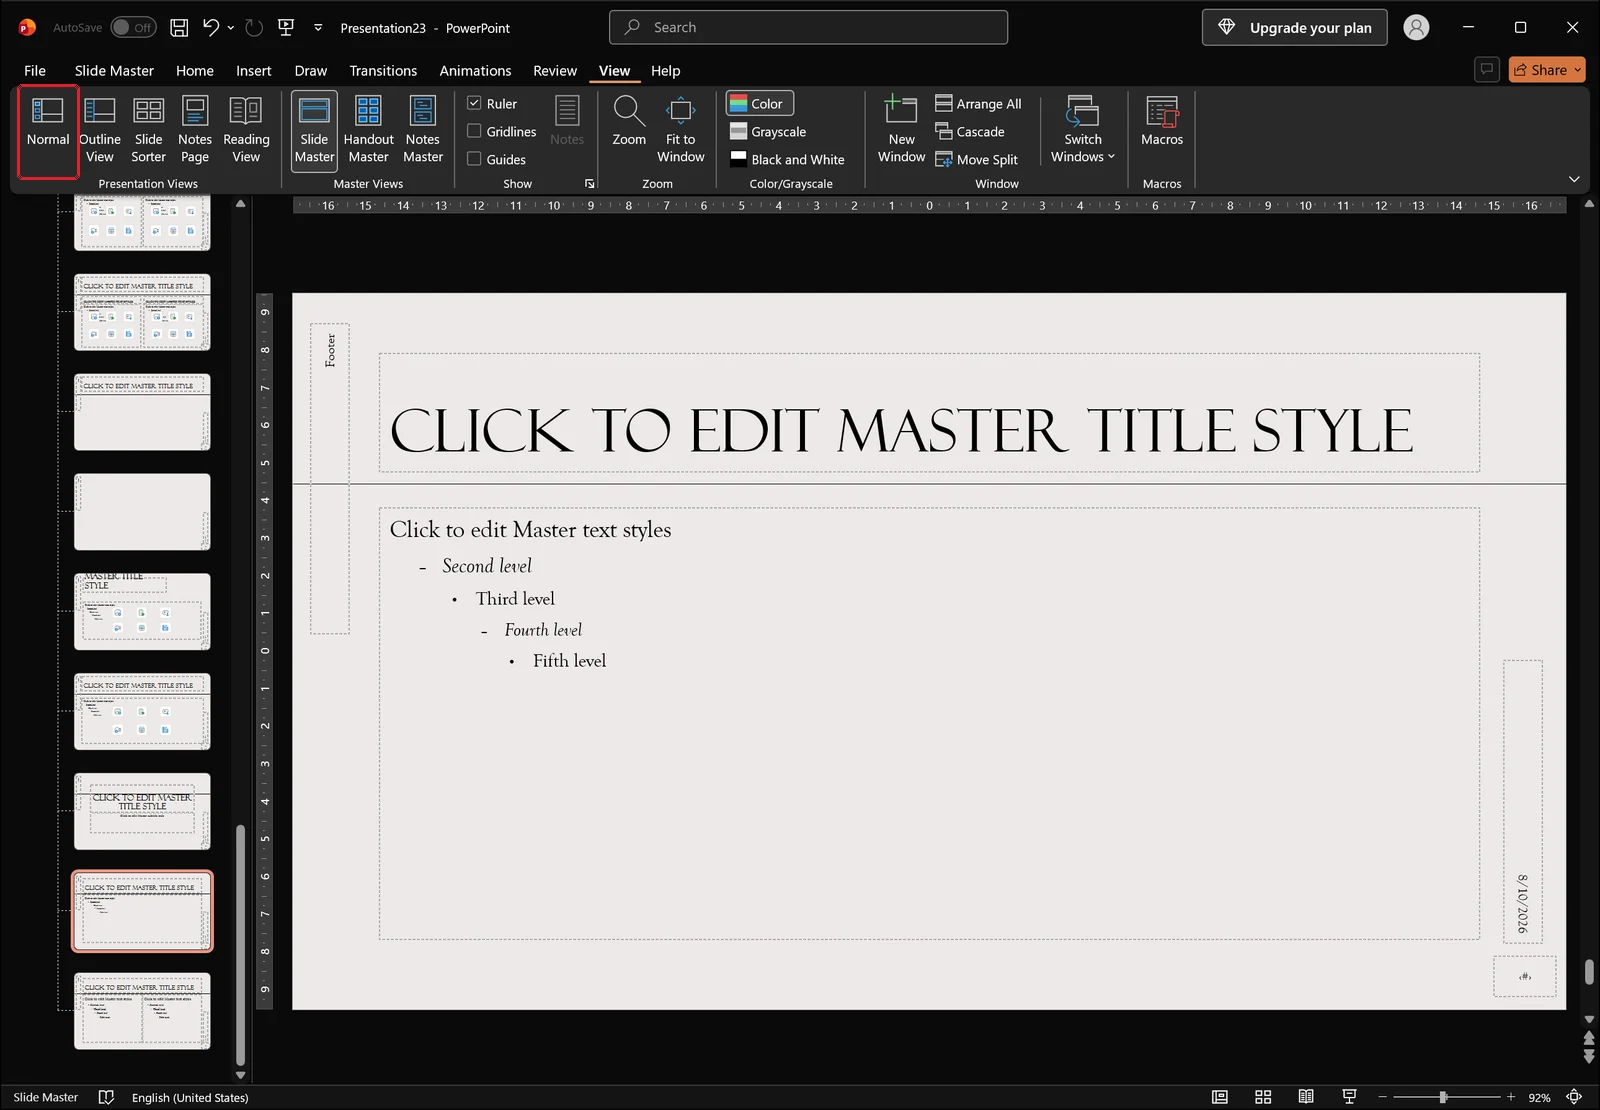
Either route keeps your edits. Master editing has no separate apply or commit button, so there is nothing to confirm before you leave.
Confirm the change reached every slide
Back in Normal view, page through the deck from the first slide and check that title positions and fonts line up. Below is a slide that took the master formatting correctly: the title marked in red sits exactly where the master puts it, and the body lines below it are evenly spaced.
Save it as a template and reuse it
A finished master can be saved through File > Save As with the file type set to PowerPoint Template (.potx). New documents can then start from that formatting, and when several people need to work to the same standard, distributing one file is enough. To apply it to a document that already exists, open the Design tab, expand the themes gallery, and use Browse for Themes to load the saved file.
One principle covers most of this: touch formatting only on the master and its layouts, and type only content on individual slides. As long as that holds, one master edit takes the entire deck with it.
Frequently asked questions
Q. What is the actual difference between a slide master and a layout?
The master is the source at the top, and formatting changed there flows down to every layout and slide beneath it. A layout inherits the master and defines one slide type, so edits there affect only the slides using that layout. Put universal elements such as a logo or slide number on the master, and structural differences between a cover and a content slide on the individual layouts.
Q. I edited the master but some slides did not change.
Check three things in order. First, direct formatting applied on that slide, which Reset and Clear All Formatting on the Home tab will undo. Second, a hand-drawn text box instead of a placeholder, which means deleting the box and moving the content into the layout's placeholder. Third, a second master picked up from copied slides, which you can confirm by counting the large thumbnails in Slide Master view.
Q. How do I get out of Slide Master view?
Click Close Master View at the right end of the Slide Master tab, or click Normal in the Presentation Views group of the View tab. Your edits are kept automatically, so there is no apply button to look for.
Q. Can I use the same master in other files?
Save the file through File > Save As as a PowerPoint Template (.potx) and new documents can start from it. For a document you are already working on, use Browse for Themes in the Design tab's themes gallery and select the saved file.
Cleaning up deck formatting with inline AI
The slide master handles shared formatting well, but it does nothing about a file that arrived already full of manual overrides — someone still has to find each slide that broke away from the master and reset it. inline AI is a desktop agent that runs on your own machine and can open PowerPoint, Word, and Excel files directly. Describe the job in plain language, such as asking it to bring every title font in the deck onto a single setting, and it works through the file and changes those parts. Because the processing happens locally rather than in the cloud, internal material and unreleased presentations never leave your computer.
See what an agent could take over at your company in a 30-minute call.