Learn
How to Add Sections in PowerPoint: Group and Reorder Slides

A common misunderstanding is that when you add sections in PowerPoint, you are somehow splitting the file or cutting slides apart. You are not. Sections are an editing structure layered on top of the deck: the slides stay exactly where they are, and you simply label which range belongs together. Slide content and numbering never change, no matter how many sections you create. What you get instead is a header row in the thumbnail pane for each block, and the ability to collapse that block or drag the entire thing somewhere else. This guide walks through creating and naming sections, reordering slides a whole block at a time, and presenting just one section without touching the original deck.
When a Deck Actually Needs Sections
The problem that starts around slide 20
With ten slides or so, scrolling the thumbnail pane is enough to keep your bearings. It stops working once a report-style deck passes twenty slides. When the thumbnails run as one unbroken column, there is nothing telling you which part of the story the current slide belongs to, and a request like "move the budget part toward the end" means counting slides again to figure out where the budget part starts and stops.
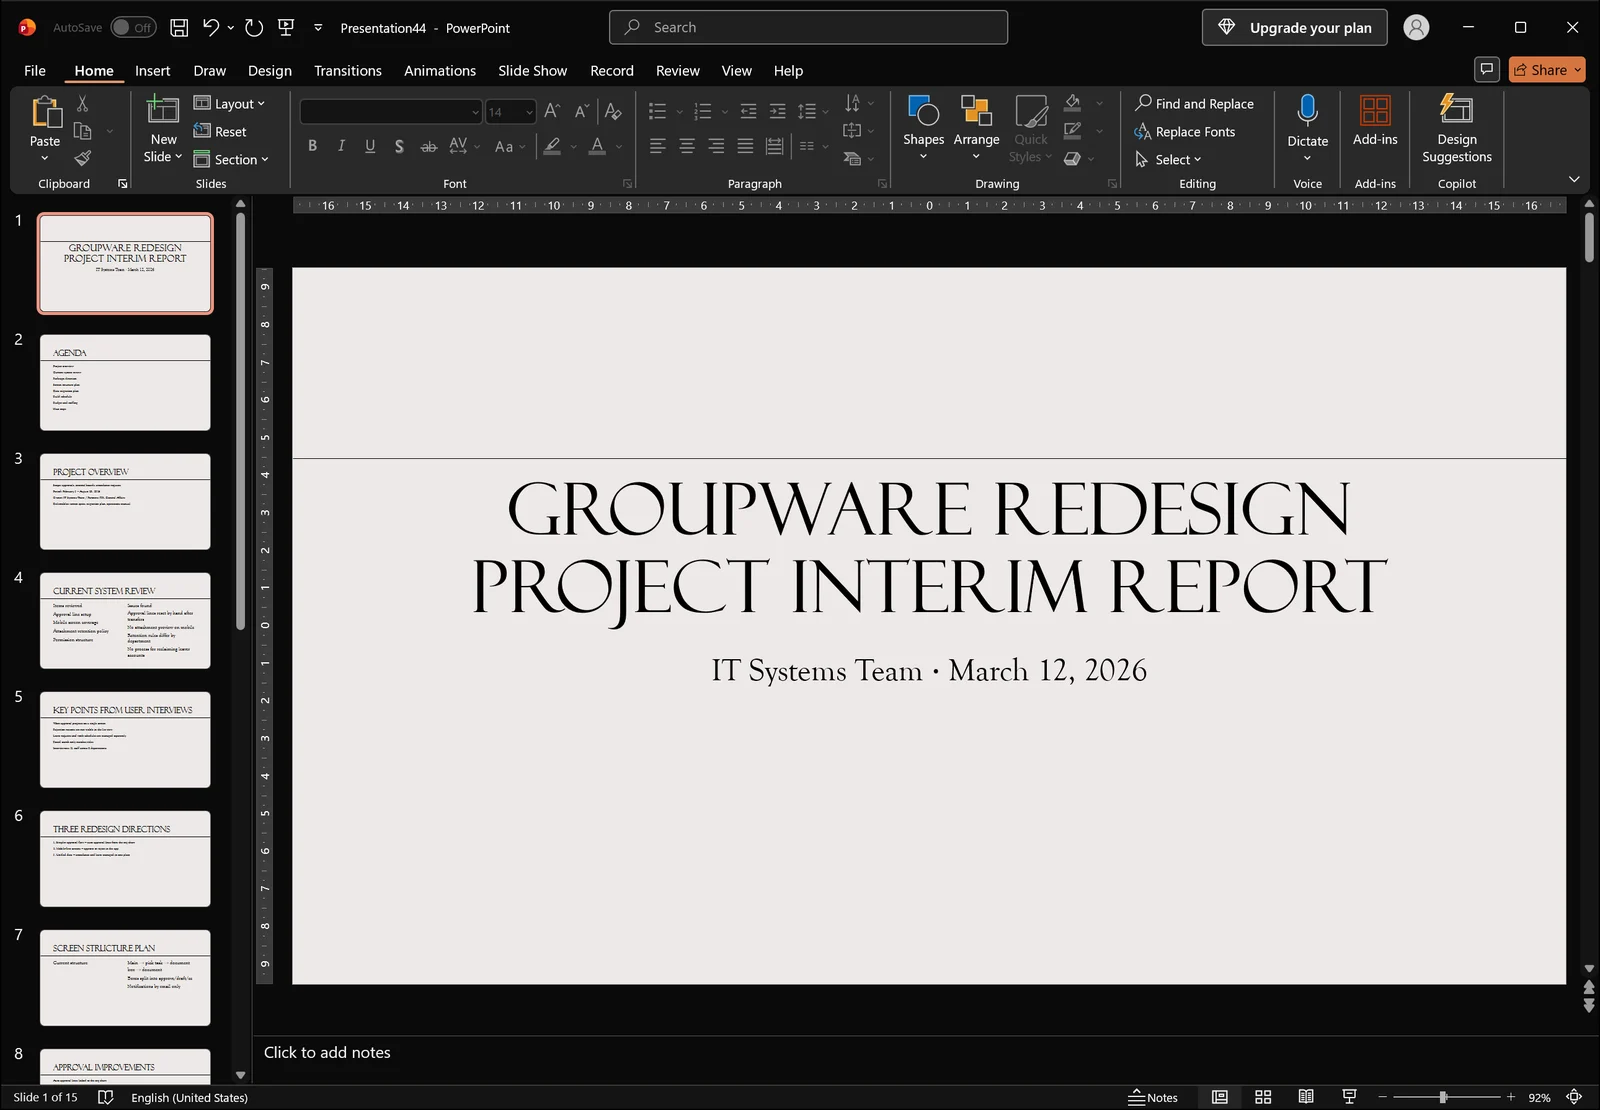
That is the deck above: fifteen slides covering the project overview, a review of the current system, redesign directions, the build schedule, and the budget plan, all listed by number with nothing separating one topic from the next. Scroll a few times and it is easy to lose track of where you are.
Think of a section as a folder for slides
The closest analogy is a folder in File Explorer. Creating a folder does not alter the files inside it, and creating a section does not alter your slides. What you gain is the same set of folder behaviors: you can name it, collapse it, and move the whole thing to a different position.
By default every slide belongs to a single unnamed block. That is why, when you create your first section partway through a deck, the slides above it are automatically gathered into a block called Default Section.
Three things that change once sections exist
First, section headers appear in the thumbnail pane and in slide sorter view, so your current position is visible at a glance. Second, collapsing sections shrinks a fifty-slide file into a handful of lines that read like a table of contents. Third, dragging a section header moves every slide inside it as a unit, with the internal order preserved.
One thing worth knowing up front: section names live in the editing window only. Run the slide show and they do not appear on screen.
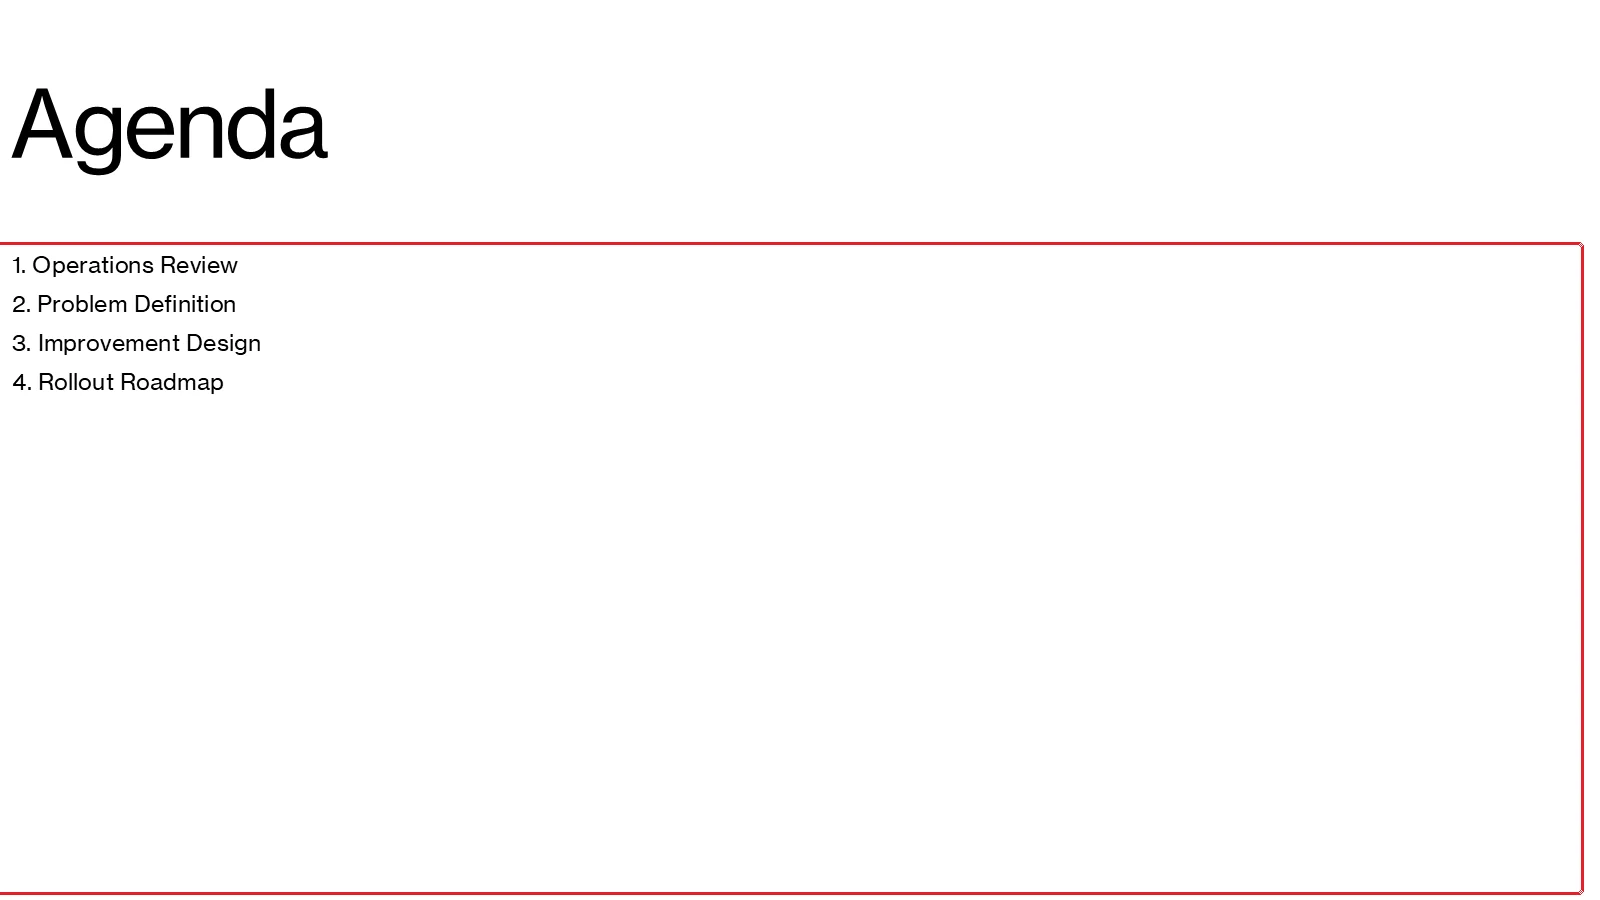
You also do not need to invent section names from scratch. If the deck already has an agenda slide like the one above, those entries are your section names. Here, "1. Operations Review", "2. Problem Definition", "3. Improvement Design", and "4. Rollout Roadmap" become four sections directly.
Before You Split: Get the Whole Deck in View
Use Slide Sorter to see the flow
Look at the overall structure before you create anything. Adding sections without deciding where the boundaries go usually means adjusting those boundaries later, which costs more time than planning them.
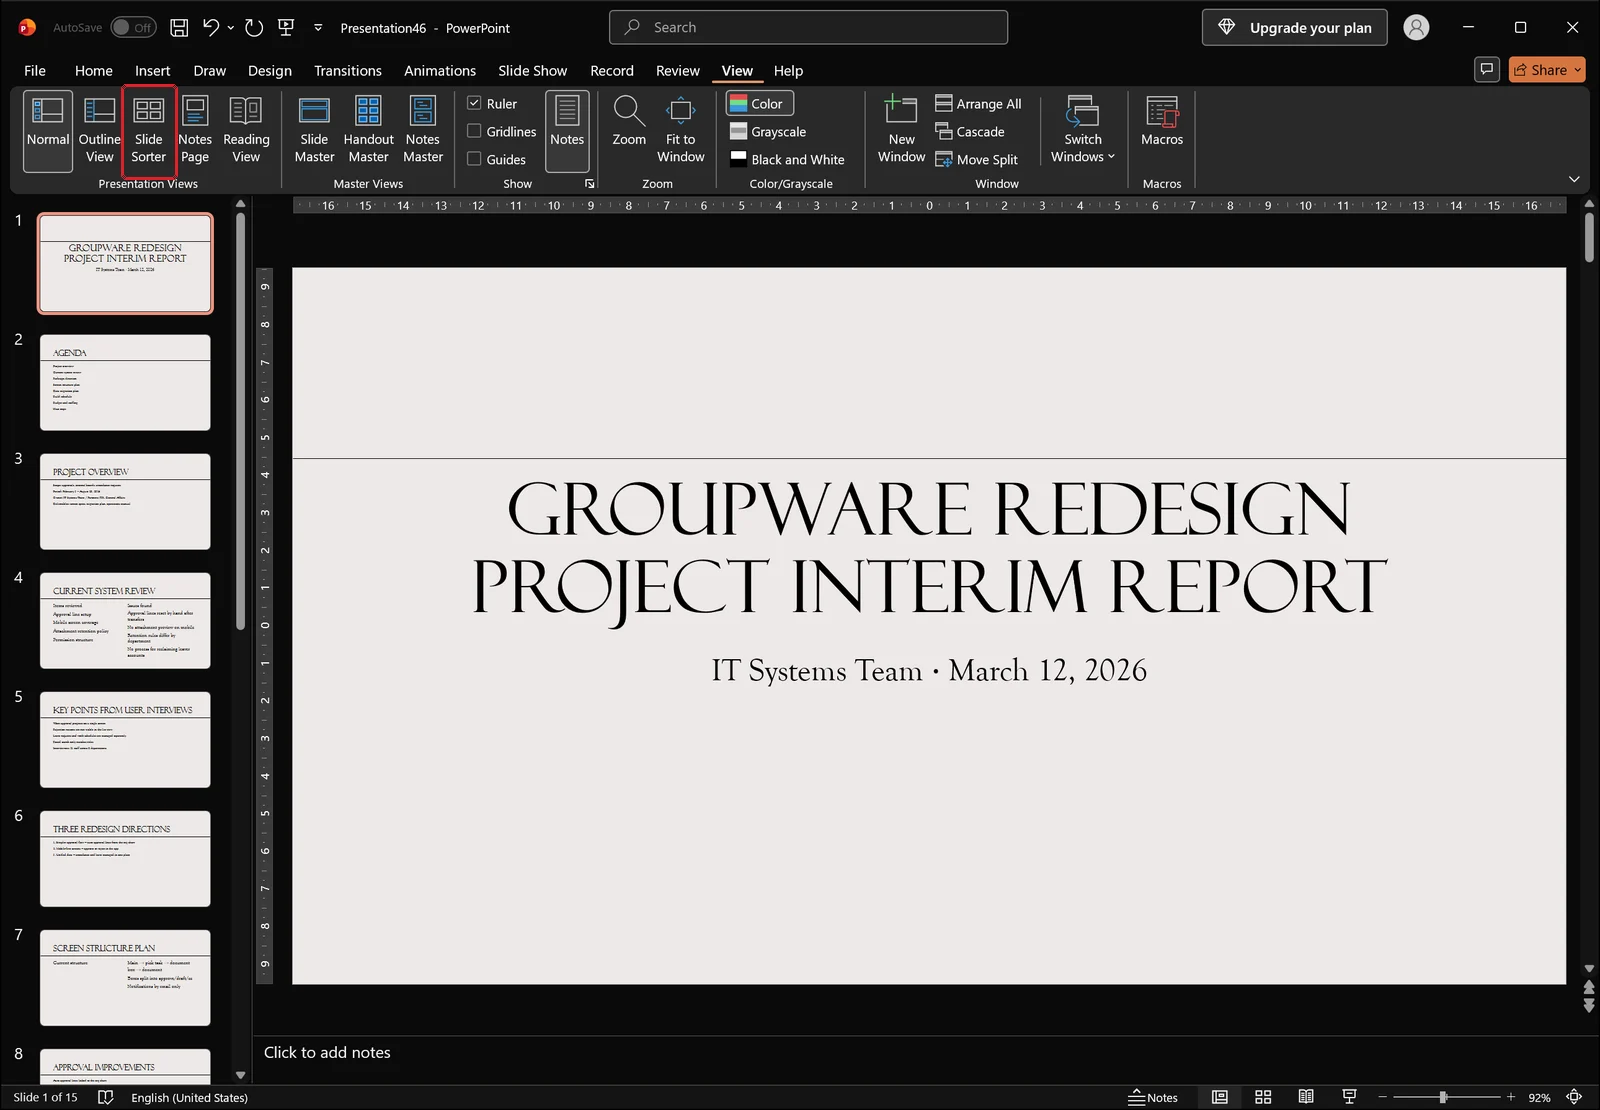
Open the View tab and the view-switching buttons sit together on the left side of the ribbon. Click Slide Sorter, marked in red above.
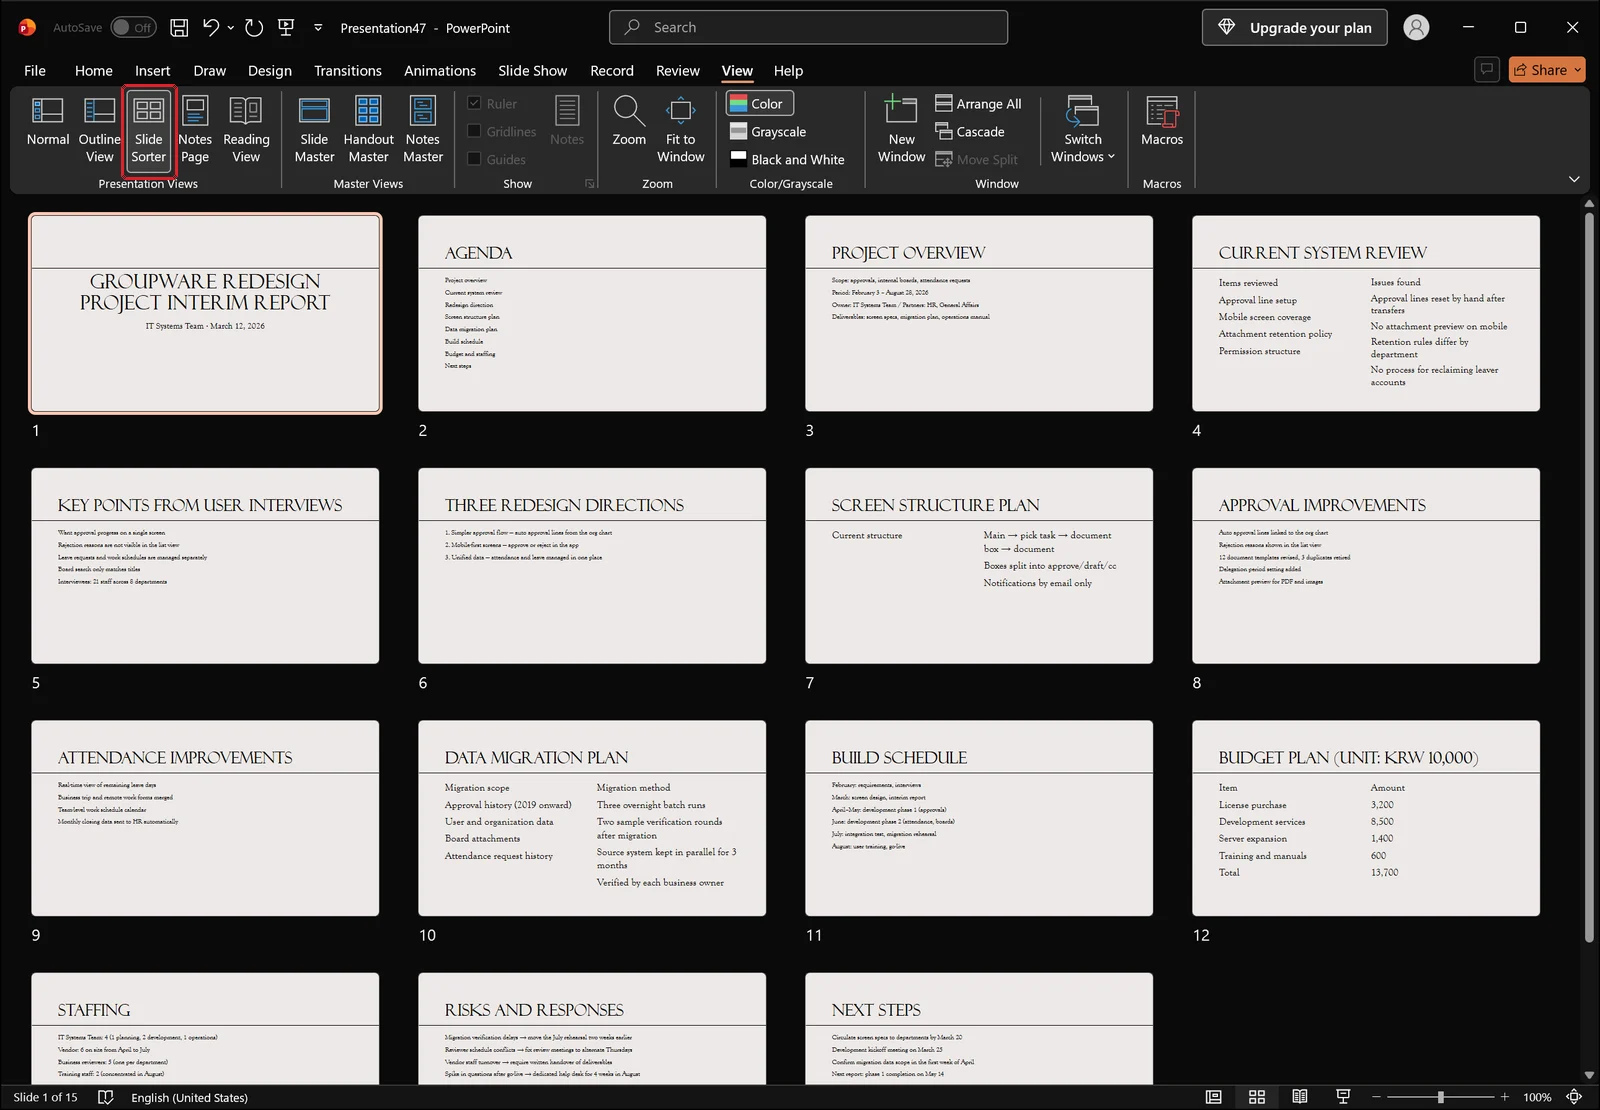
The editing area turns into a grid of thumbnails. There are no header rows yet because no sections exist, so the slides are laid out in plain numerical order. Use this view to spot where one topic ends and the next begins.
Deciding where to cut: follow the agenda
The safest boundary rule is your agenda. The point in the talk where you say "next, the improvement proposals" is exactly where a section should start. Cutting along the spoken narrative rather than by slide type also pays off later, when you start rearranging the order.
A section covers everything from the slide you select up to the slide before the next section. So all you need to write down in advance is the first slide number of each block. For the deck above, that might be 3, 6, 8, and 10.
A naming convention that holds up: number plus topic
Prefix each name with a two-digit number, as in "01 Operations Review". The order is then readable at a glance when everything is collapsed, and if you move a section later and the numbers fall out of sequence, that mismatch is itself a signal that something needs tidying. Keep names to roughly ten characters or so, since longer ones get truncated by the width of the thumbnail pane.
👉 Numbered List in Word: Restart, Continue, and Turn Off Auto
Adding a Section and Giving It a Name
Select the slide the section starts on
Go back to normal view from the View tab. In the thumbnail pane on the left, click once on the slide where the new section should begin. That slide becomes the first slide of the section, so selecting one slide too early will pull the last slide of the previous block in with it.
Home tab → Section → Add Section
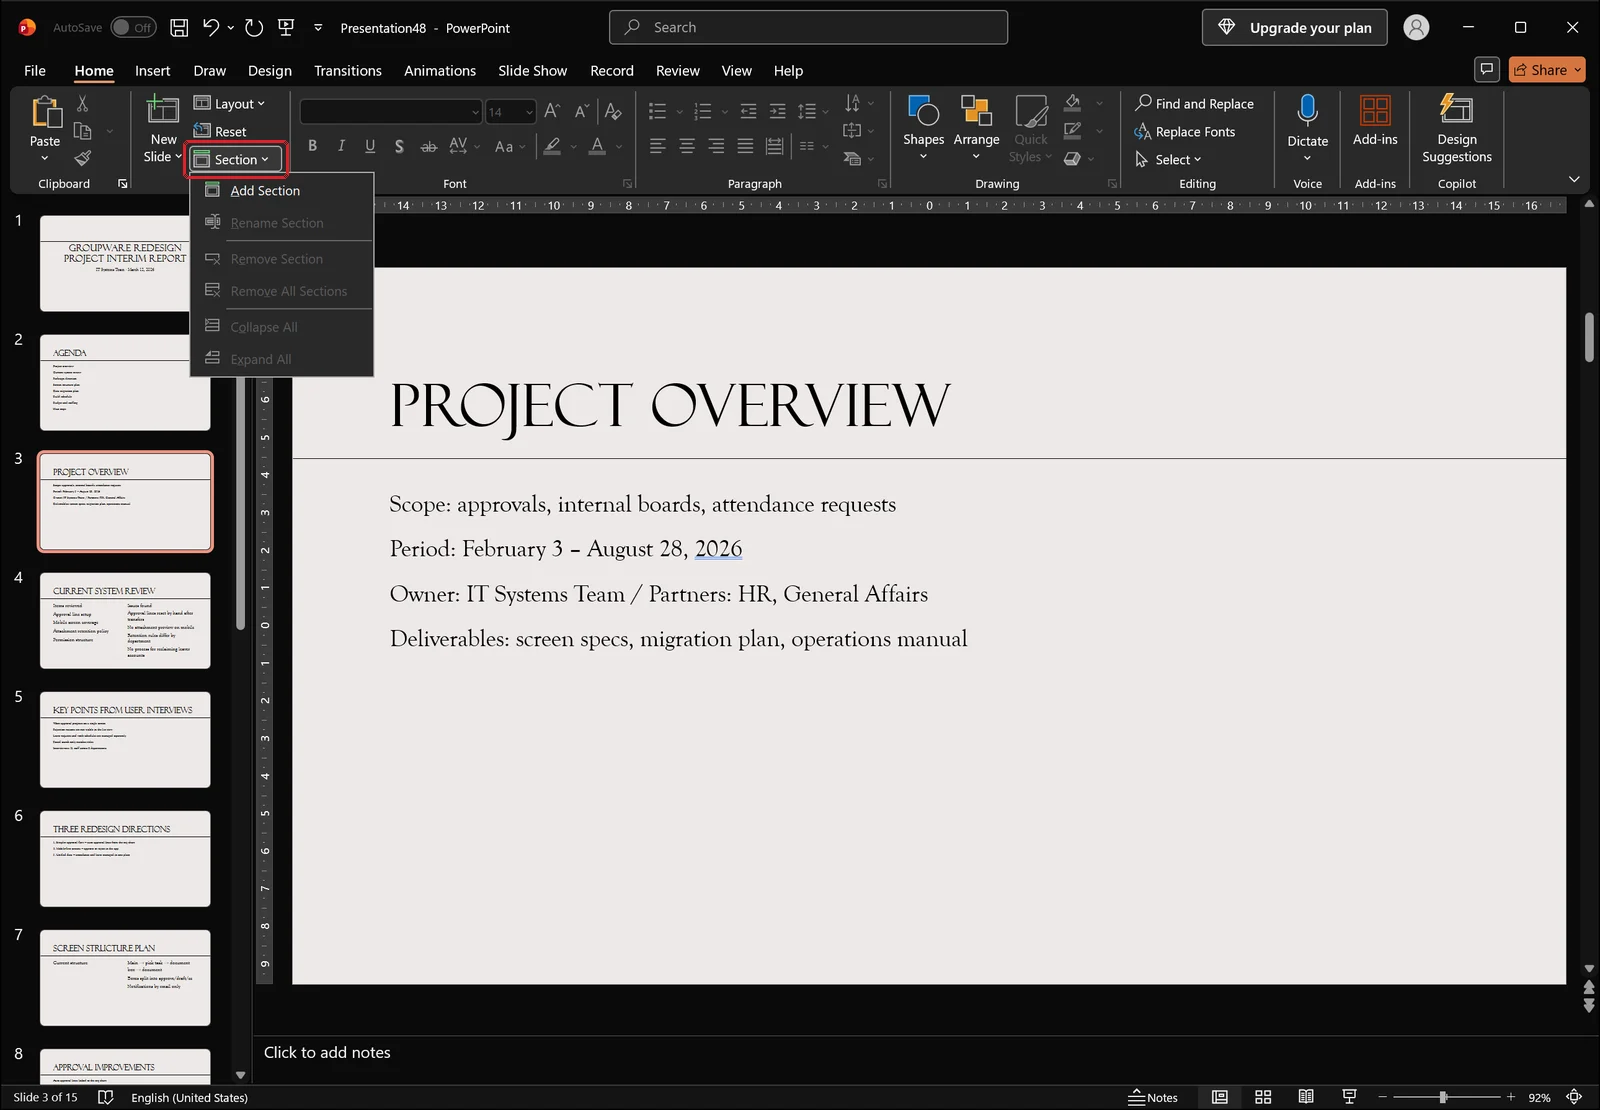
The Section button sits on the right side of the Slides group on the Home tab. Clicking it gathers every section-related command into one menu: Add Section to create a new one, Rename Section to change a name, Remove Section and Remove All Sections to dissolve blocks, and Collapse All and Expand All to fold or unfold the pane. Choose Add Section.
Right-clicking in the empty space between two thumbnails gives you the same command. The point you click becomes the boundary, so as long as you aim accurately the result is identical.
Handling the name dialog
Add Section opens a small dialog asking for a name. Type the name you prepared, such as "01 Operations Review", and click the rename button; a gray header row appears in the thumbnail pane. Skipping the name leaves you with "Untitled Section", which tells you nothing later, so it is worth filling in right here.
Creating your first section also sweeps the slides above it into a block named Default Section. You can rename that one using the method below.
Repeat for the remaining boundaries
Run the same three steps at each remaining boundary: select the first slide of the block, add a section, type the name. If you noted the starting slide numbers earlier, work through them top to bottom so nothing shifts under you. Four sections means four passes.
Collapsing Sections and Moving Slides in Bulk
Collapse and expand with the header triangle
There is a small triangle to the left of each section name. Click it and the section folds up, with the number of slides it contains shown next to the name. Click again to unfold it. Keeping only the part you are working on expanded and the rest collapsed cuts down scrolling dramatically.
Collapse All turns the pane into a table of contents
Choosing Collapse All from the Section menu folds every block at once. A file with dozens of slides compresses into a few section names, and the thumbnail pane effectively becomes an outline of the deck. Expand All in the same menu brings the thumbnails back.
Drag a section header to move the whole block
This is the real reason to bother with sections. With everything collapsed, grab a section header with the mouse and drag it up or down: every slide inside moves with it, in the same internal order. To promote "03 Improvement Design" ahead of "02 Problem Definition", you drag one line. Whether the section holds five slides or fifteen makes no difference.
Compared with Ctrl-clicking individual slides and dragging them across, there is almost nothing to get wrong. Section headers can be dragged the same way in slide sorter view.
Check the order in Outline View
Once the order is rearranged, reading through just the title text is a good way to sanity-check the logic.
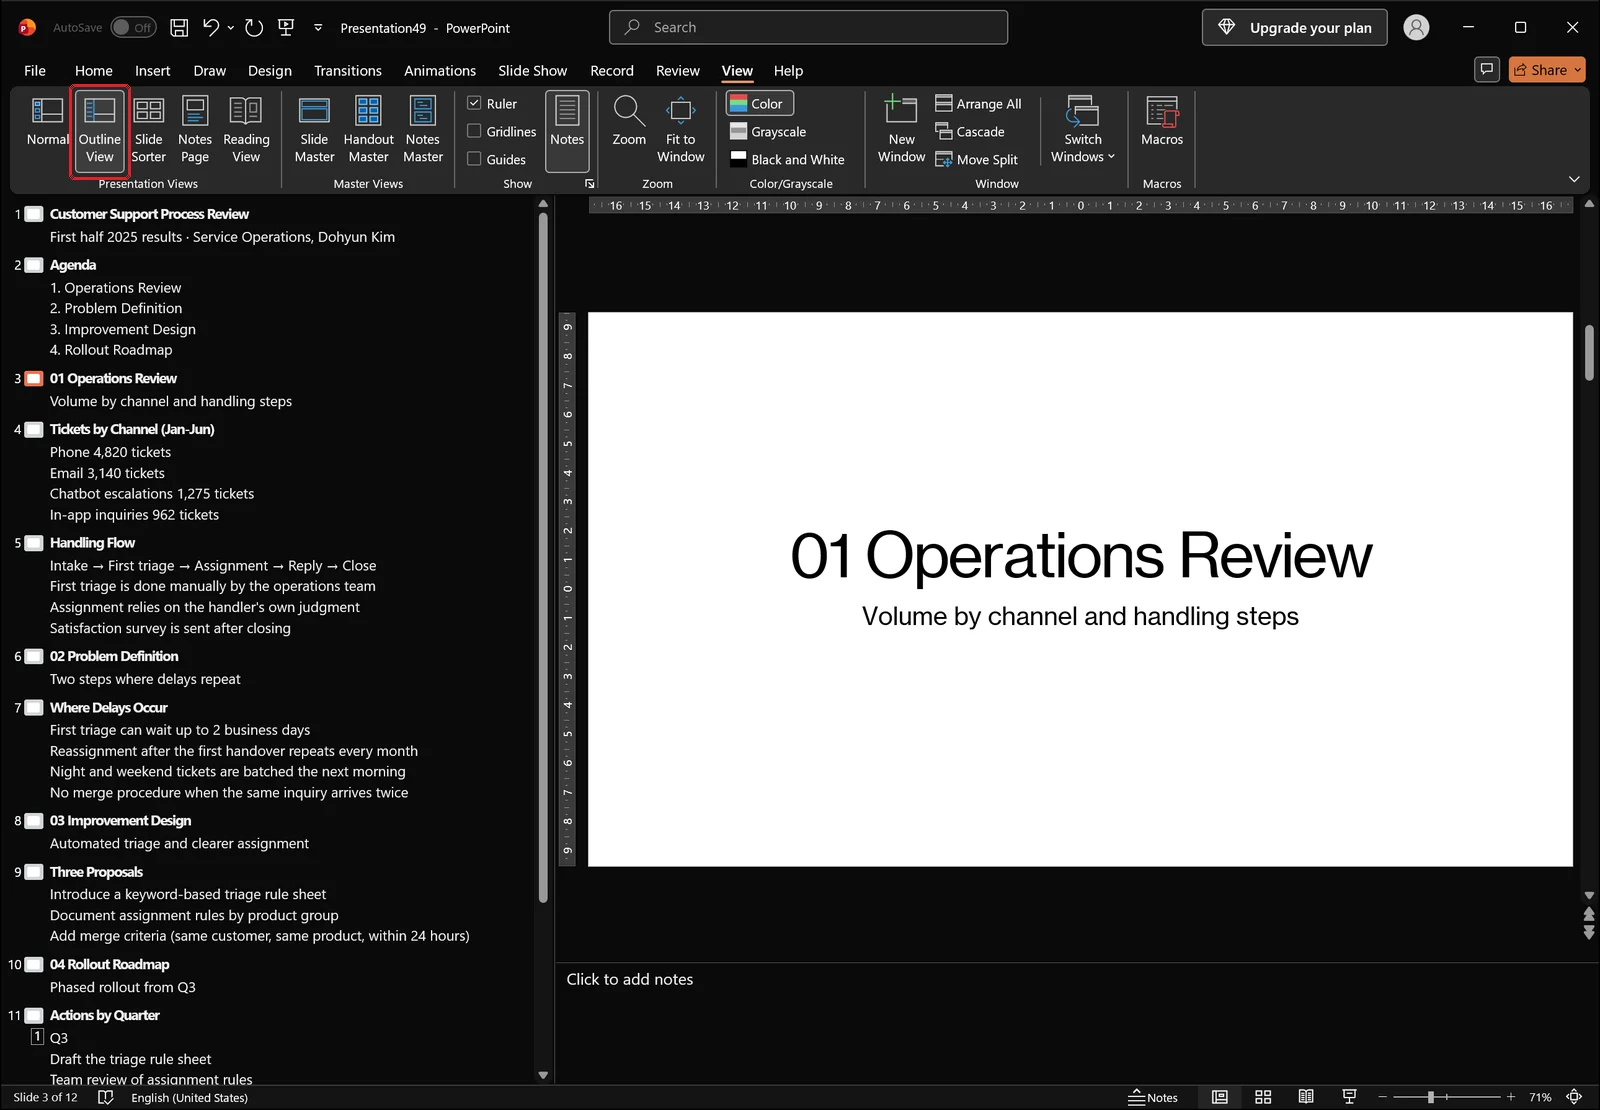
Click Outline View on the View tab and the left pane swaps thumbnails for a text list. Slide titles and body text appear as an indented outline, which is ideal for judging the sequence of ideas with the design stripped away. Note that section headers are not shown in this view, so do any section-level dragging in normal view or slide sorter view instead.
Renaming, Removing, and Section Header Slides
Renaming a section
The fastest way to change a name is to double-click the section header in the thumbnail pane. The name dialog opens immediately; type the new name and you are done. Selecting the section and choosing Rename Section from the Section menu on the Home tab does the same thing. This is also how you clean up the automatically generated Default Section and Untitled Section labels.
Removing the section vs. removing the slides too
The removal commands have similar names, which is where mistakes happen. The only thing you need to keep straight is what actually disappears.
| Command | Section structure | Slides |
|---|---|---|
| Remove Section | Header disappears; slides merge into the block above | Kept |
| Remove Section & Slides | Header deleted | Slides inside are deleted too |
| Remove All Sections | All section structure disappears | All kept |
Remove Section & Slides appears in the menu you get by right-clicking a section header in the thumbnail pane. Since it deletes slides, double-check which section is selected before you click it.
Building divider slides with the Section Header layout
Because section names are editing-only information, your audience never sees where one part of the talk ends and the next begins. The fix is a divider slide at the start of each section.
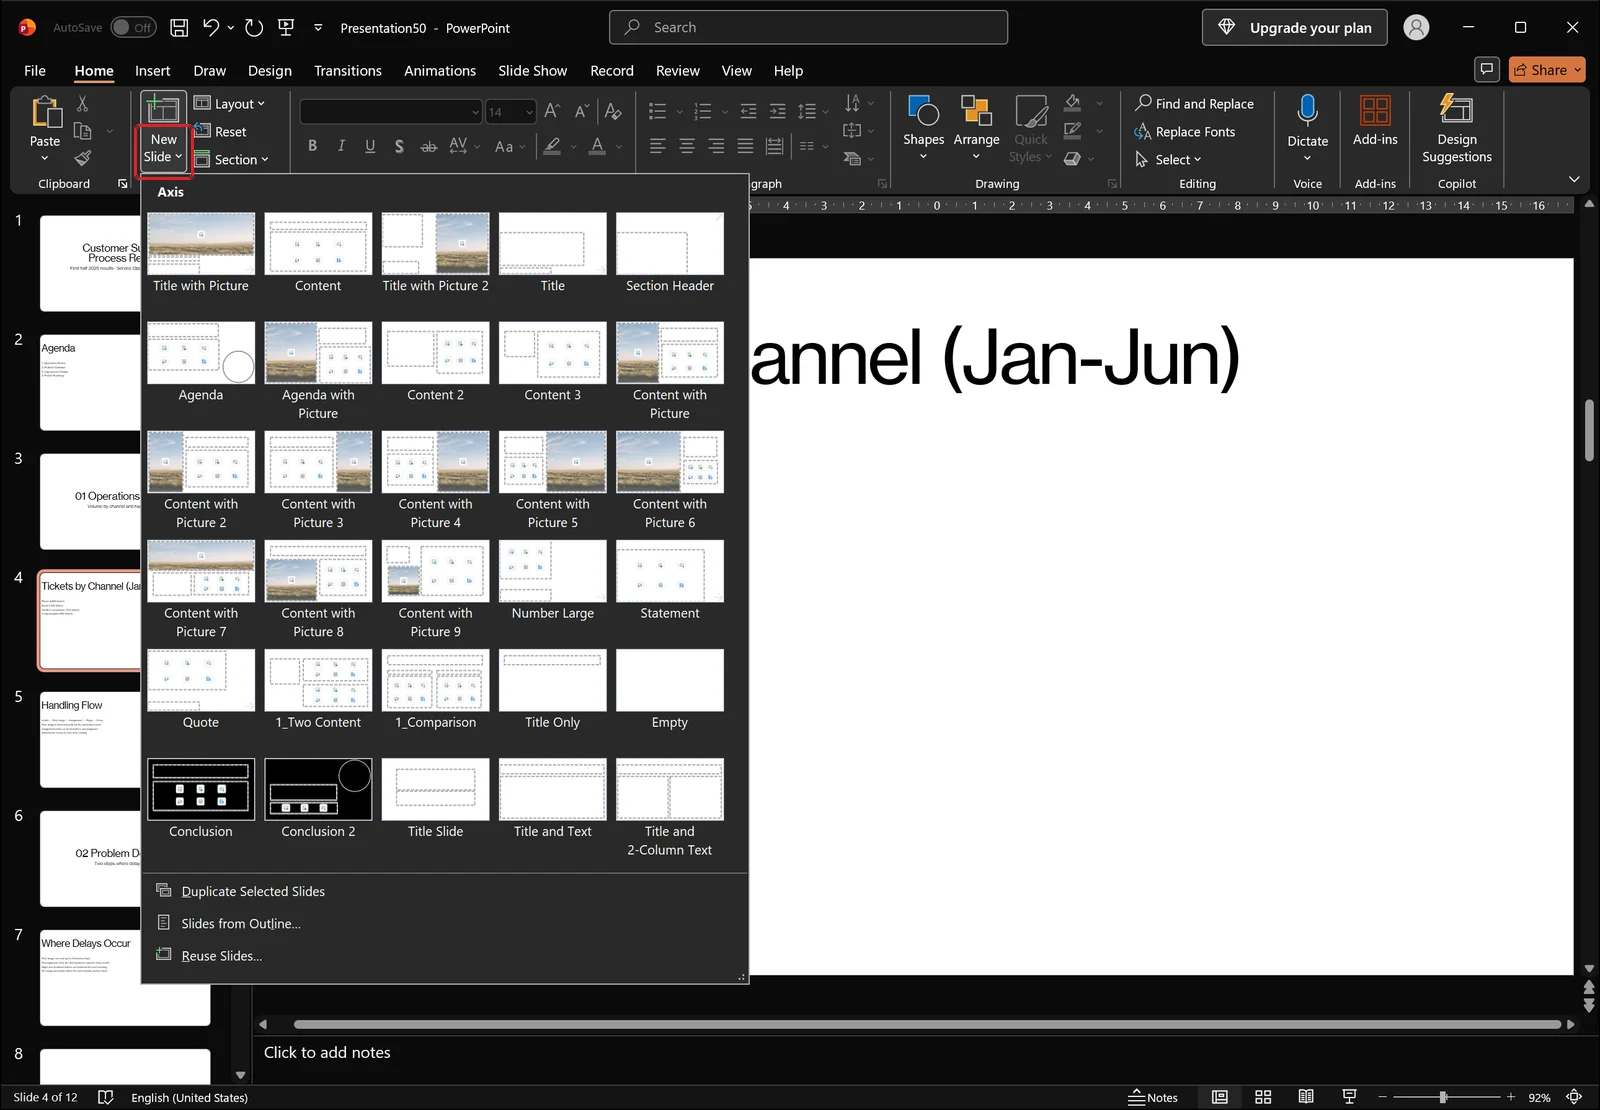
In the Slides group on the Home tab, click the arrow beneath New Slide to open the layout gallery. The gallery is headed with the name of the theme in use — Axis in the screenshot above — and alongside Title Slide and Title and Text you will find the Section Header layout. Picking it creates a slide made up of a large title and a short subtitle line.
Put the exact section name in the title placeholder. Matching the editing-window section name to the on-screen divider title means everyone uses the same vocabulary during review: "the second slide in section 3" points to one specific slide for both of you.
👉 Replace All Fonts in PowerPoint: Unify Every Slide at Once
When Sections Misbehave
Collapsed sections keep reopening
The collapsed or expanded state is saved with the file, so collapsing everything, saving, and closing usually leaves things collapsed the next time you open it. It can still come back expanded if you switch to slide sorter view and back, or if a colleague saves the file with everything unfolded. One click on Collapse All in the Section menu resets it.
Recovering a section you deleted by accident
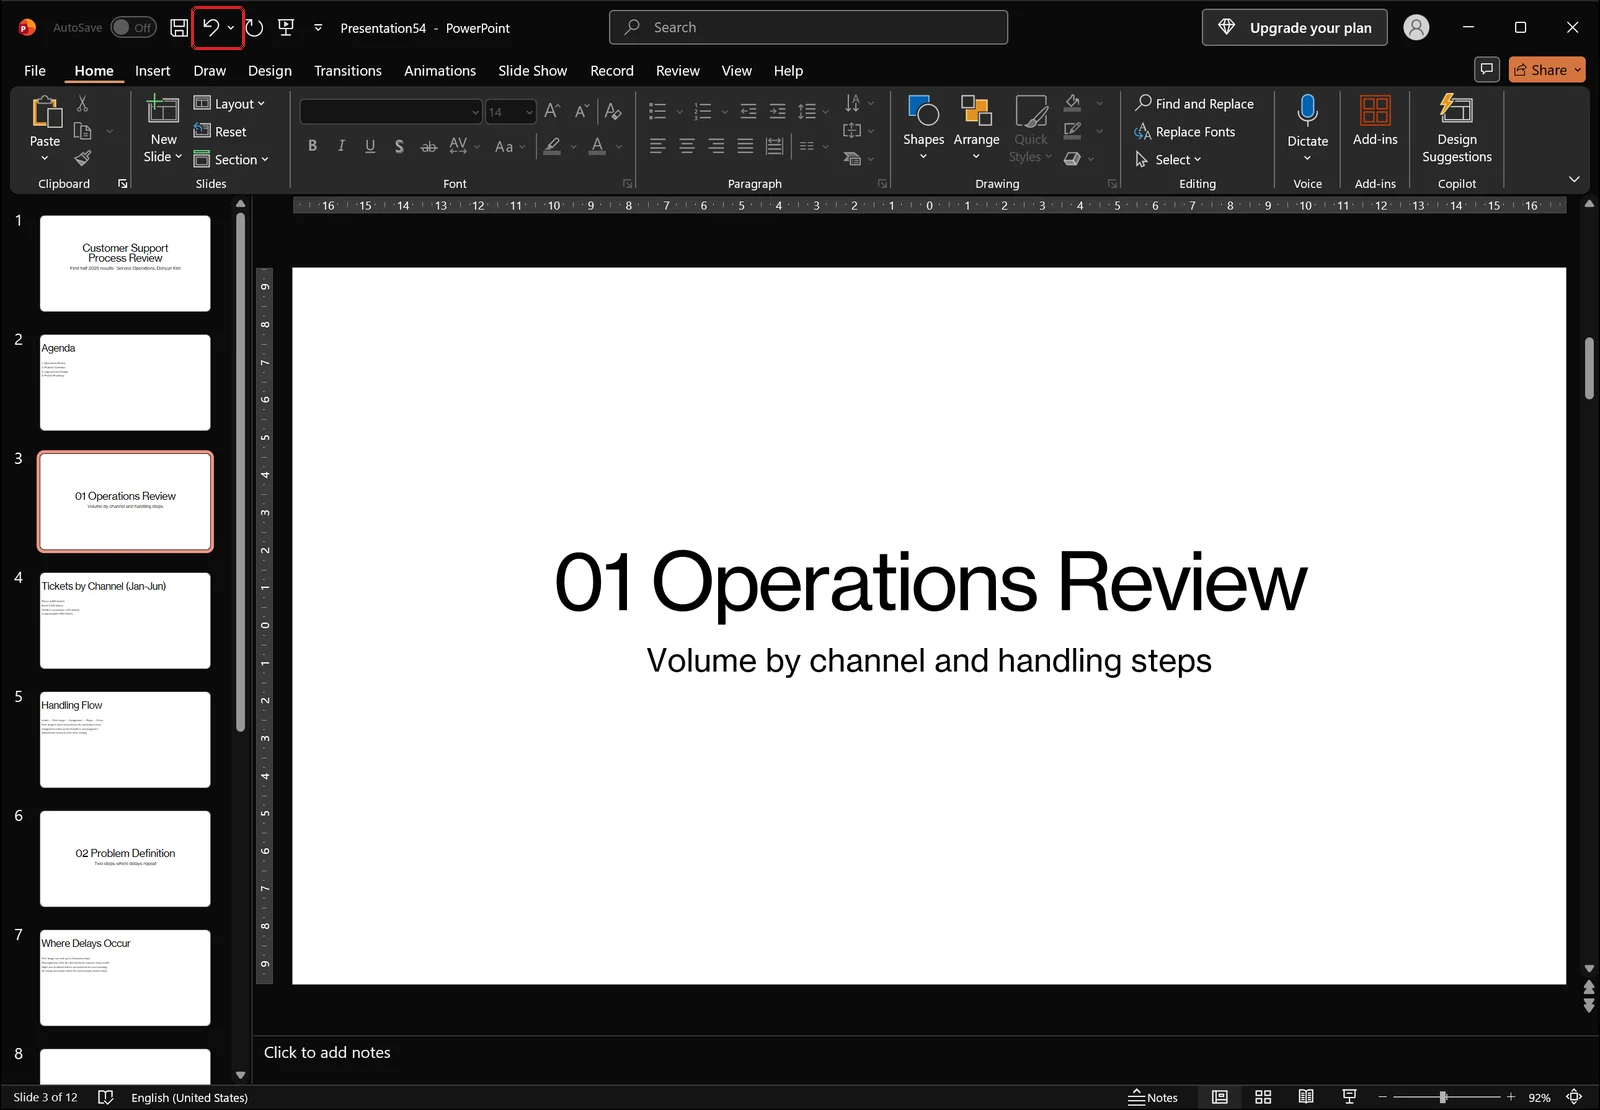
If you hit Remove Section & Slides and the slides vanished with it, undo before doing anything else. In the screenshot above the deck is already back to a plain numbered list with no section headers left, and the Section button sits closed in the Slides group. The Undo button on the quick access toolbar at the top-left of the window, or Ctrl+Z, brings the deleted slides back along with the section. Saving and closing the file clears the undo history, so after any bulk deletion it is safer to check the result before you save.
Presenting only one section
Sometimes you need to show part of a deck without disturbing the original order, such as sharing only the improvement proposals out of a full status report.
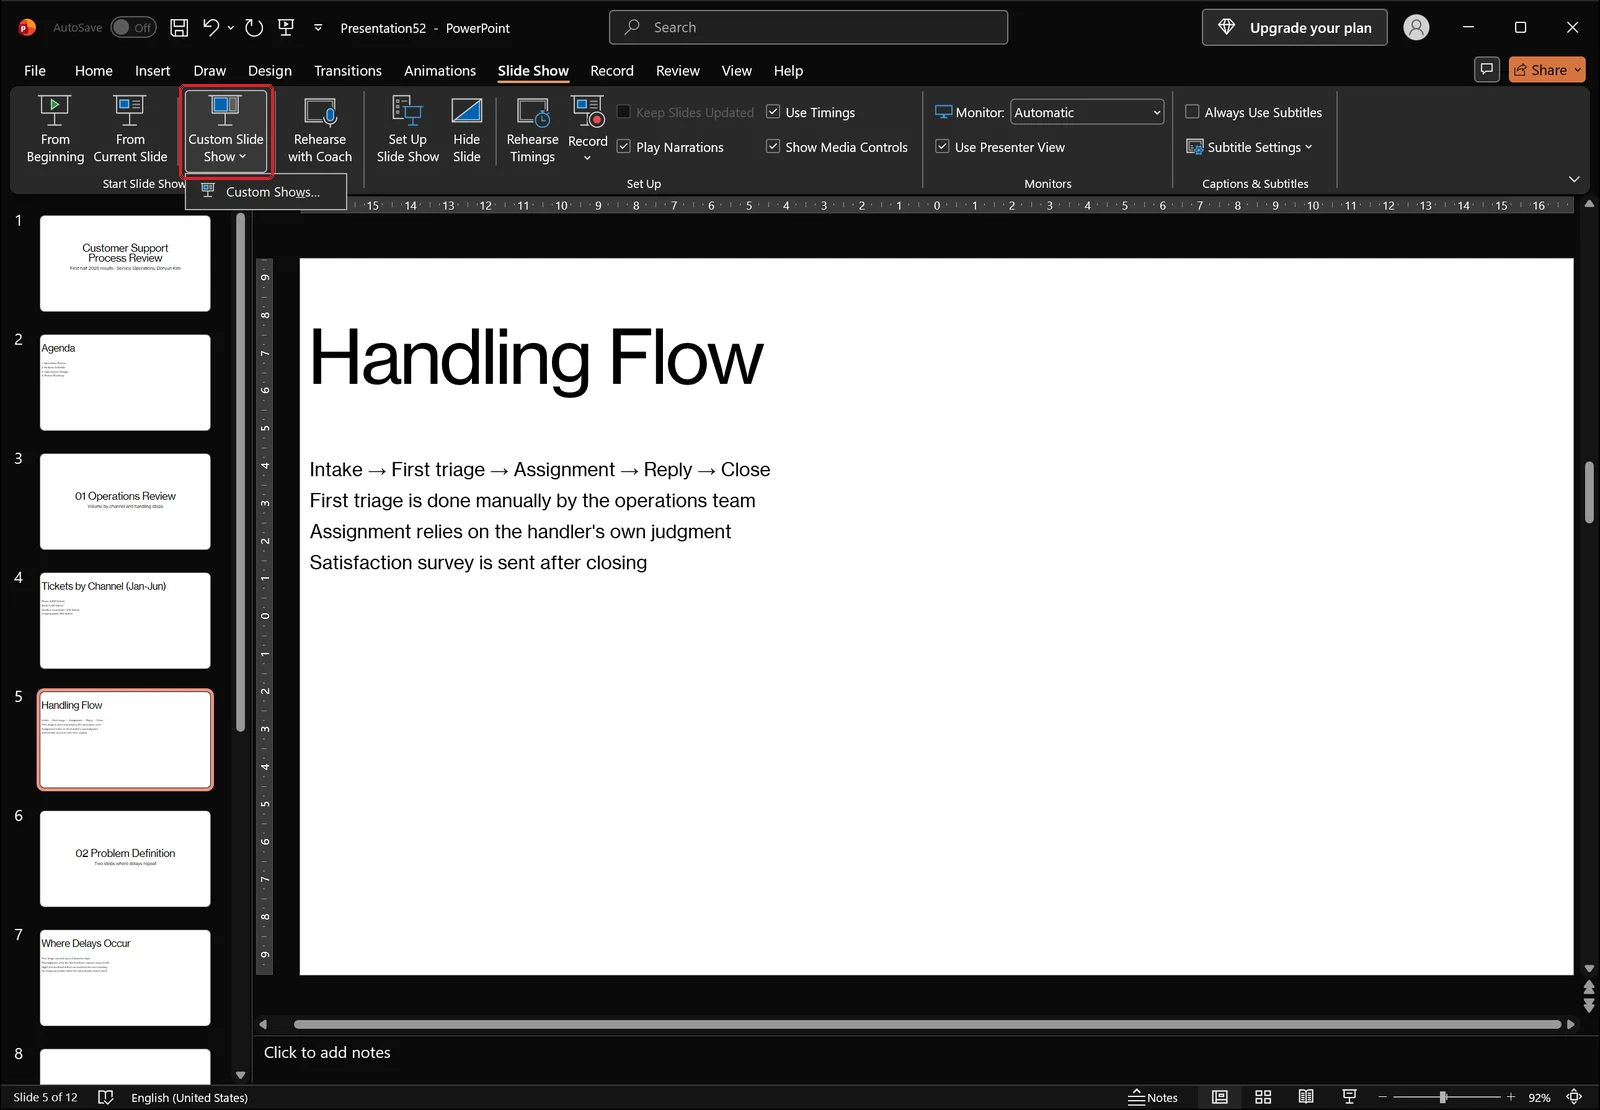
Click Custom Slide Show on the Slide Show tab to open the menu. It holds one item, Custom Shows... — choose it, then create a new show and pick only the slides from the sections you need; the original file stays untouched while those slides play in sequence. You can keep several of these saved and choose the right one depending on the audience.
The simpler option is hiding. Select the slides you want to leave out in the thumbnail pane and click Hide Slide on the Slide Show tab; once the slide is hidden, that same button reads Unhide Slide.
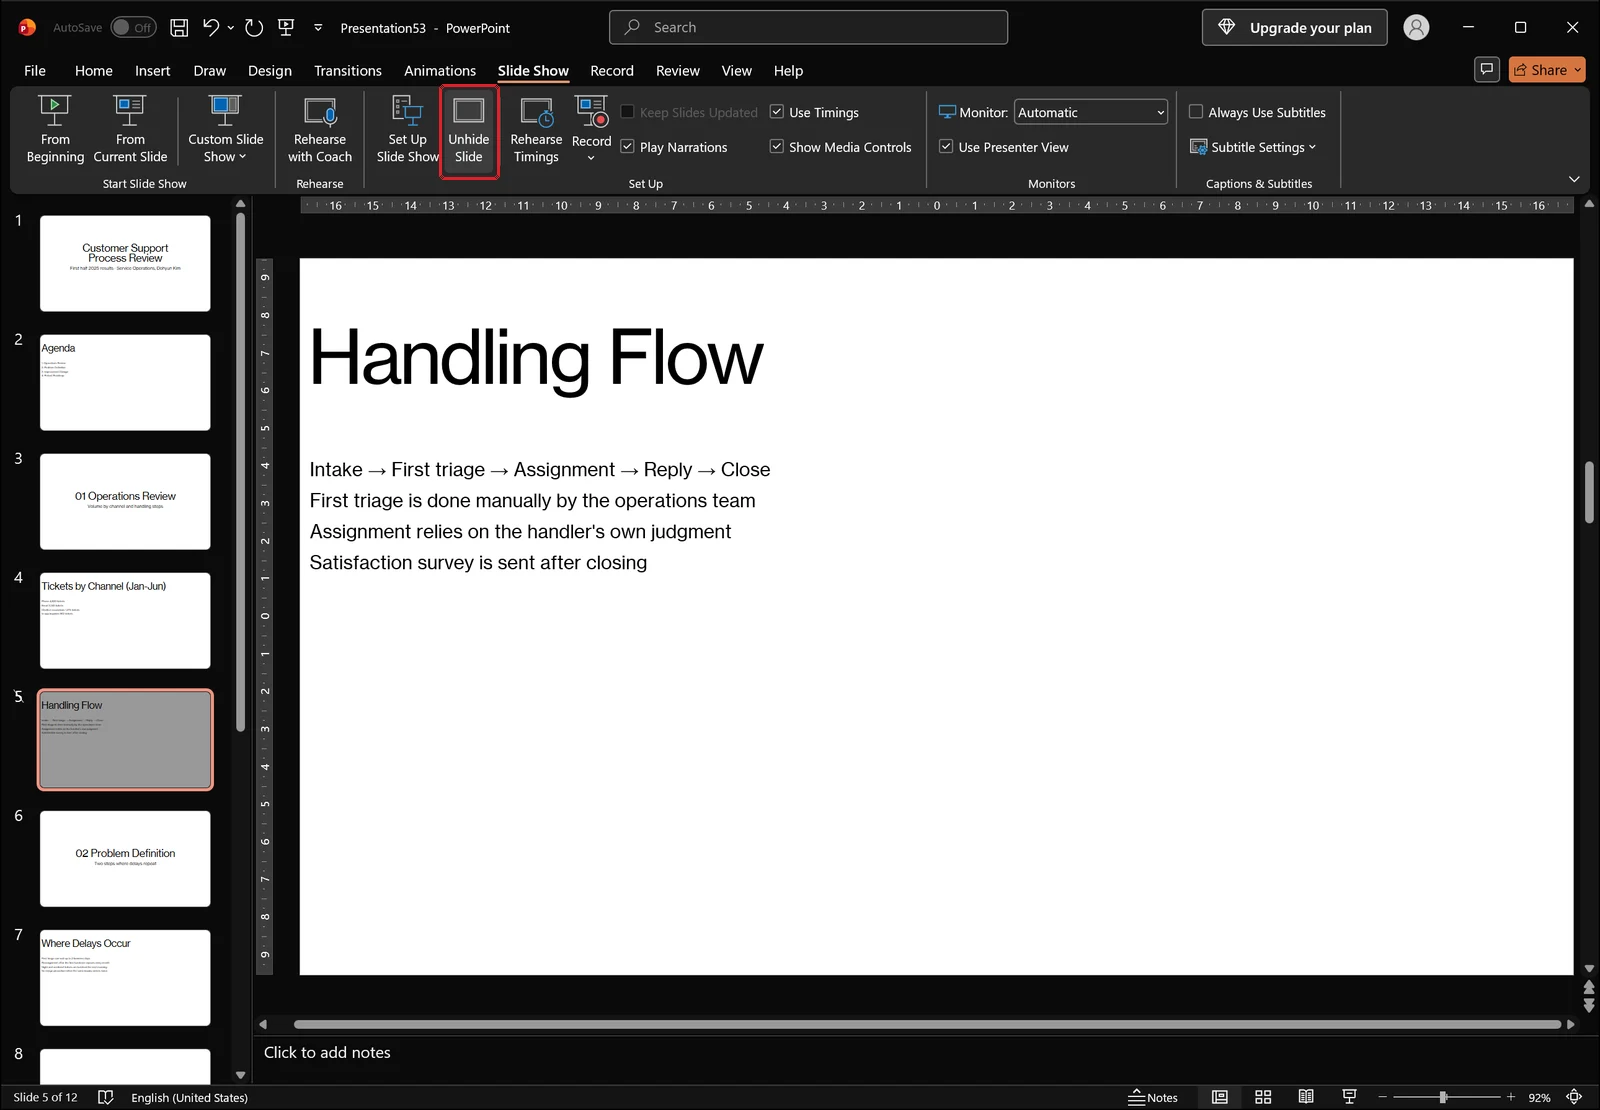
Once hiding is applied, the thumbnail for that slide is greyed out and the button changes to Unhide Slide, as with slide 5 above. Select the same slide and click it again to bring the slide back into the show. Hidden slides are not deleted from the file and stay fully editable.
Checklist for when sections are not showing
- Check whether you are in Outline View. Section headers are not displayed there; switch back to normal view and they reappear.
- If the thumbnail pane is too narrow, names get truncated and the header rows are hard to make out. Drag the divider between the pane and the editing area to the right.
- If everything is collapsed, the pane can look empty because the thumbnails are folded away. Use the triangle beside a header or Expand All.
- Files saved in the older .ppt format may not retain section information. Save and work in .pptx.
Sections in PowerPoint: FAQ
Q. Does removing a section delete the slides inside it?
Remove Section only dissolves the grouping; the slides stay. To delete the slides as well you have to use Remove Section & Slides. Remove All Sections clears the section structure and keeps every slide. If you click the wrong one, Ctrl+Z reverses it immediately.
Q. Does the collapsed state survive when I reopen the file?
Collapse and expand states are saved with the file, so in most cases the deck opens the way you left it. It can still open expanded if you switched to slide sorter view and back, or if someone else edited and saved the file. Clicking Collapse All in the Section menu once puts it right.
Q. Do section names appear in the slide show or in printouts?
Section names are editing information shown only in the thumbnail pane and slide sorter view, so they never appear on the presentation screen. If you want the audience to see where one part ends, insert a divider slide using the Section Header layout. When printing, you can choose to print by section.
Q. How do I present the slides from just one section?
Use Custom Slide Show on the Slide Show tab to build a show containing only that section's slides, which leaves the original order alone. A quicker alternative is to click the section header to select the entire section and apply Hide Slide to everything else.
Organizing slide structure with inline AI
Creating sections is straightforward, but deciding where the boundaries belong and what to call each block still means reading the deck from start to finish. The longer the deck, the more time that takes, and once you have reordered the sections there is the follow-up work of bringing the agenda slide and divider titles back in line.
inline AI reads the titles and content of the PowerPoint file you have open, points out where the topic shifts, and drafts section names from what it finds. It also handles requests stated in plain language, such as grouping slides 3 through 7 and naming that block, or matching the wording between the agenda slide and each divider title. It works the same way in Word and Excel files.
Everything runs on your own computer. An unreleased status report or an internal budget deck never has to be uploaded to an outside server to be worked on.
See what an agent could take over at your company in a 30-minute call.