Learn
How to Recover an Unsaved Excel File: AutoRecover, Temp Files, and Version History

Losing an unsaved Excel file almost never happens at a convenient moment. The program crashes in the middle of a long session, the laptop battery dies, or you click "Don't Save" on autopilot while closing a workbook you actually needed. Hours of work seem to vanish in a second.
The good news: Excel quietly protects you more than you might think. AutoRecover snapshots, temp files, and cloud version history mean that in most situations, at least some of your work can be brought back. This guide covers every recovery route in order, from the most likely to succeed to the last resort, and then shows you the settings that make sure you never need this article again.
Can an Unsaved Excel File Actually Be Recovered?
Don't give up just because the file seems gone. Excel automatically saves temporary snapshots of open workbooks at regular intervals, so depending on what happened, a large part of your work is often recoverable.
Whether recovery works comes down to one question: was Excel's automatic saving active when you lost the file?
Recovery is likely when:
- Excel crashed or the computer shut down unexpectedly
- You closed the file without saving by mistake
- The file was synced to OneDrive or SharePoint
Recovery is difficult when:
- AutoRecover was turned off
- The changes were made after the last automatic snapshot
- The temp files have already been deleted
One thing to check before anything else: when you relaunch Excel after a crash, a Document Recovery pane often appears with recovered files listed. Save the recovered file first, before doing anything else. It's the safest starting point.
Finding Your File with AutoRecover
If Excel crashed or you closed without saving, AutoRecover is the first thing to try. By default, Excel saves a recovery snapshot every 10 minutes, so if an AutoRecover file exists, you can usually get most of your work back.
AutoRecover File Location on Windows
When you restart Excel, recovered files often appear automatically in a pane on the left. If they don't, you can look for them directly at this path:
C:\Users\YourName\AppData\Roaming\Microsoft\Excel\
Paste the path into the File Explorer address bar to see the automatically saved snapshot files. Files with an .xlsb or .asd extension are AutoRecover files.
You can also reach them from inside Excel:
File → Info → Manage Workbook → Recover Unsaved Workbooks
AutoRecover File Location on Mac
On a Mac, AutoRecover files live at the path below.

/Users/YourName/Library/Containers/com.microsoft.Excel/Data/Library/Preferences/AutoRecovery/
In Finder, open Go → Go to Folder, paste the path, and press Enter. Open the file in that folder with the most recent modification date.
If no AutoRecover file shows up, check these two possibilities:
- AutoRecover was disabled: go to File → Options → Save and confirm that "Save AutoRecover information every N minutes" is checked.
- The file was closed too quickly: if Excel closed right after the last snapshot, no new temp file may have been created.
Searching the Temp File Folder Directly
If AutoRecover didn't bring your file back, the next step is to check the temporary file folder yourself.
Finding Temp Files on Windows
Windows stores temporary files here:
C:\Users\YourName\AppData\Local\Temp\
Paste the path into File Explorer, or press Win + R and type %temp% to jump straight there. Look for Excel-related files with a .tmp extension or names starting with ~.
Sort the folder by date modified to find the most recent temp file quickly.
Finding Temp Files on Mac
On a Mac, the fastest route is Terminal. Open Terminal and run:
open $TMPDIR
The folder that opens contains temporary files, including Excel's. To get there through Finder instead, use Go → Go to Folder and enter $TMPDIR.
Before You Open a Temp File
Temp files usually don't carry an .xlsx extension, so you may need to switch the file filter to "All Files" to see them in the Open dialog. And once a temp file opens, save it under a new name immediately. If you close it without saving, the temp file itself can be deleted.
When the File Exists but Won't Open
If the file is still there but throws errors or refuses to open, it may be corrupted. Excel has a built-in repair feature for exactly this case. Note that it's available on Windows only.
In Excel, go to File → Open, select the damaged file, then click the arrow next to the Open button and choose Open and Repair.
This recovers as much data as possible from a damaged workbook. It only works when at least part of the file is intact, though. It can't resurrect a file that has been fully deleted.
Recovering with OneDrive and SharePoint Version History
If the file was stored in OneDrive or SharePoint, version history is your best option. Cloud storage saves changes continuously, so the odds of recovery are highest here.
Restoring a Previous Version from OneDrive
Option 1: From the OneDrive website
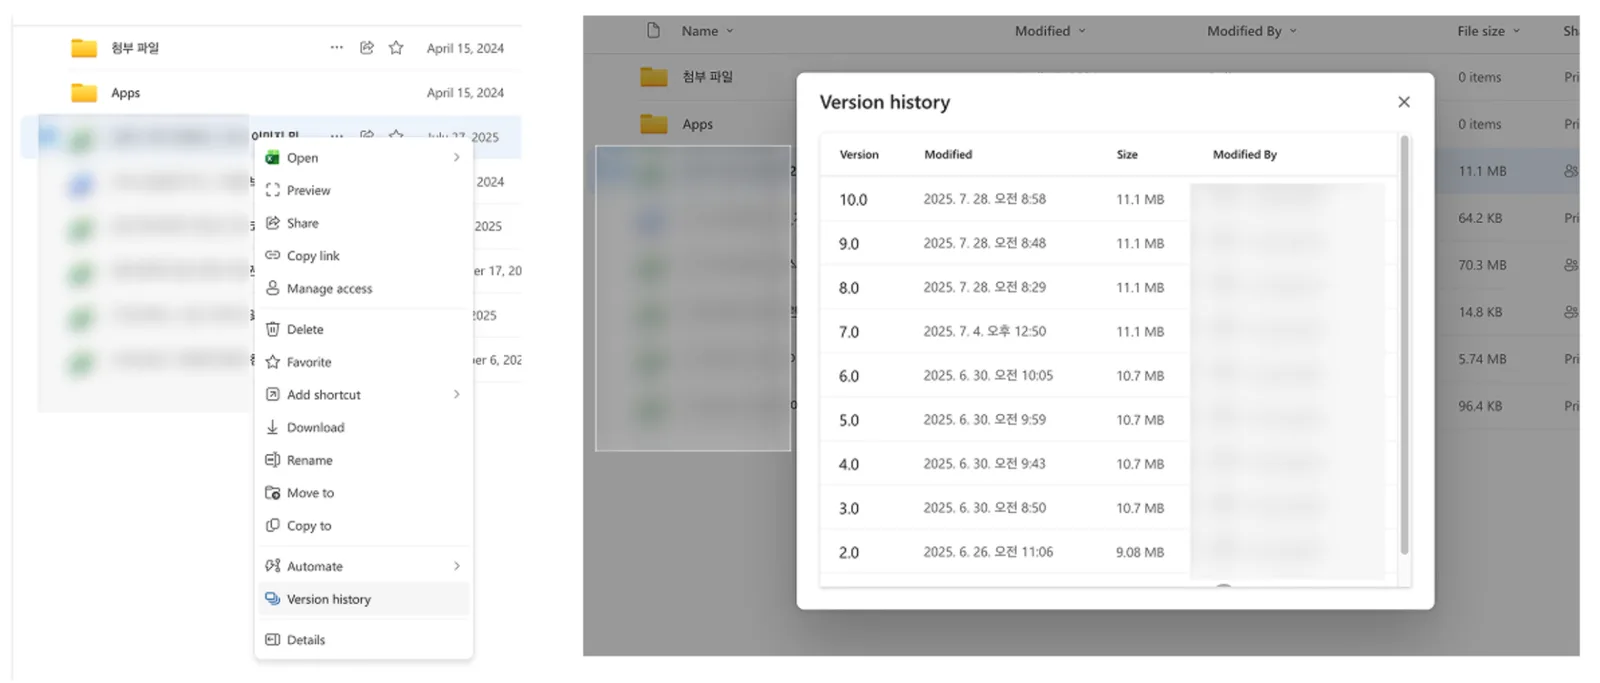
Go to OneDrive on the web (onedrive.live.com) and right-click the file you want to recover. Choose Version history, and a list of saved versions appears with dates and times. Pick the version you need and restore or download it.
Option 2: From inside Excel
For files synced with OneDrive, you can check version history without leaving Excel. Go to File → Info → Version History to see the list of saved versions by date, then click any version to review it and restore it.
Using SharePoint Version History
Files stored in SharePoint work the same way. In the SharePoint document library, right-click the file → Version history. Each version shows the modified date and who changed it, so you can restore exactly the point in time you need.
Common Issues with Cloud Recovery
- Version history doesn't appear: the free OneDrive plan may keep versions for a limited time. Business plans retain versions for up to 180 days.
- Recent work disappeared after restoring: restoring an older version overwrites everything after it. Save a copy of the current version separately before you restore.
AutoSave Settings That Prevent the Next Data Loss
Recovery is damage control. What matters most is setting things up so files don't get lost in the first place.
Configuring AutoRecover
On Windows
Go to File → Options → Save. Check "Save AutoRecover information every N minutes" and set the interval you want. Make sure "Keep the last AutoRecovered version if I close without saving" is checked as well.
On Mac
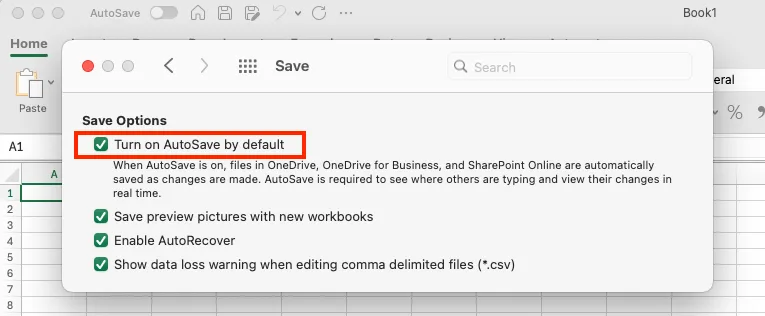
Go to Excel → Preferences → Save and turn on the AutoRecover option.
Turning On AutoSave with OneDrive
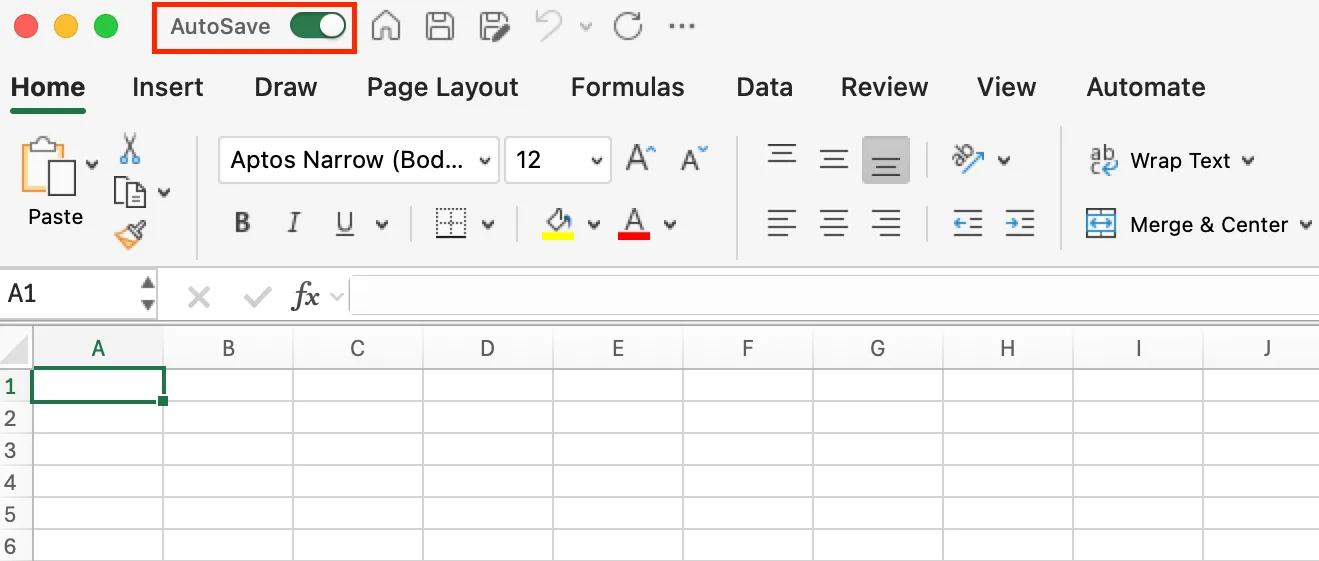
Flip the AutoSave toggle in the top-left corner of Excel and your file syncs to OneDrive in real time. With the file stored in a OneDrive folder and the toggle on, every change is saved to the cloud as you work.
With AutoSave active, even a crash or a sudden power cut is very unlikely to cost you your work.
Easy-to-Miss Details
- File format: files saved in the legacy .xls format may not support AutoSave. Convert them to .xlsx first.
- OneDrive storage: AutoSave stops when your storage is full. Check your remaining space periodically.
- Network connection: OneDrive AutoSave needs an internet connection. When you work offline, AutoRecover settings matter even more.
If You Keep Losing Excel Files, Let inline AI Help
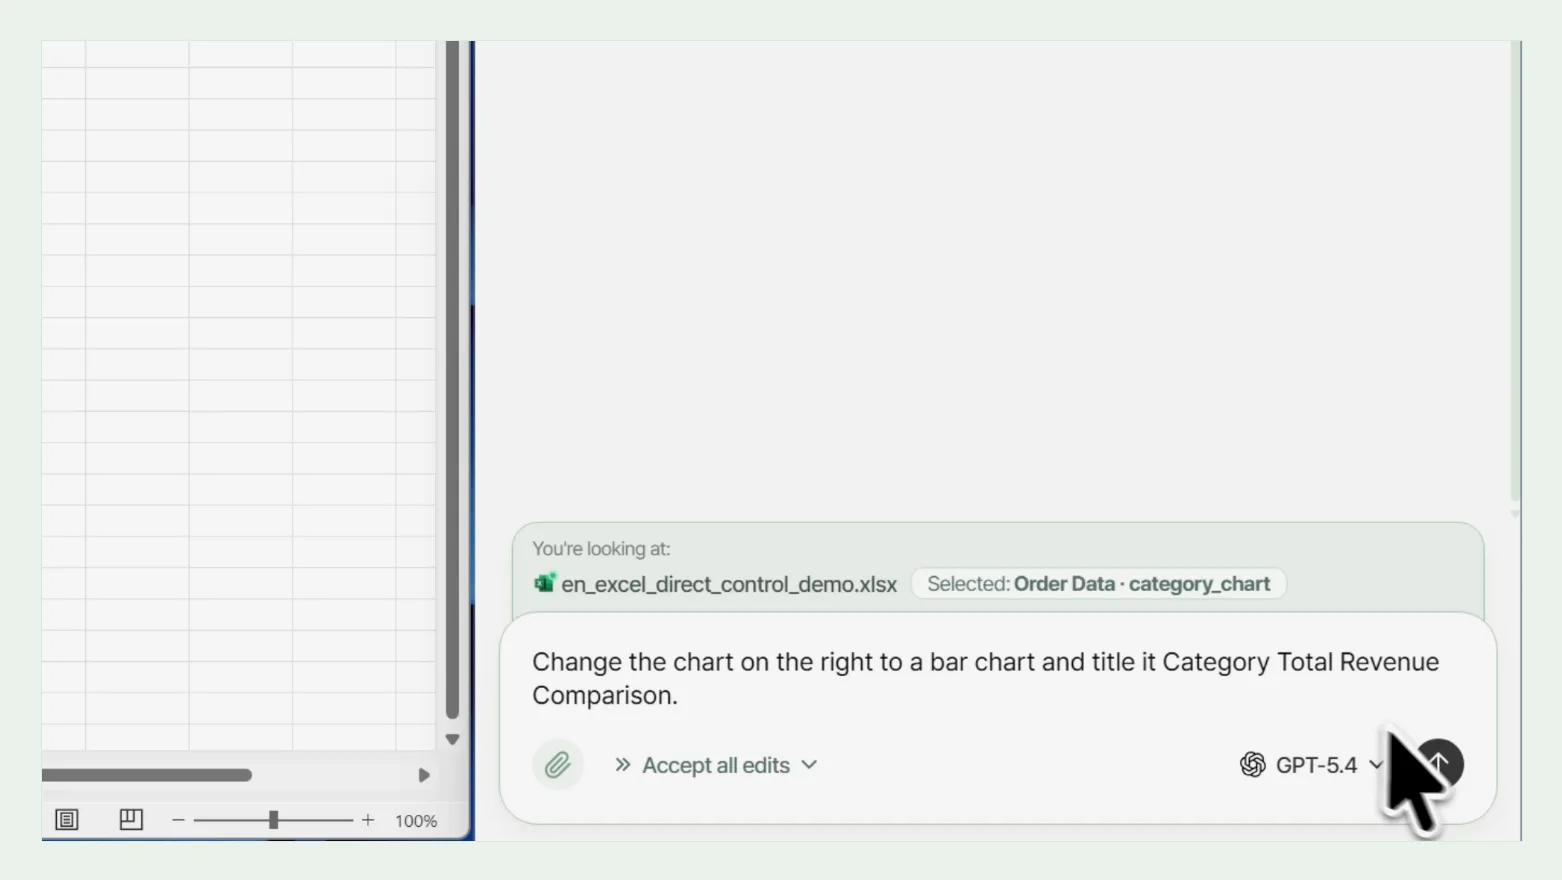
Knowing how to recover files is useful, but if data loss keeps happening, the real fix is changing how you work. When forgetting to save or missing a setting is a recurring pattern, pairing Excel with an automation tool is the effective answer.
With inline AI, autosave setup, version management, and repetitive Excel work are handled in one place. It cleans data and writes formulas for you, which shrinks the total time you spend in a file - and with it, the window for losing work.
If lost files keep eating your hours, try inline AI and make your Excel workflow both safer and faster.
See what an agent could take over at your company in a 30-minute call.