Learn
How to Mail Merge from Excel to Word: Letters, Labels, and Envelopes Step by Step

Imagine you need 200 invitations for a year-end event. The wording is identical on every single one - only the name and address change. Copying and pasting while swapping names one at a time burns through two hours easily, and one typo means starting over.
Mail merge from Excel to Word changes that completely. Connect the recipient list you already keep in Excel to a Word document, and 200 letters with names, addresses, and dates filled in automatically are done in a few minutes.
This guide walks through the whole workflow step by step: preparing the Excel data, connecting it to Word, the setup differences between letters, labels, and envelopes, and how to fix formatting errors when merged data comes out wrong.
What Is Mail Merge? The Bridge Between Excel and Word
Mail merge links the fixed text of a Word document with the variable data in an Excel sheet, generating a personalized document for every recipient automatically. The structure is simple: one document template plus one data table. In Word you choose the output type - letter, labels, or envelopes - and in Excel you keep one row of data per recipient.
Mail merge shines when you send the same announcement personalized per customer, produce documents like event certificates where only the name and date change, or bulk-print address labels and envelopes. And the key to making Word's mail merge behave is getting the Excel data structure right first.
Preparing Your Excel Data Before the Merge
Whether a mail merge comes out clean is decided in Excel before Word ever gets involved. When something breaks in Word, the cause is almost always an ambiguous data structure, mixed formats, or a file that was edited after connecting.
Headers in Row 1, One Value per Cell
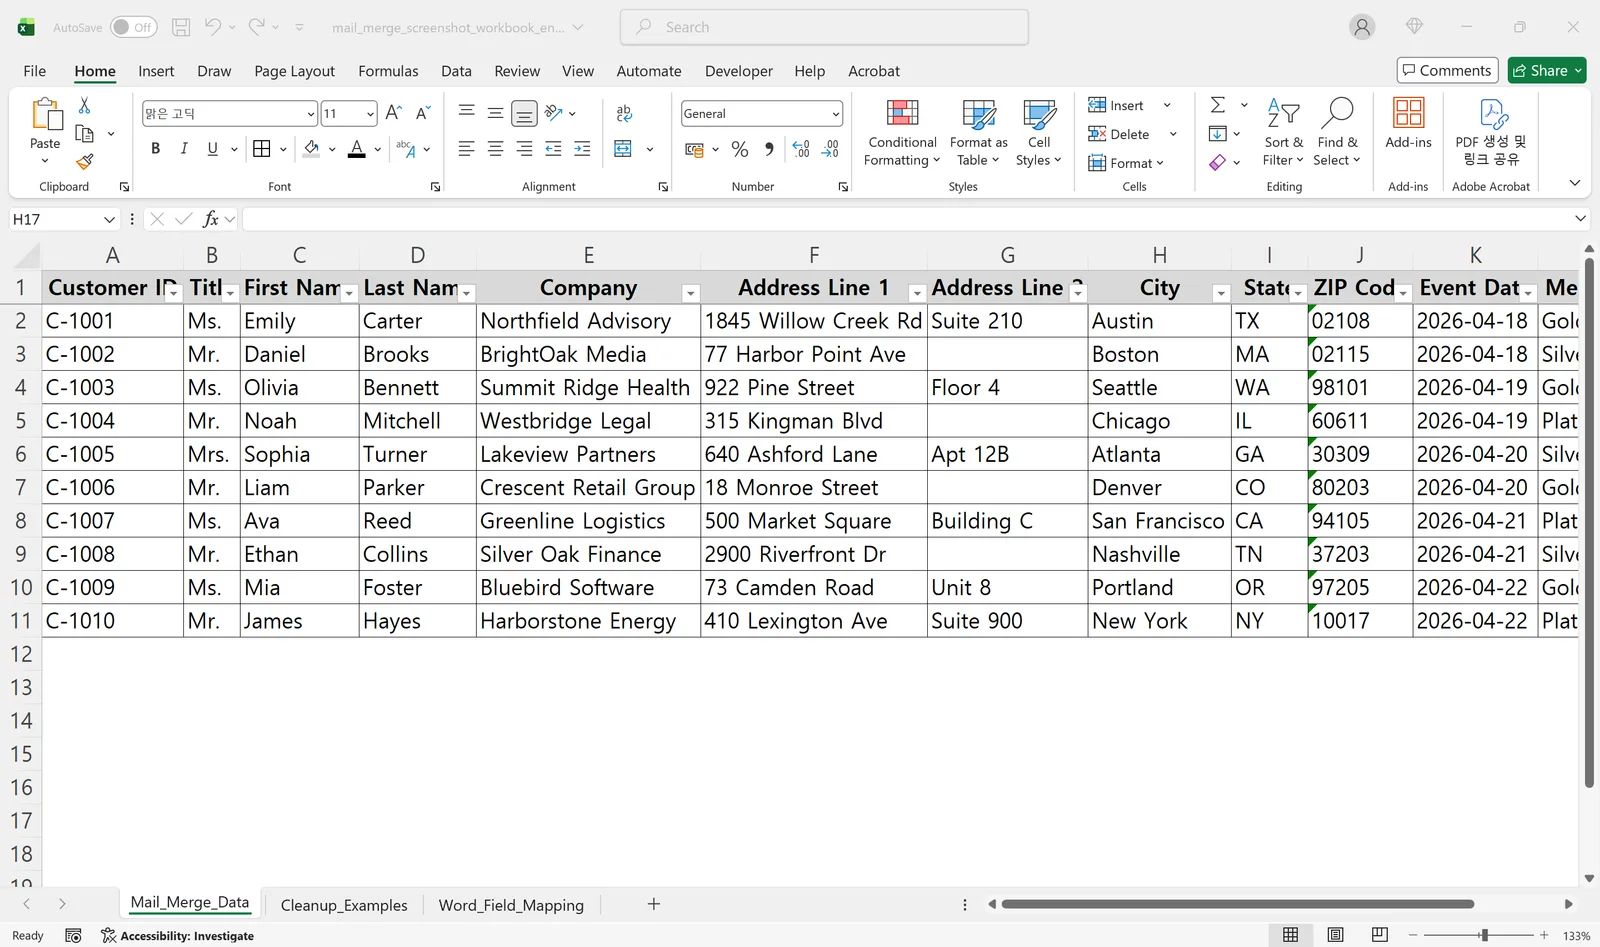
Word reads the column names in your first row and uses them directly as merge field names. So design each column to mean exactly one thing. Splitting items into independent columns - First Name, Last Name, Address 1, Address 2, City, ZIP Code - makes it easy to pick and place only the fields you need in Word.
Cramming a name and a title into one cell, or an address together with its ZIP code, makes label and envelope line layouts awkward. Stick to the rule of one row per person, one column per item, and finish all edits before connecting to Word. Renaming columns or moving sheets after connecting can break field recognition.
Clean Up Empty Cells, Merged Cells, and Stray Characters First
If a required field like a name or ZIP code is empty, letter greetings read strangely and label addresses come out truncated. Optional fields like Address 2, on the other hand, are fine left blank.
Merged cells are effectively forbidden in a merge data table. Word reads your Excel sheet like a row-and-column database, and merged cells can keep it from interpreting the structure reliably. Keep the merge sheet flat rather than formatted for looks.
Address data copied from the web often carries leading and trailing spaces or stray symbols. Tidy it with TRIM, CLEAN, or Find and Replace before saving. And if ZIP codes start with a leading zero, confirm the column is stored as text. If your sheet already has merged cells you need to untangle first, this guide to merging and unmerging cells in Excel covers the cleanup.
Connecting Excel to Word, Step by Step
The Word side of the flow runs in this order: choose the document type, connect the recipient list, place merge fields, preview, and finish the merge. If it's your first time, the Step by Step Mail Merge Wizard makes fewer mistakes than working from the ribbon alone. Three things prepared in advance make it smooth: a Word draft, an Excel file with clean field names, and a fixed local save location.
Connecting the Excel Data Source with the Wizard
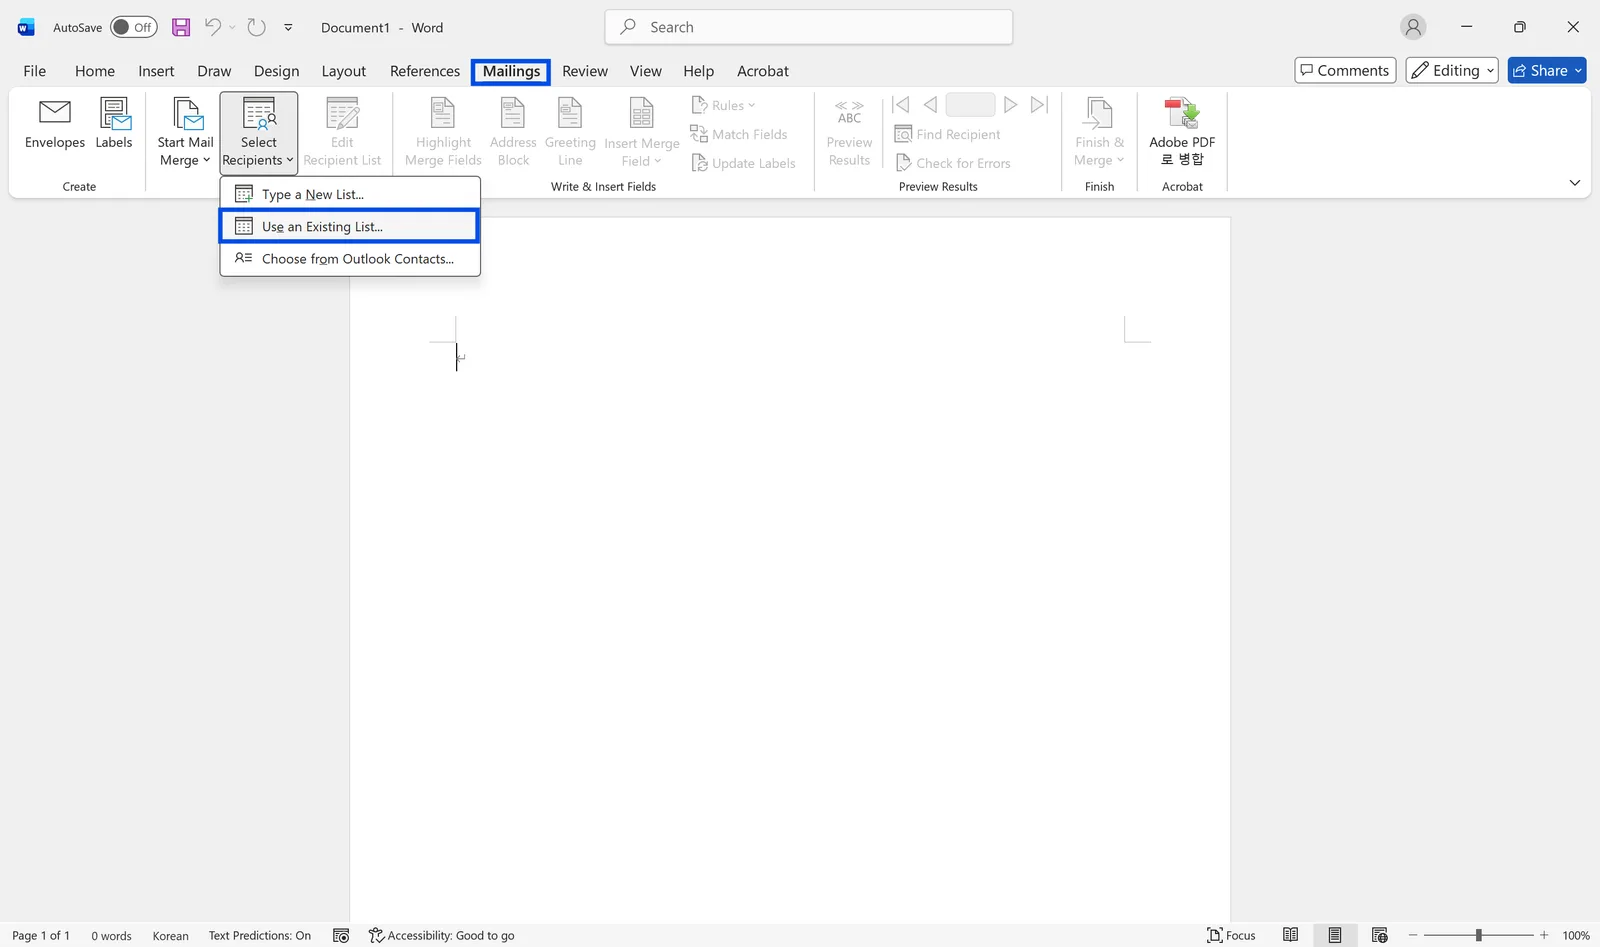
On the Mailings tab, click 'Start Mail Merge' and choose 'Step by Step Mail Merge Wizard'. A task pane with step-by-step guidance appears on the right. First pick the document type: letter, labels, or envelopes. At the recipient selection step, choose 'Use an existing list' and open your Excel file. If the data lives in the first sheet, sheet selection is much simpler.
Once connected, the 'Mail Merge Recipients' window lets you exclude specific people with checkboxes or filter down to recipients matching a condition. After the connection is made, don't rename or move the Excel file.
Inserting Merge Fields and Previewing Results
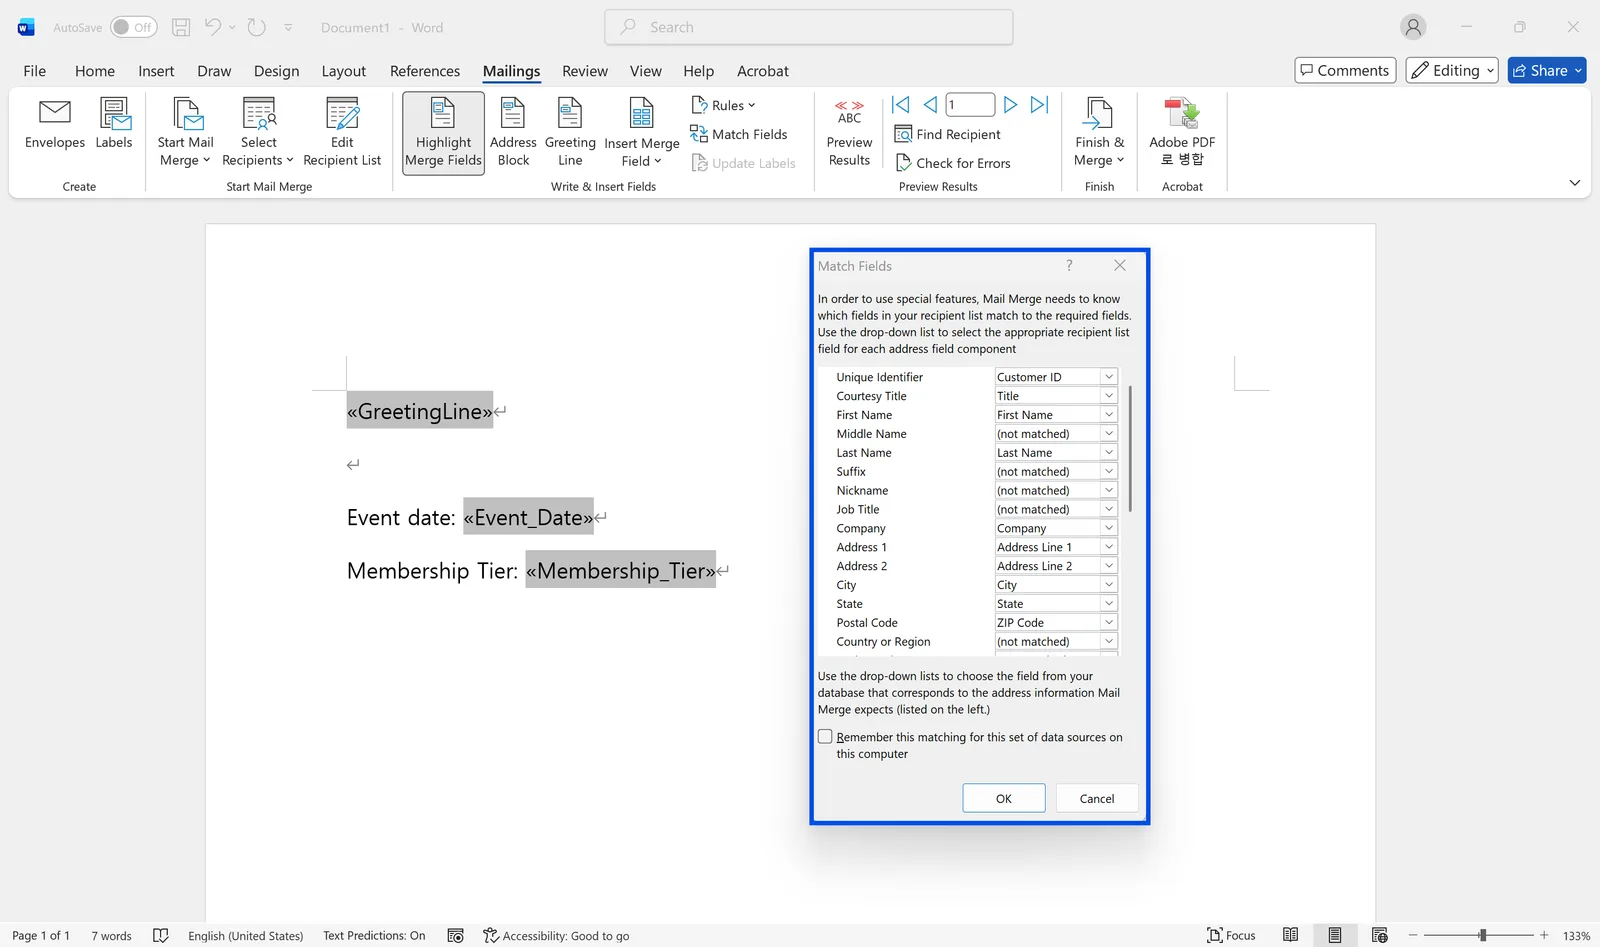
Click 'Insert Merge Field' to see the list of fields tied to your Excel column names. Place one at the top of the letter as Dear <<First Name>>, then drop <<Event date>> and <<Membership Tier>> into the body, and every recipient gets their own version automatically.
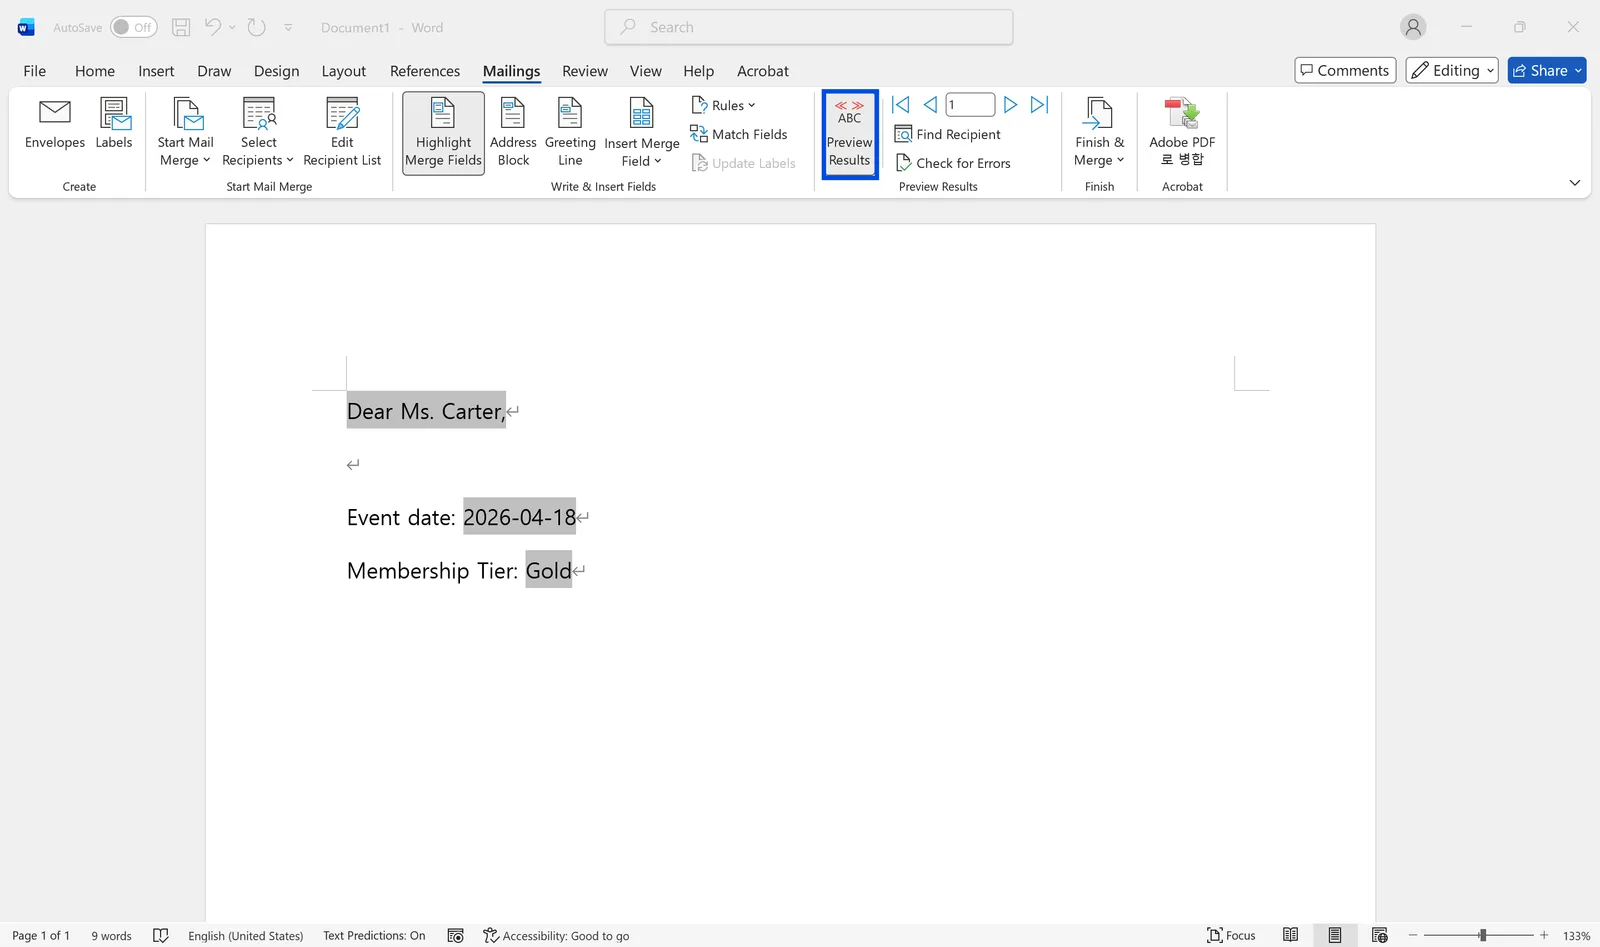
Once all fields are placed, always page through records with 'Preview Results' to check the output. Awkward phrasing from empty fields and broken date or number formats are mostly caught at this stage. When the review is done, choose what you need from 'Finish & Merge' - print, or generate individual documents. Merging to a new document and doing a second review before printing is by far the safer route.
Letters vs. Labels vs. Envelopes: What Changes
The same Excel data behaves differently depending on which document type you pick in Word, and so do the things you need to check. Choose the right type from the start - switching mid-merge scrambles the whole layout.
Letters: Personalized Documents per Recipient
The letter format fits documents where the body is identical but details like the name, date, or contract number vary. Names make greetings possible, but an empty name field makes the sentence read wrong - data completeness in Excel matters that much. For documents with dates or amounts, formatting breakage is common, so page through multiple records in preview. For low-error-tolerance documents like contracts, notices, and certificates, don't print directly: output with 'Edit individual documents,' review, then print.
Labels: Printing a Full Address Sheet at Once
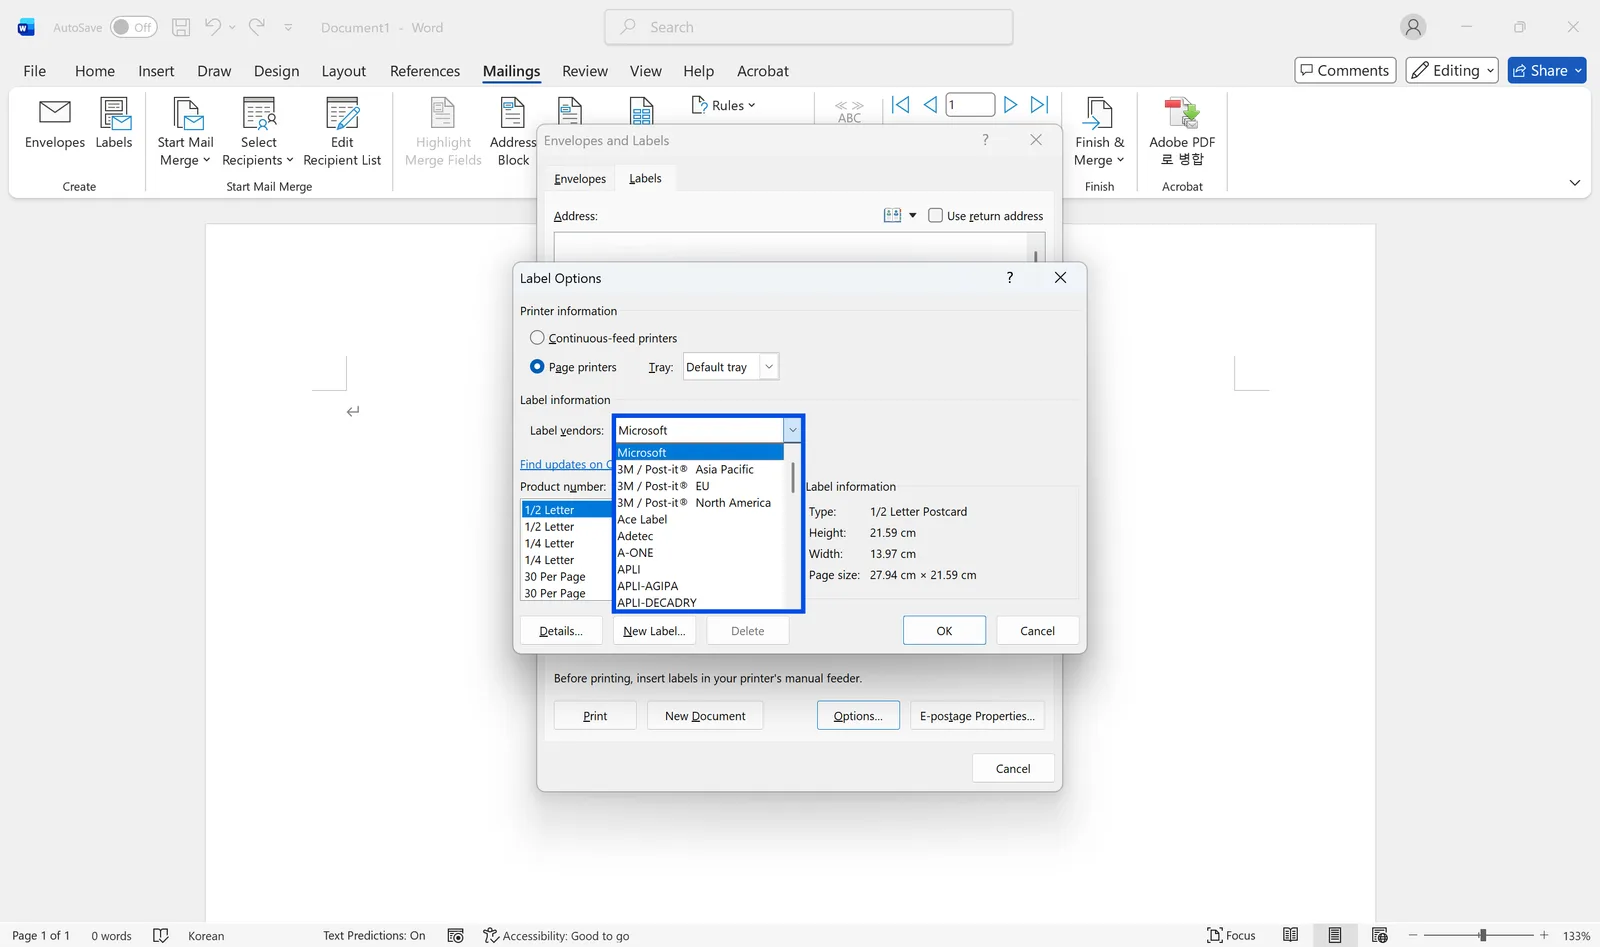
Making mail merge labels from Excel starts with choosing 'Labels' and specifying the manufacturer and product number under 'Label Options'. Enter the product number printed on your label package exactly, or the physical print positions won't line up. The core of label setup: arrange the name and address fields in the first label cell in the line order you want, then update the remaining cells so the same layout replicates across the sheet. Even a slightly off line break or margin can shift printing in the last row or column, so always run a test print.
Envelopes: Size Settings Are Everything
Envelope merges depend on physical size settings far more than letters or labels do. Check the envelope size, where the recipient address block starts, whether the return address prints, and the printer's feed direction - all of it. Even if the on-screen alignment looks right, going straight to a full print run without a test envelope is risky.
Fixing Broken Data and Formats After the Merge
Dates and Numbers Come Out Wrong
A cell can display '2026-04-02' in Excel while Word reads the internal serial number and prints something entirely different. First confirm the column is genuinely stored as a date in Excel. Then check Word's actual output with 'Preview Results'. If the problem persists, you can edit the merge field code directly in Word to force a date format. Check leading-zero ZIP codes are stored as text while you're at it.
The "Data Source Could Not Be Found" Error
This error means the merge document can no longer find the Excel file it was connected to. Moving or renaming the source file is the usual cause. The fix is reconnecting the list through 'Select Recipients'.
In practice, connections break because files keep getting renamed - 'customer list_final.xlsx', 'customer list_finalfinal.xlsx', and so on. Lock the merge source file's name and location, and keep edited copies as separate backups. While you're cleaning the list, it's also worth removing duplicate recipients the right way so nobody gets two letters.
Mail Merge from Excel to Word: FAQ
Q. Does the merge create one file per recipient?
No. Choosing 'Edit individual documents' under 'Finish & Merge' generates every record as pages inside a single Word file. Recipients stack up in one document rather than splitting into separate files.
Q. If I edit the Excel data, does Word update automatically?
No. Changes in Excel only show up after you reopen Word or refresh the recipient list.
Q. Can I insert different wording based on a condition?
Yes. Word's 'Rules' feature supports 'If...Then...Else...' conditions, inserting different text automatically depending on a field's value.
Q. Can a CSV file be the data source?
It can, but CSV files frequently run into encoding problems and date or number format issues. An .xlsx file is the more reliable data source.
Make Mail Merge Prep Smarter with inline AI
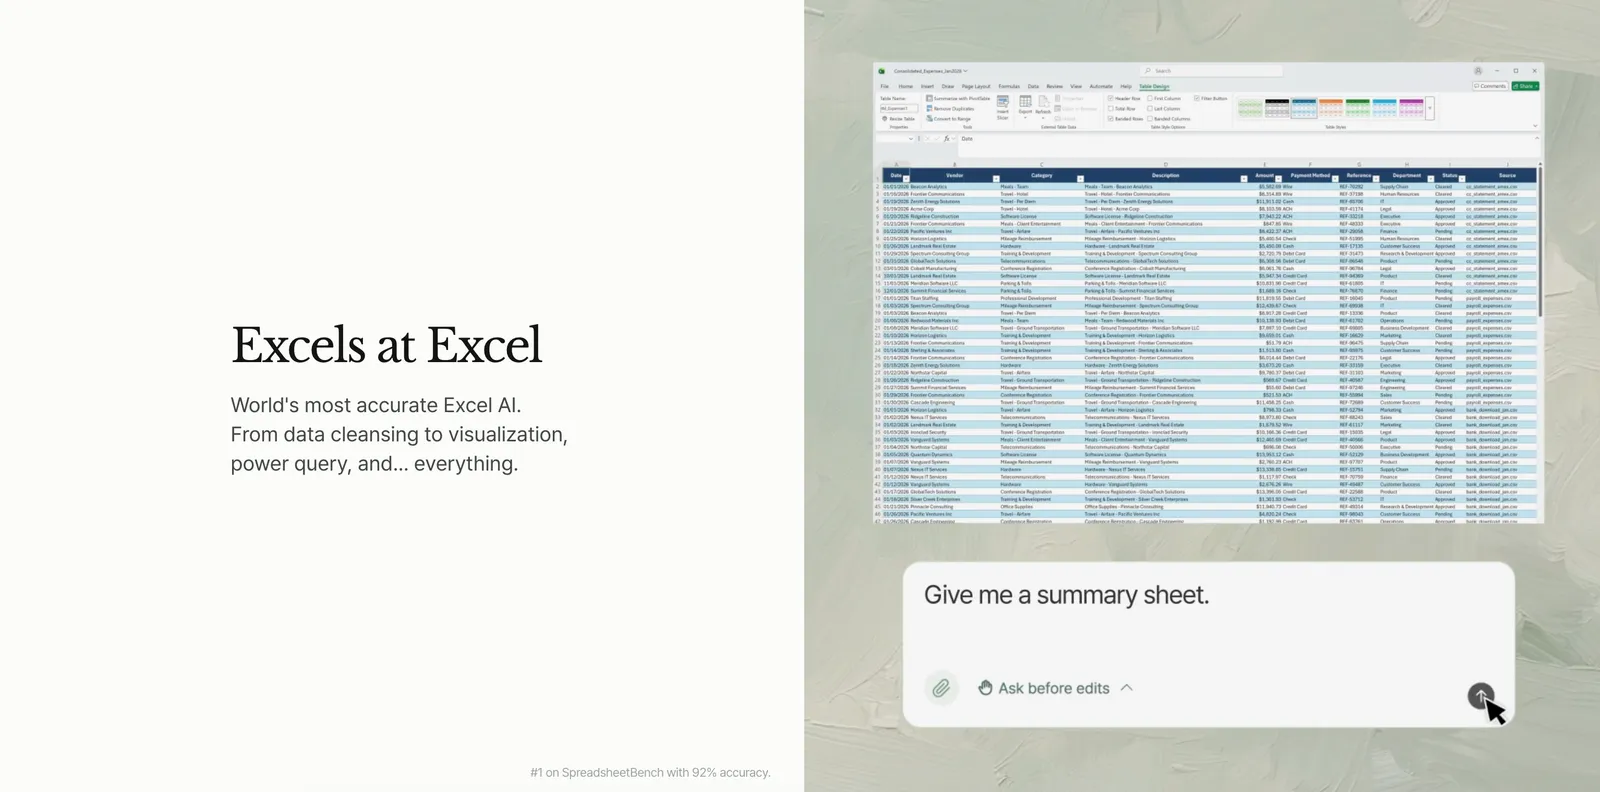
Now that the Excel-to-Word workflow is in your toolkit, the next step is automating the repetitive part. Cleaning column headers, hunting for empty cells, fixing date formats one at a time before every merge - why keep doing that by hand?
inline AI is the first local agent that works directly on top of your Excel and document files. Ask in plain language, like "calculate the standard deviation of this column," and it reads the Excel file and edits it in real time.
It runs locally on your PC without uploading data to the cloud, so even sensitive lists stay safe. Download it now and see what your Excel workflow looks like with the busywork gone.
See what an agent could take over at your company in a 30-minute call.