Learn
Replace All Fonts in PowerPoint: Unify Every Slide at Once

There are two separate ways to replace all fonts in PowerPoint, and picking the wrong one is why the problem keeps coming back. One swaps the text that already exists in the deck. The other changes the document's baseline so every slide you add from now on inherits the right typeface. They edit different layers, so if you only do the first, the deck looks clean today and drifts again the moment someone appends three more slides next week.
This guide walks through both, in the order that actually works, and then covers the awkward cases: placeholders that ignore the change, pasted slides that dragged a second master in with them, and fonts that look wrong only on someone else's laptop.
Why PowerPoint Decks End Up With Mixed Fonts
Three ways the mismatch gets in
The most common one is a shared deck. Several people build their own slides, someone copies them into a single file, and pasted slides usually carry their original formatting with them. Two or three typefaces now live in the same presentation.
The second is borrowed material: a template, a sample slide, or a chart lifted from a vendor PDF and dropped into the middle of your deck. The third is quieter. If a font isn't installed on the machine that opens the file, the system substitutes something close and displays that instead. Save the file on that machine and the substitution can become permanent.
Direct formatting vs theme fonts: which layer to fix
Font settings in PowerPoint stack in three layers. The lower layer is the default, and whatever is set on a higher layer wins.
- Formatting applied directly to a shape or a run of text (highest priority)
- Placeholder formatting on the layout and the slide master
- The theme fonts applied to the whole document (one for headings, one for body)
If you change layer 3 and nothing on screen moves, that text has layer 1 set on it. Strip layer 1 only, and the deck looks tidy right up until you insert a new slide and the old font reappears. That's the whole reason both layers need attention.
The order to work in
The sequence below is the one that holds up, and it's the order the rest of this article follows.
- Find out which fonts are actually in the file.
- Use Replace Fonts on the Home tab to swap the existing text in bulk.
- Set the theme fonts in Slide Master so new slides inherit them.
- Clean up the few leftover shapes by hand.
Find Out Which Fonts Are Actually in the Deck
Scan everything in Slide Sorter
Before you change anything, you need to know how big the mess is. On the View tab, click Slide Sorter and every slide drops into one screen as a thumbnail grid, which makes an odd title or a heavier body font easy to spot.
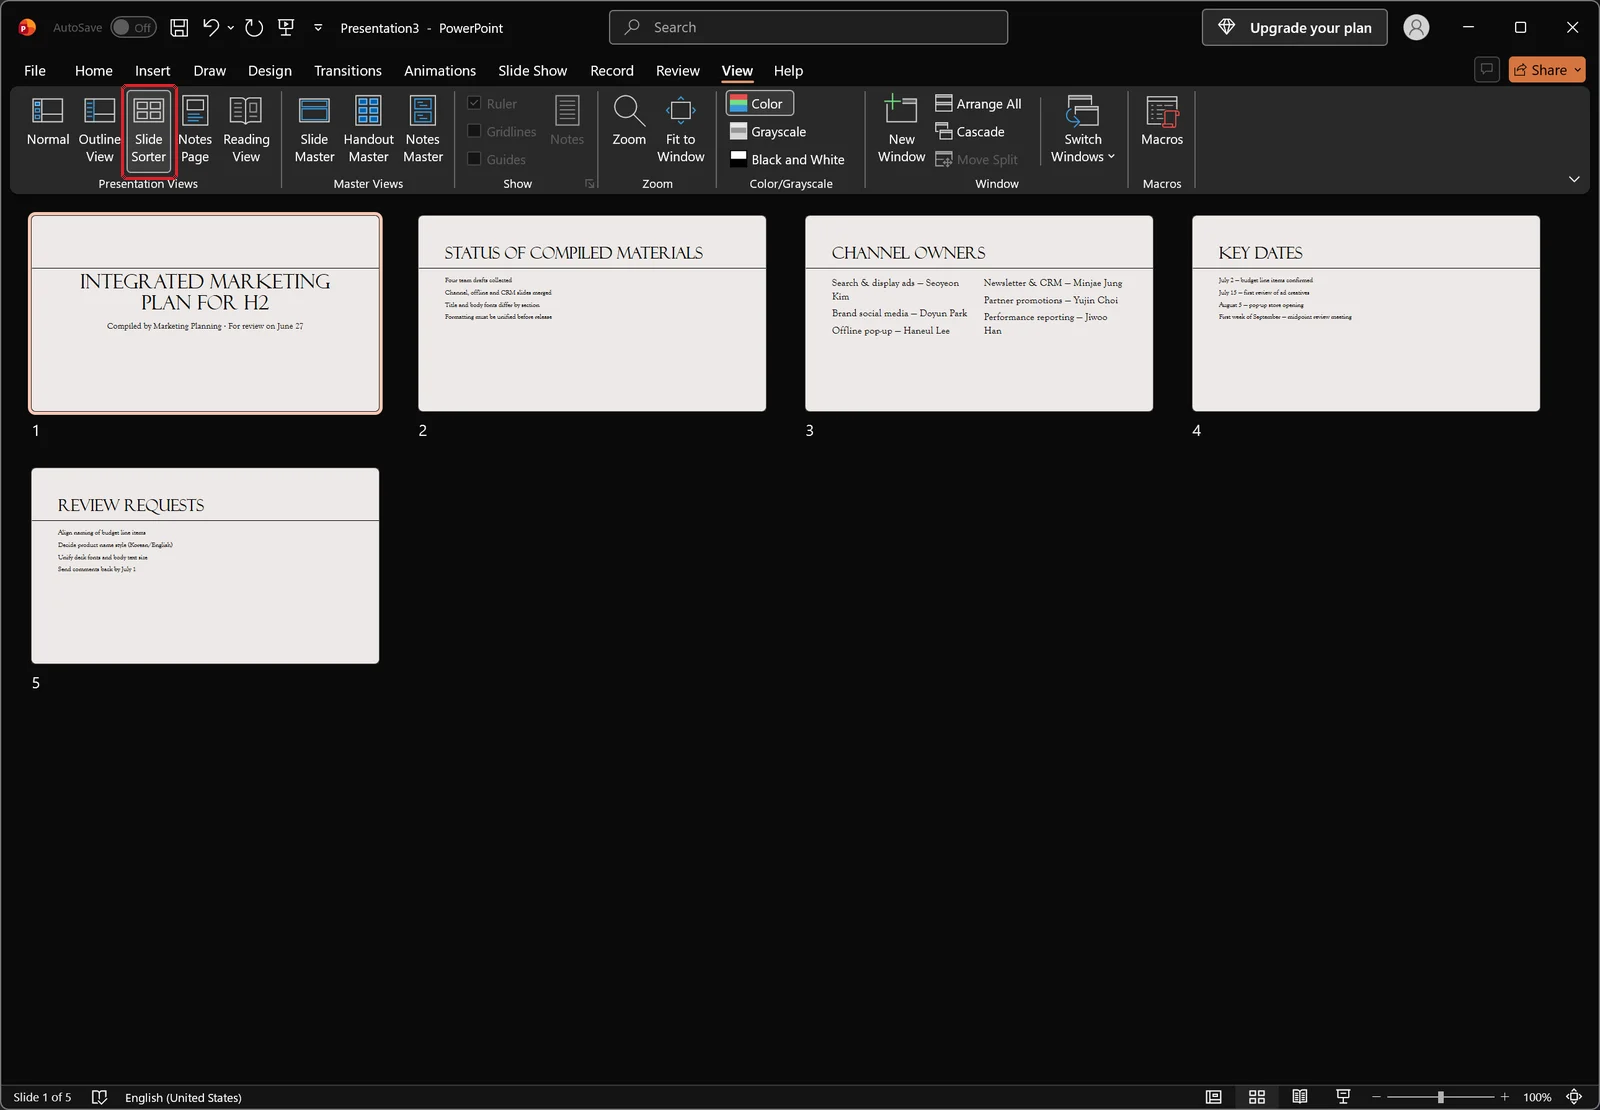
Thumbnails are better for this than they sound. At small sizes, differences in stroke weight and letter spacing stand out more than they do at full scale. Jot down the slide numbers that look off so you have something to verify against later.
Compare text only in Outline View
Switching to Outline View on the View tab strips the deck down to titles and body text in the left pane. With shapes and images out of the way, it's easy to see which slide's bullets were typed in a different face.
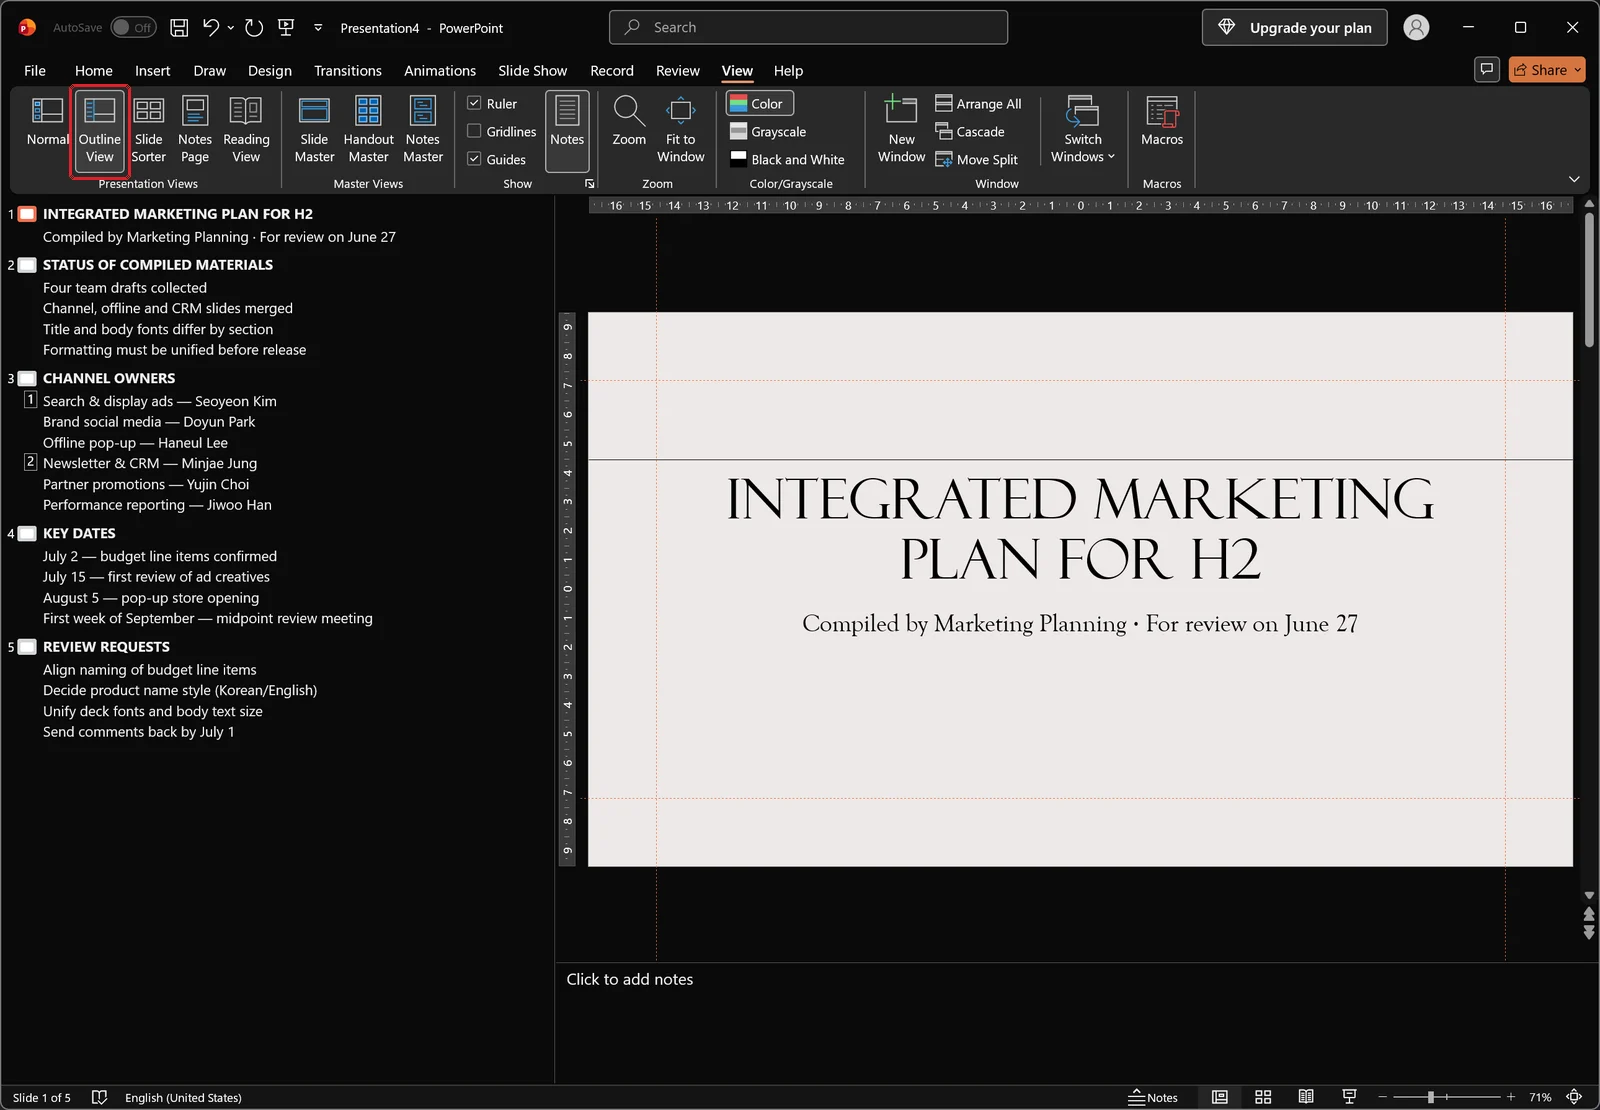
One caveat: Outline View only shows text that lives in a placeholder. Free-floating text boxes, text inside tables, and SmartArt labels never appear here. Those elements need a separate pass later.
Click a shape to read the font name
For the exact font name, select the shape. Click any text-bearing shape and the Font box on the Home tab shows what it's using. If the selection contains two or more fonts, the Font box goes blank. That blank is useful information on its own: it means the fonts are mixed inside a single shape.
Unify Every Slide With Replace Fonts
Where Replace Fonts lives
The command that swaps a font across the entire file sits at the right end of the Home tab, in the Editing group, alongside find and replace and Select. The one you want is Replace Fonts...
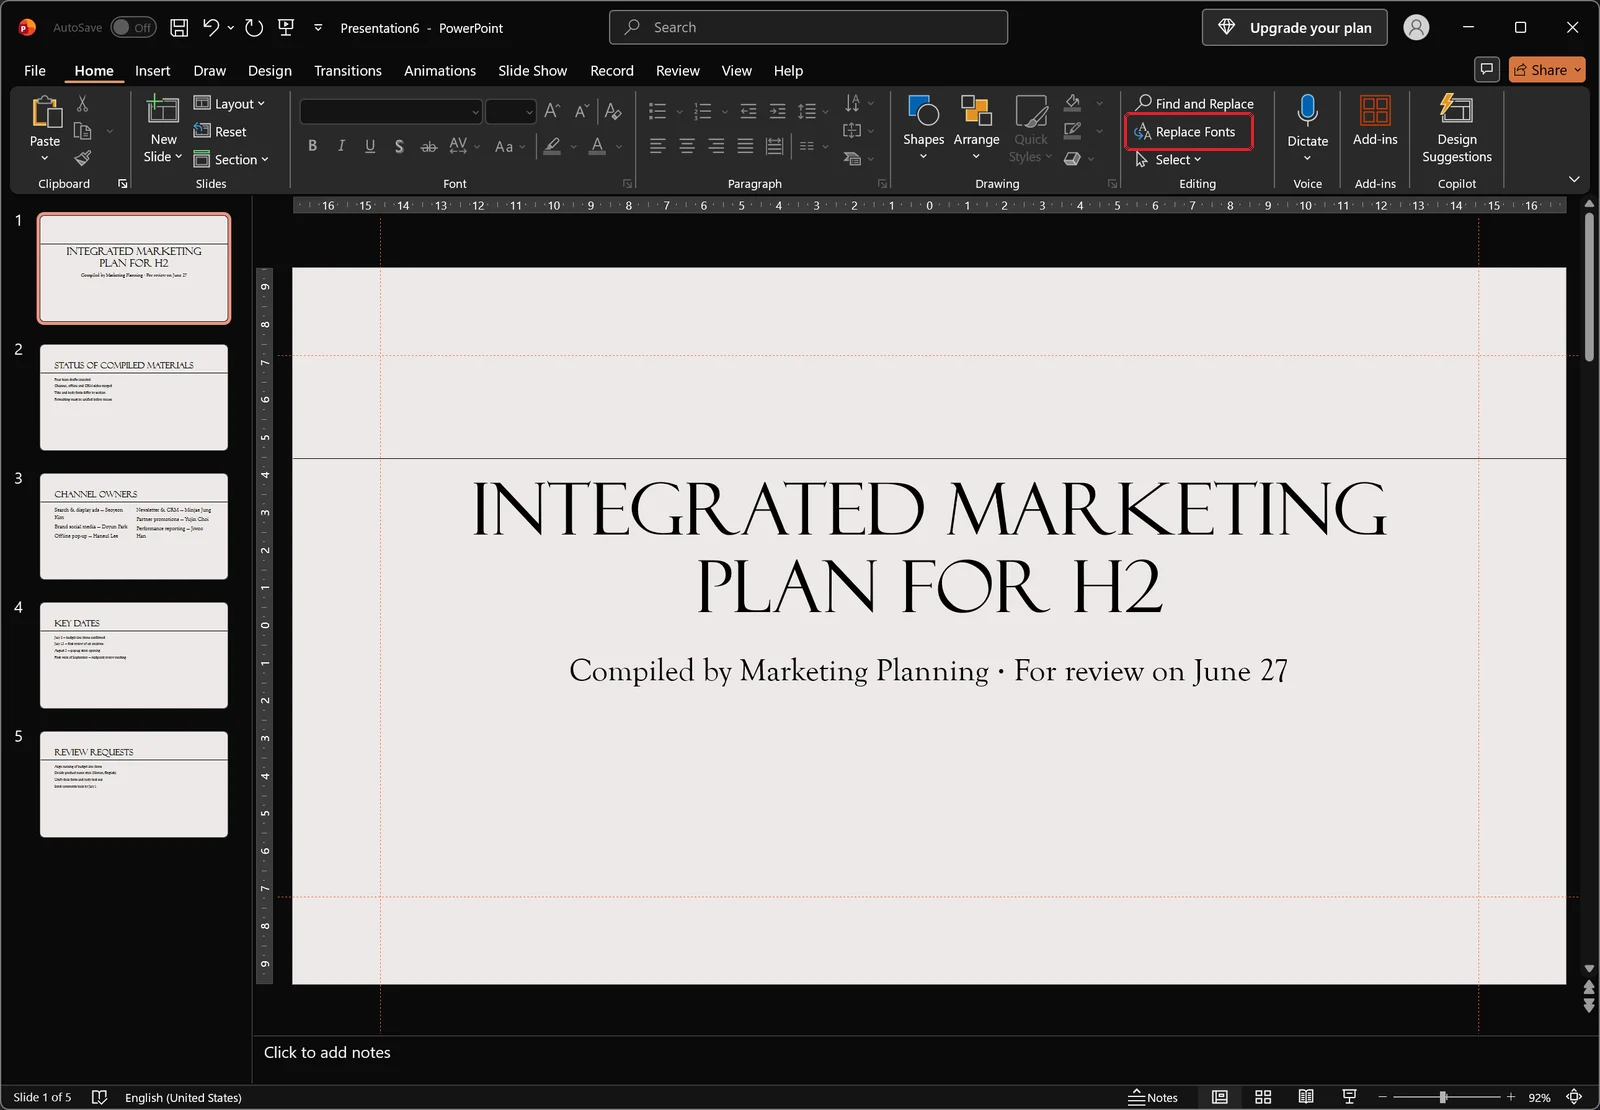
You don't need to select slides first. It applies to the whole presentation, so running it with your cursor on slide 1 still updates the last slide in the deck. Ctrl+Z undoes it if the result isn't what you wanted, so saving the file once beforehand is precaution enough.
Choose the old font, then the new one
The dialog asks for the font to replace and the font to replace it with. The top list only shows fonts that are genuinely in use in this file, which makes it a diagnostic in itself: three entries in the list means three typefaces are living in your deck.
Pick the one you want gone, choose the target font underneath, and every piece of text set in the old font changes at once.
Repeat for each font in the list
Replace Fonts handles one typeface per run. If the list has four fonts and you want a single one, that's three passes. The list shrinks each time you run it, so keep going until only your chosen font remains.
This is also where Ctrl+A causes confusion. Opening Select in the Editing group shows a select-all command, and Ctrl+A does the same thing.
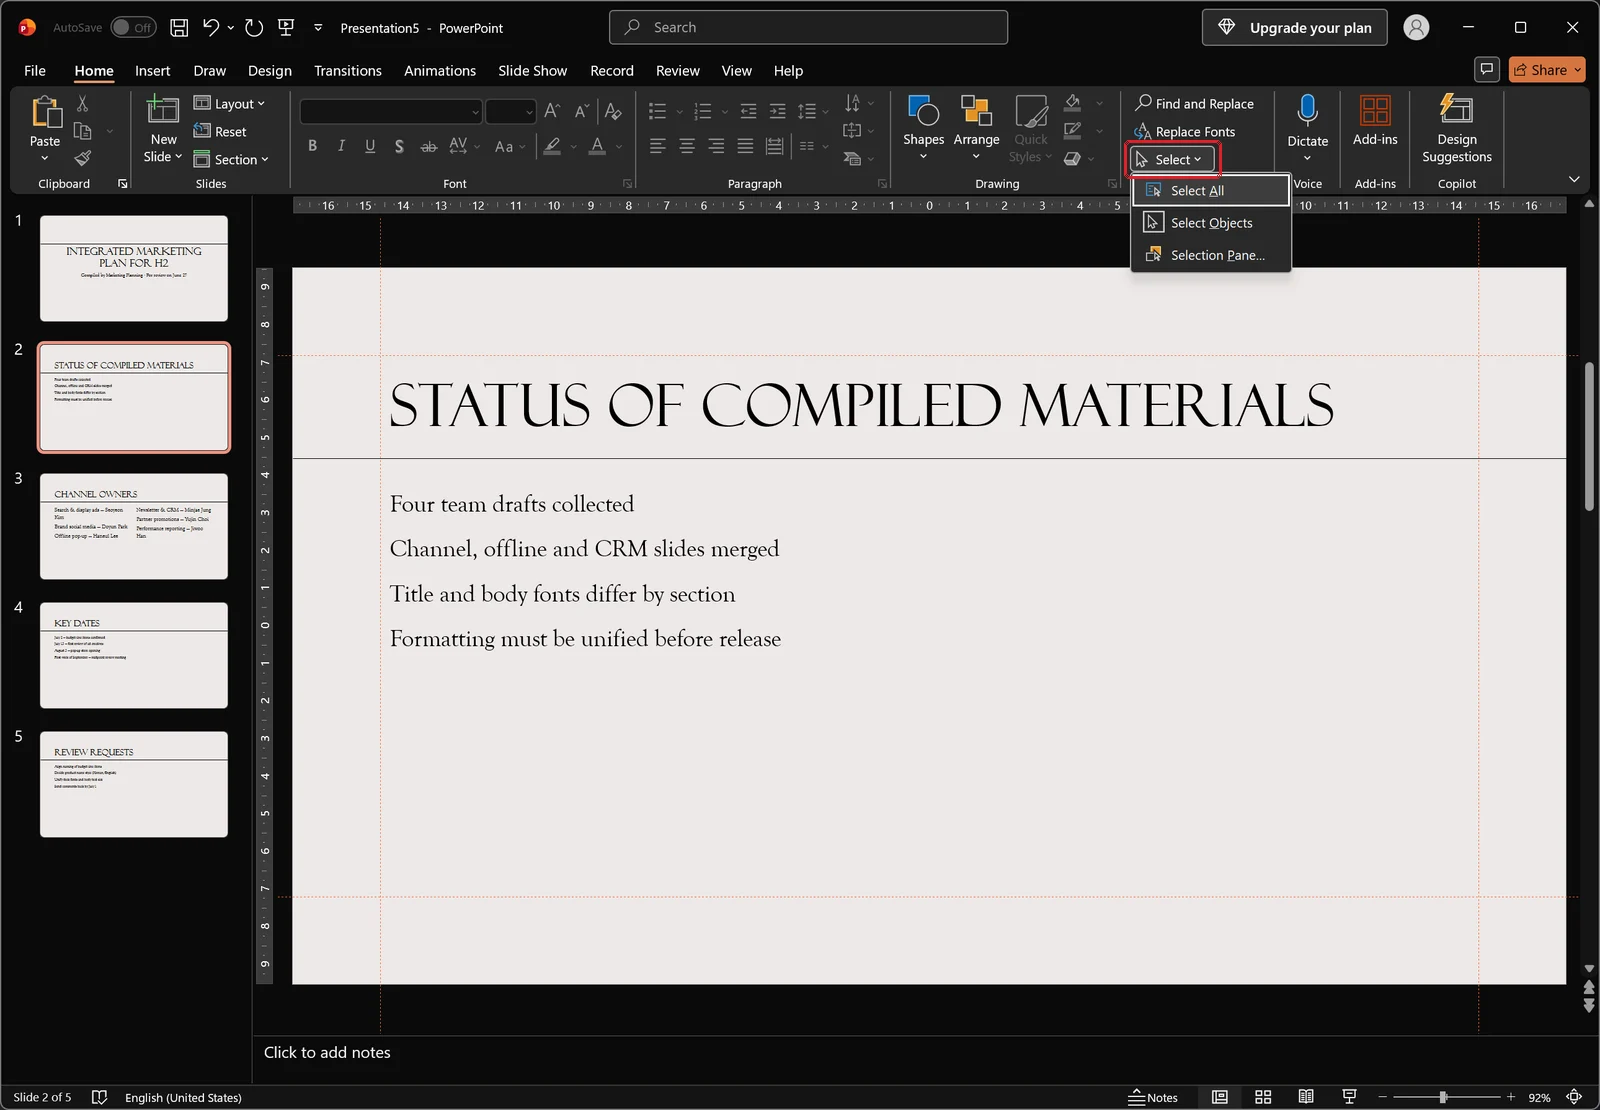
But that selects objects on the slide you're currently looking at, and nothing else. Change the Font box with that selection active and you've fixed exactly one slide. It's quick for a page or two; for the whole file, Replace Fonts is the reliable route.
Once the passes are done, the title and body text share a single typeface across the deck.
Use the Font dialog for size and weight
Matching the typeface fixes most of it, but if sizes or weights are still inconsistent, select the text and press Ctrl+Shift+F to open the Font dialog. It also separates the Latin text font from the Asian text font, which is where you'll find the answer if the words changed but the numbers and English words kept their old shape.
👉 How to Change Line Spacing in Word: 1.5, Exact pt, and Fixes
Lock It Down With Slide Master Theme Fonts
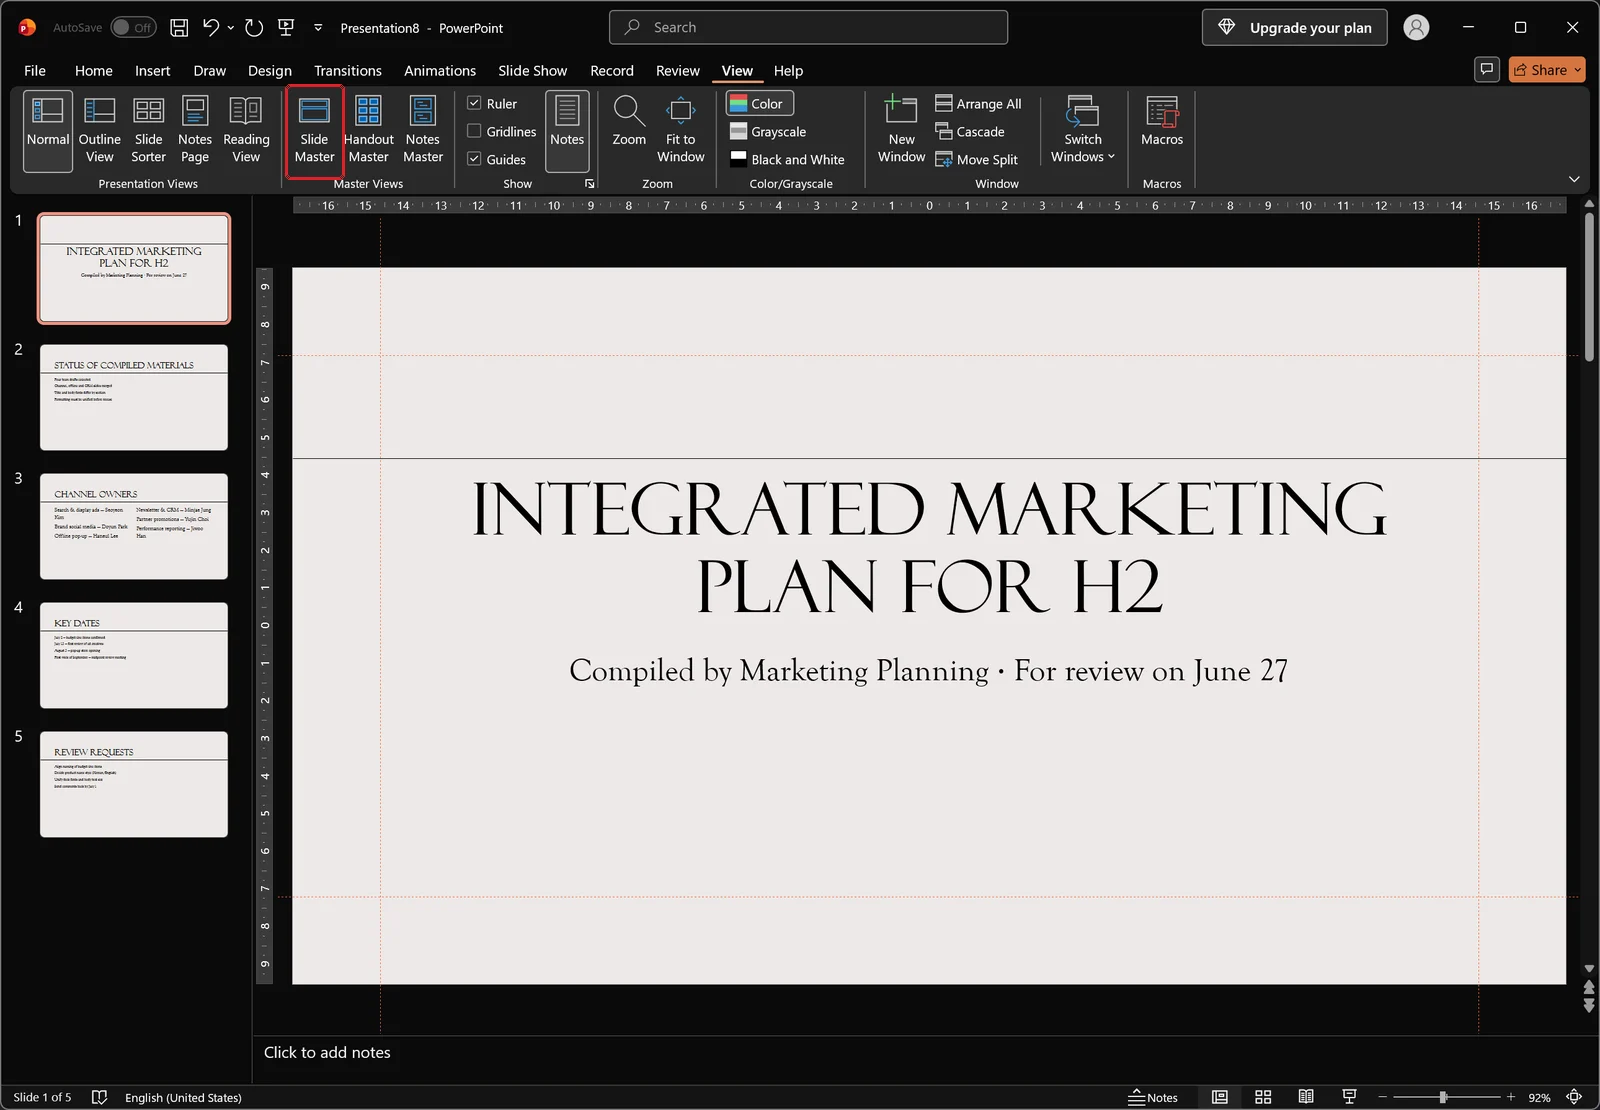
Open Slide Master from the View tab
Replace Fonts only touches text that already exists. Add a new slide after your cleanup and the placeholders come back in the old font. To break that loop, you have to change the document's baseline. On the View tab, in the Master Views group, click Slide Master.
Set the theme fonts on the master itself
Once you're in Slide Master view, the ribbon switches to the Slide Master tab and the left pane shows the master at the top with its child layouts indented beneath it. If the list is long, it can open already scrolled down, so scroll back up to find the master.
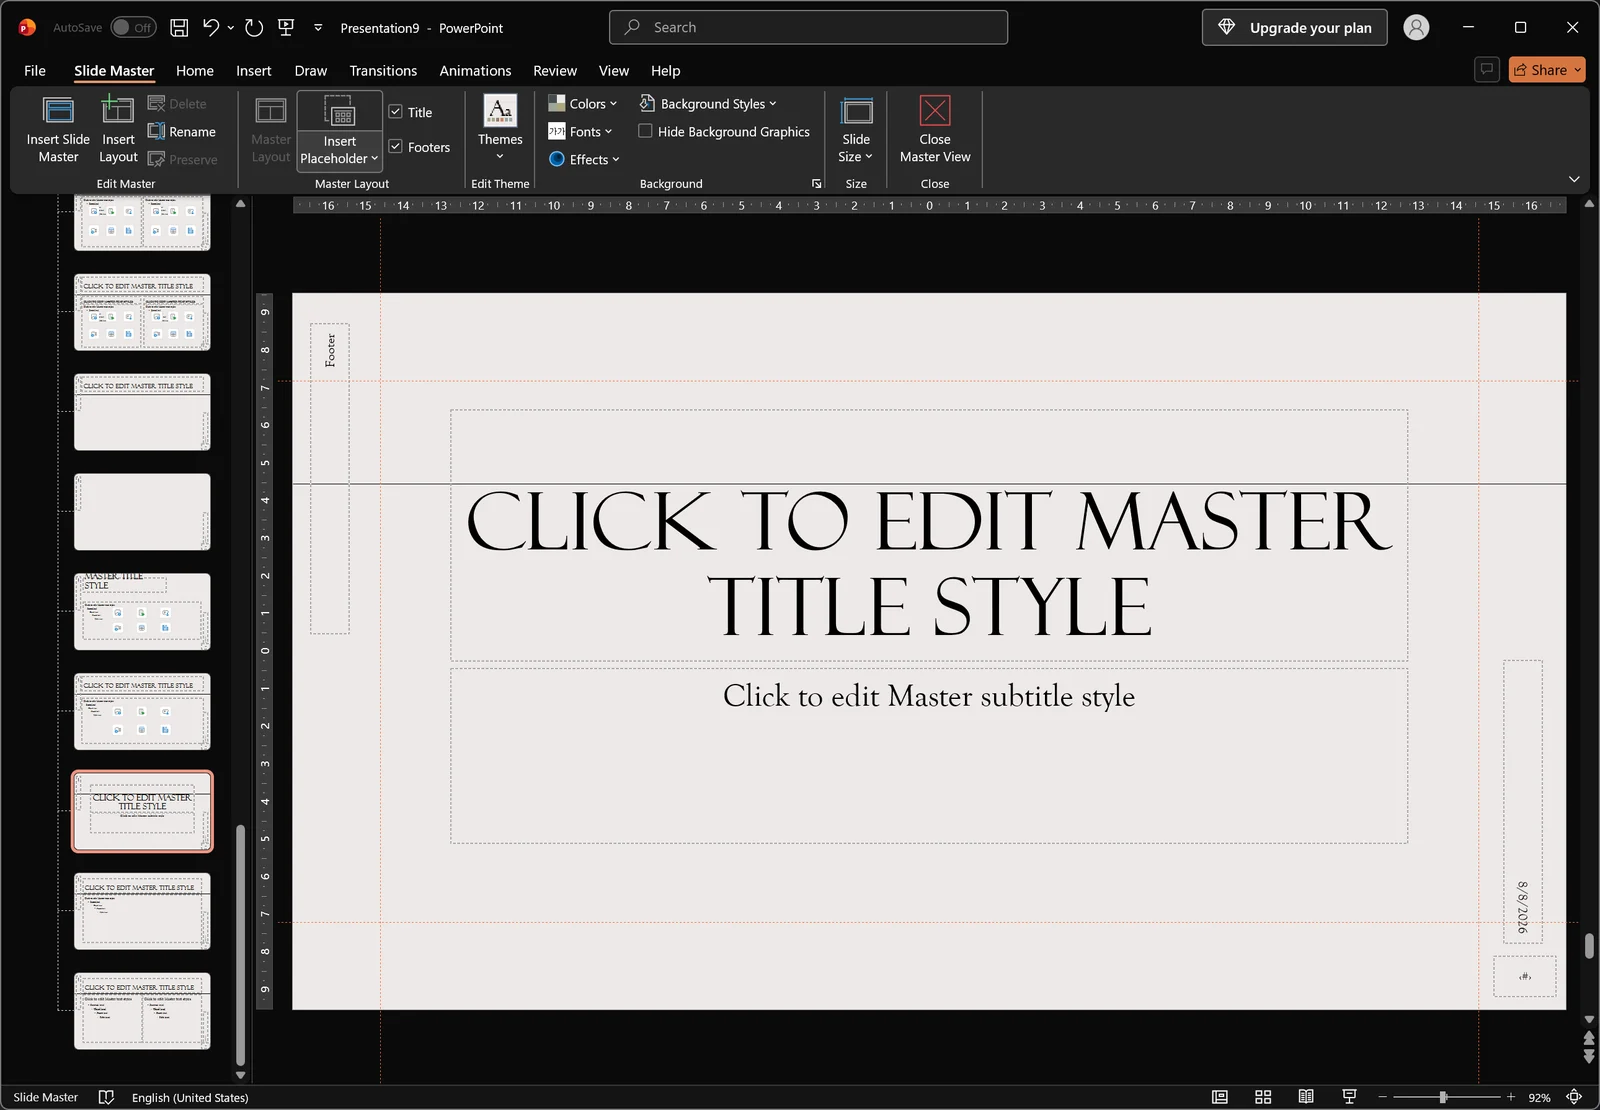
Click the top-level master first, then choose a font set from Fonts on the Slide Master tab. This matters. If a child layout is selected when you make the change, only slides using that one layout pick it up. Theme fonts come as a pair, one for headings and one for body, so choosing a set fills both slots at the same time.
Swap the whole theme instead
If you want the typography and the visual design to change together, use the Themes gallery on the Design tab. Expanding it shows the current presentation at the top, then a grid of theme thumbnails, each with its own heading and body font pairing and its own color scheme.
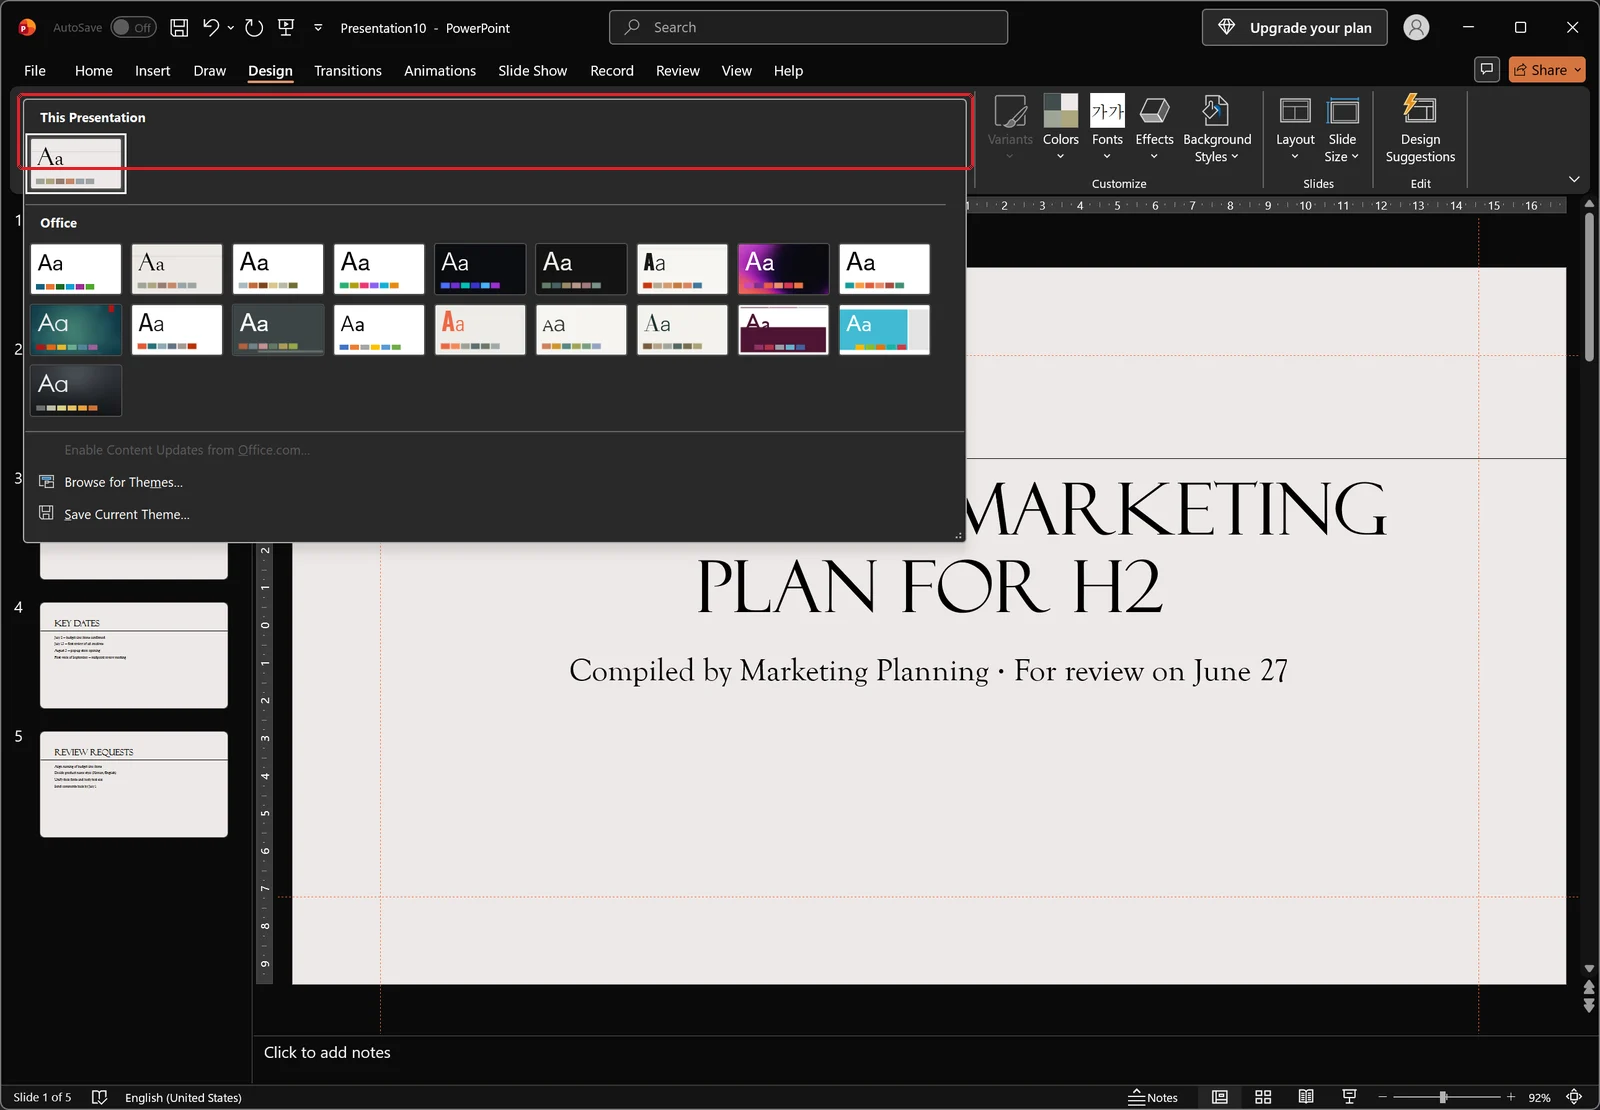
Be aware that a theme changes colors and effects as well as fonts. For an internal deck that already follows a brand palette, adjusting only the font set is the safer move.
Confirm the change took
Close Master View to return to normal editing, then insert one new slide. If the title and body placeholders come in with your new font, the baseline is set correctly. If some existing slides still look wrong, those have direct formatting on them, which the next section covers.
When the Font Refuses to Change
Direct formatting: Reset and Clear All Formatting
If someone manually set a font inside a placeholder, changing the master does nothing to it. Select the slide and click Reset in the Slides group on the Home tab. The placeholders snap back to the layout's position and formatting.
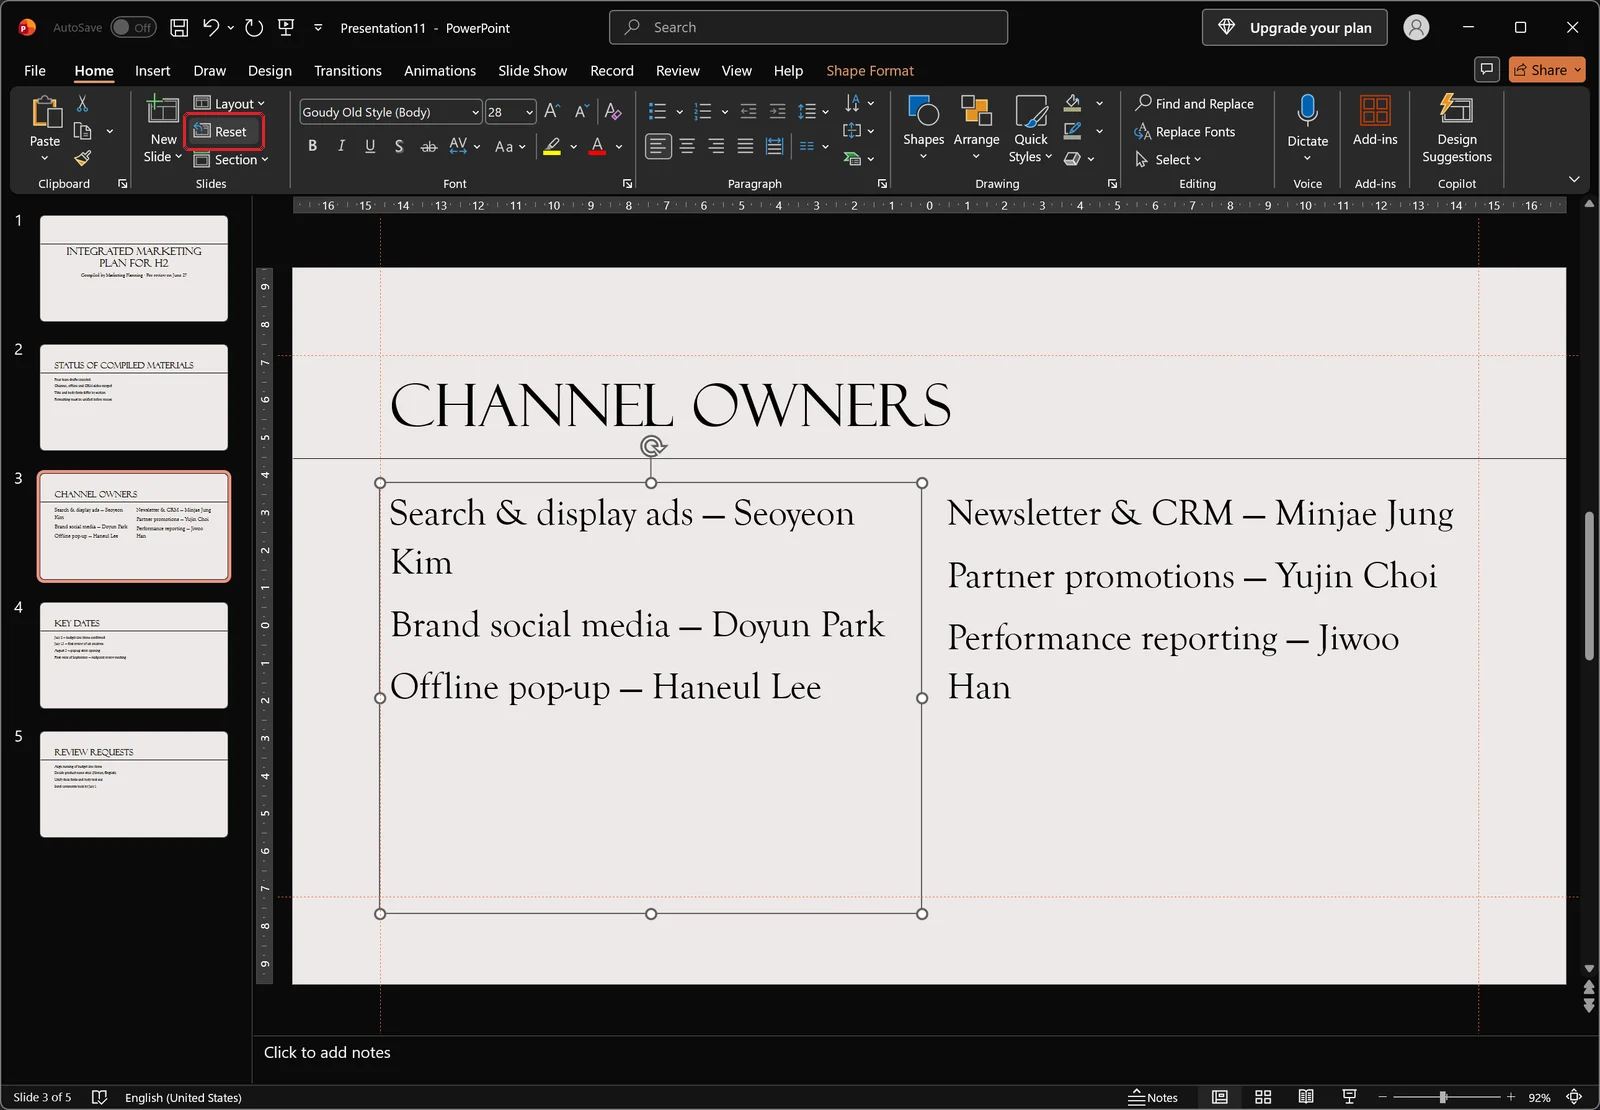
Reset has no effect on ordinary text boxes, since they aren't placeholders and have no layout to return to. For those, select the text and use Clear All Formatting in the Font group.
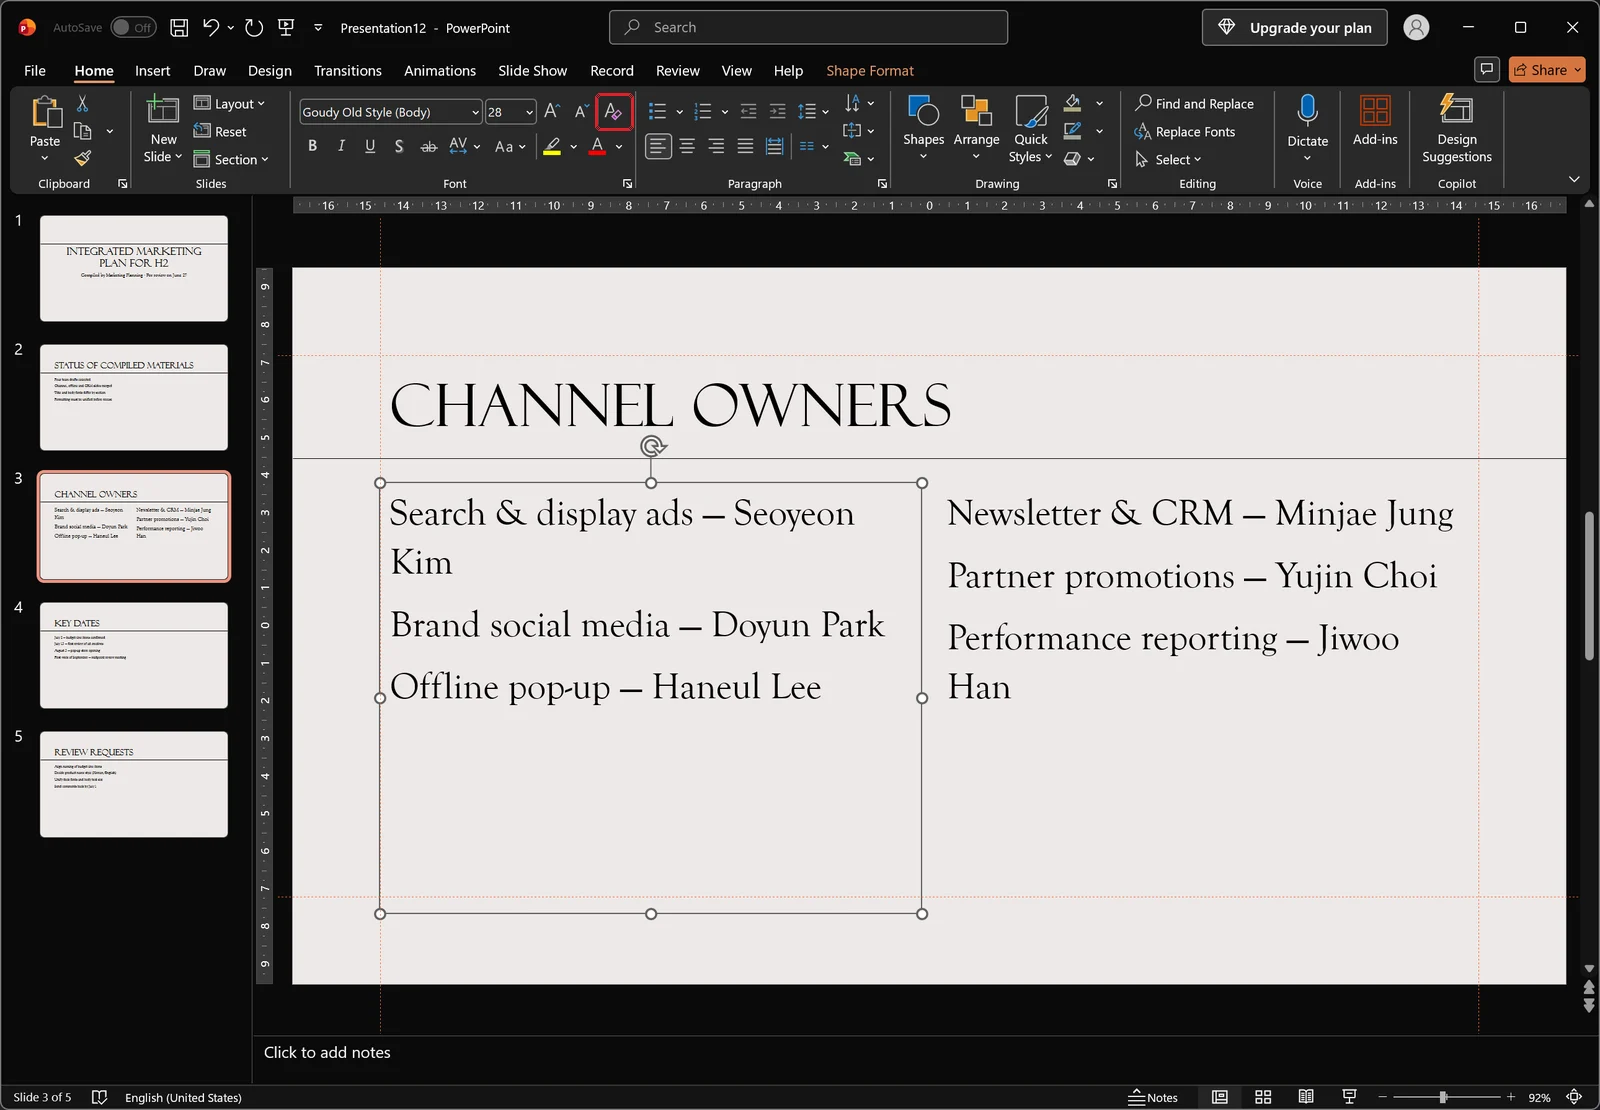
Clear All Formatting wipes color, weight, and size along with the font, so on text that carries deliberate emphasis, treat it as clear-then-reapply rather than a quick fix.
Text boxes, tables, charts, and SmartArt
Theme fonts operate through placeholders. Text boxes drawn in later, table cells, chart axis labels, and text inside SmartArt shapes often don't follow when you change the master.
Replace Fonts catches most of these. Anything still standing out afterward has to be selected and set directly.
Latin and Asian fonts set separately
A classic symptom in bilingual decks: the East Asian text updates, while the English words and numbers keep their old shape. That happens because the Font dialog stores a Latin text font and an East Asian text font as separate settings. Press Ctrl+Shift+F and check that both are what you expect.
Pasted slides carrying a second master
Bringing slides in from another file sometimes imports the source master along with them. You'll see it immediately in Slide Master view: two or more masters listed in the left pane. When that happens, fixing one master doesn't clean up the file. Either match the fonts on every master, or reapply one of your existing layouts to the imported slides.
A font that isn't installed on this PC
If the Font box reads the name you want but the letters look wrong, the font isn't installed on this machine and the system is drawing a substitute. That's a machine problem, not a file problem. Install the font, or standardize the deck on something that ships with every install.
👉 Excel Print on One Page: Fit a Wide Table Using Page Layout
Shortcuts and a Final Pass
Shortcuts worth remembering
- Ctrl+A — select every object on the current slide
- Ctrl+Shift+F — open the Font dialog
- Ctrl+Shift+C / Ctrl+Shift+V — copy formatting / paste formatting
- Ctrl+Z — undo the replacement you just ran
Replace Fonts has no default shortcut of its own. If you use it constantly, right-click the command and add it to the Quick Access Toolbar so you can trigger it with Alt plus a number.
Format Painter for the last few holdouts
When only a handful of shapes are left, Format Painter is the fastest way to finish. Select the text you want to match, click Format Painter in the Clipboard group on the Home tab, then click the shape you're fixing. Font, size, and color all transfer.
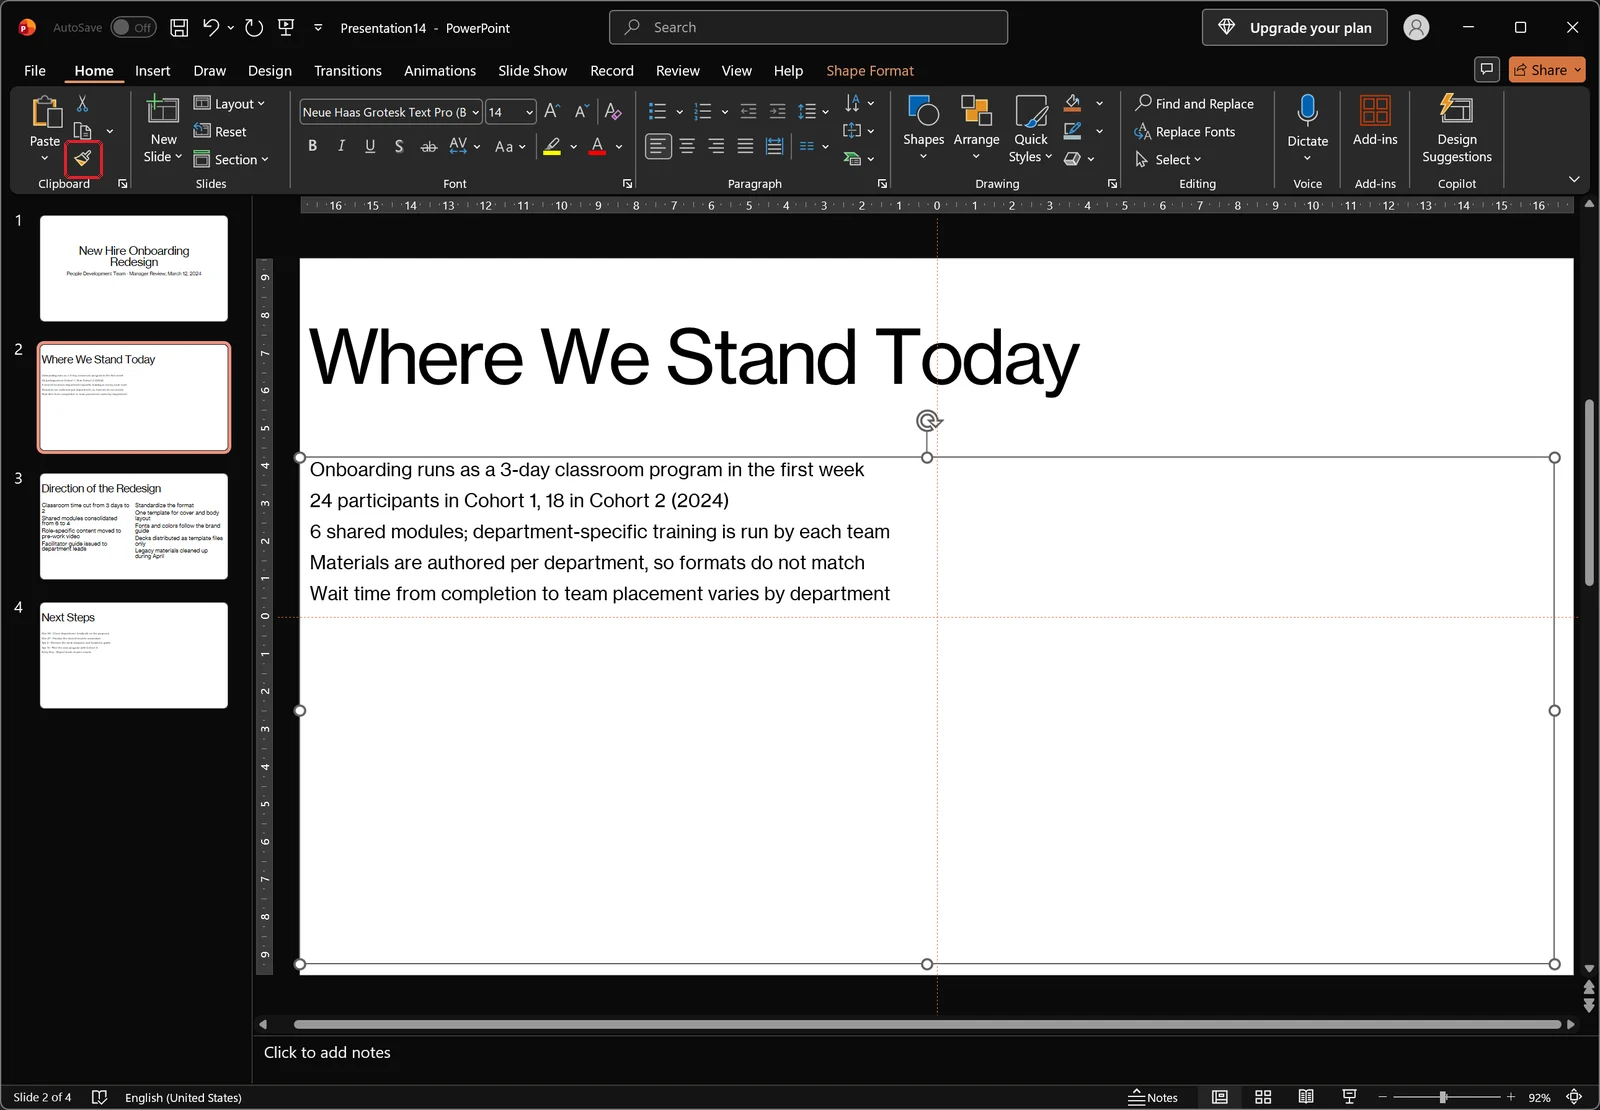
With several shapes to correct, double-click Format Painter to lock it on, click through them one after another, and press Esc when you're done.
Embed fonts so the deck survives another machine
To stop a font that looks fine here from being substituted on the conference room laptop, go to File → Options → Save and tick "Embed fonts in the file." Embedding only the characters used keeps the file smaller; embedding all characters is better if the recipient will edit the text. Some fonts can't be embedded at all because of their licensing.
If you're only presenting, exporting to PDF or building the deck on a font that ships with every Office install avoids the problem entirely. Finish by switching to Slide Sorter one more time and scanning the thumbnails for anything that still stands out.
Frequently Asked Questions
Q. Is there a keyboard shortcut for Replace Fonts in PowerPoint?
No default shortcut is assigned to it. Pressing Alt puts key tips on the ribbon, so you can reach Home → Editing → Replace Fonts... without the mouse, and Ctrl+Shift+F opens the Font dialog for whatever text is selected. If it's part of your routine, add the command to the Quick Access Toolbar and call it with Alt plus a number.
Q. I ran Replace Fonts but some slides didn't change. Why?
Usually one of five things. Those slides use a different master, the text is actually part of an image, only the Latin or only the Asian font got swapped, another font in the list hasn't been processed yet, or the text sits inside a group or SmartArt. Reset and Clear All Formatting on the Home tab resolve most of the remainder by stripping direct formatting.
Q. Should I change theme fonts or use Replace Fonts?
Replace Fonts if the goal is to fix the text that's already in the deck. Theme fonts in Slide Master if you want every future slide to match too. In practice the reliable approach is both, in that order: set the theme fonts to establish the baseline, then run Replace Fonts to bring the existing text in line.
Q. How do I stop fonts from breaking on a different computer?
Go to File → Options → Save and enable "Embed fonts in the file." Embedding only the characters in use keeps the file size down; embedding all characters preserves the font if the recipient edits the content. Licensing blocks embedding for some fonts, so if you're only presenting, export to PDF or stick to fonts installed by default.
Cutting Repetitive Formatting Work With inline AI
Everything above fixes one file. What it doesn't fix is the repetition: open the master, pick the font set, hunt down the stray text boxes, then do it again for the next deck and the one after that.
inline AI is a local AI agent that works on top of documents already open on your PC. It reads and edits Excel and Word files directly, so formatting cleanup and data tidying can be handled through a plain-language request instead of a manual pass. Everything runs on your own machine, so documents are never uploaded to an outside server.
See what an agent could take over at your company in a 30-minute call.