Learn
Change Slide Layout and Reset Placeholders in PowerPoint

Dragging a title back into position with the mouse is not a fix. The position you nudge into place applies to that one slide only, it does not carry to the next one, and the moment you change the zoom level the misalignment is visible again. PowerPoint has two separate tools for this: changing the slide layout, which decides the frame a slide follows, and Reset, which pulls elements that wandered off back into that frame. This guide explains what each one actually touches, then walks through finding the slides that drifted and getting them aligned again.
How Layouts and Placeholders Actually Work
What a Slide Layout Decides
A layout is a frame that belongs to the slide master. How far down from the top edge the title sits, how wide and tall the body box is, which font and size the text uses: all of that is defined in the layout ahead of time, and every slide using that layout inherits the definition as-is.
That is why slides sharing a layout line up automatically without anyone aligning them. When a deck looks tidy, it is usually because that frame is being respected.
Placeholder vs. Text Box: The Difference That Matters
The boxes a layout puts on the slide for you are called placeholders. The dashed box reading "Click to add title" on a new slide is one. A text box you draw yourself from the Insert tab is something else entirely: an independent object that does not belong to the layout.
This matters because Reset only acts on placeholders. A text box you drew by hand will not budge no matter how many times you click Reset.
Drag a placeholder by accident while editing and the title drops off the top baseline, and the starting line of the body text ends up different from slide to slide. Getting every slide back to the position its layout defines is what the rest of this article is aiming for.
What Reset Actually Reverts
When you drag a placeholder, stretch it, or change its font on a slide, the difference from the layout value gets recorded on that slide alone. Reset wipes those overrides and returns everything to the values the layout defines.
Once it runs, the title climbs back to the top baseline and the body lines snap to a common left edge. One thing worth being clear about: the text you typed does not disappear. Only position, size, and manually applied formatting change.
Before You Start: Finding the Slides That Drifted
Compare Positions at a Glance in Slide Sorter
Paging through a 40-slide deck one slide at a time to spot the bad ones is a waste of effort. Click Slide Sorter on the View tab and the editing area turns into a grid of thumbnails, where a slide with a different title height or body start line stands out immediately.
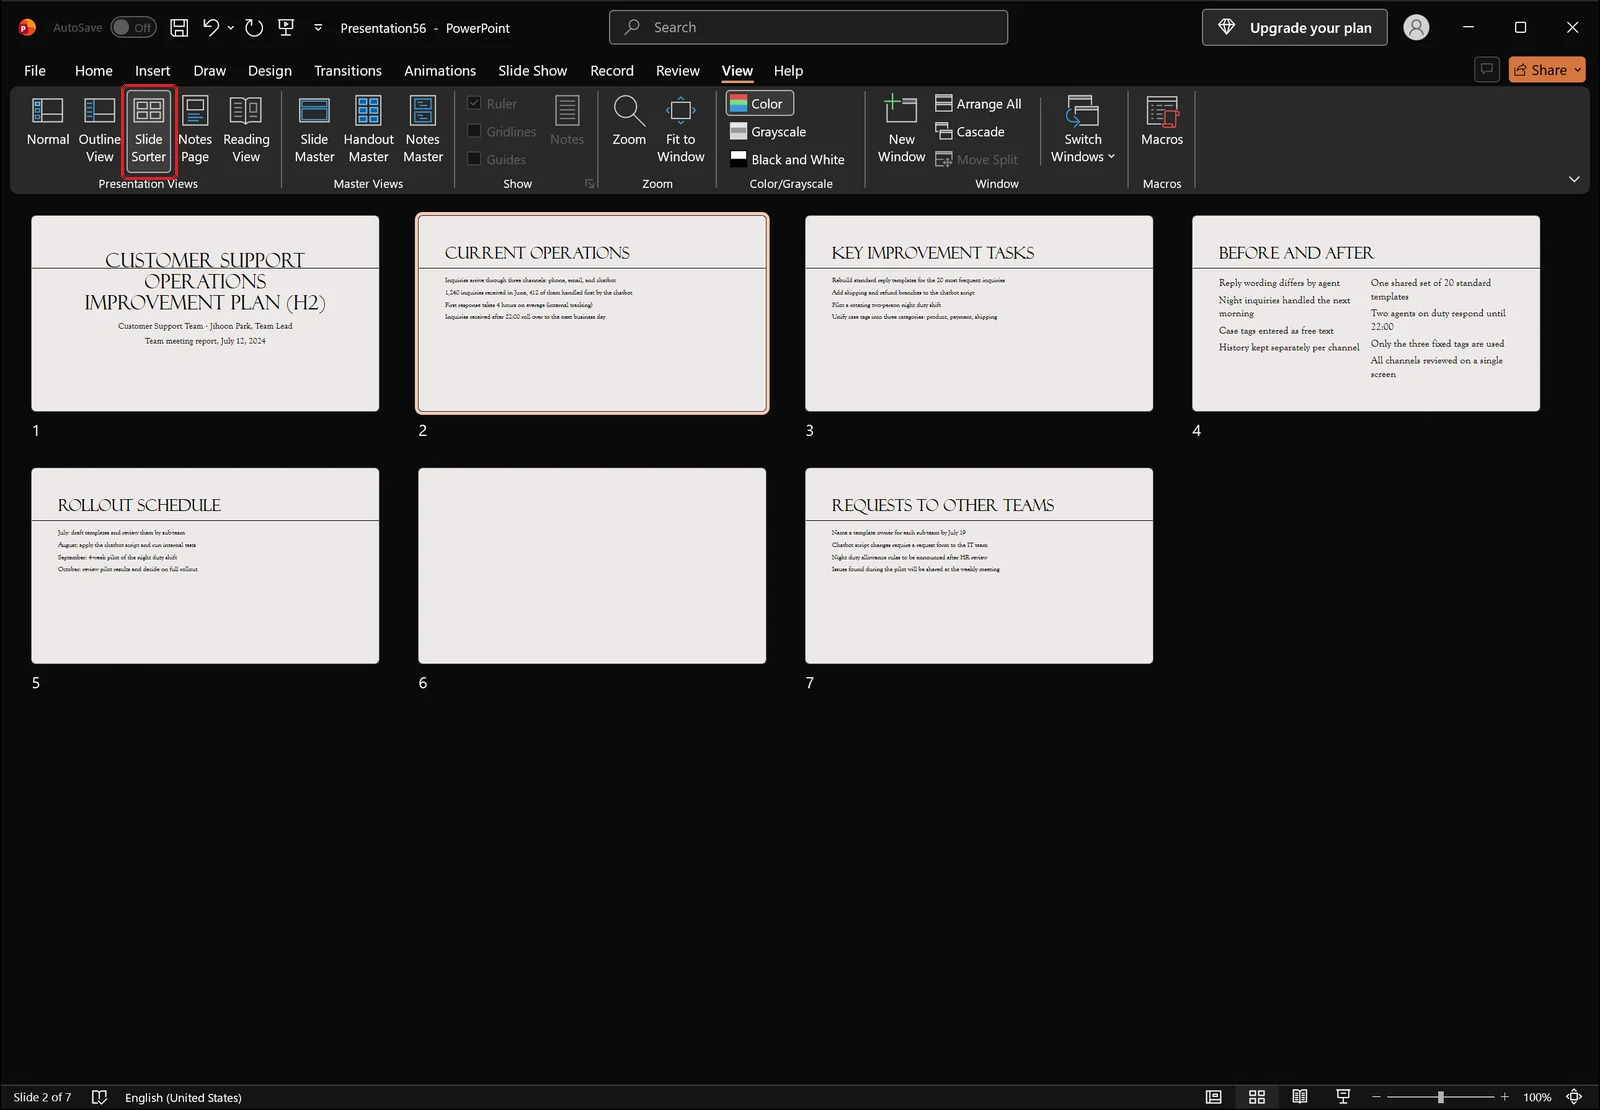
Scan the grid and note the slides whose title line sits at a different height, or whose body block leans noticeably left or low. That list is your work queue.
Use Outline View to Check Whether a Title Is a Placeholder
Outline View, also on the View tab, lists slide titles and body text in the left pane. Everything shown in that list lives inside a placeholder.
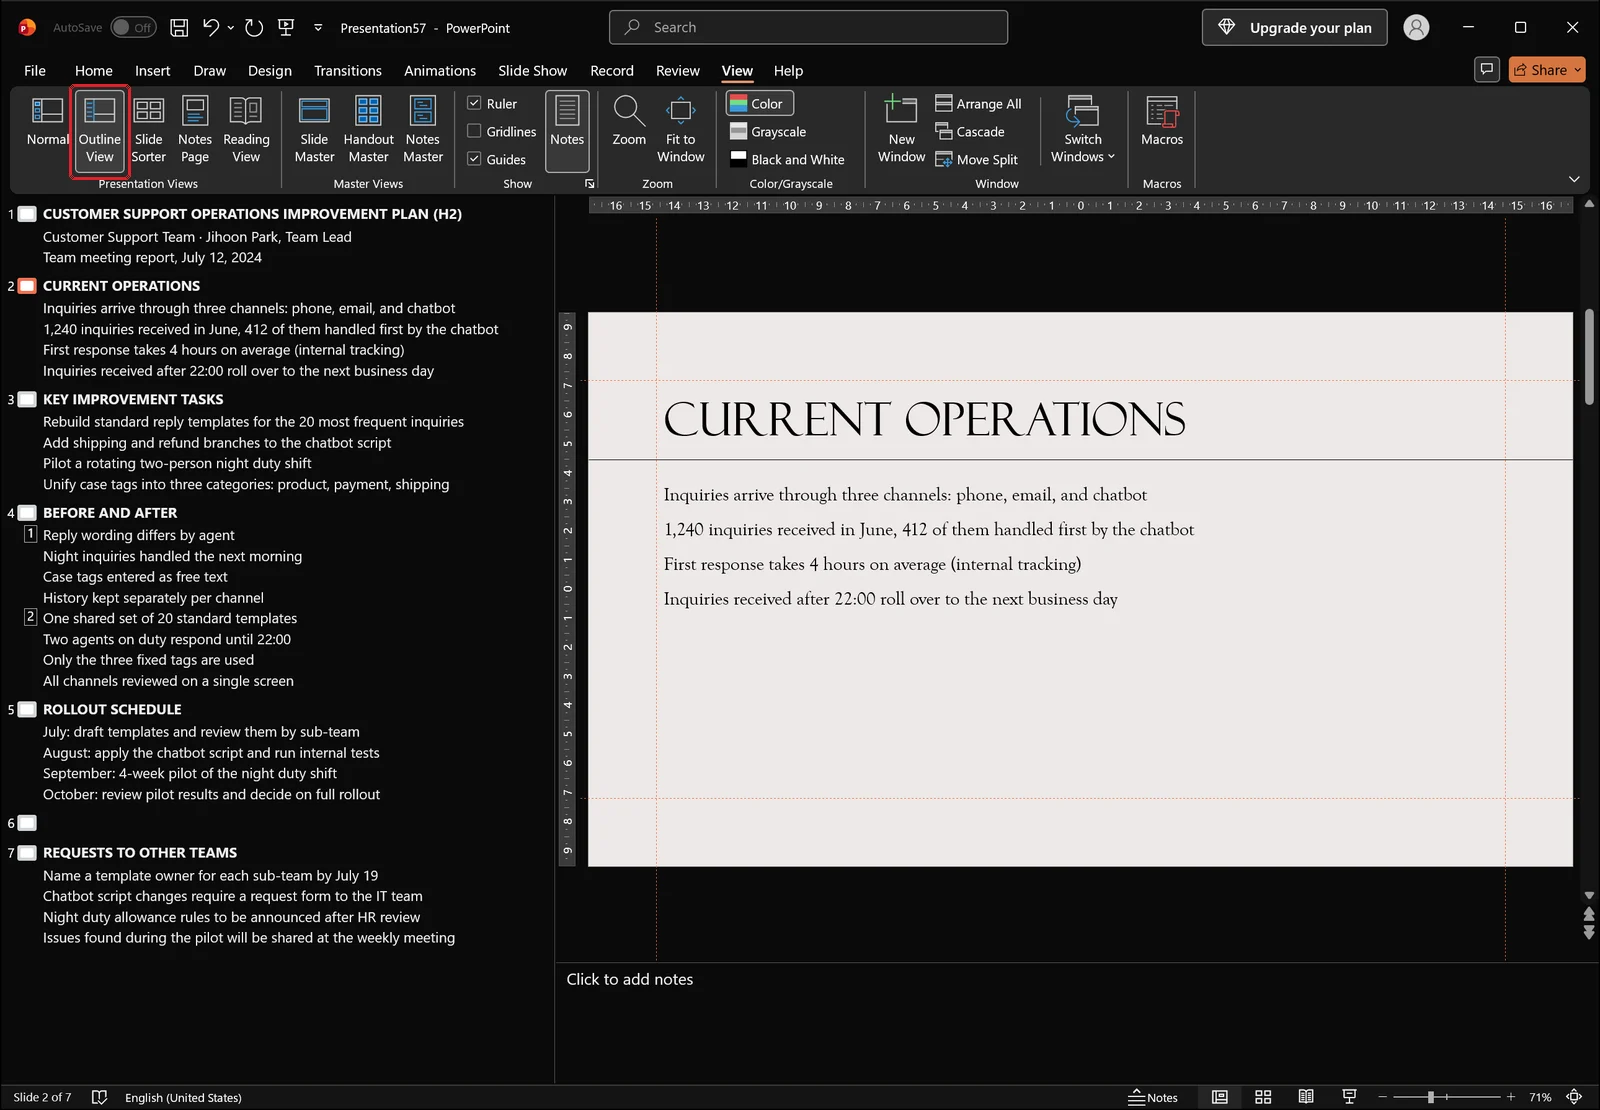
So if a slide clearly shows a title on screen but that title is missing from the outline, the text is a hand-drawn text box, not a title placeholder. Reset will not move it, and those slides need the separate fix described later in this article.
Check Which Layout the Current Slide Is Using
Before you align anything, find out which frame the slide is following. Open Layout on the Home tab and the thumbnail of the layout currently applied is highlighted. Two slides that look similar often turn out to be on different layouts, which is exactly why they refuse to line up.
Changing the Slide Format from Home > Layout
Open the Layout Gallery and Pick a Format
Select the target slide in the thumbnail pane, then click Layout on the Home tab. Thumbnails appear for the layouts in the current theme, such as Content, Content 2, Content 3, Title and Text, Title and 2-Column Text, Title Only and Empty, alongside whatever theme-specific layouts are defined, for example Title with Picture, Agenda, Content with Picture, Statement or Quote.
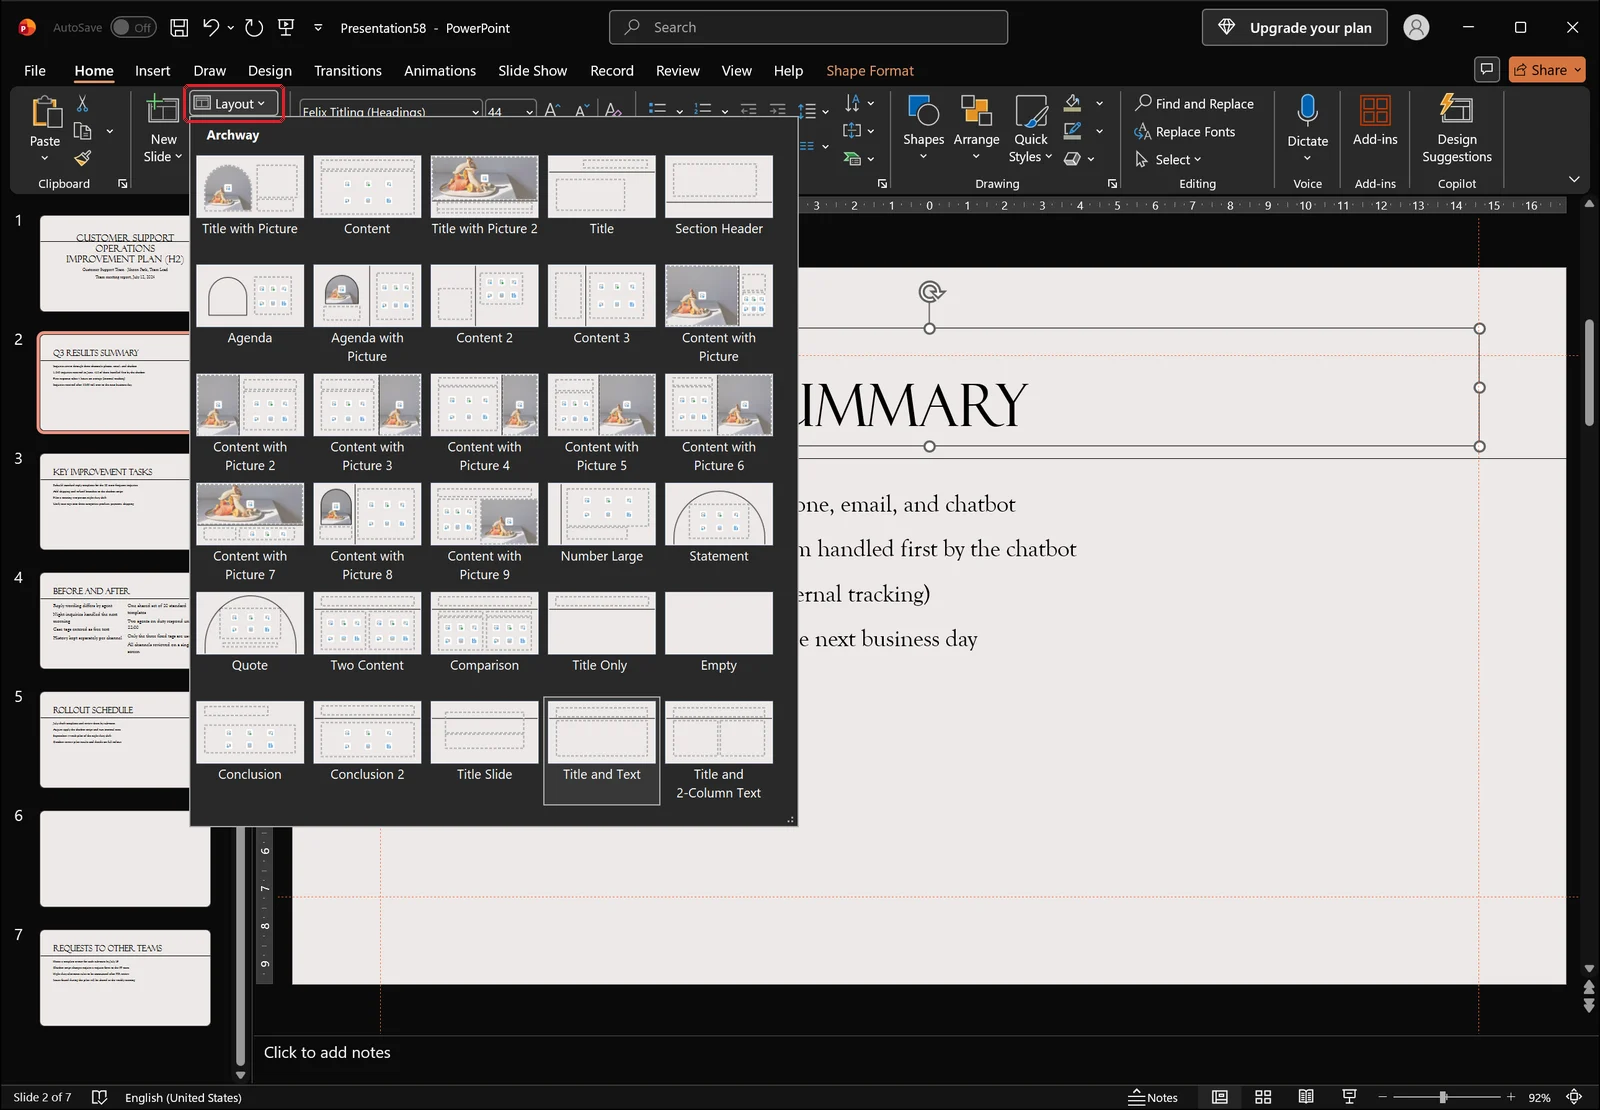
Pick the format that matches the content. A normal slide with a heading and a bulleted list belongs on Title and Text, while a slide that is one large photo with a heading on top is better served by Title Only.
Apply the Same Layout to Several Slides at Once
In the thumbnail pane, Ctrl-click to pick out slides scattered through the deck, or Shift-click to grab everything between a first and last slide. With several selected, open Layout and choose a format, and the same frame applies to all of them.
Where the Content Goes After a Layout Change
Changing a layout moves the content of each existing placeholder into the corresponding placeholder in the new layout: title to title, body to body. When there is no corresponding slot, for example switching a slide that has body text over to Title Only, the body box is not deleted. It stays on the slide as-is.
Choose a layout with a split content area, such as Title and 2-Column Text, and the material is arranged into left and right blocks. One caveat here: a placeholder you already moved by hand can keep its manual position even after the layout changes, because swapping the frame does not clear the overrides stored on the slide. That is why picking a layout and then clicking Reset, in that order, is what actually finishes the job.
👉 How to Use Slide Master in PowerPoint: Format Every Slide
Putting Placeholders Back with Reset
Select the Slide and Click Reset
With the slide you want to fix selected, click Reset in the Slides group of the Home tab. If you selected several slides in the thumbnail pane, one click handles all of them.
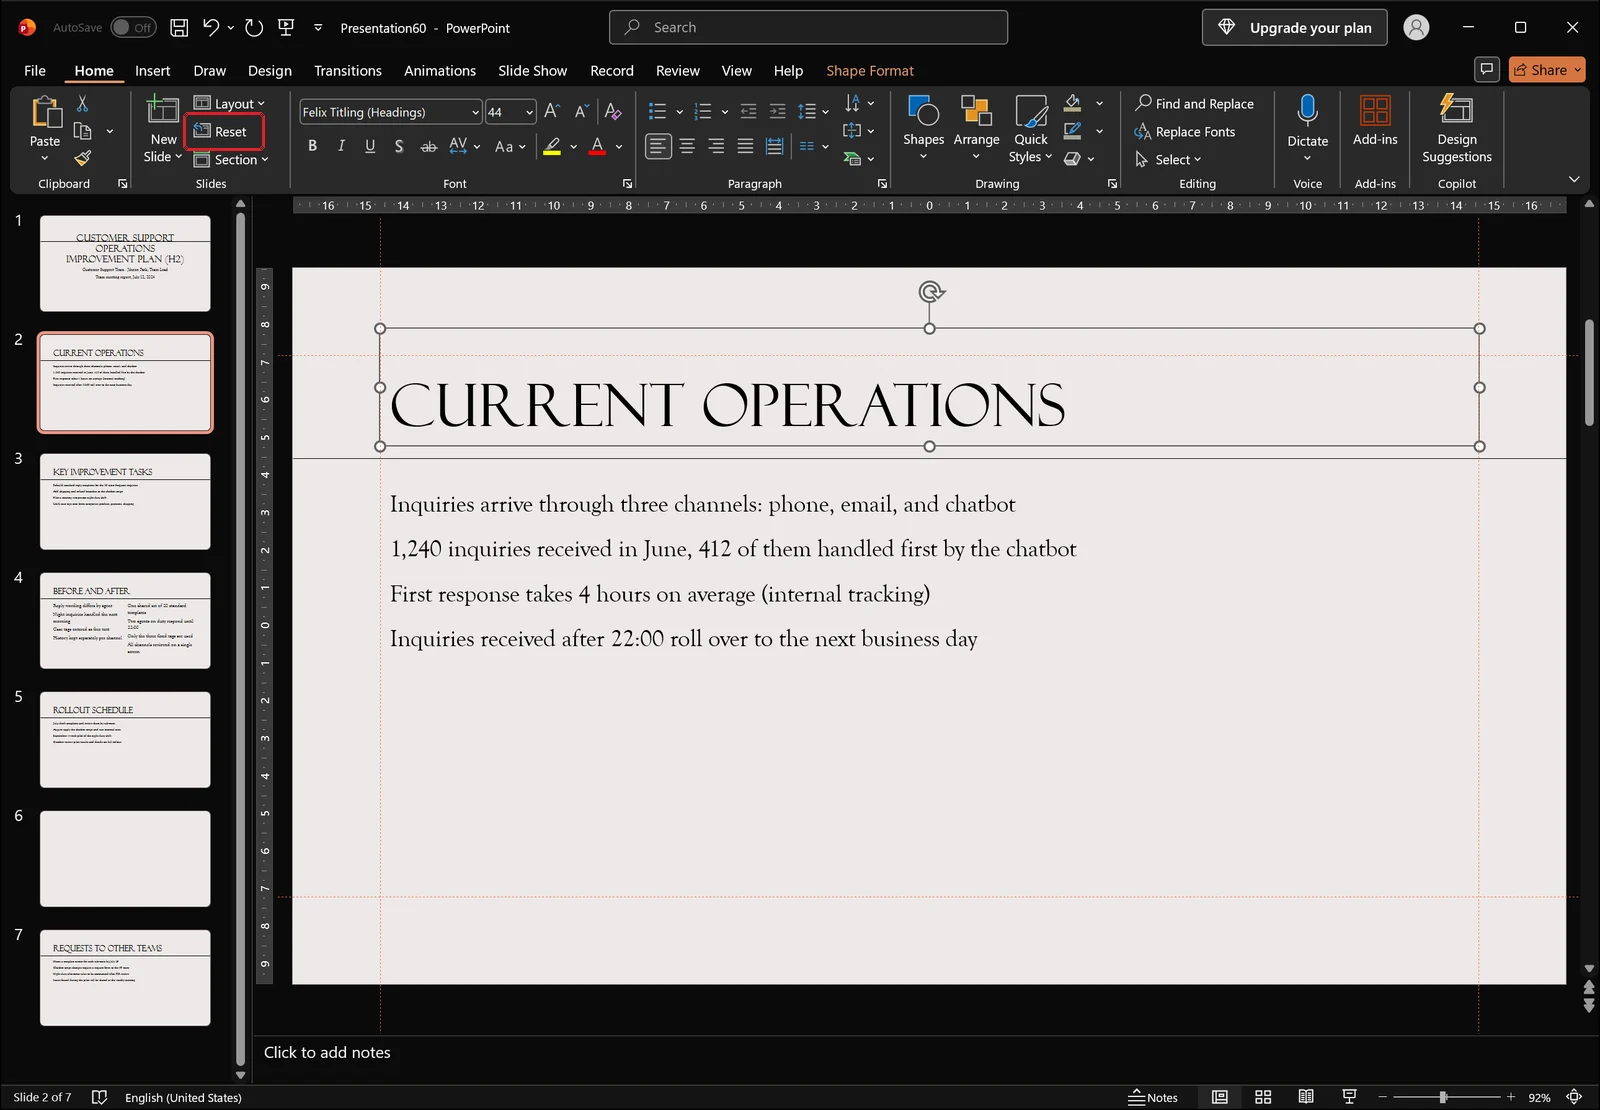
You can also work from the slide itself: select the placeholder that is out of position so its handles appear, then click Reset.
What Changes Before and After
Position and size are not the only things that revert. Font, size, colour, and alignment that you set directly on the slide all go back to the layout values as well. If you bolded something or recoloured it for emphasis, expect to reapply that afterward. The text content itself stays untouched.
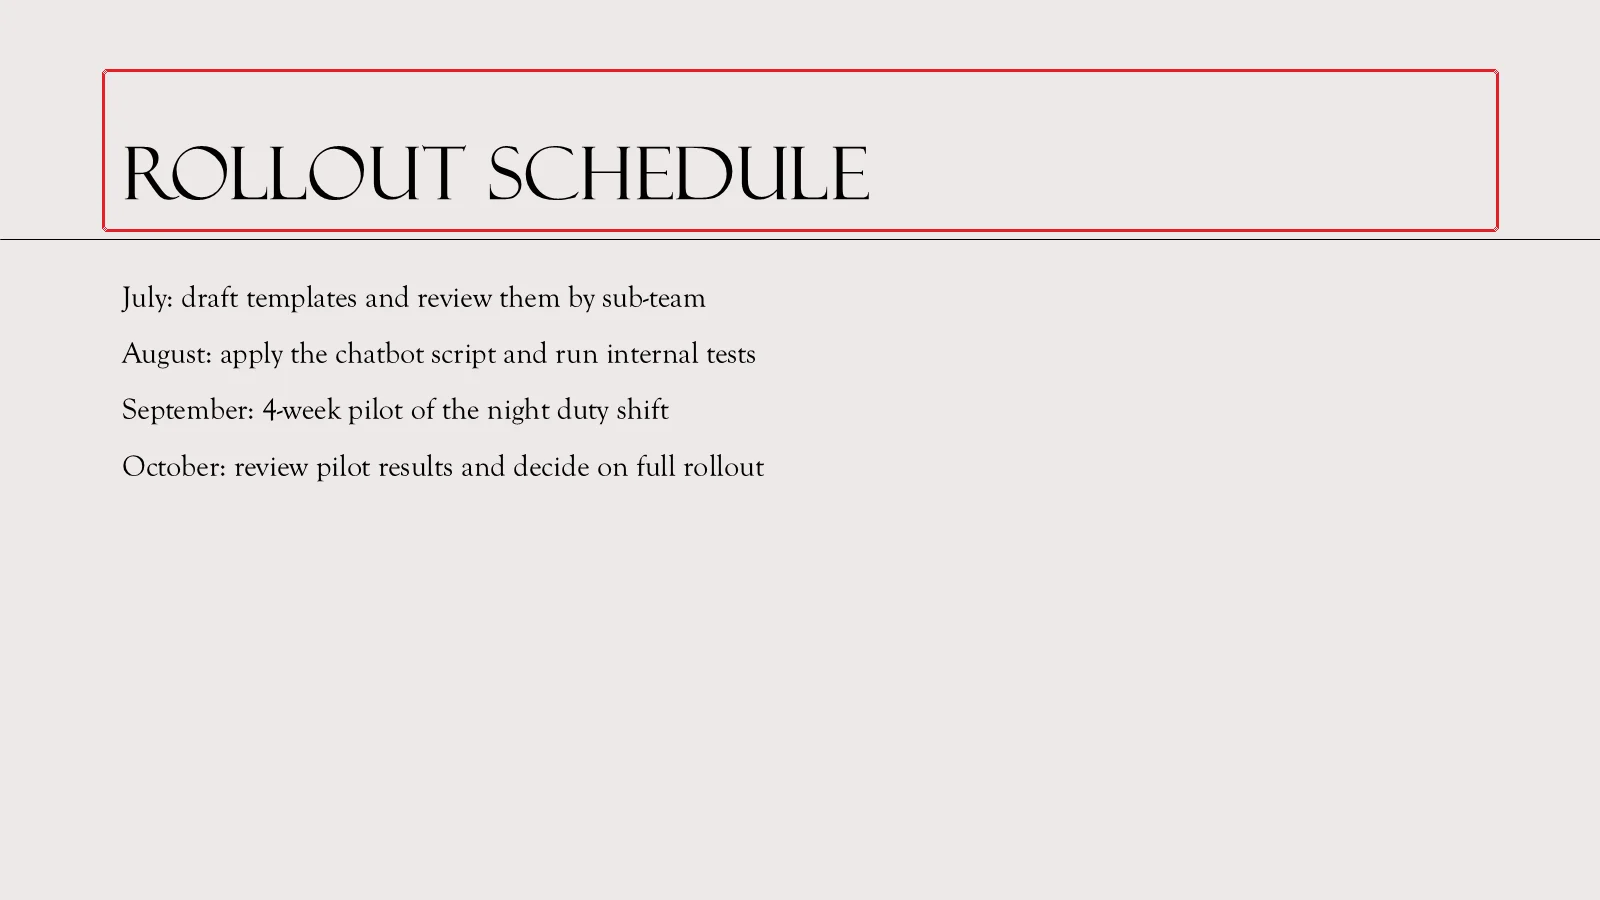
When it finishes, the title is back at the standard top position and the body lines share the same left edge and line spacing as every other slide on that layout. This is the arrangement the layout intended all along.
Cancel Safely with Undo (Ctrl+Z)
Sometimes the result is not what you wanted. If a cover title you deliberately enlarged got flattened along with everything else, press Ctrl+Z immediately, or click Undo on the quick access toolbar at the top-left of the window.
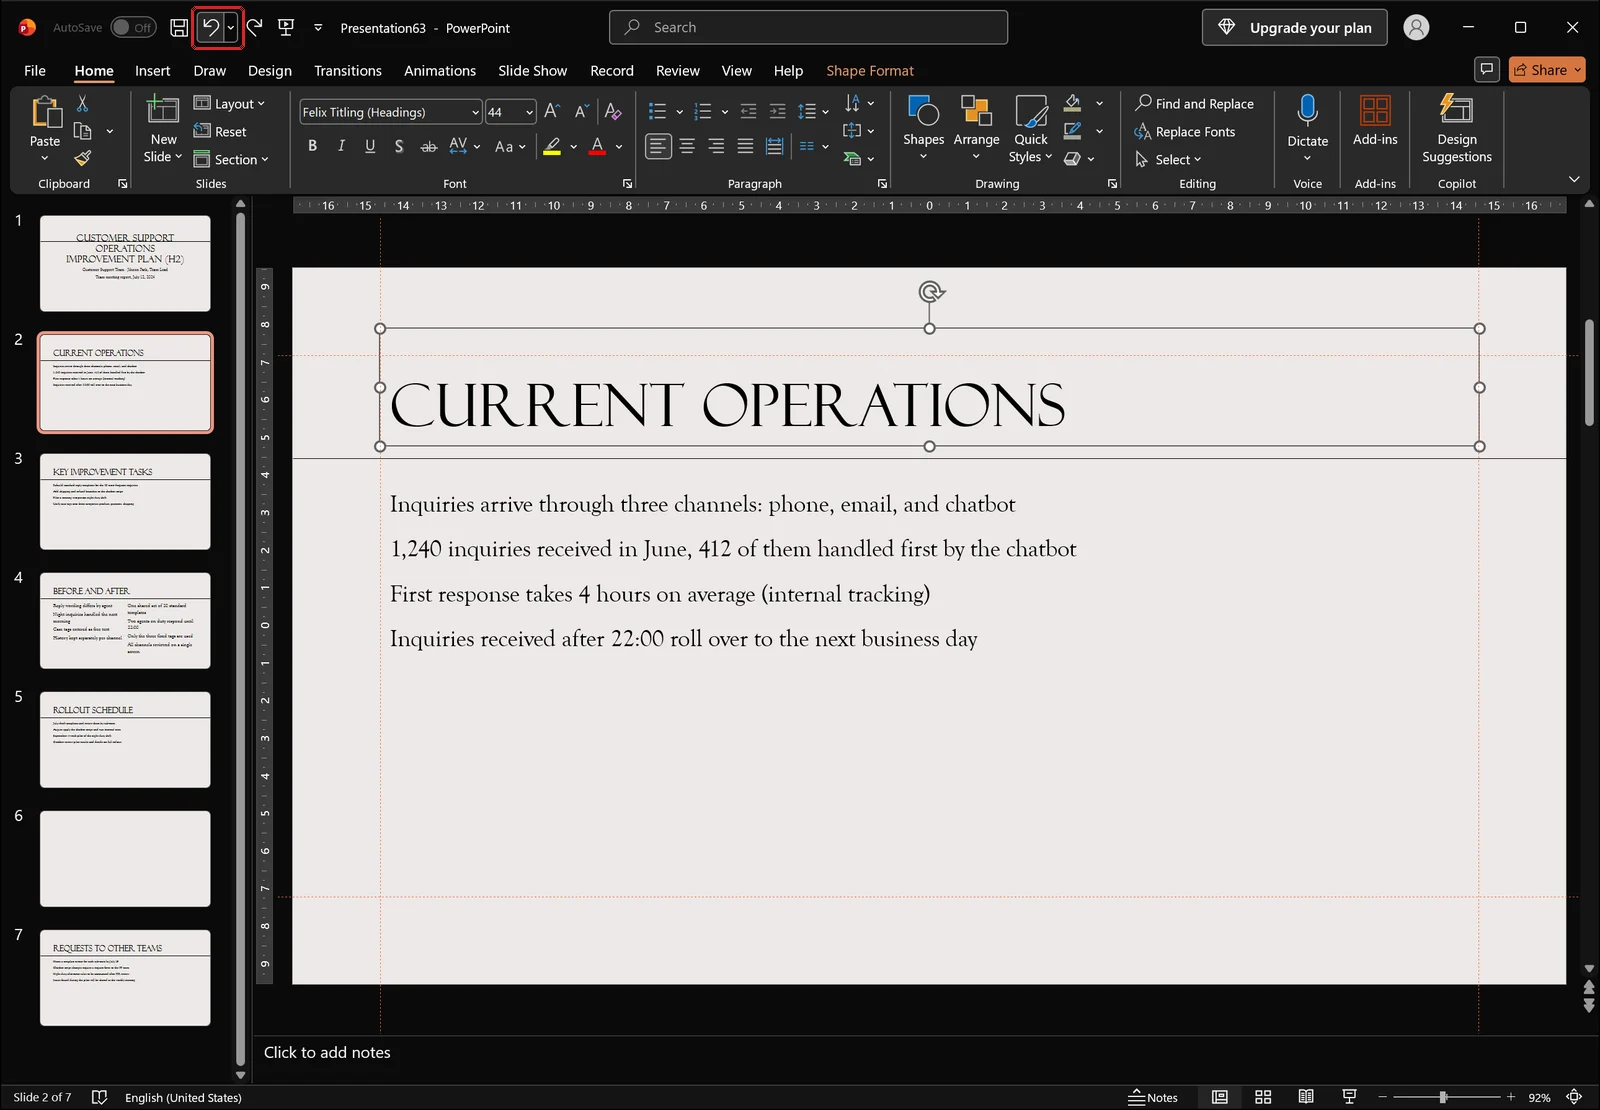
Undo puts the placeholders back exactly where they sat before Reset ran. Knowing that the change is reversible makes it worth trying first and judging afterward, which is usually faster than inspecting a slide to guess what Reset will do.
New Slides and the Empty Layout
Choose the Layout When You Create the Slide
The easiest way to reduce misalignment is to pick a format at the moment the slide is created. Click New Slide on the Home tab and the layout thumbnails drop down.
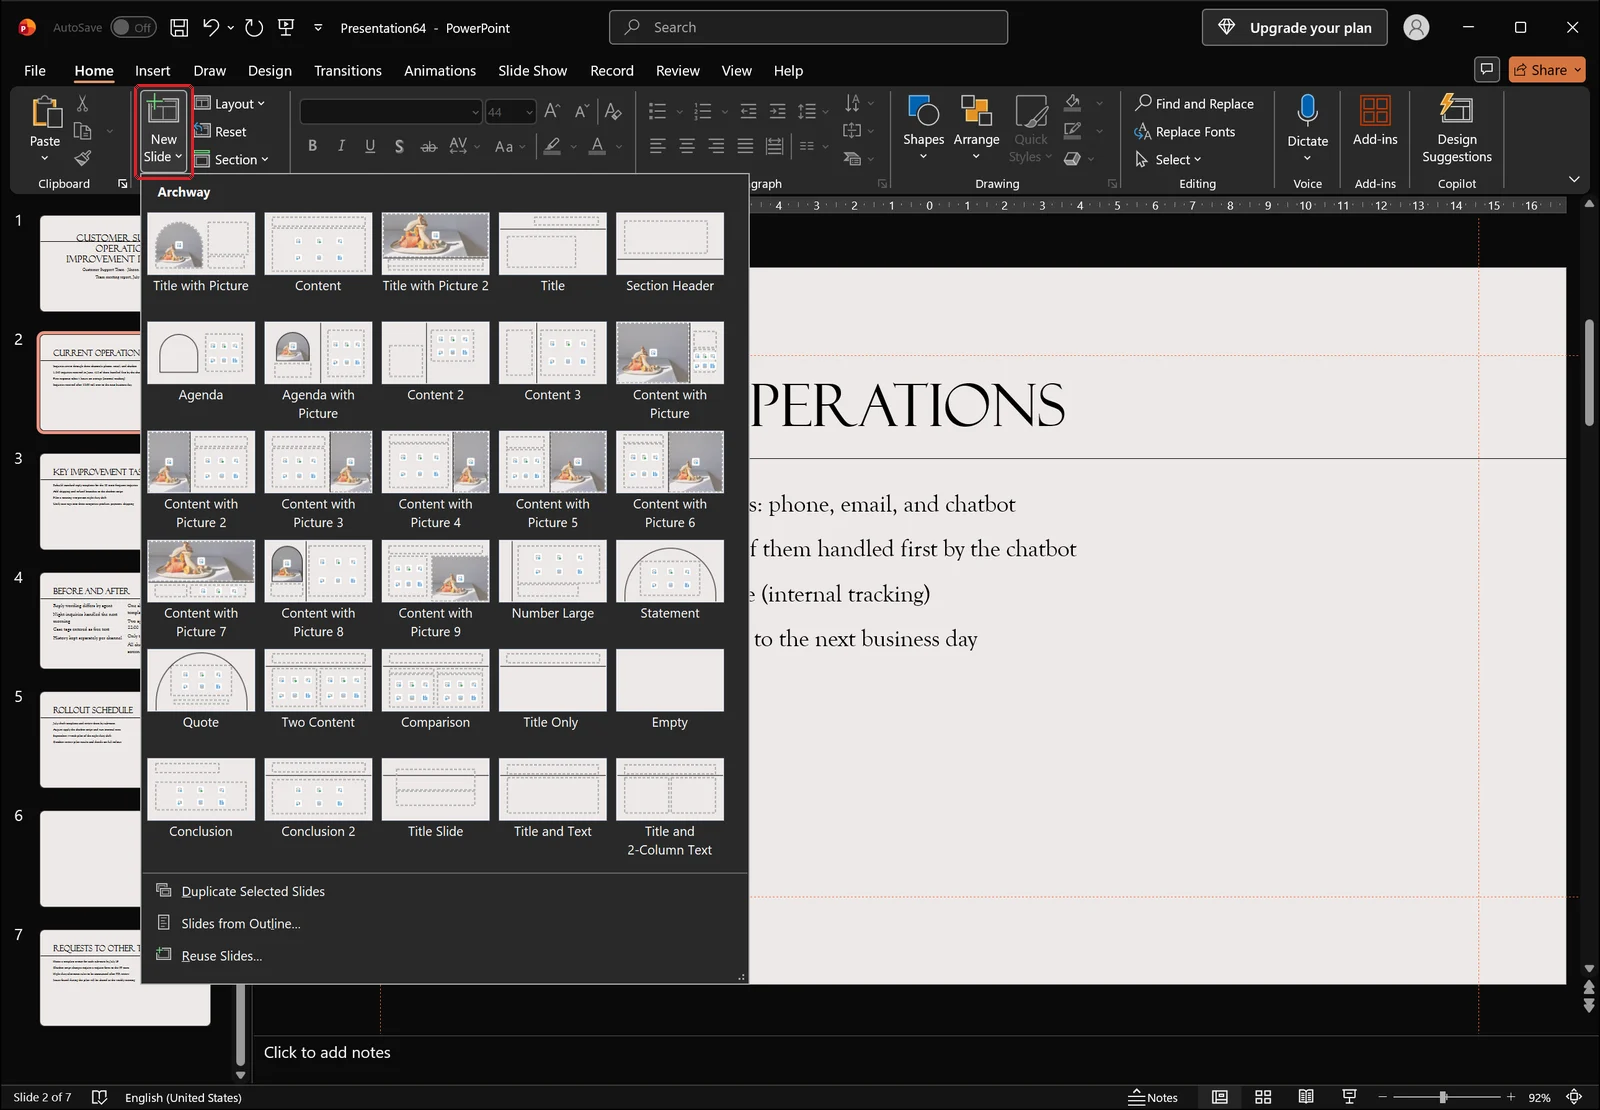
Choose a format here and the new slide arrives with its title and body placeholders already sitting at the standard positions, which cuts down the cleanup work later.
When to Use the Empty Layout, and When to Avoid It
Empty is a layout with no placeholders at all. On a slide using it, Reset has nothing to act on, so clicking it produces no visible change.
That makes Empty useful for a full-bleed photo or diagram, but if the slide needs even a single line of heading, Title Only is the better choice. A text box drawn on an Empty slide and used as a title will never appear in Outline View and falls outside alignment management entirely.
Bringing Back a Placeholder That Looks Gone
If you deleted a body box outright and the slide now looks empty, recovery is simple. Reapply the same format from Layout, or click Reset, and the empty placeholder comes back as a dashed frame with its prompt text.
That dashed frame and its prompt appear only in the editing view, never in a slide show or in print. Leaving it empty has no effect on what your audience sees.
When Reset Does Not Fix It
A Title Made from a Text Box Is Not a Target
This is the most common cause. A box created with Text Box in the Text group of the Insert tab is unrelated to the layout, so Reset has no effect on it.
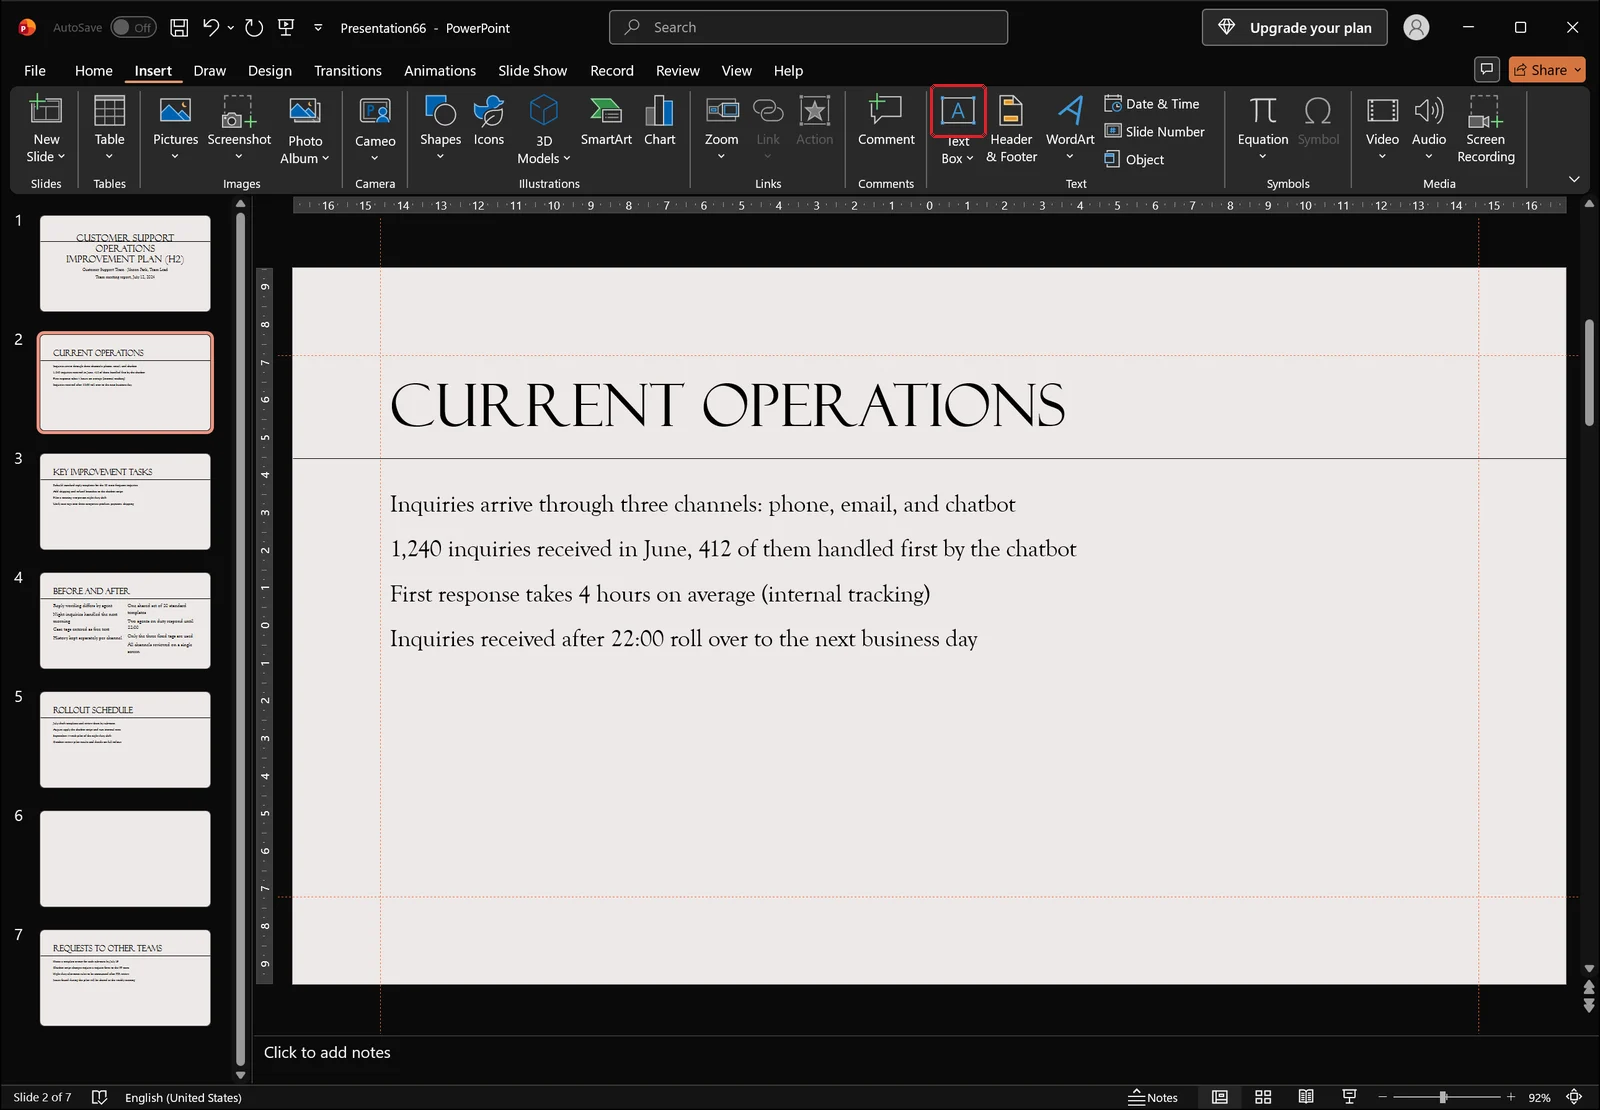
The fix is to change what the text belongs to. Cut the text out of the box, delete the box, apply a layout such as Title and Text to bring the title placeholder back, and paste the text inside it. Reset works normally from then on.
Check the Slide Master, the Source of the Layout
If Reset moves things into a position that is itself wrong, the reference values it reverts to are wrong. Click Slide Master on the View tab to inspect the source.
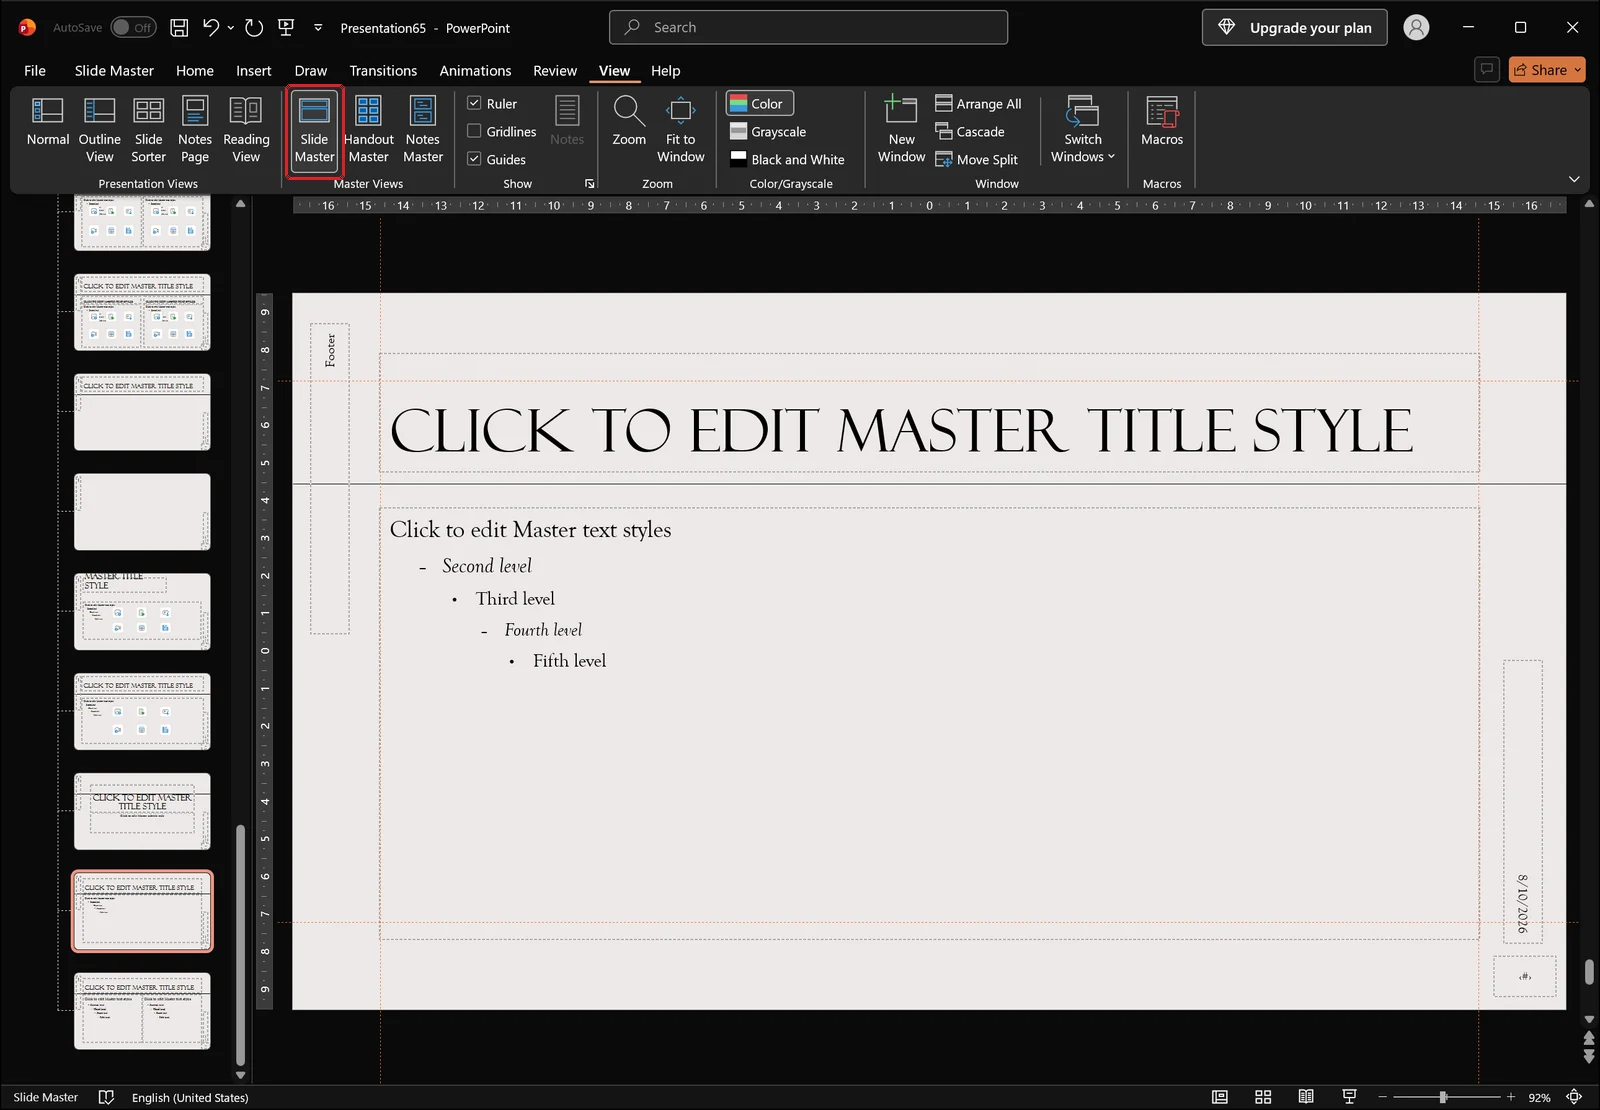
Pick the problem layout from the thumbnail pane on the left, correct the position and size of its placeholders, close master view, and click Reset once more. Slides now align to the corrected reference.
Reverting Only the Formatting
Sometimes the position is fine and only the font or text colour is out of step with the rest of the deck. Select the text or the placeholder and click Clear Formatting in the Font group of the Home tab.
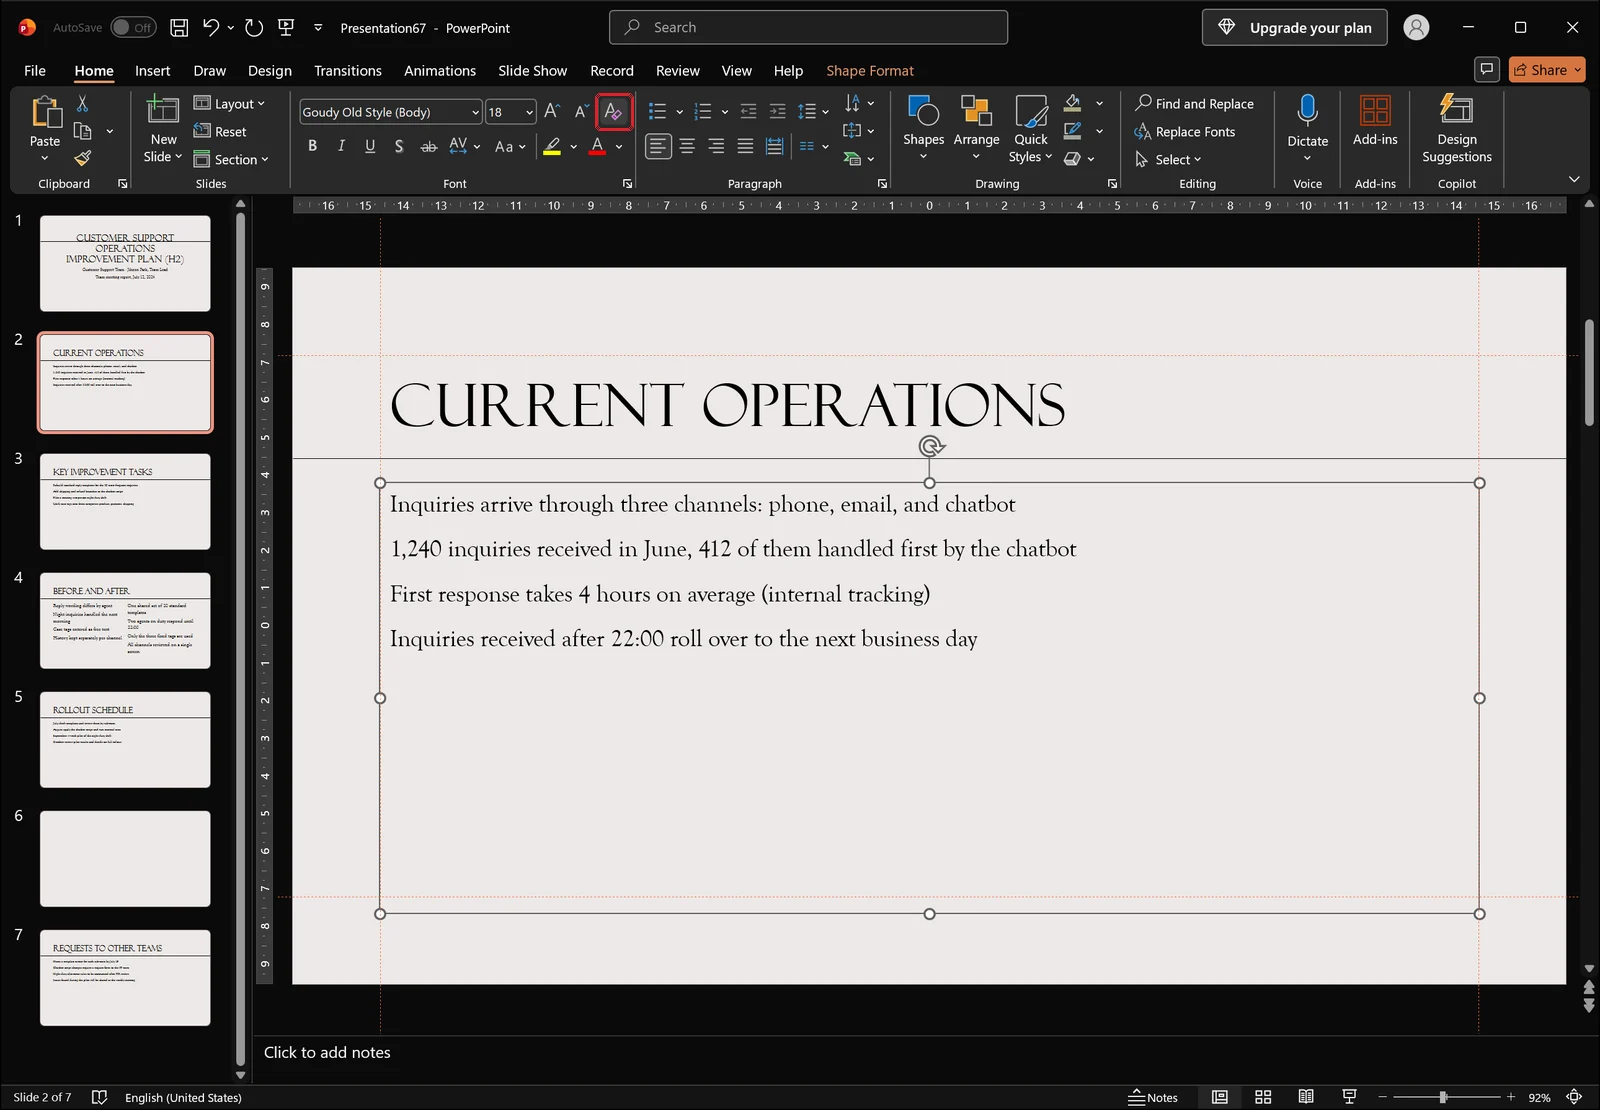
Any size, colour, or bold applied on top of the text is stripped and the default formatting returns. Position is left alone, which makes this the right tool when the arrangement is correct and only the type needs cleaning up.
Slides Pasted In from Another File
A slide copied from another presentation brings that file's theme with it, so its reference values differ from the current document's layouts and the alignment keeps drifting. In the paste options that appear when you paste, choose the option that uses the destination theme, and the slide follows the layouts of the file it is landing in.
👉 Replace All Fonts in PowerPoint: Unify Every Slide at Once
FAQ: PowerPoint Layouts and Reset
Q. Does clicking Reset delete the text I typed?
No, the text content stays. What reverts is the placeholder's position and size, plus any formatting that differs from the layout. Manual emphasis such as bold or a custom text colour can disappear along with it, so check the slide after applying and press Ctrl+Z right away if the result is not what you wanted.
Q. What is the difference between changing the layout and clicking Reset?
Changing the layout swaps the frame a slide follows. Reset takes the frame that is currently applied and pulls the drifted placeholders back into it. Neither replaces the other, and the usual order is to set the format with Layout first, then finish with Reset.
Q. Can I align every slide in the deck at once?
Click into the thumbnail pane, press Ctrl+A to select all slides, then click Reset once on the Home tab. Be aware that cover slides or any slide you deliberately scaled up for emphasis will be reset too, so Ctrl-click to remove those from the selection first.
Q. Why does the title stay put even after I click Reset?
The title is most likely a text box rather than a placeholder. If it does not appear in the list in Outline View, cut the text, paste it into a real title placeholder, and reset again. If it does appear in Outline View but still refuses to move, the layout in the slide master has itself been edited.
Tidying slides with inline AI
Layout and Reset only reach placeholders. When a deck mixes titles built from text boxes, slides pulled in from other files, and layouts that were edited in the master, you are still left checking slides one at a time, and that gets slow as the page count grows.
inline AI is a local AI agent that opens documents on your PC and reads and edits them directly. With the file open, you can ask in plain language, such as "list the slides where the title position differs from the rest," and it inspects the actual contents of the deck to answer.
Because it works inside your own PC rather than uploading files to the cloud, internal decks and documents containing personal information never leave the machine. It works the same way with Word and Excel files.
See what an agent could take over at your company in a 30-minute call.