Learn
Highlight Text in PowerPoint: Change Color, Erase, and Fixes

Highlighting text in PowerPoint is not the same thing as changing its color. The letters stay exactly as they are, and PowerPoint paints a band behind them, the way a marker leaves a stripe across a printed page. That is why the ribbon calls the control Text Highlight Color rather than anything with "highlighter" in the name, and why reaching for font color or Shape Fill instead usually leaves a slide looking messier than before. This guide covers how to apply the highlight, how to change or remove it cleanly, and what to do when the button is not there at all.
What Text Highlight Color Actually Does
Highlight vs. font color vs. Shape Fill
The three controls paint three different things. Text Highlight Color fills only the background of the characters you selected, following the shape of the text itself. Font color changes the strokes of the letters. Shape Fill covers the entire area of a text box or shape, empty margins included.
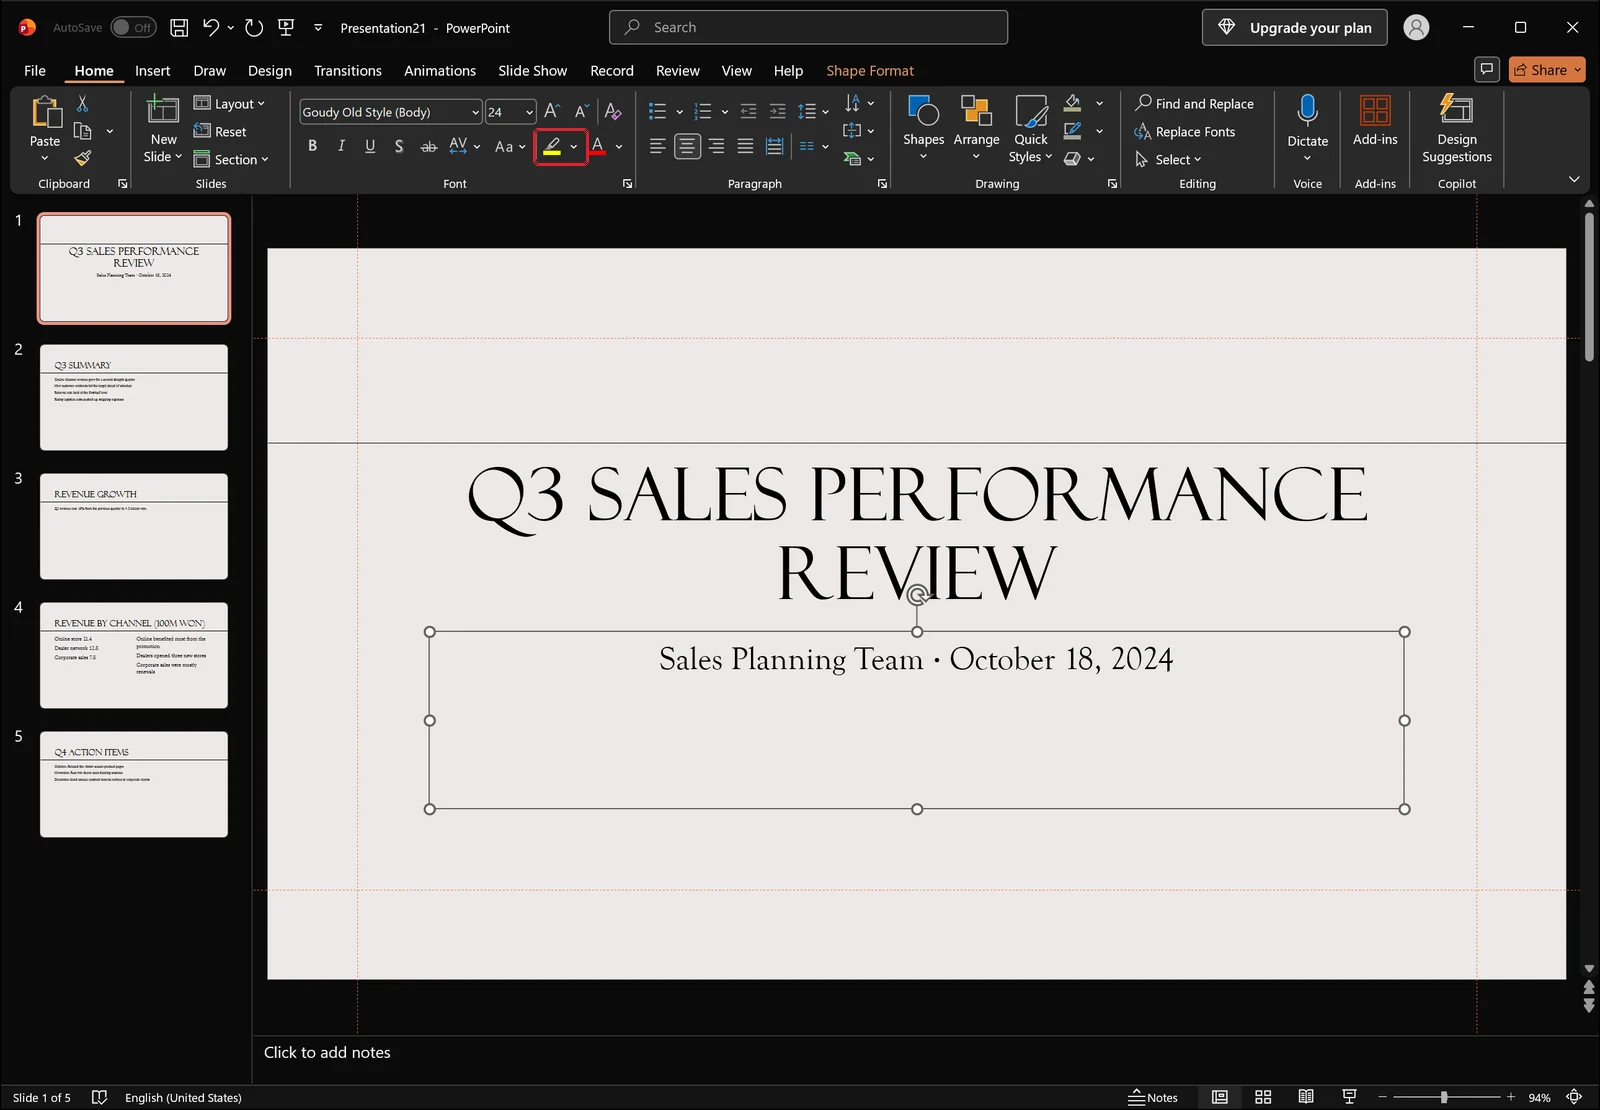
Text Highlight Color lives in the Font group on the Home tab. Look along the row that holds bold, italic, underline and font color: the marker-shaped highlight button sits just to the left of the font color "A", which takes the right end of that row.
The two buttons are close enough that it is easy to hit the wrong one, and font color repaints the letters instead of the background. If the result does not match what you expected, check which of the two you clicked before assuming anything is broken.
Which versions have the button
Text Highlight Color ships with Microsoft 365 and PowerPoint 2019 or later. On 2016 and earlier, the button simply does not exist anywhere in the Font group, no matter how long you search. In that case you need one of the workarounds further down: Shape Fill or the Draw tab highlighter.
Look at the slide before you highlight anything
If the slide is already dense with full sentences, cutting text is a better first move than painting it. Highlighting works when it appears once or twice per slide. Coat several lines and it stops reading as emphasis and starts reading as a background color.
Select the Exact Text First
Whole placeholder vs. part of a sentence
Text Highlight Color applies only to what is selected. Click the border of a placeholder once to select the whole box and every character inside it gets painted. Drag across a specific phrase and only that phrase gets painted.
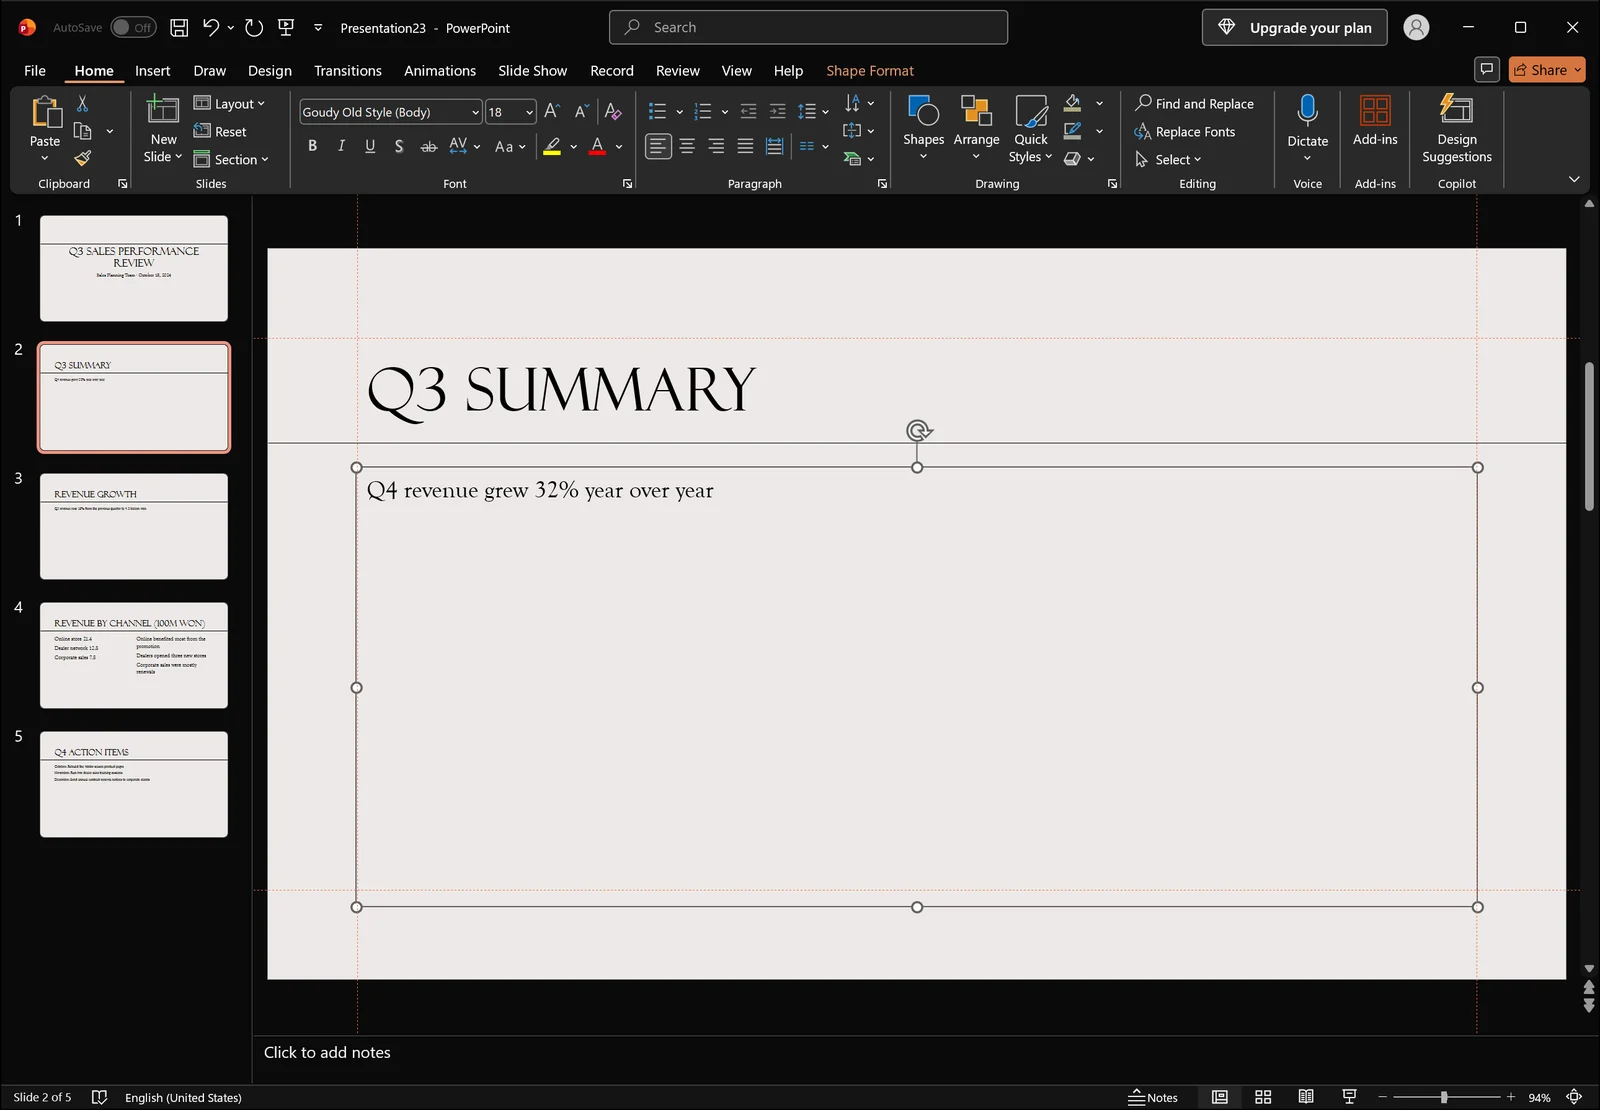
When the border and the corner handles are both visible, as above, the entire box is selected. Apply a color in that state and everything inside it changes at once.
Painting several lines or several boxes
To give the same emphasis to several text boxes, click the first one, hold Shift, click the rest, then apply the color. Inside a single box, hold Ctrl while dragging to select several separated phrases and paint them all in one pass.
What a bad selection looks like
The most common misfire is clicking the button while nothing but the cursor is blinking. No characters are selected, so nothing changes on screen and the feature looks dead. The opposite case is just as annoying: you think the whole box is selected but the cursor is merely sitting inside it, so the highlight lands only on the characters you type afterward and the slide ends up uneven.
The Basic Steps for Highlighting
Open the palette from the Home tab
Select your phrase, then go to the Font group on the Home tab. Clicking the body of the Text Highlight Color button applies the last color used, which is yellow the first time. Clicking the dropdown arrow next to the Text Highlight Color button opens the palette.
The palette holds a grid of bright highlighter swatches, with a No Color command for stripping the highlight back off. Once you pick a color here, the button body repeats that same color from then on.
Check what the result looks like
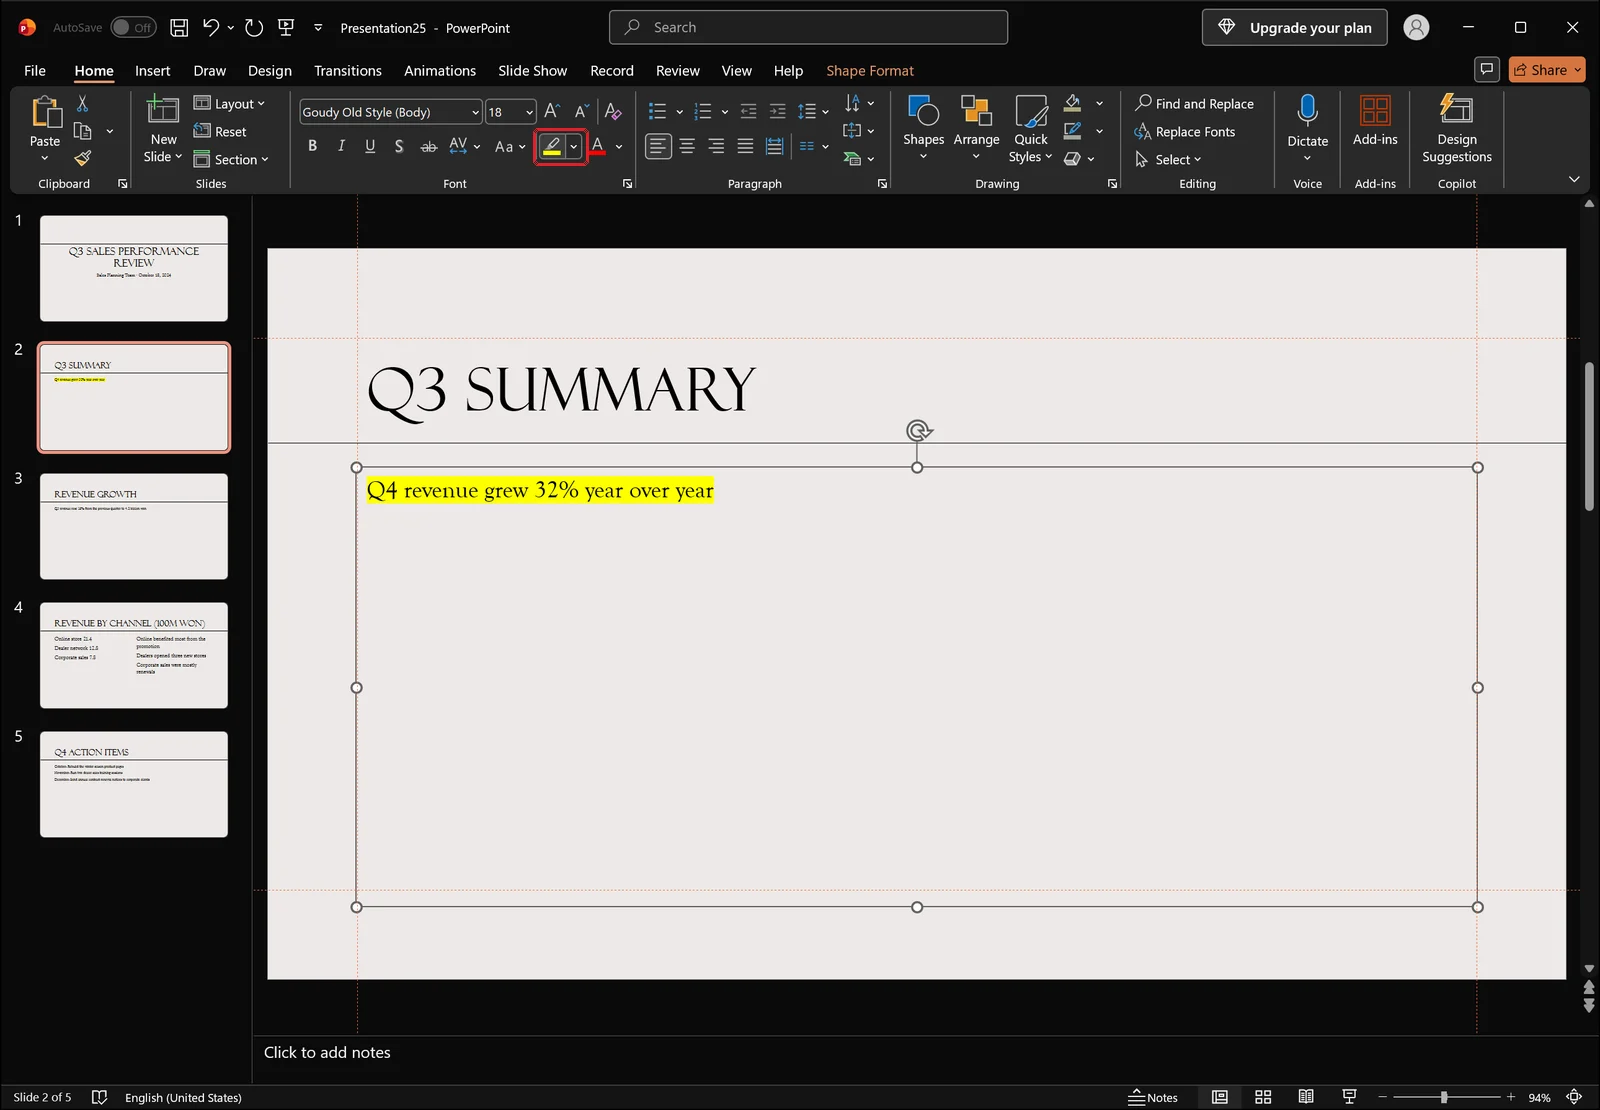
Right after you apply it, the color appears behind the characters only. The empty margin inside the box stays clear, which is the visual giveaway that separates a highlight from a Shape Fill. Delete a word or reword the sentence and the band shrinks and grows with the text.
Painting several spots in a row
You do not need to reopen the palette every time. Set the color once, select the next phrase, and click the button body to repeat it.
Keep each painted run to a single line, or at most a single phrase. Coating a whole sentence gives the eye nowhere specific to land, while a number or a short noun phrase pulls attention to exactly the right spot. If your text is running long because PowerPoint keeps shrinking it to fit, that is worth fixing before you start highlighting.
👉 Turn Off Autofit Text in PowerPoint: Stop Fonts Shrinking
Changing the Color and Removing the Highlight
Overwriting with a different color
Reselect painted text, pick another swatch, and the new color replaces the old one directly. There is no need to clear it first.
Choose No Color near the bottom of the palette, just above the greyed-out Stop Highlighting entry, and the highlight disappears while font size, weight and font color stay untouched. This is the safest way to remove emphasis.
What Clear Formatting does instead
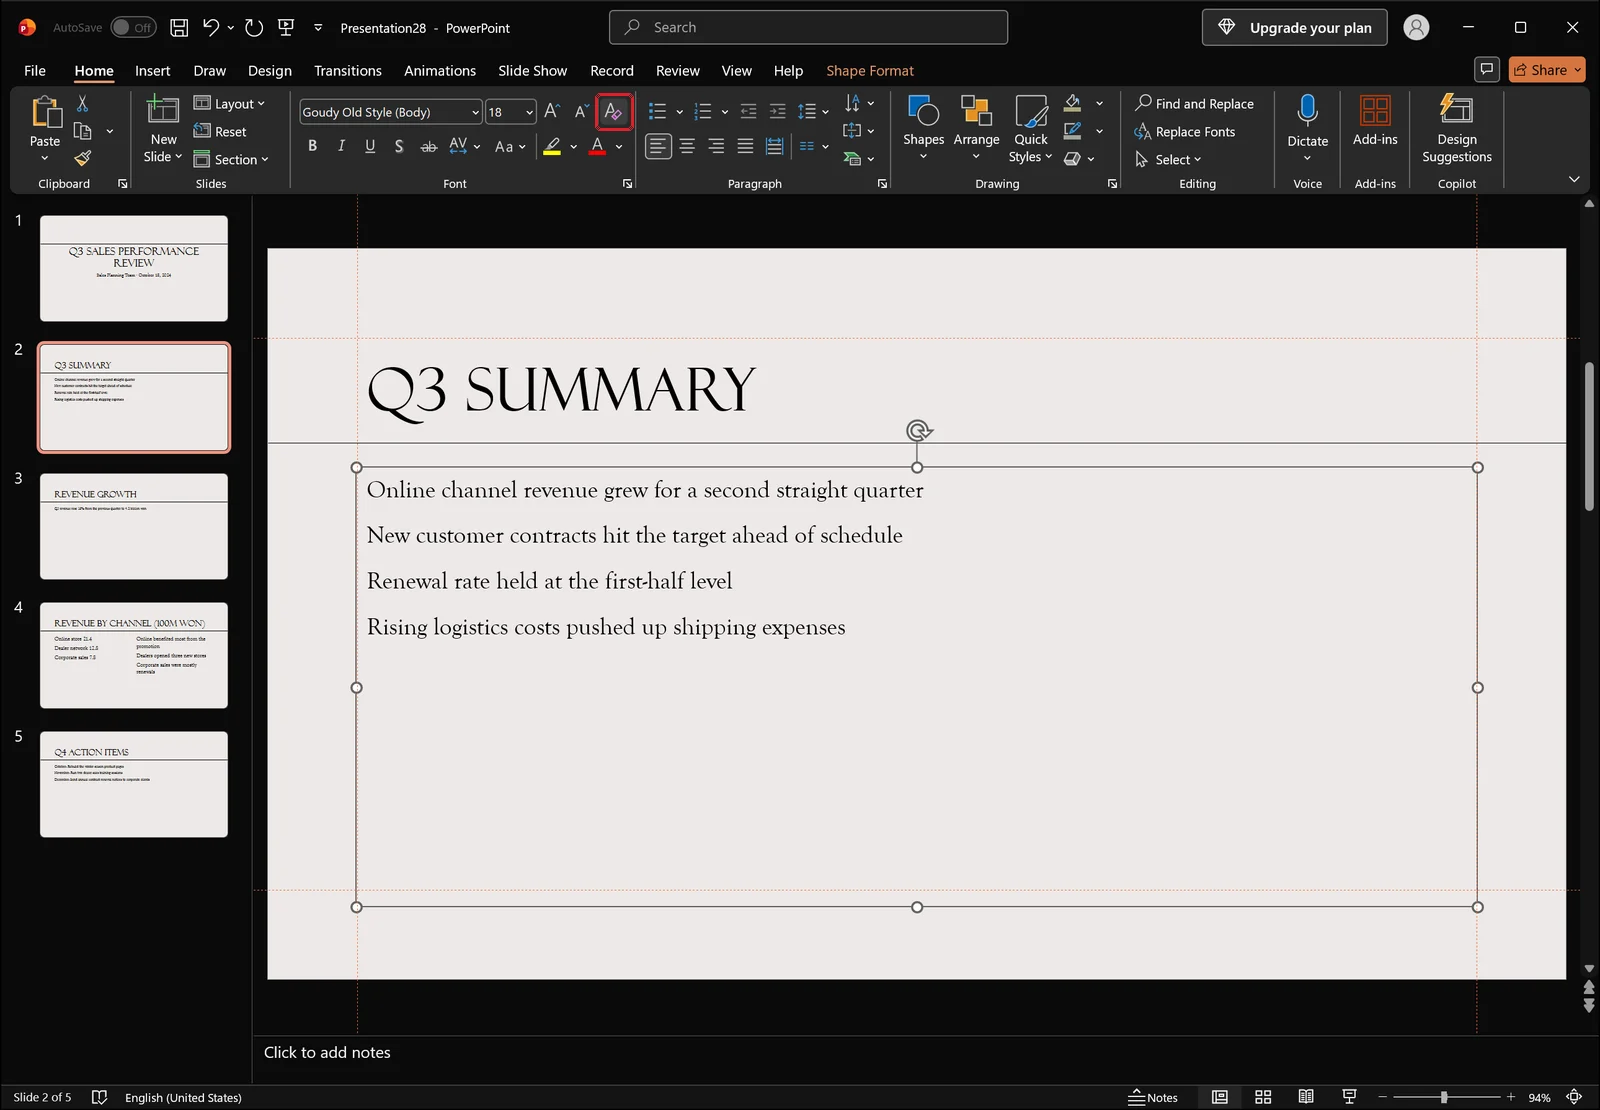
Clear Formatting sits in the same Font group, but it is not a highlight remover. As the screenshot shows, bold, font size and font color all reset along with the highlight, leaving plain default formatting. If you spent time getting the type right, use No Color rather than this button.
Undoing the last action
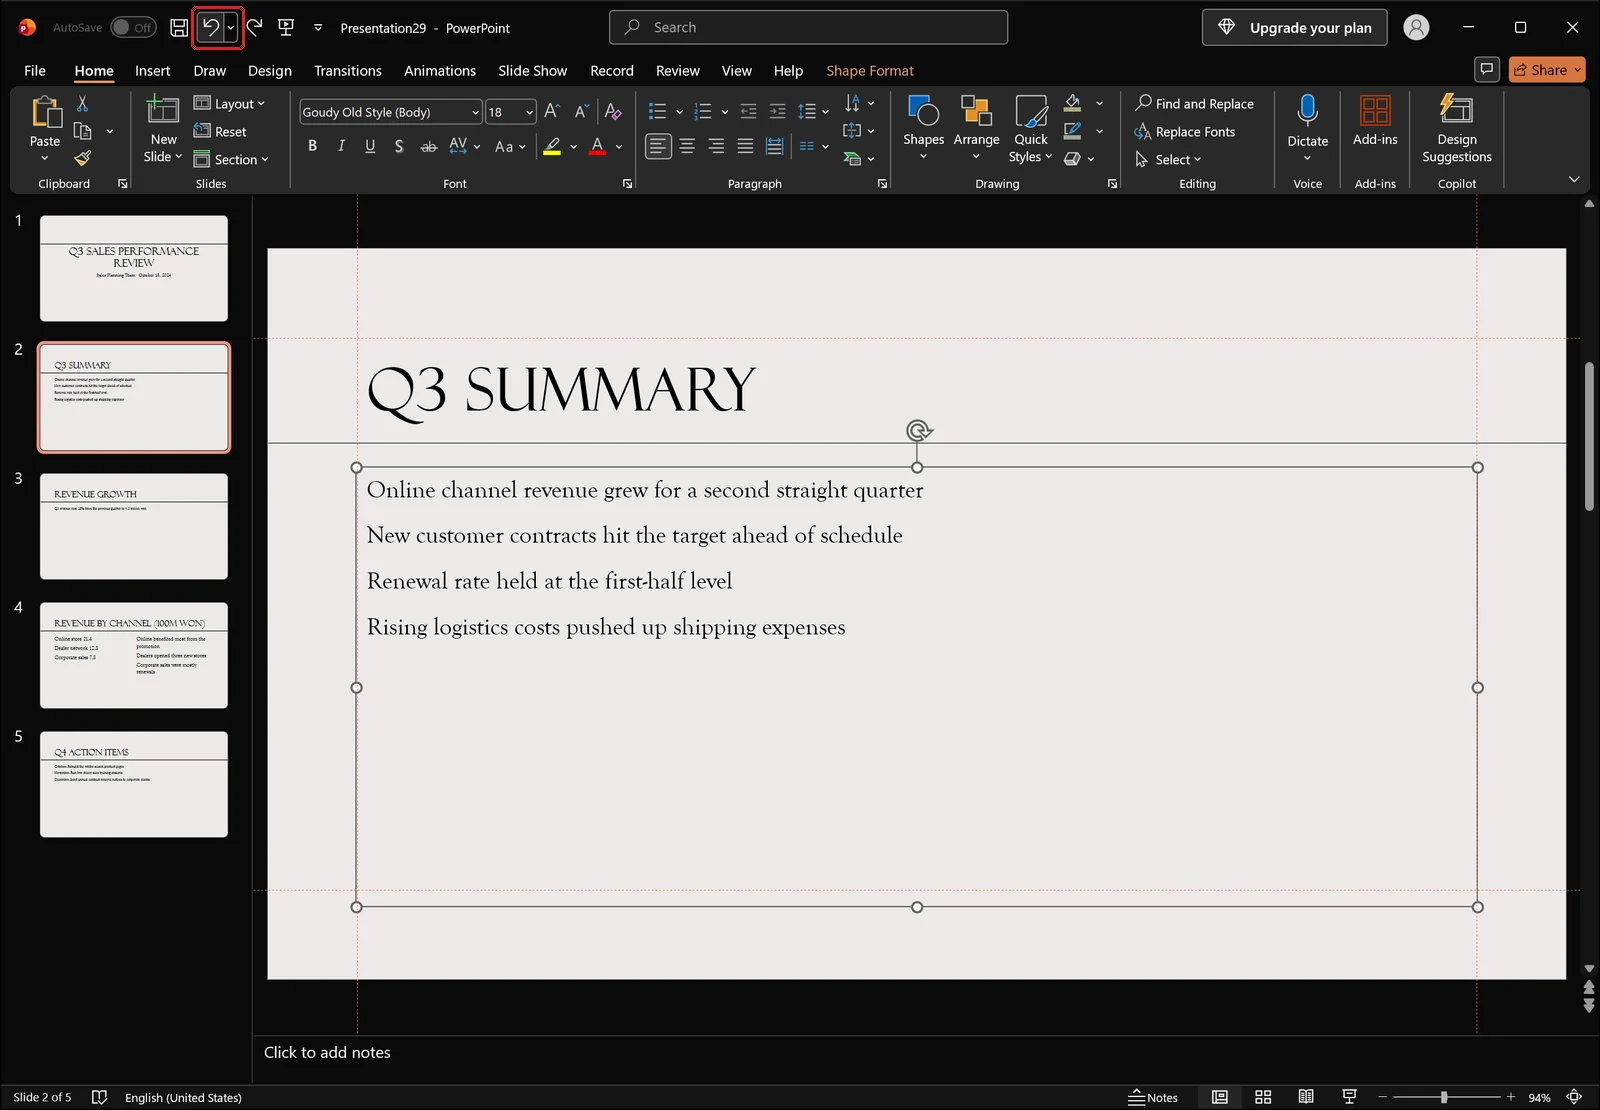
To take back a color you just applied, Undo (Ctrl+Z) at the top left of the window is the quickest route. Stepping back several times also wipes out whatever else you did in between, so for a highlight applied a while ago, No Color is the better tool.
| Method | What disappears | What survives |
|---|---|---|
| No Color | The highlight only | Font, size, weight, font color |
| Clear Formatting | Highlight plus all character formatting | The text itself |
| Undo | The most recent action | Everything as it was before it |
On a dark theme, you may remove the highlight and still see color sitting behind the letters. That is usually not Text Highlight Color at all but a Shape Fill applied to the box.
When the Highlight Is Missing or Will Not Apply
The button is nowhere in the Font group
If Text Highlight Color is absent from the Home tab, you are likely on PowerPoint 2016 or earlier, or the license is not activated. A narrow window can also collapse the Font group, so maximize the window or expand the group and check again before concluding anything.
Building a block background with Shape Fill
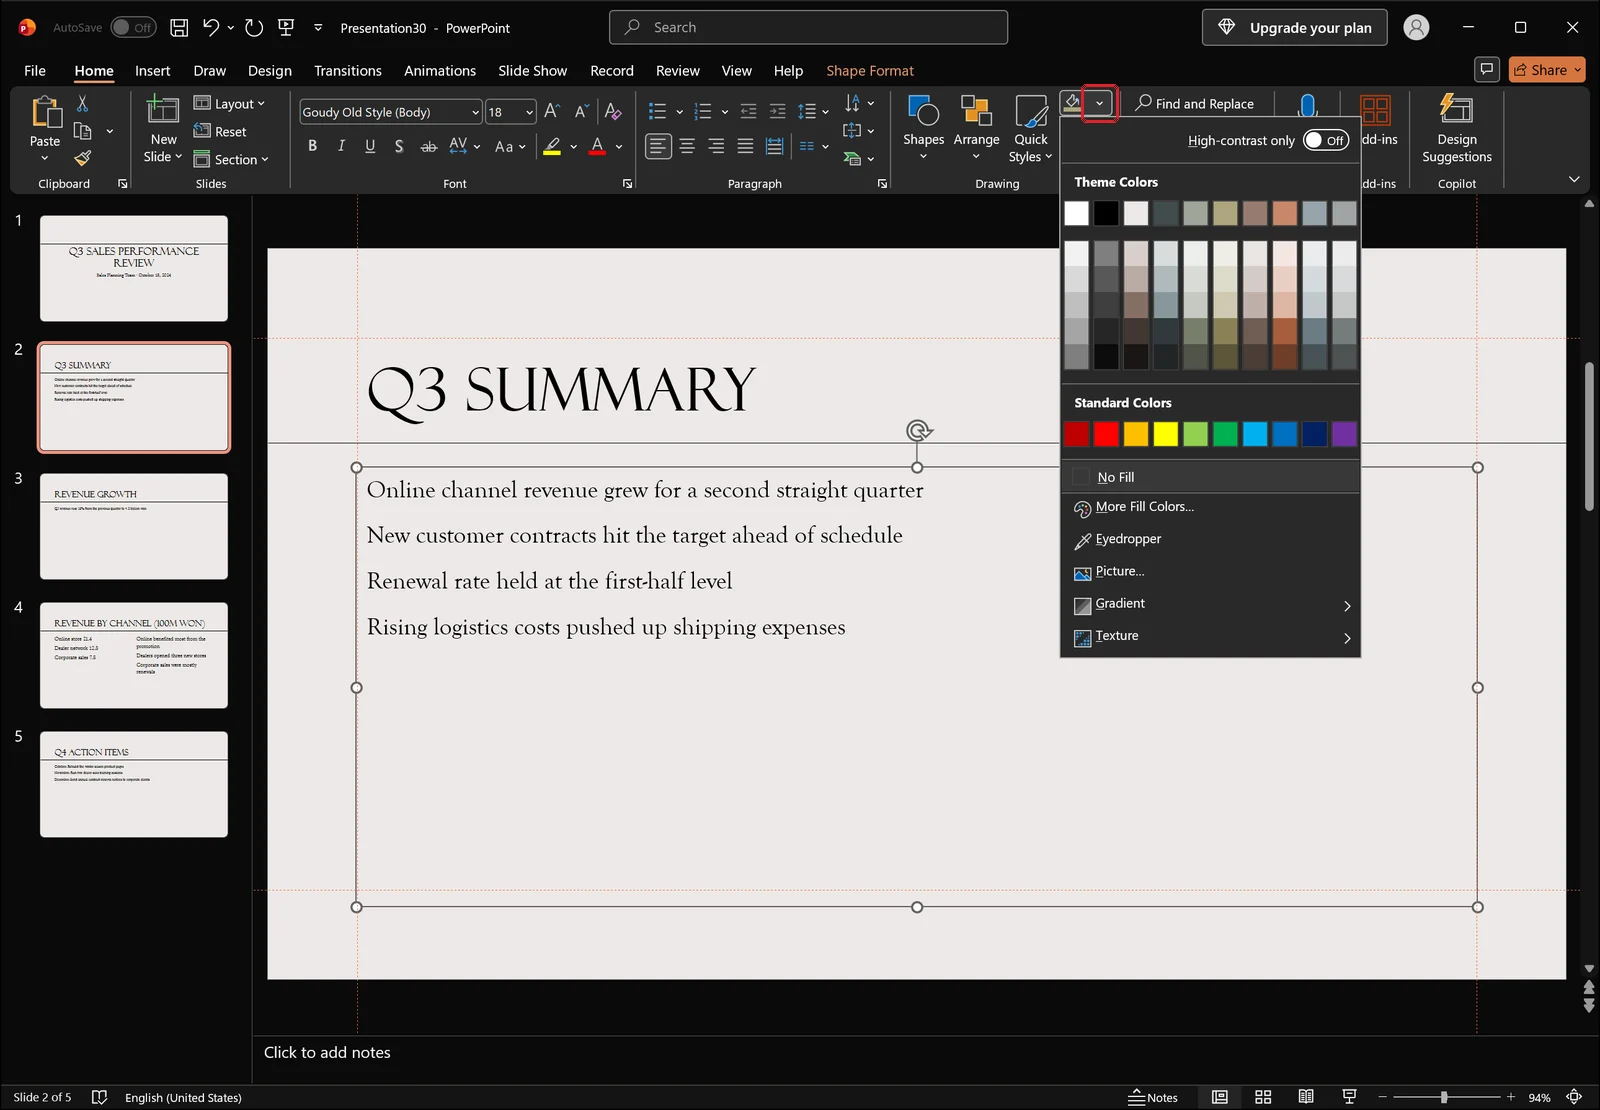
Select the text object and pick a color from Shape Fill in the Drawing group on the Home tab to create a solid block behind the words. The catch is that the fill covers the whole box, so as soon as the text wraps to a new line the shape of the block changes with it. Splitting a short one-line phrase into its own box keeps this predictable.
The highlighter on the Draw tab
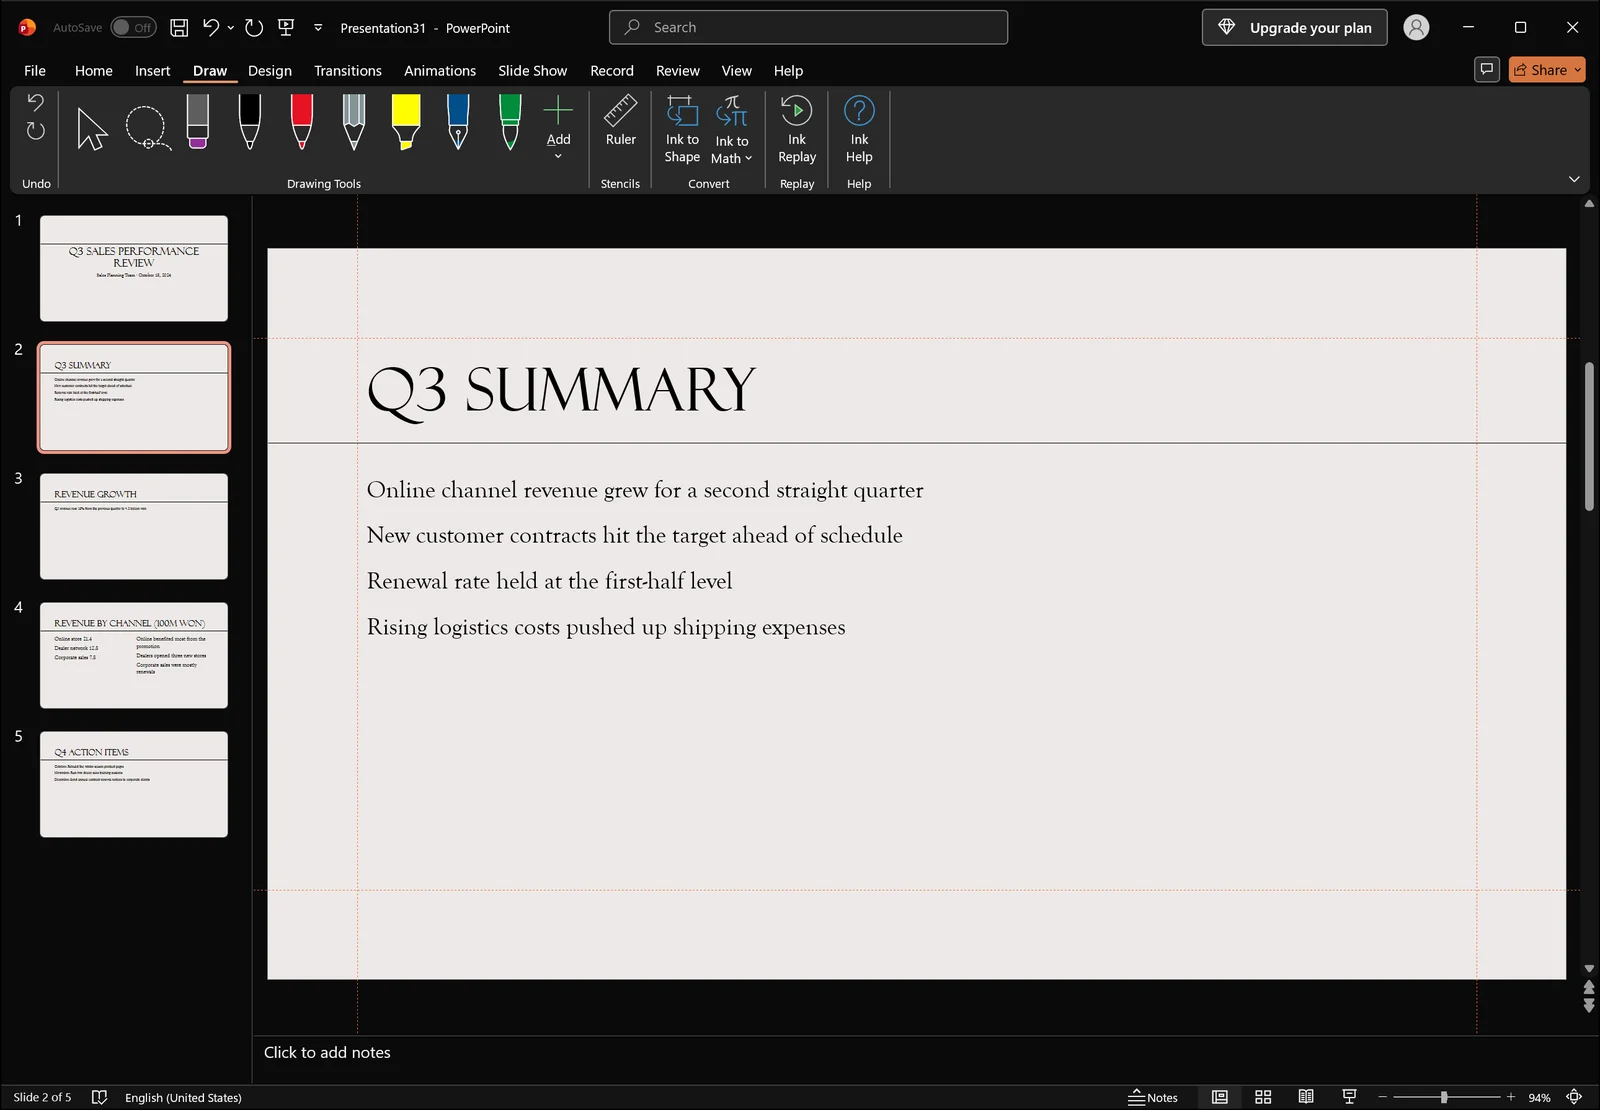
The Draw tab includes a highlighter alongside the pen and pencil. What it leaves behind is not text formatting but a separate ink object sitting on top of the slide. Edit the words and the ink stays exactly where you drew it, so save this for text that is already final; to remove a stroke later, select the ink and delete it.
If you want to mark something up live, run the slide show and pick the highlighter from the pen tools at the bottom left of the screen or from the right-click menu.
Underline and color from the Font dialog
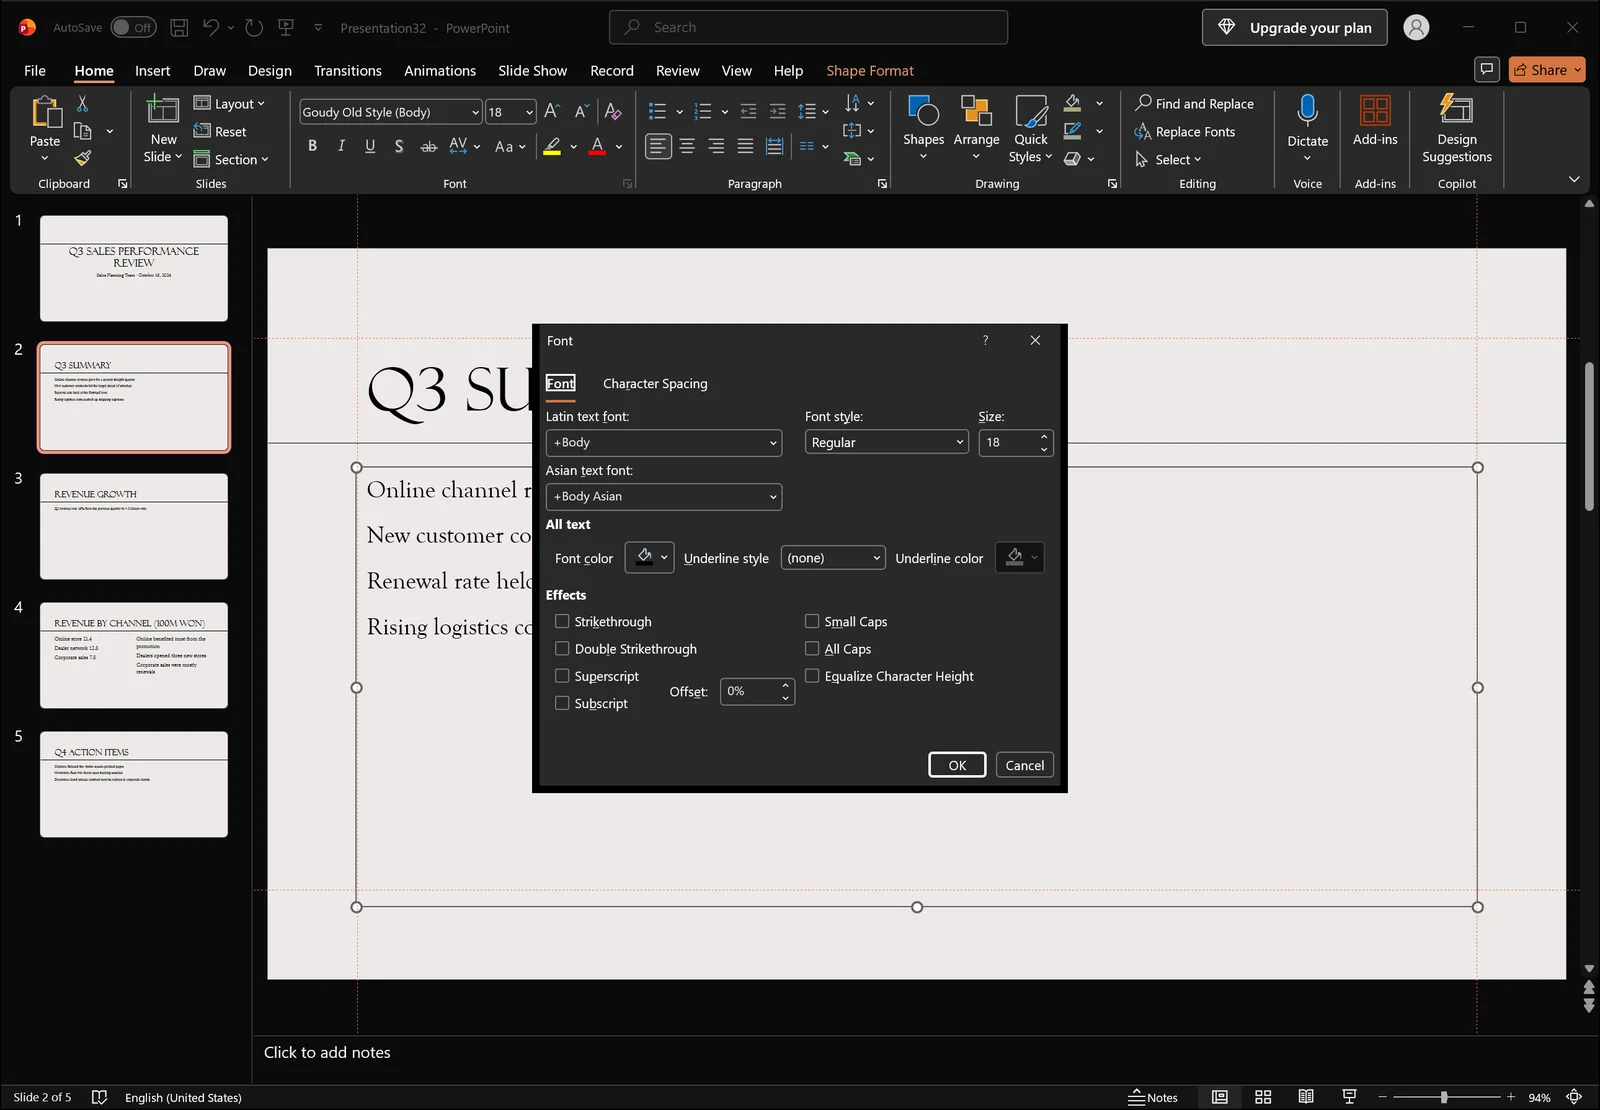
Where highlighting is not available, the Font dialog lets you combine a font color with an underline style and a separate underline color. A thick underline in a strong color reads well in print, and because there is no color band it holds up on dark themes too.
One more limit worth knowing: text pasted as a picture is not text, so Text Highlight Color cannot touch it. On WordArt with outlines and effects, the highlight often ends up buried under those effects and barely shows.
Keeping Emphasis Clean Across a Deck
Two colors maximum, one spot per slide
Emphasis everywhere is emphasis nowhere. Limit the whole deck to two highlight colors and give each one a meaning: yellow for key figures, pink for items that need attention. Two or three slides in, the audience picks up the rule on their own.
Copying the rule with Format Painter
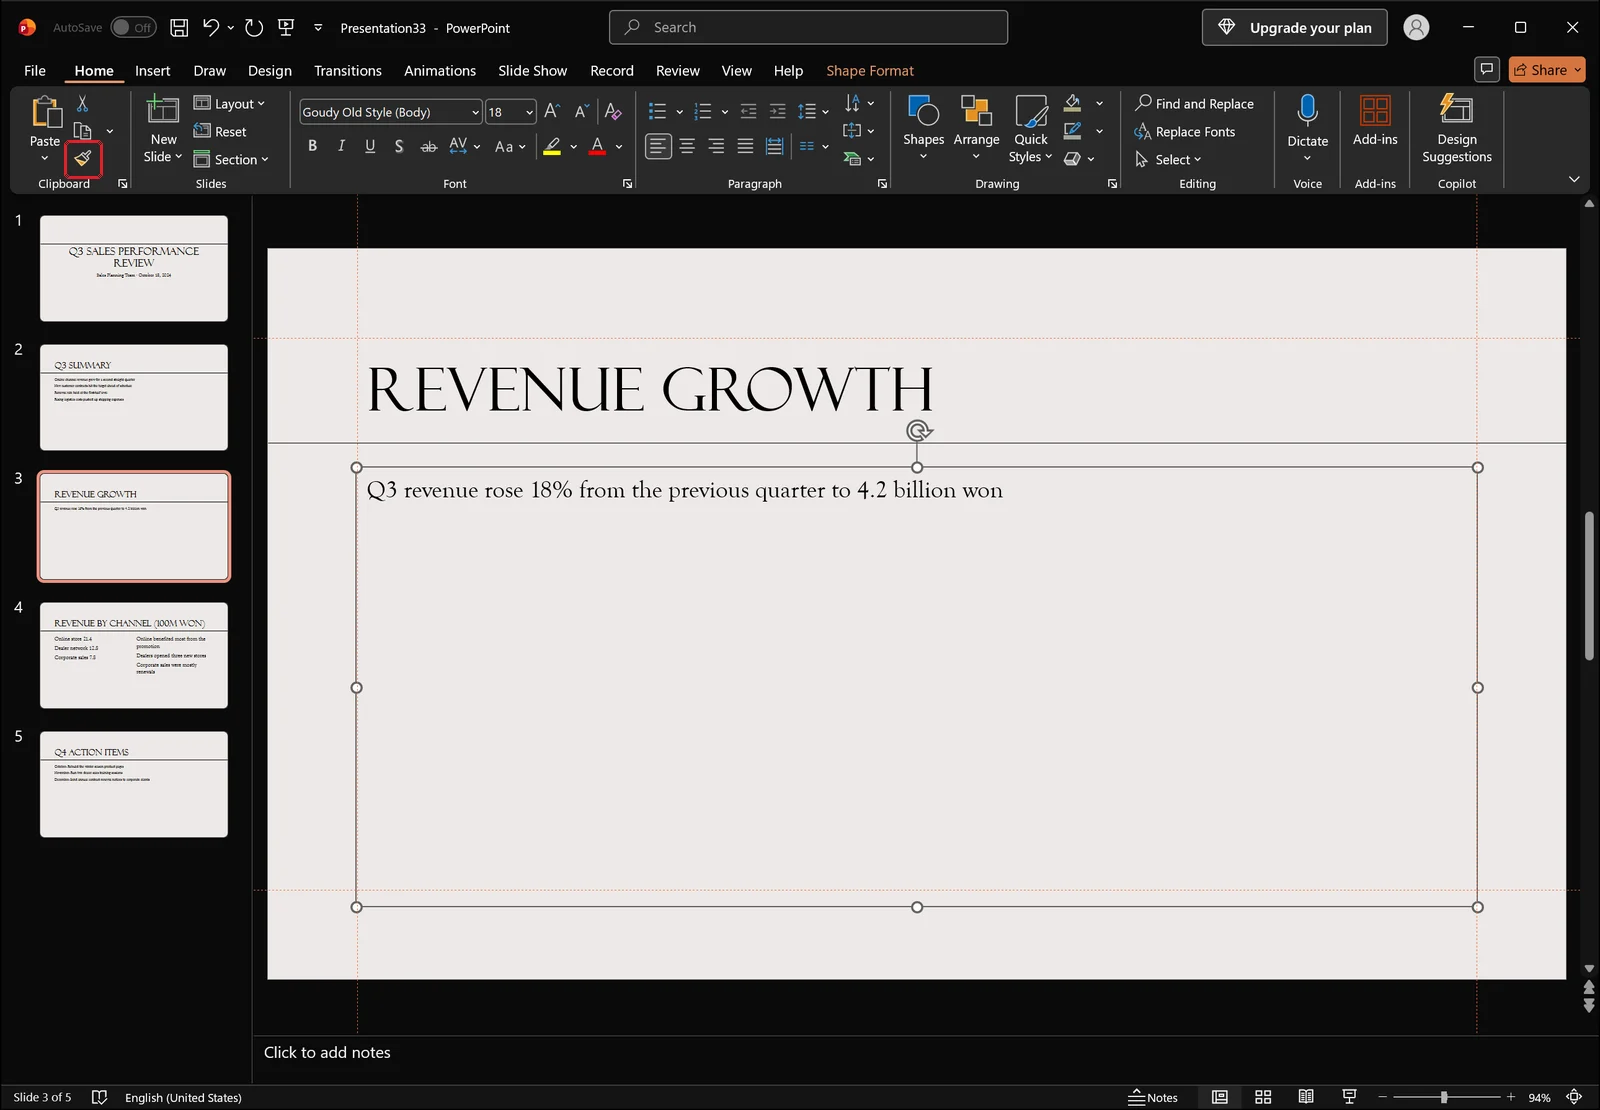
Select the phrase you want to treat as the standard, click Format Painter at the left end of the Home tab, then drag across another phrase to carry the same emphasis over. Picking a color from the palette again on every slide is how decks end up with three shades of nearly the same yellow; Format Painter removes that drift. Double-click the button to keep applying it until you switch it off.
Check it in grayscale
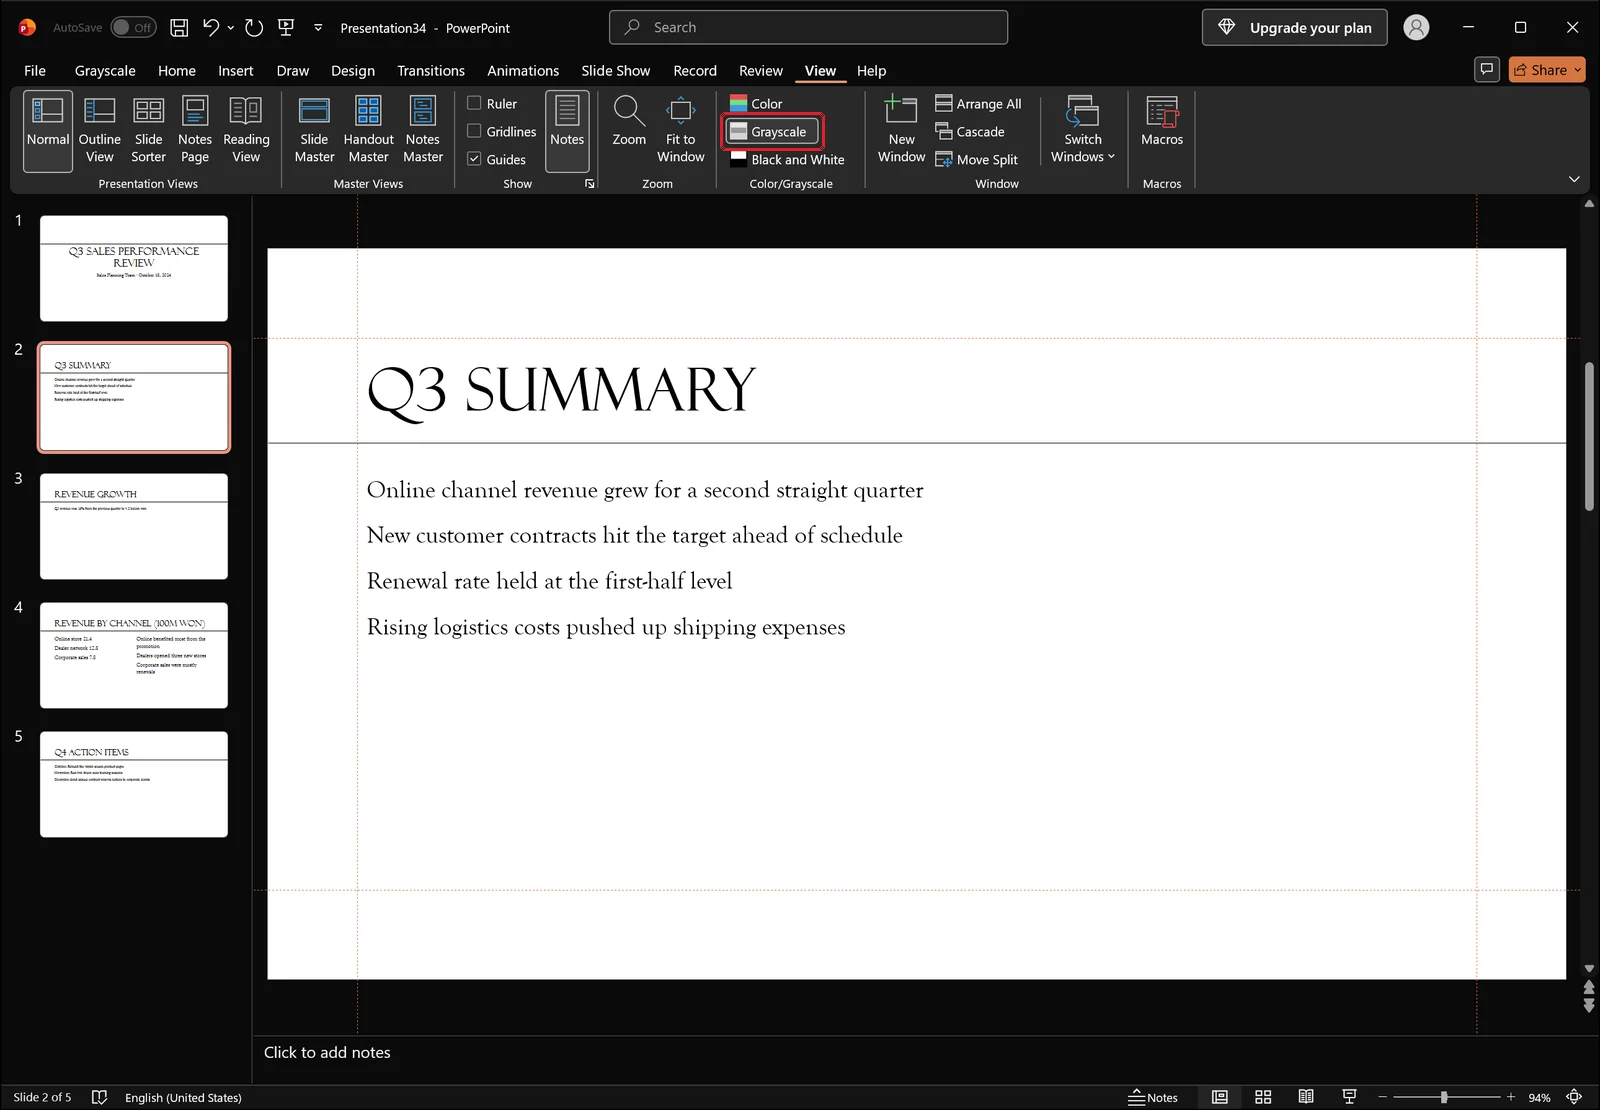
If the handouts print in black and white, preview them with Grayscale on the View tab first. A highlight that looks crisp on screen can turn into a dark gray band that swallows the letters. When that happens, drop to a lighter shade or switch to the bold-and-underline approach described above.
👉 How to Use Slide Master in PowerPoint: Format Every Slide
FAQ: Highlighting Text in PowerPoint
Q. Why can I not find the highlight button?
Text Highlight Color appears in the Font group only in Microsoft 365 and PowerPoint 2019 or later. On 2016 and earlier, or with an unactivated license, the button does not exist. A narrow window can also collapse the Font group, so widening the window or expanding the group sometimes brings it back.
Q. How do I remove a highlight completely?
Reselect the painted text and choose No Color from the Text Highlight Color palette. The highlight goes and every other character setting stays. If you applied it moments ago, Ctrl+Z is faster. Save Clear Formatting for when you actually want bold, size and font color reset as well.
Q. What is the difference between highlighting and Shape Fill?
A highlight paints only behind the selected characters and follows the text as you edit it. Shape Fill covers the entire text box or shape, so the block changes shape whenever the line length changes. Use a highlight for part of a sentence and Shape Fill for a deliberate block background.
Q. Can I highlight during a presentation?
Yes. While the slide show is running, choose the highlighter from the pen tools at the bottom left of the screen or from the right-click menu and draw straight onto the slide. When you end the show, PowerPoint asks whether to keep the ink annotations; keeping them leaves the marks on the slide as objects.
Cleaning Up Deck Formatting with inline AI
Applying a highlight to one phrase is quick, but none of the steps above scale. When a 40-slide deck has drifted into four shades of yellow, or the rule itself has to change, the only manual option is opening each slide and repainting by hand.
inline AI is a local agent that runs on your PC and reads and edits the document you already have open. Ask it in plain language, something like "keep yellow highlights on the key figures only and clear the rest," and it finds the affected slides and adjusts the formatting. It works the same way in Word and Excel files. Nothing is uploaded to a cloud service; the file is processed on your own machine, so an unreleased deck never leaves it.
See what an agent could take over at your company in a 30-minute call.