Learn
First Line Indent and Hanging Indent in Word: Exact Values

Pressing Tab at the start of a paragraph is not indentation. It inserts a single tab character, so the moment the font changes or the margins shift, that first line moves with it. A first line indent and hanging indent in Word are paragraph properties, which means they hold their position no matter what happens to the text around them, as long as you set them as values in the Paragraph dialog or on the ruler. This guide covers how to set both to exact numbers, how to push one setting across an entire document with styles and shortcuts, and how to undo indentation that went wrong.
The Three Indent Values, and Why Tab Is Not One of Them
Left Indent, First Line, and Hanging
Word has three separate values that move a paragraph inward. Left indent shifts every line of the paragraph to the right. First line indent moves only the first line inward while the rest stay where they were. Hanging indent does the opposite: the first line stays put and every line after it moves in.
There is one detail that trips people up constantly. First line and hanging indents are not measured from the page margin, they are measured relative to the left indent. If the left indent is 0.4" and the first line indent is 0.2", the first line starts 0.6" from the margin and the following lines start at 0.4". Set the left indent by accident and every value after it lands somewhere you did not expect.
What Actually Breaks When You Use Tab
A tab is a character. Change the body font or adjust the margins and the tab width changes with it, so first lines that used to line up start drifting apart paragraph by paragraph. Move sentences around during editing and you find stray tabs stranded mid-paragraph, producing gaps nobody typed on purpose.
The bigger problem shows up later. Paragraphs pushed over with tabs tend to fall apart when you generate a table of contents or convert them to a numbered list, because Word recalculates paragraph properties and the tab characters are still sitting there. An indent stored as a paragraph value survives font changes, reordering, and copy-paste.
Values People Actually Use
There is no single correct number, but the conventions are fairly stable. Body paragraphs in reports typically use a first line indent of 0.25" to 0.5" (roughly 0.6 cm to 1.27 cm). Reference lists, glossaries, and definition-style layouts, where a label or citation opens the line, usually use a hanging indent of 0.5", which is what APA and MLA both specify.
The worst outcome is a document where the value is different in every section. Decide on the number first, then use styles to apply it everywhere at once.
Before You Start: Show the Ruler and Check Your Units
Turning On the Ruler
Working with indent values is much easier with the ruler visible, because you can see immediately where a number landed.
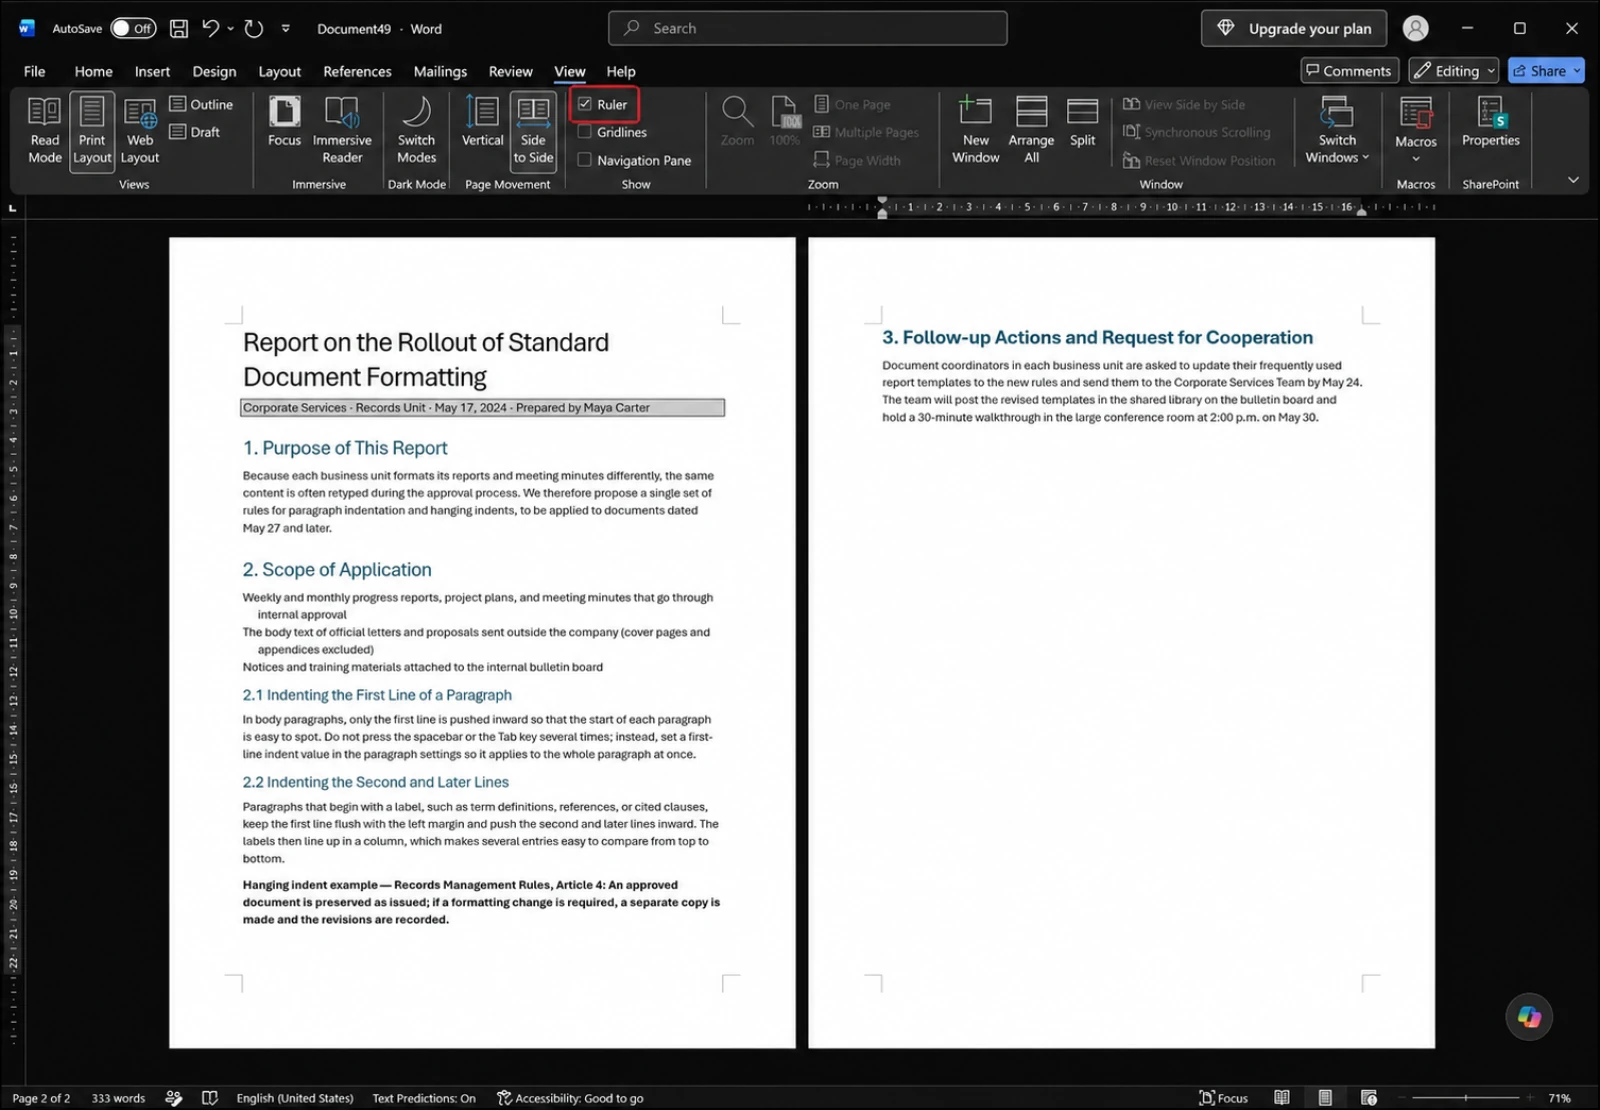
On the View tab, tick Ruler in the Show group and a horizontal ruler appears above the page. At its left end sit a few small triangle and square markers, and those markers represent the indent values of whichever paragraph the cursor is currently in.
Reading the Markers
There are three markers, and they map exactly onto the three values described above.
- Upper triangle: first line indent. Drag it alone and only the first line moves.
- Lower triangle: hanging indent, meaning the start position of the second line onward.
- Lower rectangle: left indent. Drag this and both triangles move together, keeping their spacing.
Hold Alt while dragging and the ruler displays live measurements, so you are matching a number instead of guessing. Without Alt, the markers snap to fixed increments, which is fine for rough work but useless if you need something like 0.35". For values that precise, type them into the dialog.
Checking the Result in Print Layout
Indents are calculated from the page margin, so you need a view that actually draws the margins to see what will print.
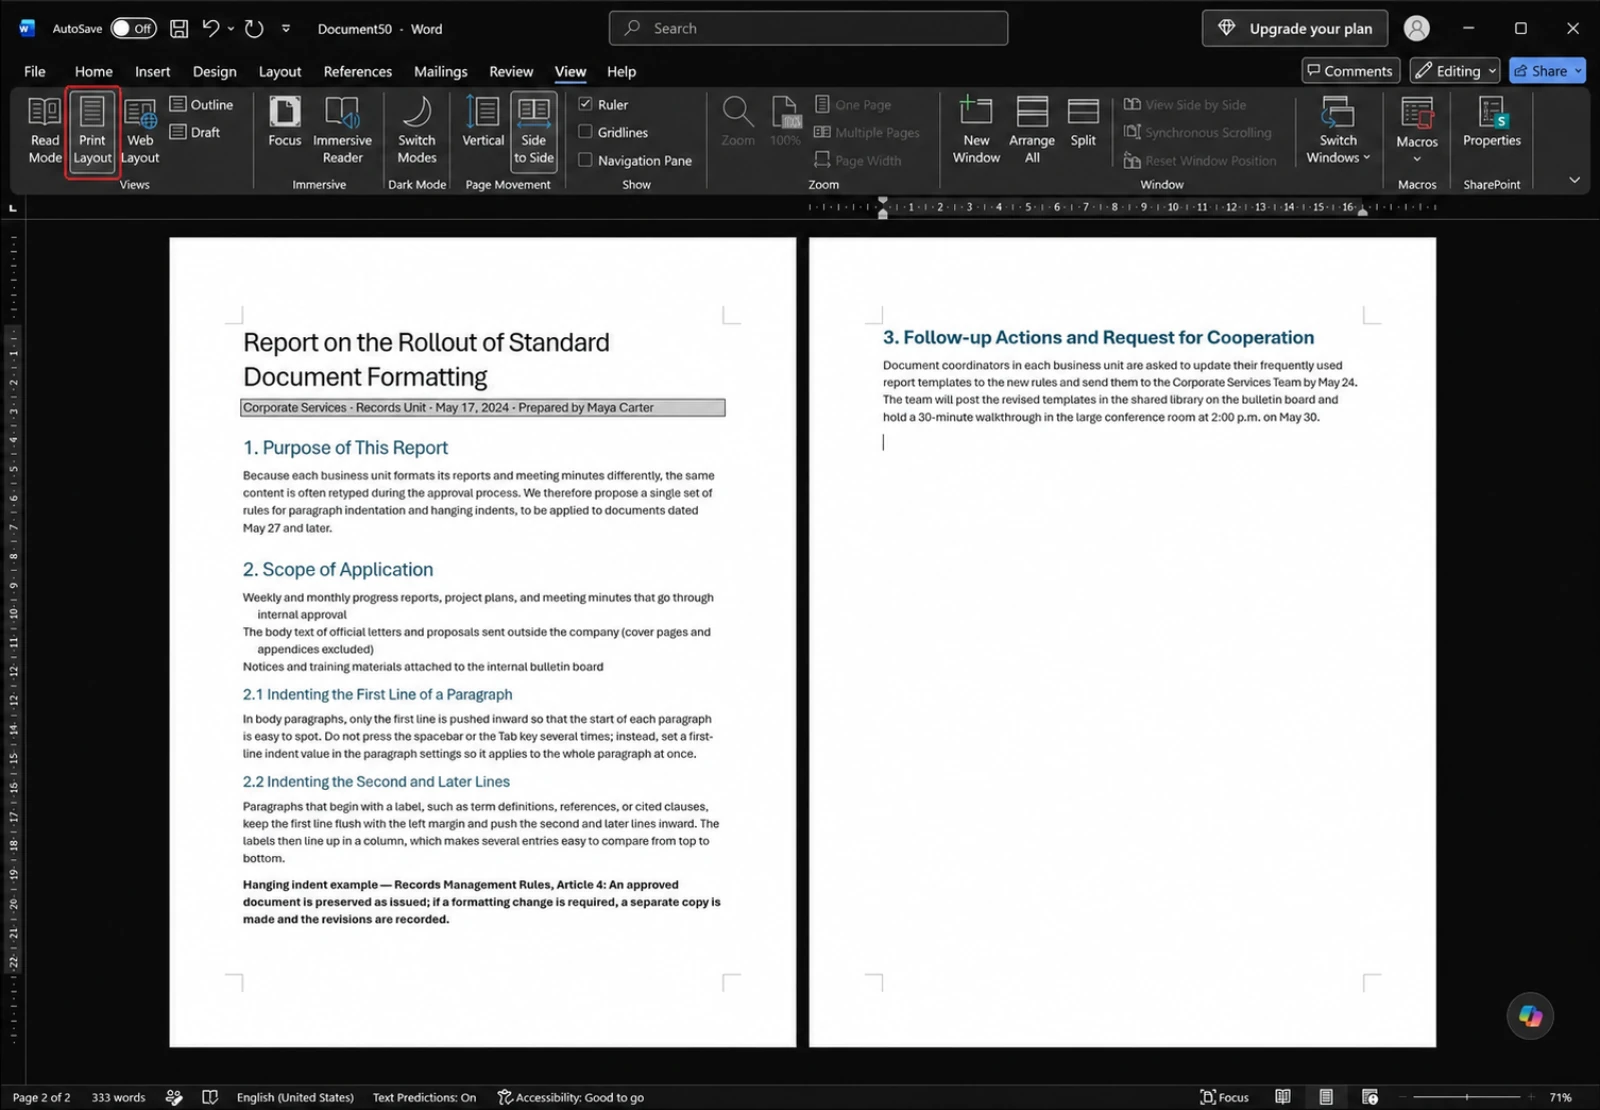
On the View tab, choose Print Layout in the Views group. Page edges and margins appear around the body text, and the ruler with its indent markers stays visible above the page. Draft and Read Mode do not show margins the same way, so leave the document in Print Layout while you are setting up formatting.
Switching Units to cm, mm, or Points
If inches are not how you think about page measurements, change the unit itself. Go to File > Options > Advanced, find the Display section, and set Show measurements in units of to Centimeters, Millimeters, Points, or Picas. This is a Word-level setting, not a document setting, so it follows you into every file you open.
Changing the unit only changes how values are displayed; the values stored in the document stay identical. You can also type a unit directly into any indent box, like 0.5cm or 10pt, and Word converts it to the current display unit.
Setting a First Line Indent to an Exact Value
Opening the Paragraph Dialog
To enter a number rather than drag a marker, you need the Paragraph dialog.
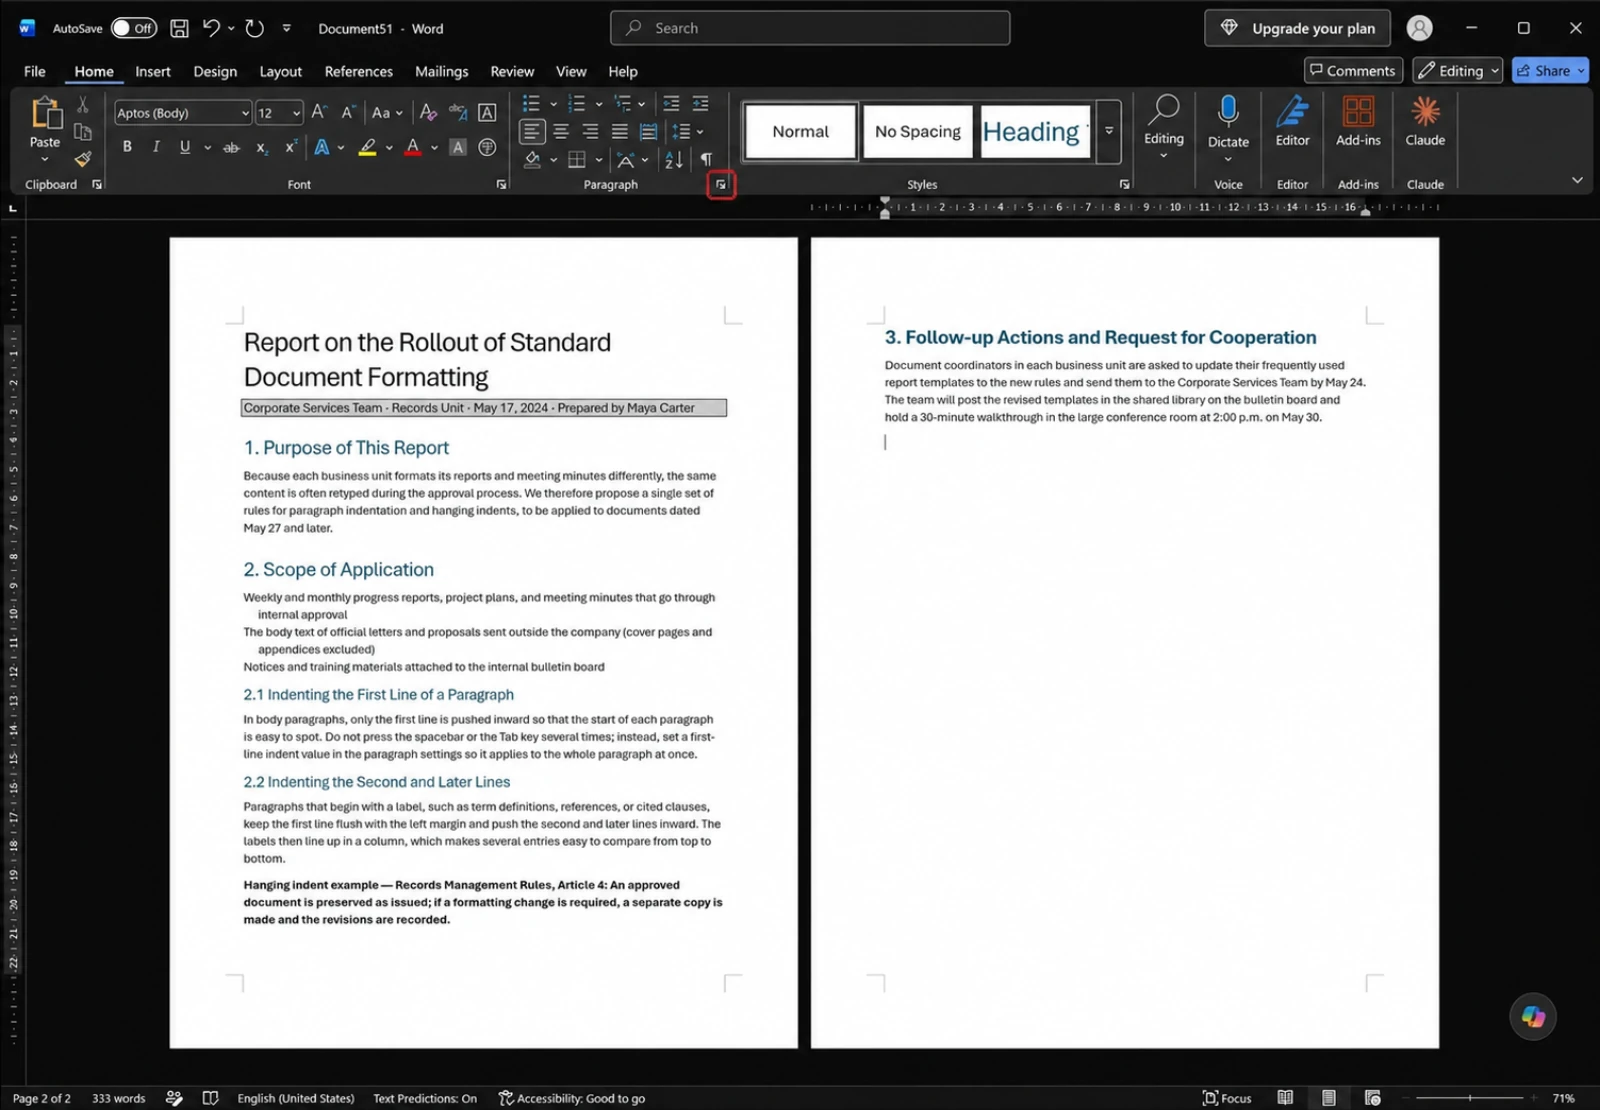
On the Home tab, click the small arrow in the bottom-right corner of the Paragraph group, labeled Paragraph.... The Layout tab has the same launcher in its own Paragraph group, and either one opens the identical dialog.
Choosing First Line and Entering a Number
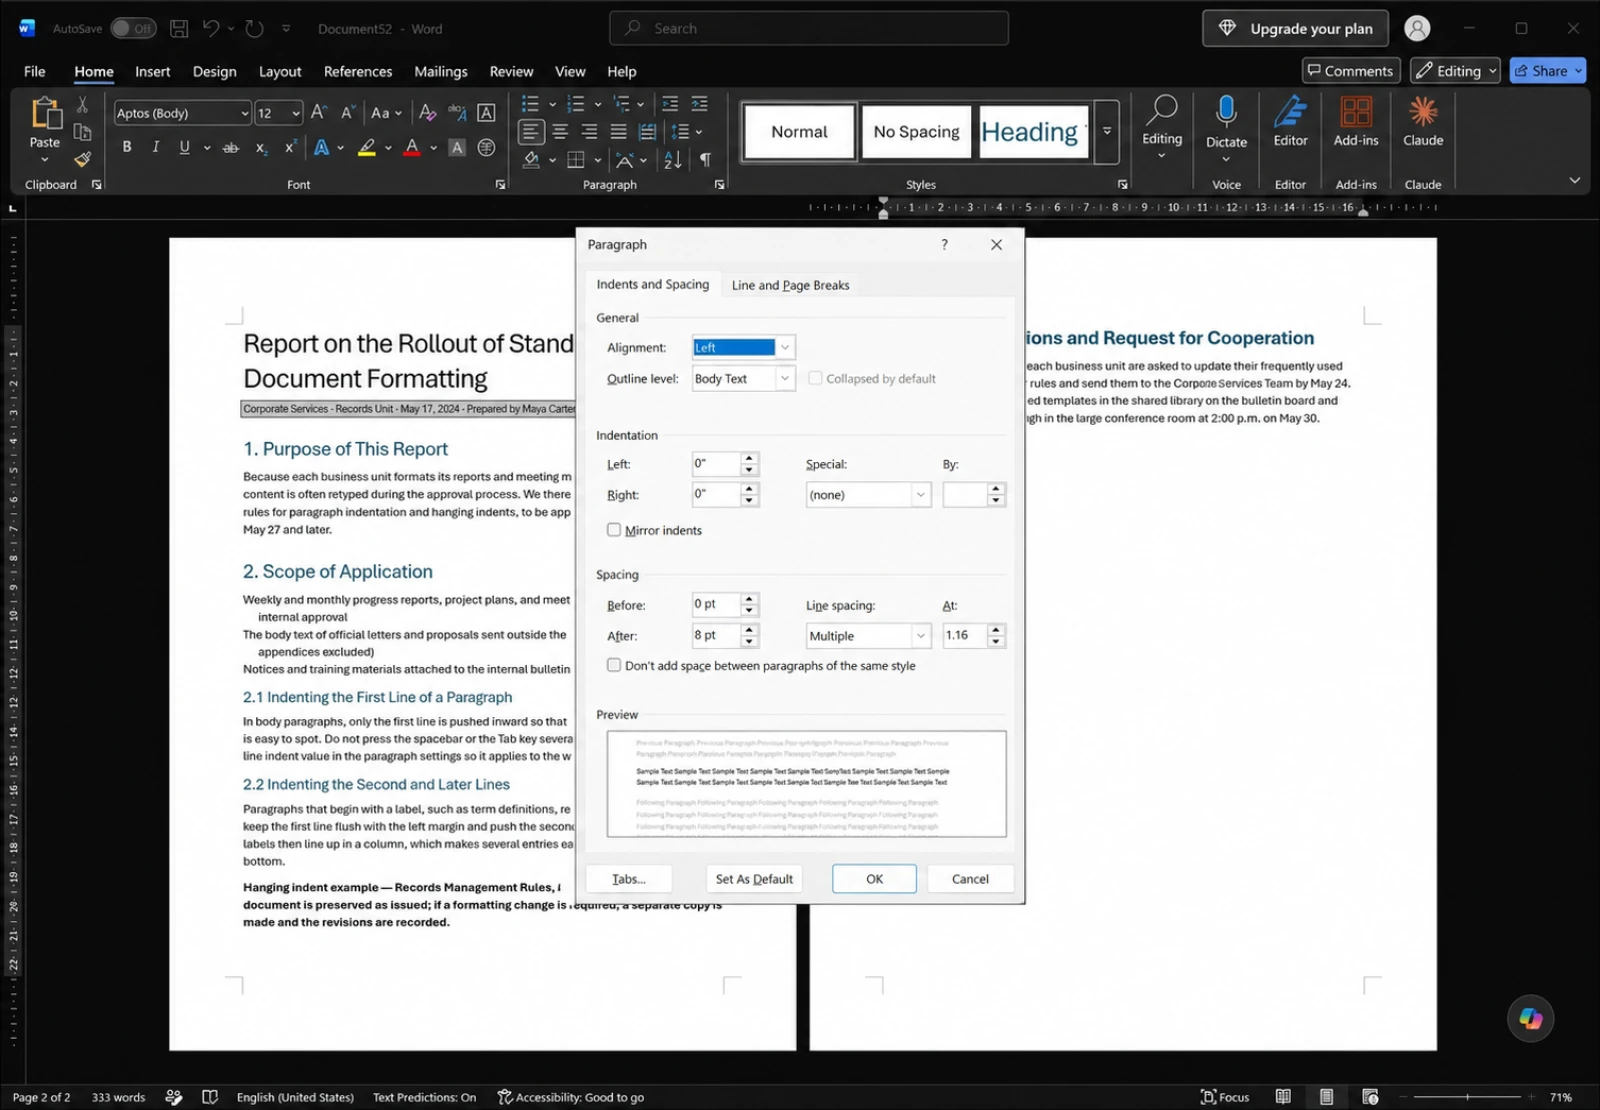
On the Indents and Spacing tab, look at the Indentation area. Left and Right move the whole paragraph. The Special dropdown next to them is where you pick the behavior: leave it at (none), or choose First line or Hanging. Select First line, then type your value into the By box, for example 0.25" or 0.5".
The preview at the bottom of the dialog updates as you type, so you can confirm that only the first line moves. If the second and third lines shift as well, the Left value has been changed by accident. Set Left back to 0 and the preview should correct itself.
Fine-Tuning from the Layout Tab
Opening the dialog every time gets tedious when you are nudging values.
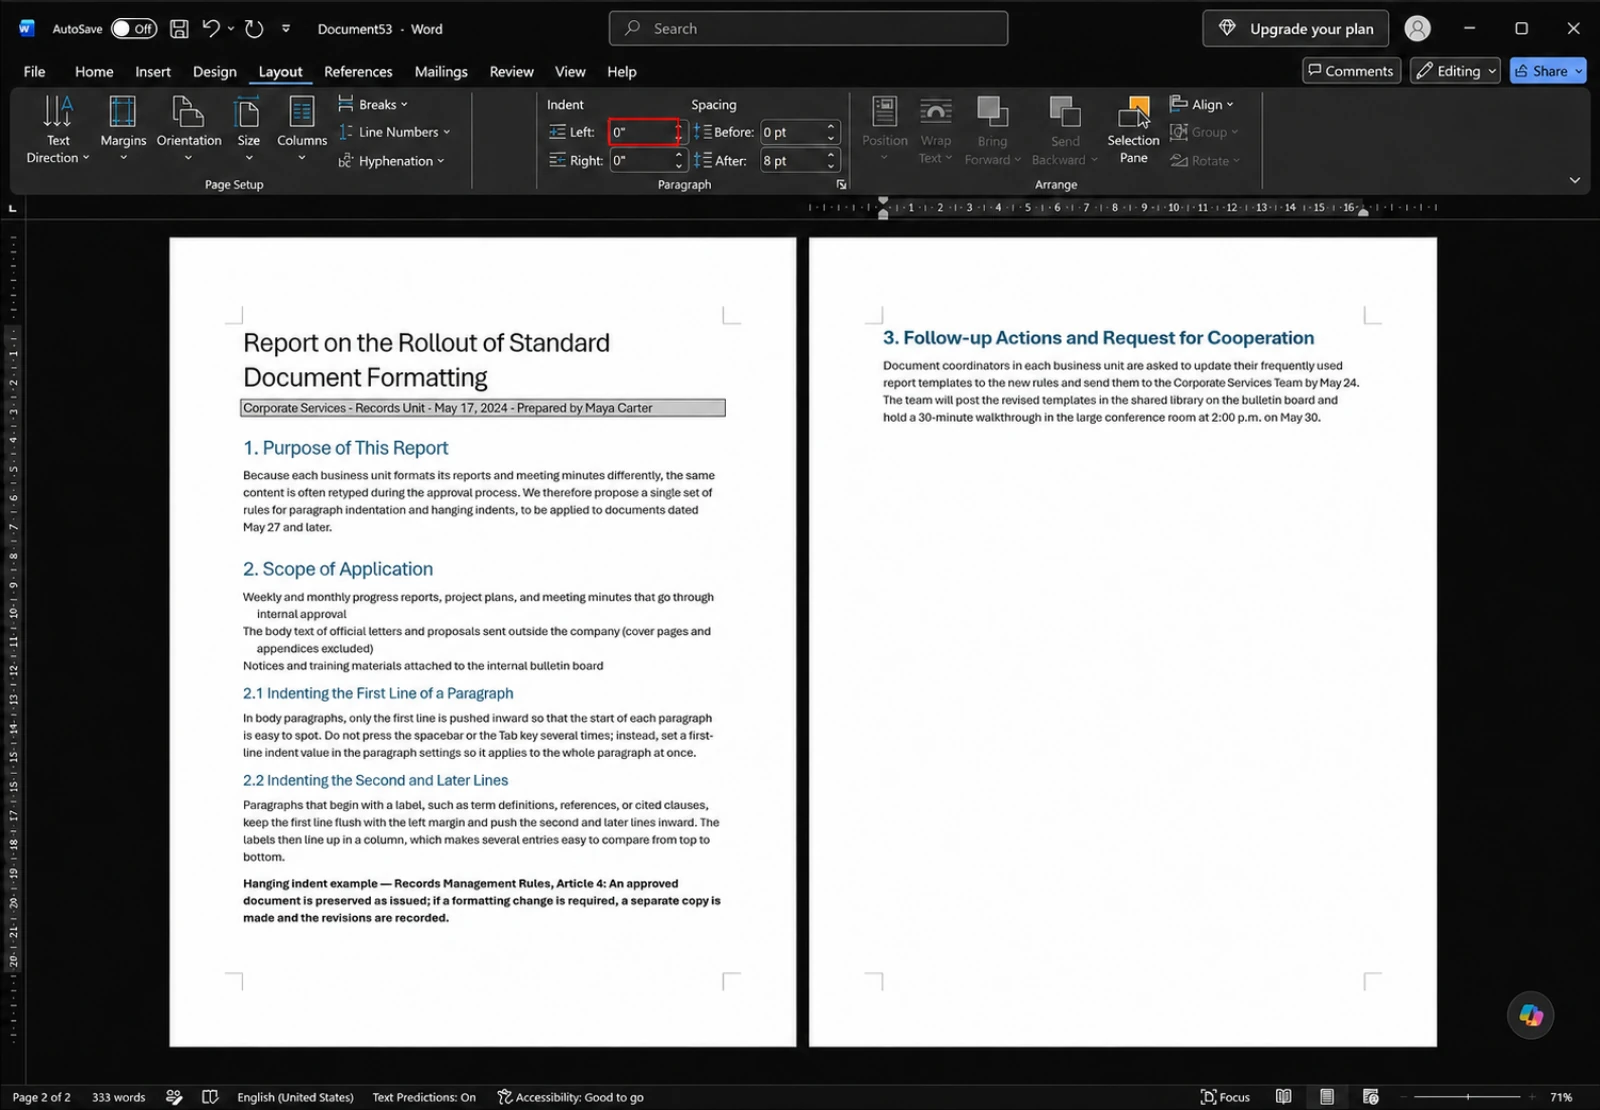
The Layout tab has Indent Left and Indent Right spin boxes in the Paragraph group, so you can step values up and down without leaving the ribbon. Two things to keep in mind. These boxes control the left indent, meaning the whole paragraph, not the first line. And because first line values are calculated on top of the left indent, changing this box shifts your first line too. If the goal is to adjust the first line alone, go back to the Paragraph dialog.
Applying It to Multiple Paragraphs
Values in the Paragraph dialog apply to the paragraph containing the cursor, or to every paragraph in the current selection. To give the whole document the same first line indent, press Ctrl+A and then set the value once.
The catch is that Ctrl+A also catches headings and any paragraphs inside tables. If your headings suddenly sit half an inch in, reselect just those paragraphs and set Special back to (none), or skip the blunt approach entirely and handle it through styles, covered further down.
Applying a Hanging Indent to the Second Line and Beyond
When a Hanging Indent Is the Right Choice
Reference lists, glossaries, and contract clauses all share the same shape: a number or label opens the line and the explanation follows. Indenting from the second line onward makes those entries far easier to scan, because the left edge tells you exactly where each new item begins.
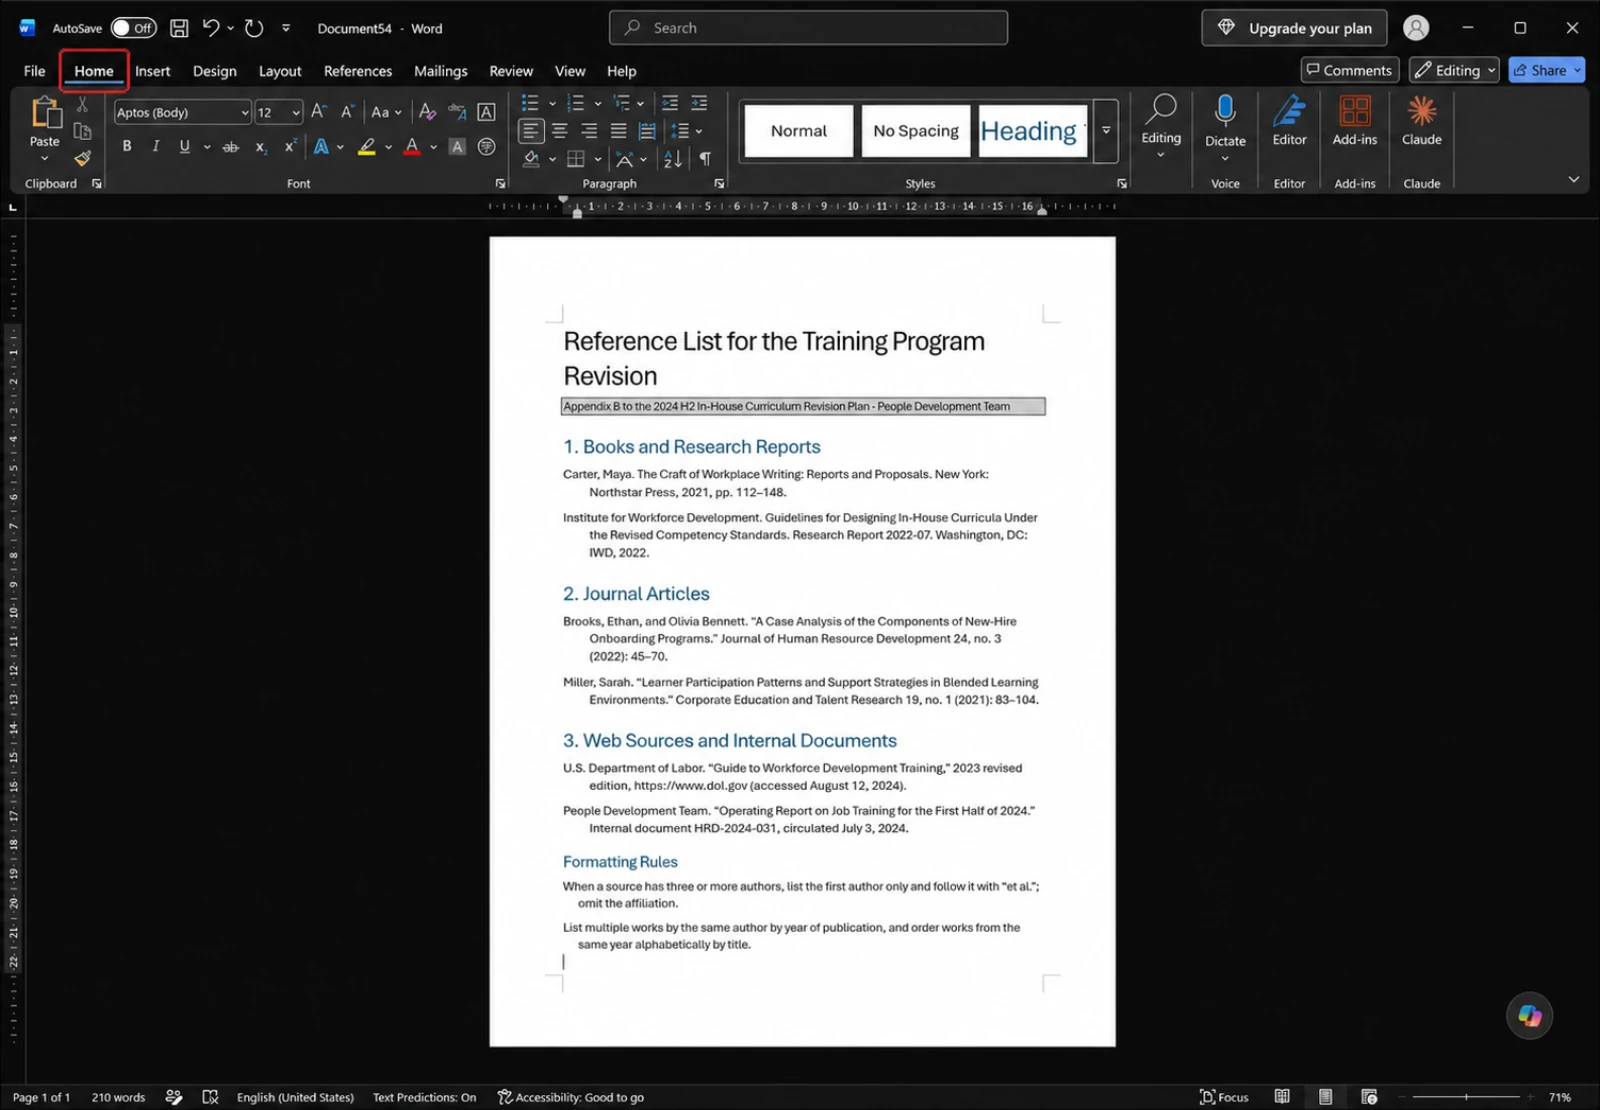
In the numbered reference list under the shaded subtitle line, entries that wrap onto a second line have that second line sitting flush at the left margin, exactly like the first, so nothing distinguishes a continuation from a new entry. Compare it with the Formatting Rules section further down the same page, where the wrapped lines "omit the affiliation." and "same year alphabetically by title." are clearly pushed in — that is the hanging indent this section shows you how to apply.
Selecting Hanging in the Paragraph Dialog
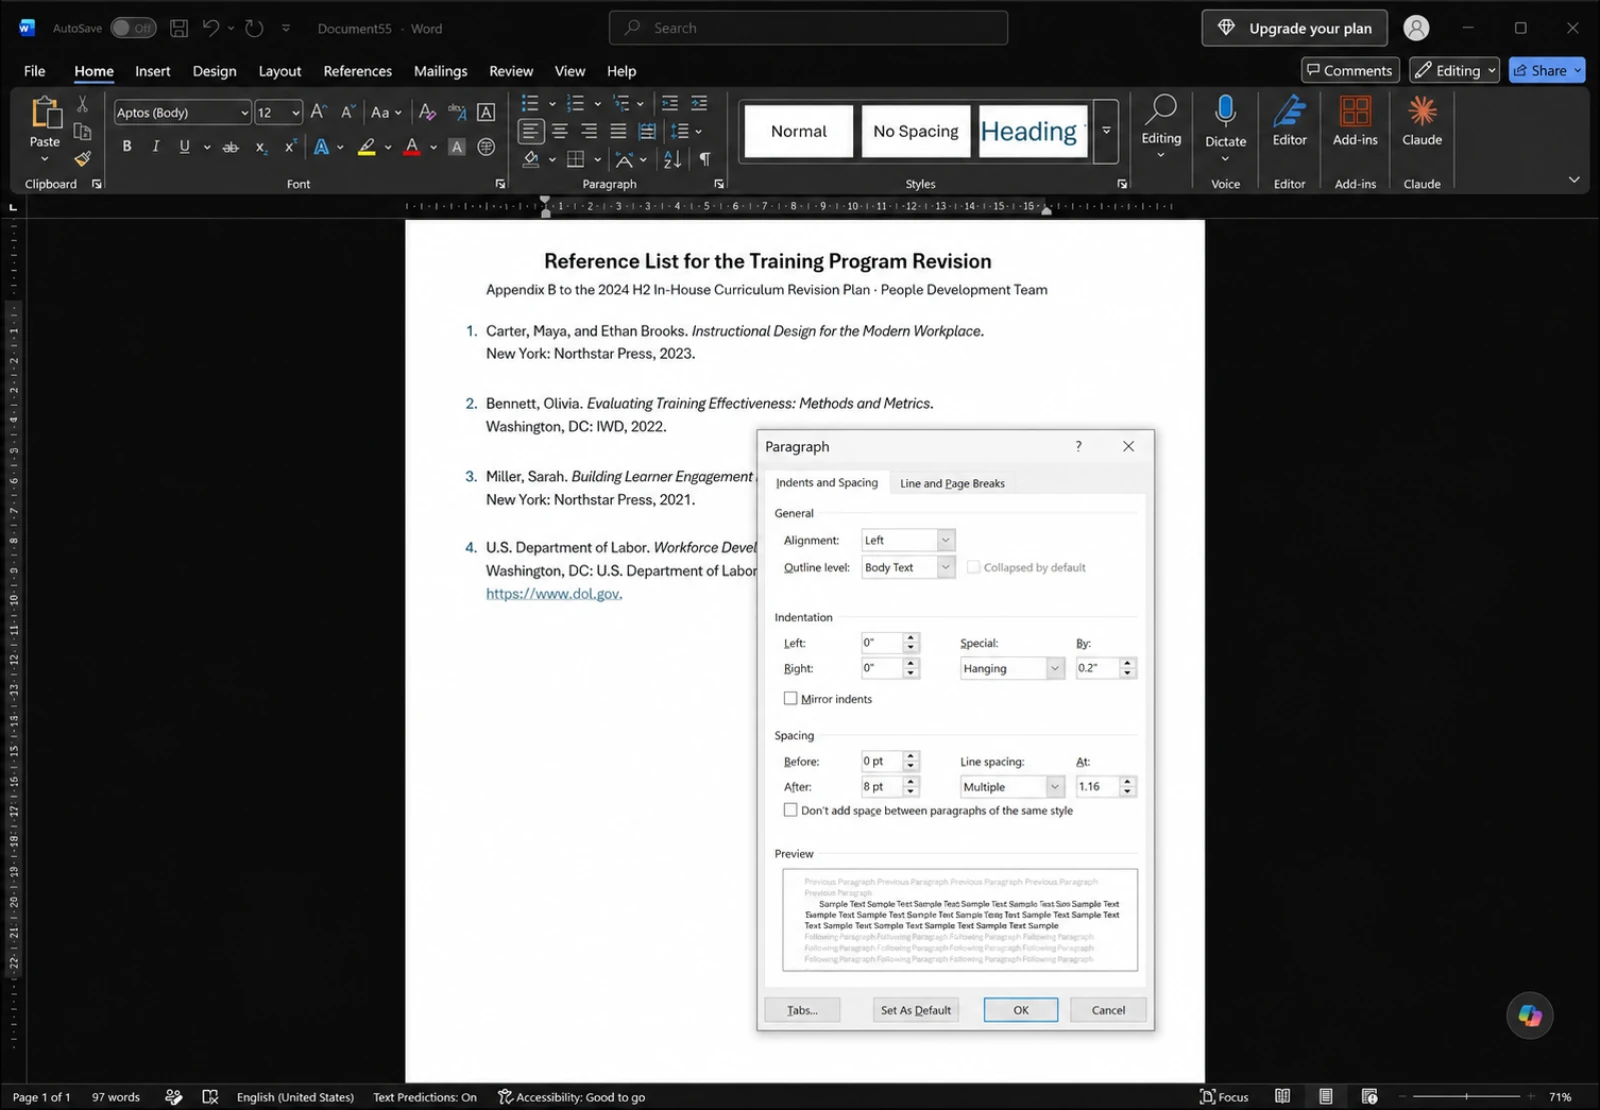
Select all the list paragraphs, open the Paragraph dialog, and set Special to Hanging. The dialog here is displaying inches — Left and Right read 0" and the By box reads 0.2". For the standard citation format used by most style guides, type 0.5" into that box instead. Anything between 0.3" and 0.5" reads cleanly; below that the effect is too subtle to help.
If entries look ragged because the numbers have different digit counts, do not fix it by tweaking the indent value. Put a tab after the number instead and set the hanging indent to match that tab position.
Increasing a Hanging Indent with Ctrl+T
When you just want to feel out the right amount, the keyboard is faster. Ctrl+T increases the hanging indent by one step and Ctrl+Shift+T takes it back. One step is the default tab stop, 0.5" (1.27 cm).
That also means the shortcut can only produce multiples of 0.5". For anything else, you are back in the Paragraph dialog typing a number.
Numbered and Bulleted Lists Create Hanging Indents Automatically
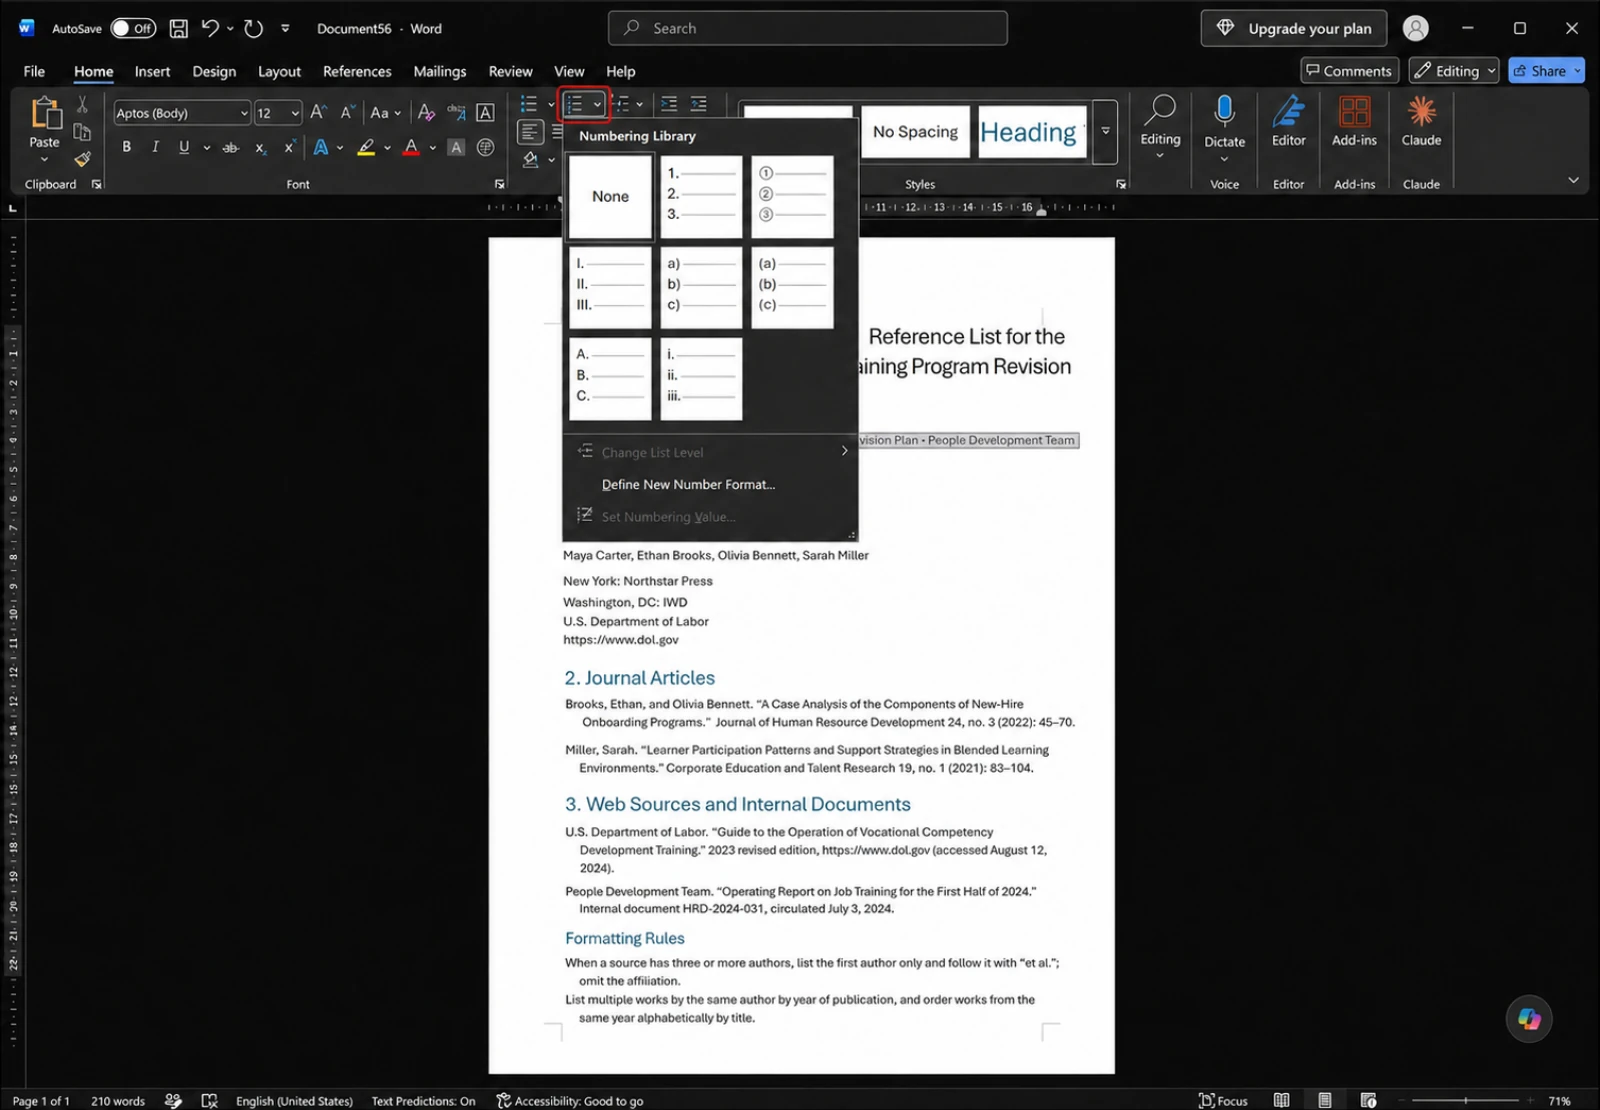
Click the arrow next to Numbering on the Home tab and the Numbering Library opens, covering the ribbon between the Clipboard and Styles groups. Its thumbnails are None, 1. 2. 3., the circled ① ② ③, I. II. III., a) b) c), (a) (b) (c), A. B. C., and i. ii. iii.; below them, Change List Level and Set Numbering Value... are greyed out until a list is active. Apply any thumbnail and Word sets a left indent and a hanging indent for you. The look you get, with the number hanging out to the left and the text aligned in a straight column, is a hanging indent.
Which is why adding a hanging indent to a paragraph that is already a numbered list pushes it much too far in: the two values stack. To change how far a list is indented, select those paragraphs and edit the existing values in the Paragraph dialog rather than adding new ones.
For documents that need different indent widths at each level, define a multilevel list once and set the values per level there, instead of hand-adjusting individual paragraphs. Changing the list definition later updates the entire document.
👉 Numbered List in Word: Restart, Continue, and Turn Off Auto
Faster Adjustments: Ribbon Buttons, Shortcuts, and Styles
What the Ribbon Buttons Actually Move
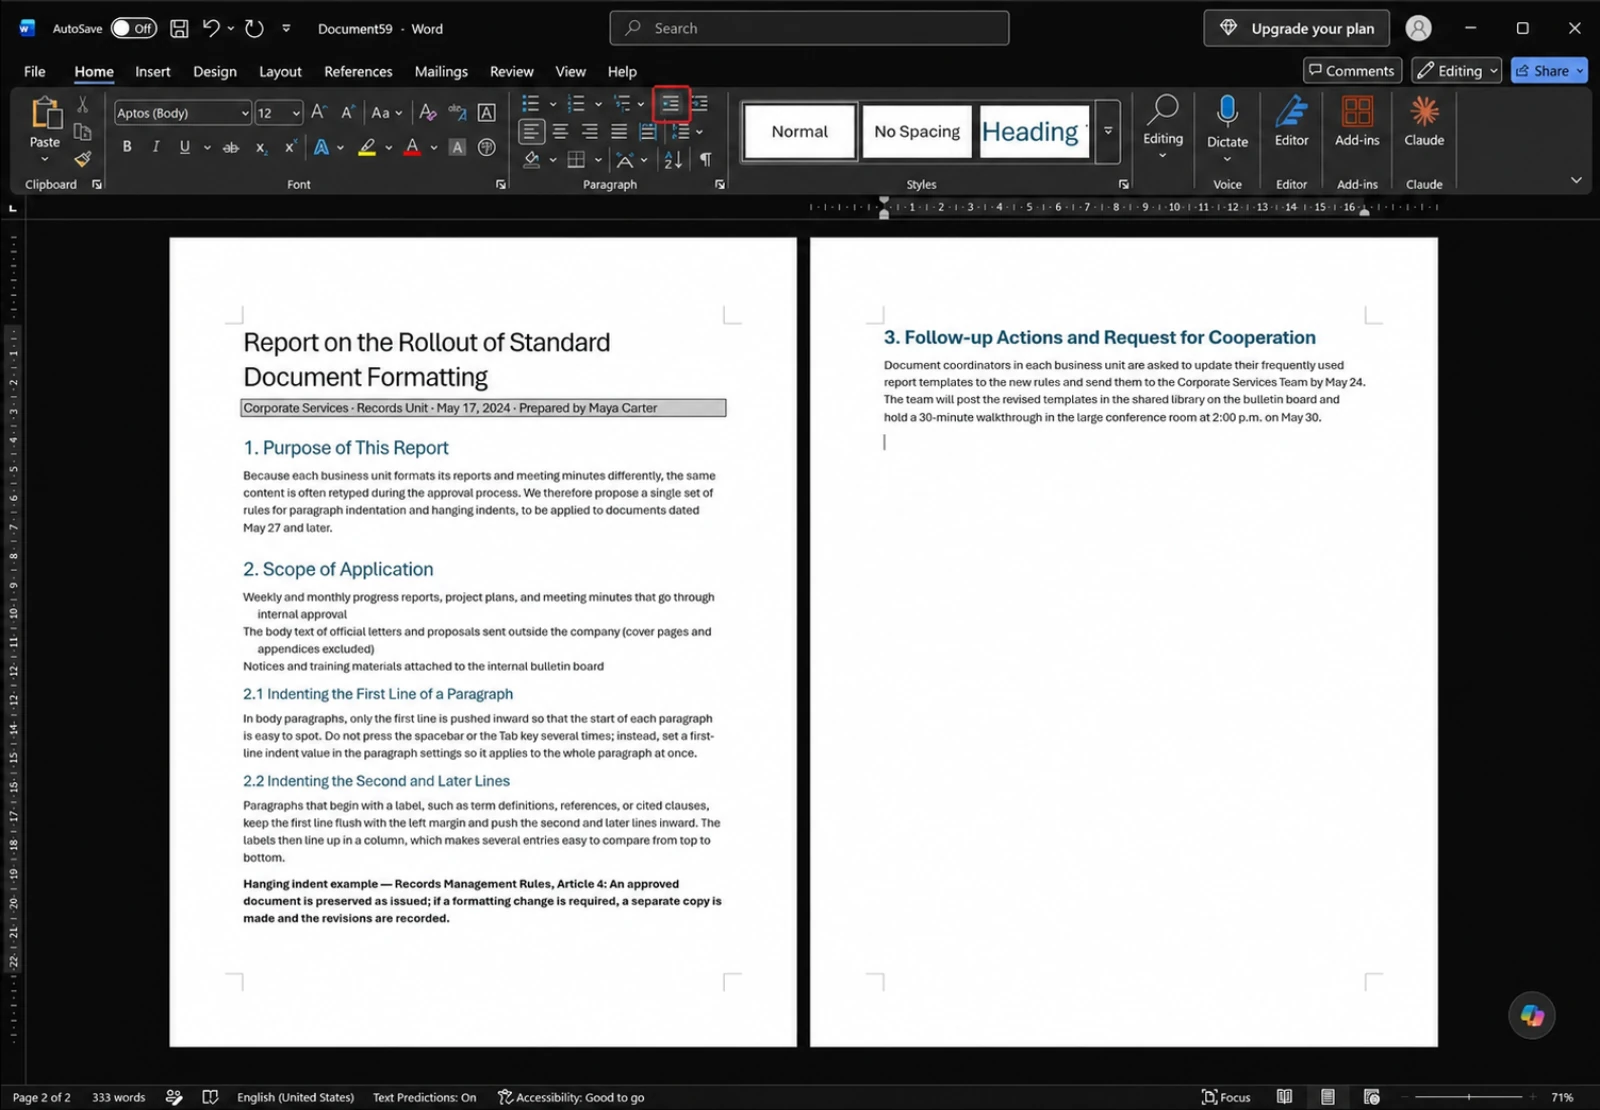
The Home tab's Paragraph group has two indent buttons side by side. Decrease Indent, boxed in red here, brings the paragraph containing the cursor one step back toward the left margin, and Increase Indent, immediately to its right, shifts it one step to the right while leaving neighboring paragraphs alone. Both buttons move the left indent, which means any first line or hanging value you already set is preserved and carried along with the paragraph.
One step for these buttons is the default tab stop, 0.5". Note that Decrease Indent is not the same thing as a hanging indent, even though both involve moving text leftward; it reduces the left indent of the entire paragraph.
Four Shortcuts Worth Memorizing
- Ctrl+M: increase left indent one step
- Ctrl+Shift+M: decrease left indent one step
- Ctrl+T: increase hanging indent one step
- Ctrl+Shift+T: decrease hanging indent one step
Add Ctrl+Q to that list. It resets paragraph formatting only, so when the values get tangled you can wipe the indentation clean without touching the font.
Storing Indents in a Style
For anything longer than a page, put the value in a style rather than applying it paragraph by paragraph. Right-click the style you use for body text in the Home tab's Styles gallery, choose Modify, and set the first line indent under Format > Paragraph. Every paragraph using that style realigns at once, and anything you type afterward picks it up automatically.
If the document is already finished and you only need to fix a few spots, Format Painter is quicker. Put the cursor in a correctly formatted paragraph, press Ctrl+Shift+C, then select the target paragraphs and press Ctrl+Shift+V. Styles for repeated work, Format Painter for touch-ups.
Removing Indents and Fixing Common Problems
Resetting Values to Zero or Clearing Formatting
The cleanest way to remove an indent is in the Paragraph dialog: set Left and Right to 0 and Special back to (none). You clear only what you meant to clear, and nothing else about the paragraph changes. If resetting the whole paragraph is acceptable, Ctrl+Q is faster.
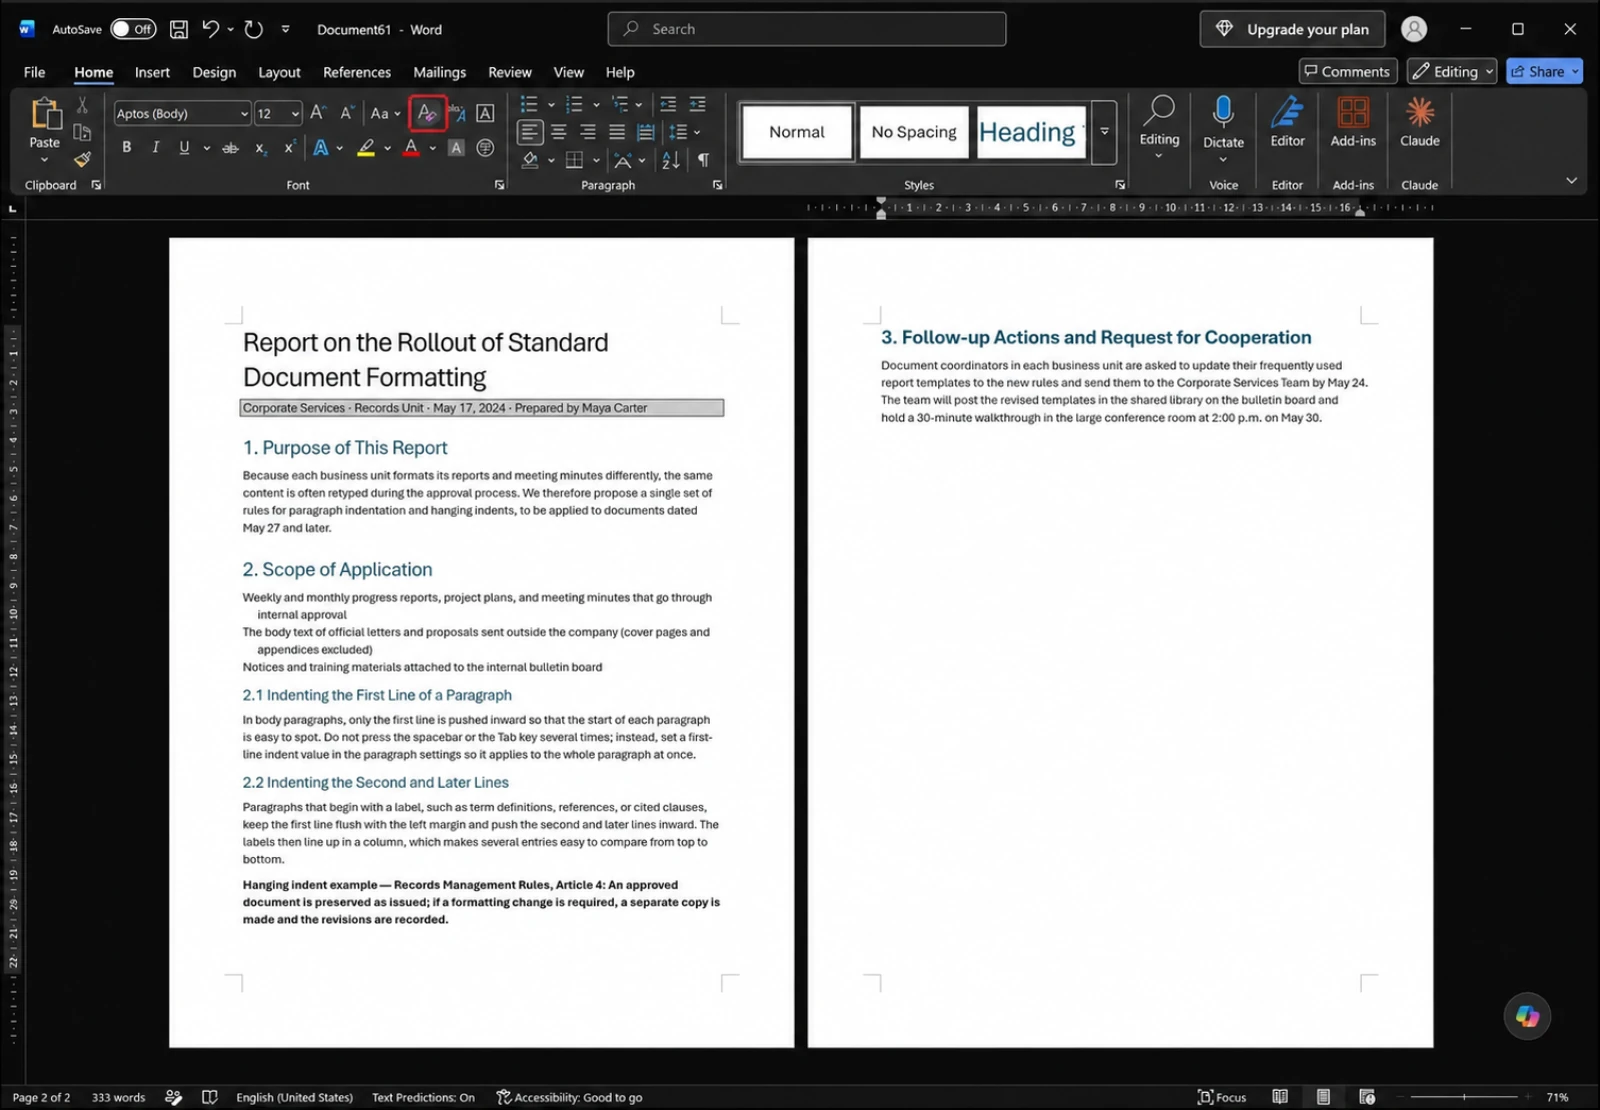
The Clear All Formatting button in the Home tab's Font group, outlined here before it is clicked, strips the indent and returns the selected paragraph to plain body text flush at the left margin. Be aware that it also resets font, size, and weight, so it is usually heavier-handed than the situation calls for.
When Tab Silently Sets a First Line Indent
If you pressed Tab at the start of a paragraph and watched the upper triangle on the ruler move with it, AutoCorrect converted that keystroke into a first line indent setting. Convenient sometimes, but a problem when you are managing values deliberately.
Turn it off under File > Options > Proofing > AutoCorrect Options, on the AutoFormat As You Type tab, by clearing the checkbox for setting left- and first-indent with tabs and backspaces. After that, Tab inserts a tab character and leaves paragraph properties alone.
When the Ruler Markers Will Not Move Correctly
The markers snap to fixed increments, which makes a value like 0.35" nearly impossible to hit by dragging. Hold Alt while you drag to release the snapping and display live measurements.
If a marker does not move at all, the cursor is probably inside a table cell or a text box. Ruler markers only act on the paragraph where the cursor sits, so click into the paragraph you want to change, or select it, before dragging anything.
When the Same Value Looks Different in Another Document
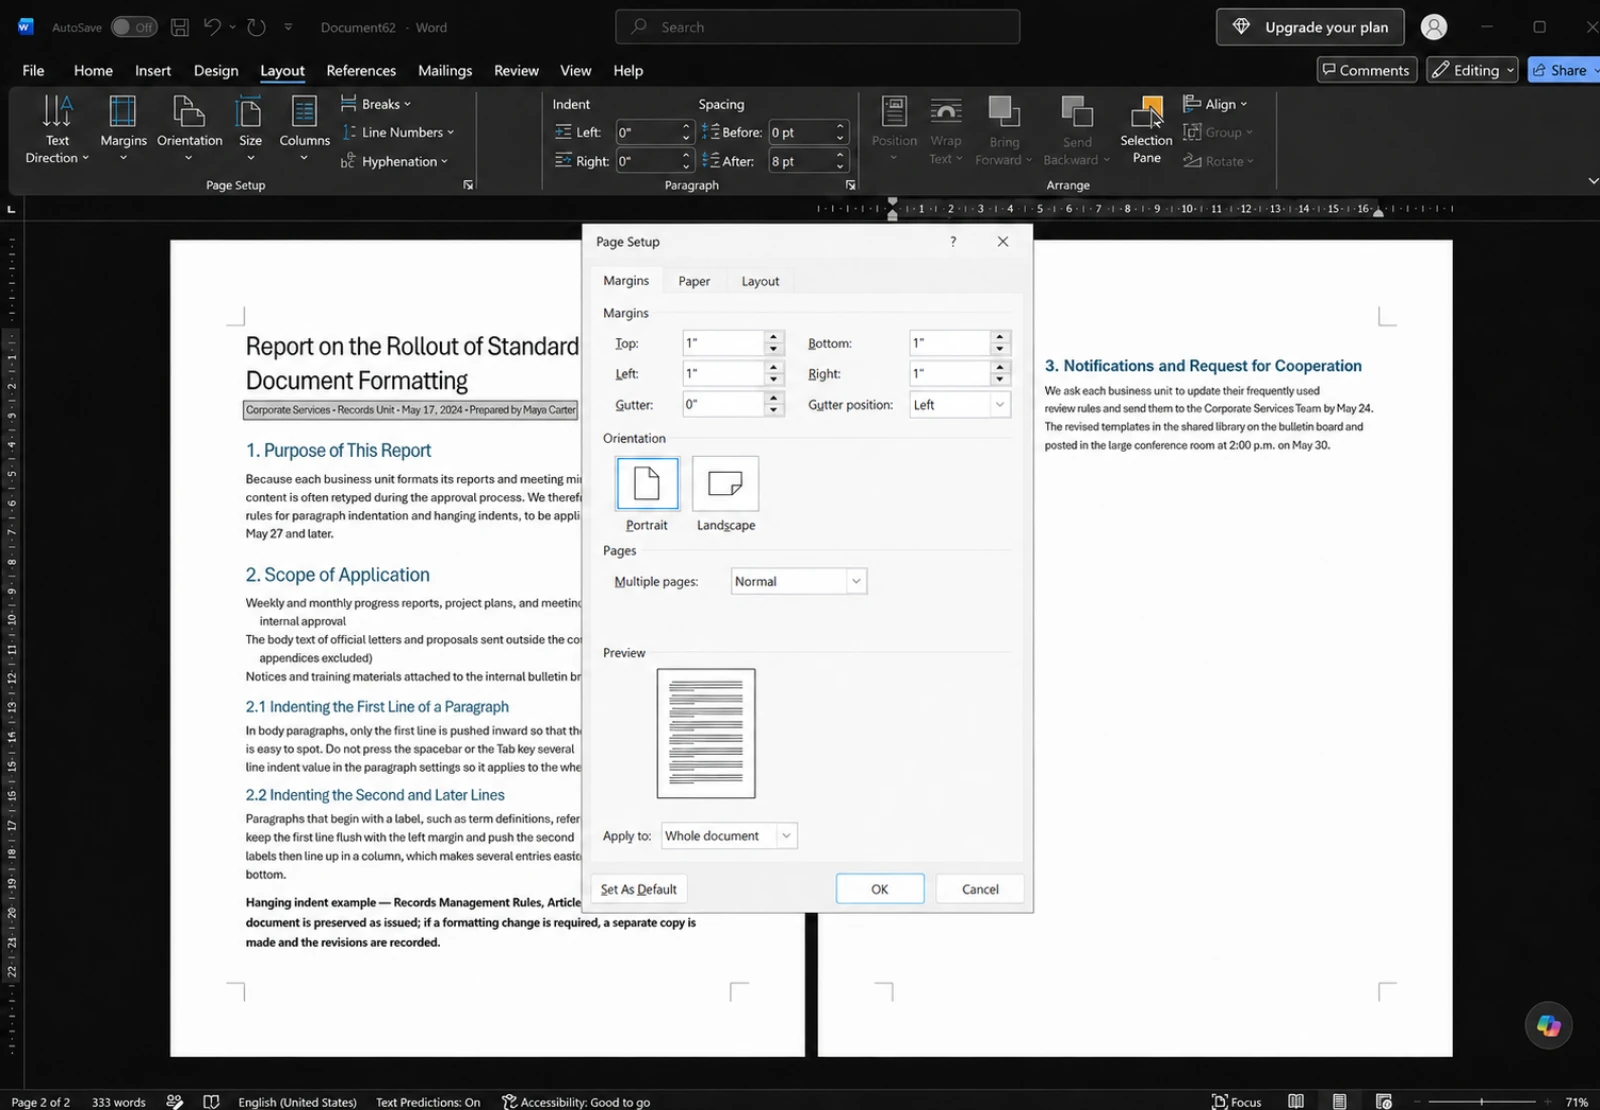
Indents are measured from the page margin, treating it as zero. Two documents with different margin settings will place the same 0.5" indent in two different spots on the printed page. When a colleague's file will not match yours, open the Page Setup dialog and compare margins before you start adjusting indent values.
Paragraphs inside table cells add one more variable. The cell's own internal margin is added on top, so identical values look more indented inside a table than in body text. To line up text across a table boundary, check the cell margin first and subtract it from your indent value.
👉 How to Change Line Spacing in Word: 1.5, Exact pt, and Fixes
FAQ: First Line and Hanging Indents in Word
Q. What are the keyboard shortcuts for indenting in Word?
Ctrl+M increases the left indent by one step and Ctrl+Shift+M decreases it. For a hanging indent, Ctrl+T increases and Ctrl+Shift+T decreases. Ctrl+Q resets paragraph formatting without affecting the font. All of these move in increments of the default tab stop, 0.5" (1.27 cm), so a specific value like 0.35" still has to be typed into the Paragraph dialog.
Q. Can I apply a first line indent to an entire document at once?
For text that is already typed, press Ctrl+A and set the value once in the Paragraph dialog. To have it apply to paragraphs you have not written yet, modify the Normal style and store the first line indent there instead. Keeping it in a style also means that changing the value later is a single edit rather than a document-wide reselection.
Q. The ruler is not showing. How do I turn it on?
Tick Ruler in the Show group on the View tab and a horizontal ruler appears above the page. If it still does not appear, check which view you are in. The ruler and page margins display fully in Print Layout, and not at all in Draft or Read Mode.
Q. How do I remove an indent completely?
Set Left and Right to 0 and Special to (none) in the Paragraph dialog; that is the most precise method. Ctrl+Q does the same job faster by resetting paragraph formatting. Clear All Formatting in the Home tab's Font group also works, but it returns font and size to their defaults along with the indentation.
Cleaning Up a Document's Indentation with inline AI
Everything above assumes you know which value belongs where. That assumption breaks down with a file you received from someone else, where tab characters, stray spaces, and real indent values are mixed together paragraph by paragraph, and just auditing what is set where takes longer than fixing it.
inline AI reads and edits the Word document open on your machine. Describe the rule you want, such as a 0.5" first line indent on body paragraphs and a 0.5" hanging indent on the reference list, and it locates the matching paragraphs, applies the values, and removes leftover tab characters at the start of paragraphs. Changes are shown in the document so you can review them before keeping them.
Files are opened and edited locally and are never uploaded to a cloud service, so internal reports and contracts stay on your computer.
See what an agent could take over at your company in a 30-minute call.