Learn
How to Change Line Spacing in Word: 1.5, Exact pt, and Fixes

Most people assume there is one setting that controls how tight a Word document looks. There are two, and that is why the page count barely moves after you change line spacing in Word from 1.15 to 1.0. Recent versions of Word ship with a body style that combines 1.08 line spacing and 8 points of space after every paragraph, so adjusting one while ignoring the other gives you a document that still reads loose.
This guide separates the two settings, then walks through the fast presets, the Paragraph dialog for exact values like 1.3 or a locked 16pt, how to strip out paragraph gaps document-wide, and what to check when spacing stubbornly refuses to shrink.
Line Spacing vs. Paragraph Spacing: Two Different Settings
Line spacing controls the gap inside a paragraph
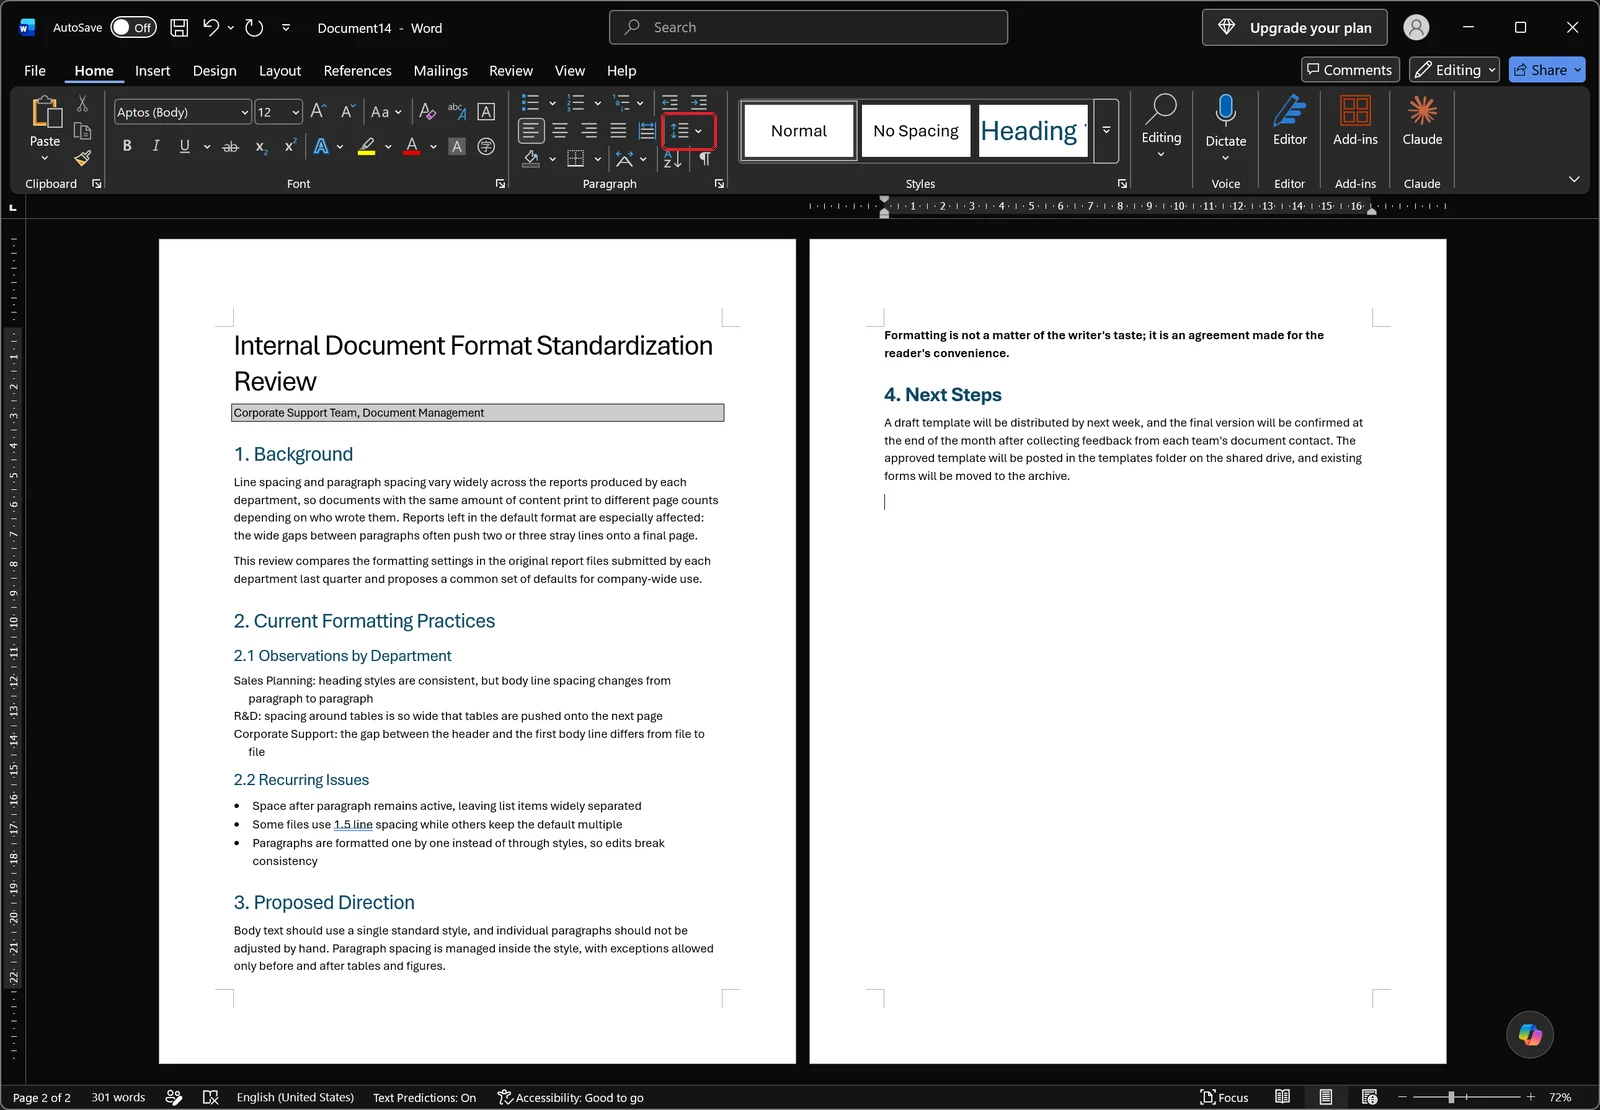
Line spacing is the distance between line one and line two of the same paragraph. You change it from the line spacing button in the Paragraph group on the Home tab, marked in red below.
Paragraph spacing controls the gap between paragraphs
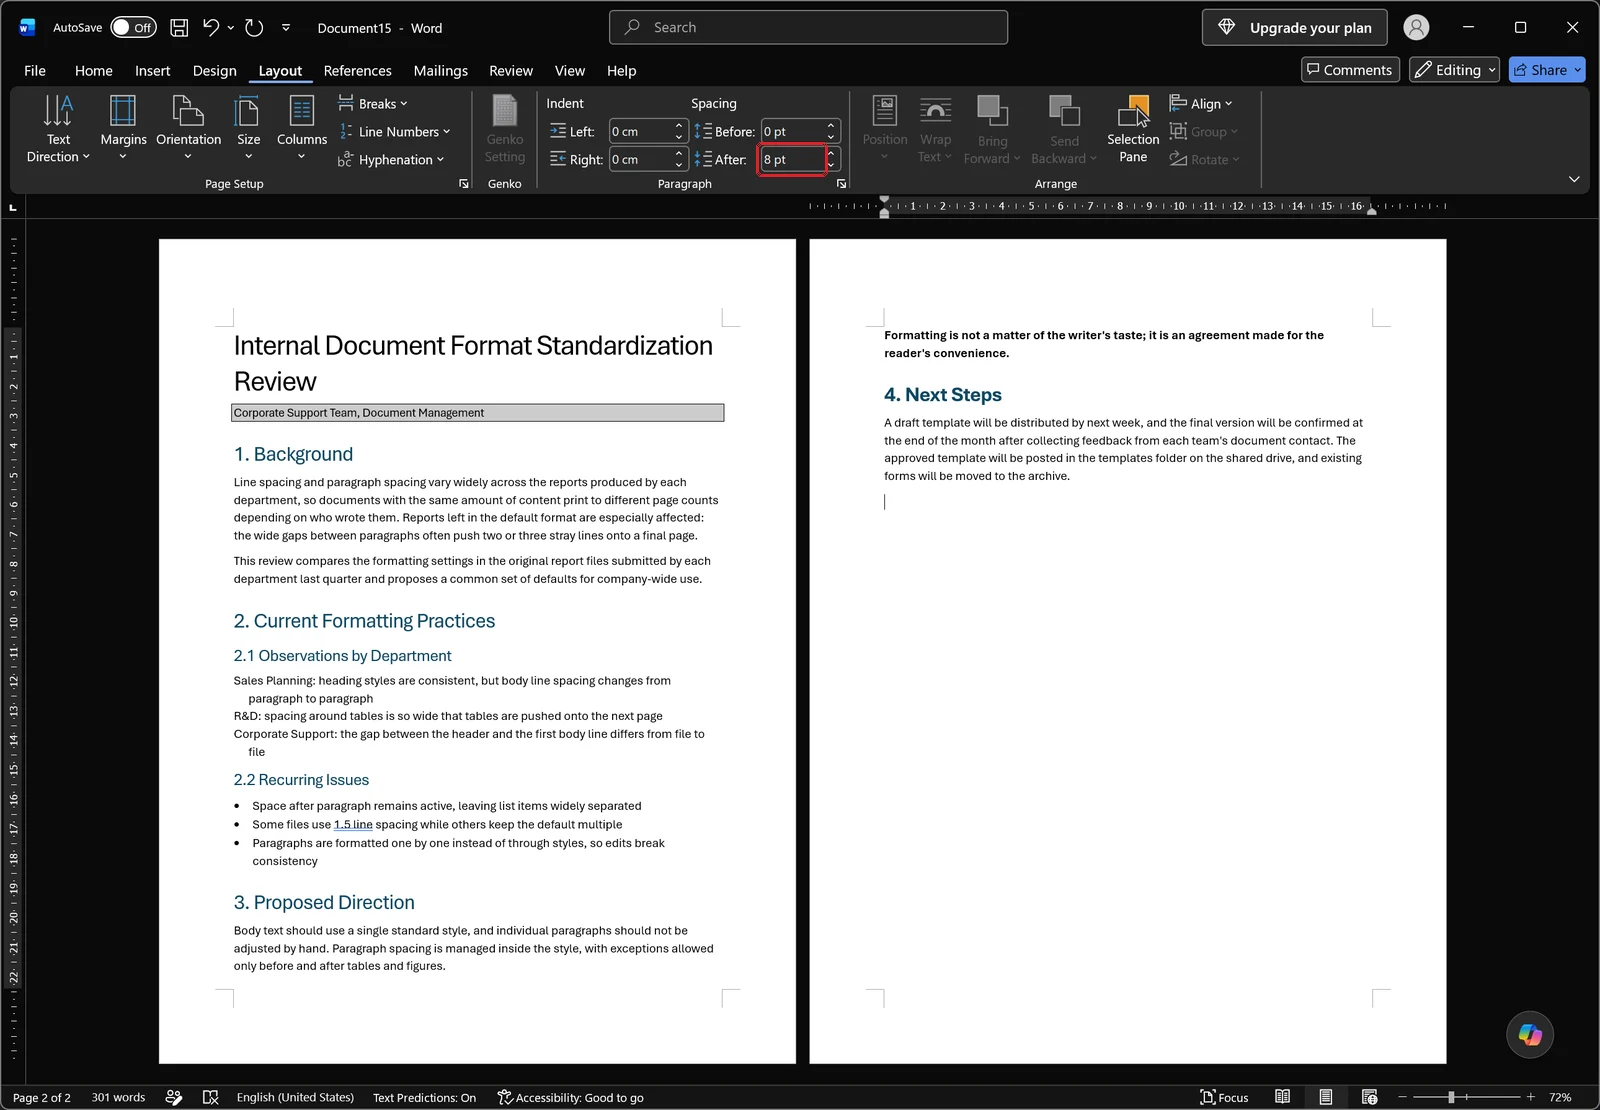
Paragraph spacing is the extra room Word adds when one paragraph ends and the next begins. It lives on the Layout tab, where the Paragraph group puts Indent Left/Right next to Spacing Before/After. Those two spin boxes take point values you type in directly.
Why 1.0 still looks loose
The two values are independent. Drop line spacing to 1.0 and leave Spacing After at 8pt, and you still get close to a full blank line every time a paragraph ends. That is the whole explanation behind "I definitely tightened the spacing and the page count didn't change."
So the order matters. Set the line spacing first, then deal with the before/after paragraph spacing as a separate step. The rest of this guide follows exactly that sequence.
Before You Adjust: Selection Scope and Screen Setup
One paragraph vs. the entire document
Paragraph formatting in Word applies to the paragraph your cursor is sitting in, or to whatever you have selected. To change a single paragraph, just click inside it — no selection needed. To change everything, press Ctrl+A first, then set the value.
One catch: text inside tables and anything in headers or footers is not covered by that Ctrl+A selection. Click into those areas and repeat the same steps separately.
Turn on the ruler to see margins and indents
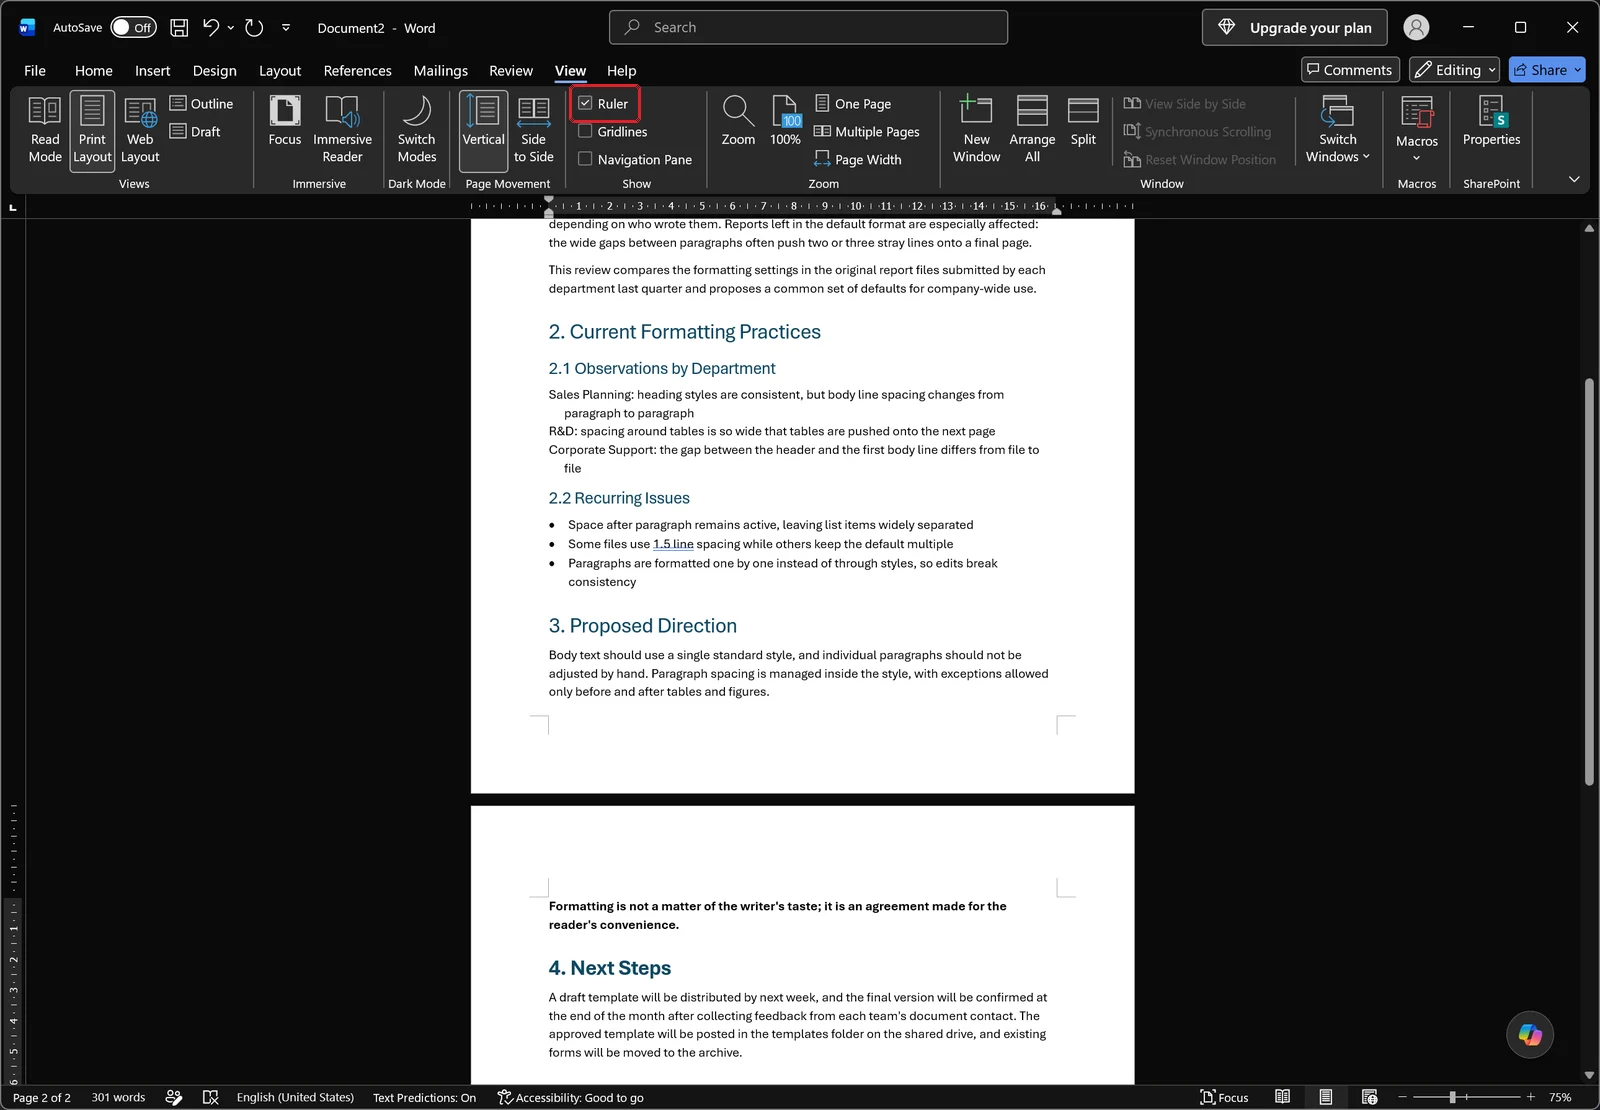
Sometimes the thing that makes a document feel airy is not the line spacing at all — it is a wide left indent or generous side margins. Switch to the View tab and tick the Ruler checkbox, and a horizontal ruler appears above the page so you can see indent markers and margin boundaries while you work.
Use One Page to measure the change
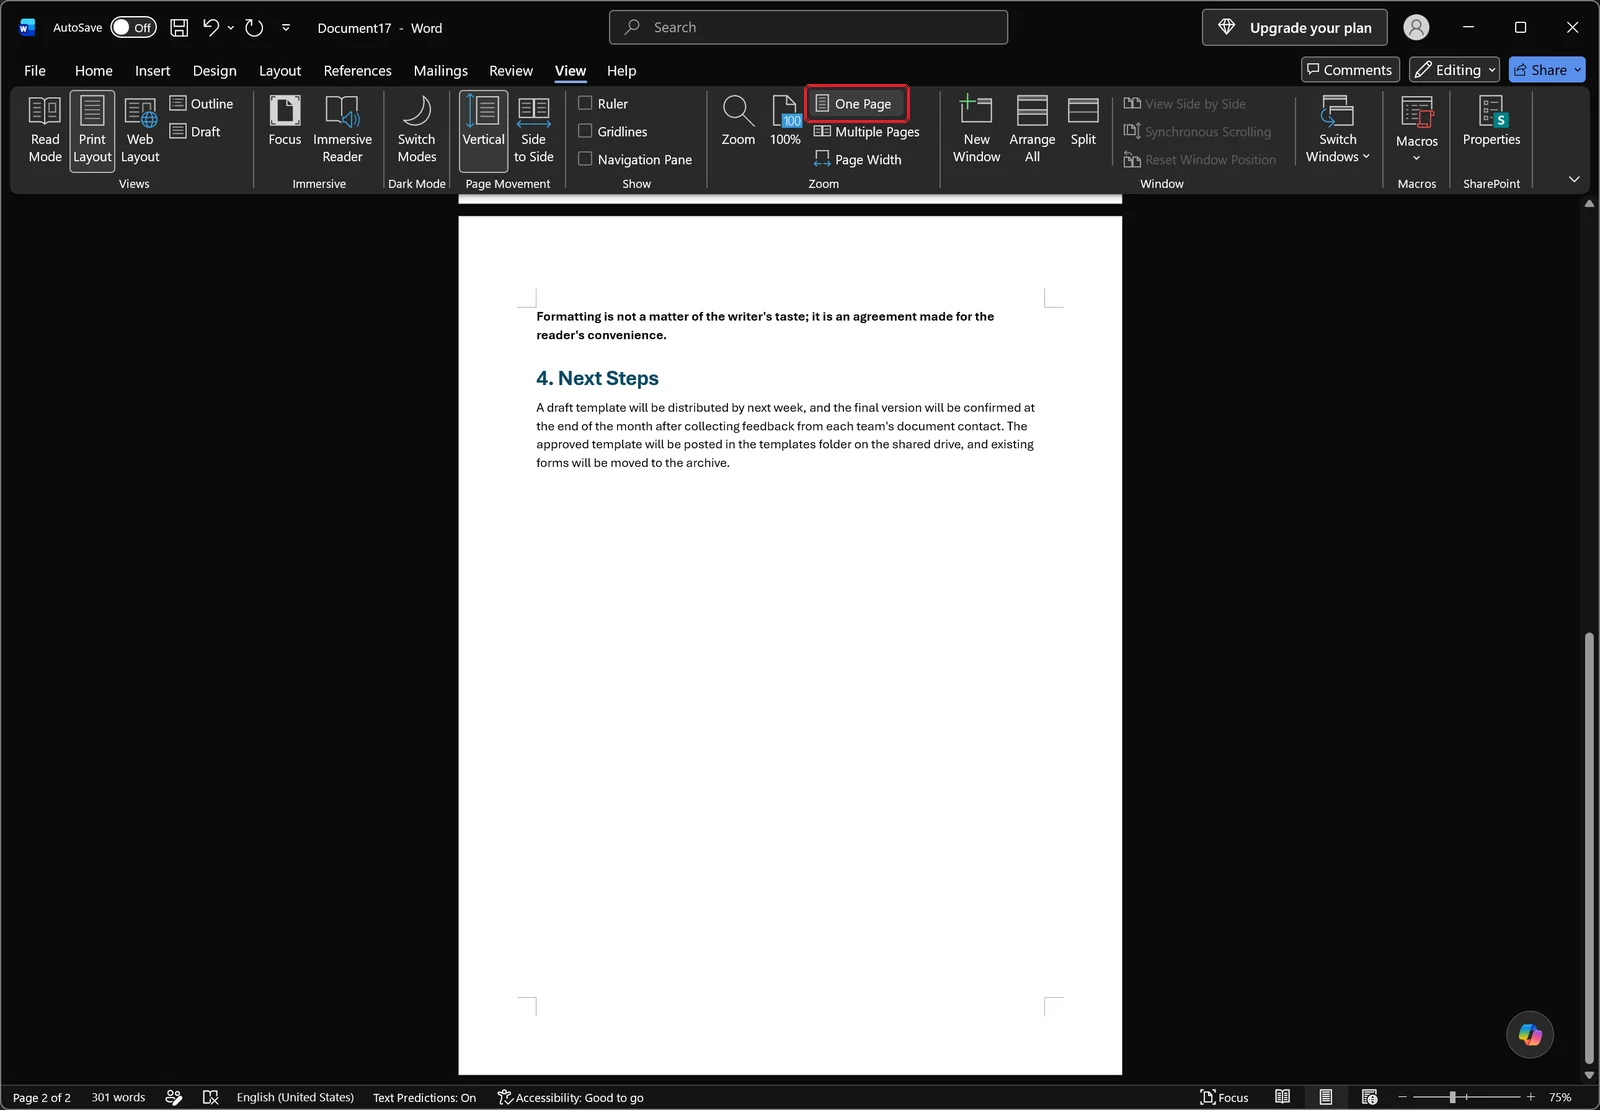
To judge whether a new value actually bought you extra lines, click One Page on the View tab. Fitting the whole page inside the window makes it obvious how much white space is left at the bottom, which is far more useful than scrolling around at 100% zoom.
Set 1.0 or 1.5 Quickly from the Home Tab
What 1.0, 1.15, 1.5, and 2.0 actually mean
The fastest route is the line spacing button on the Home tab. Click it and you get 1.0, 1.15, 1.5, 2.0, 2.5, and 3.0, followed by the line spacing options command and the commands for adding or removing space before and after the paragraph.
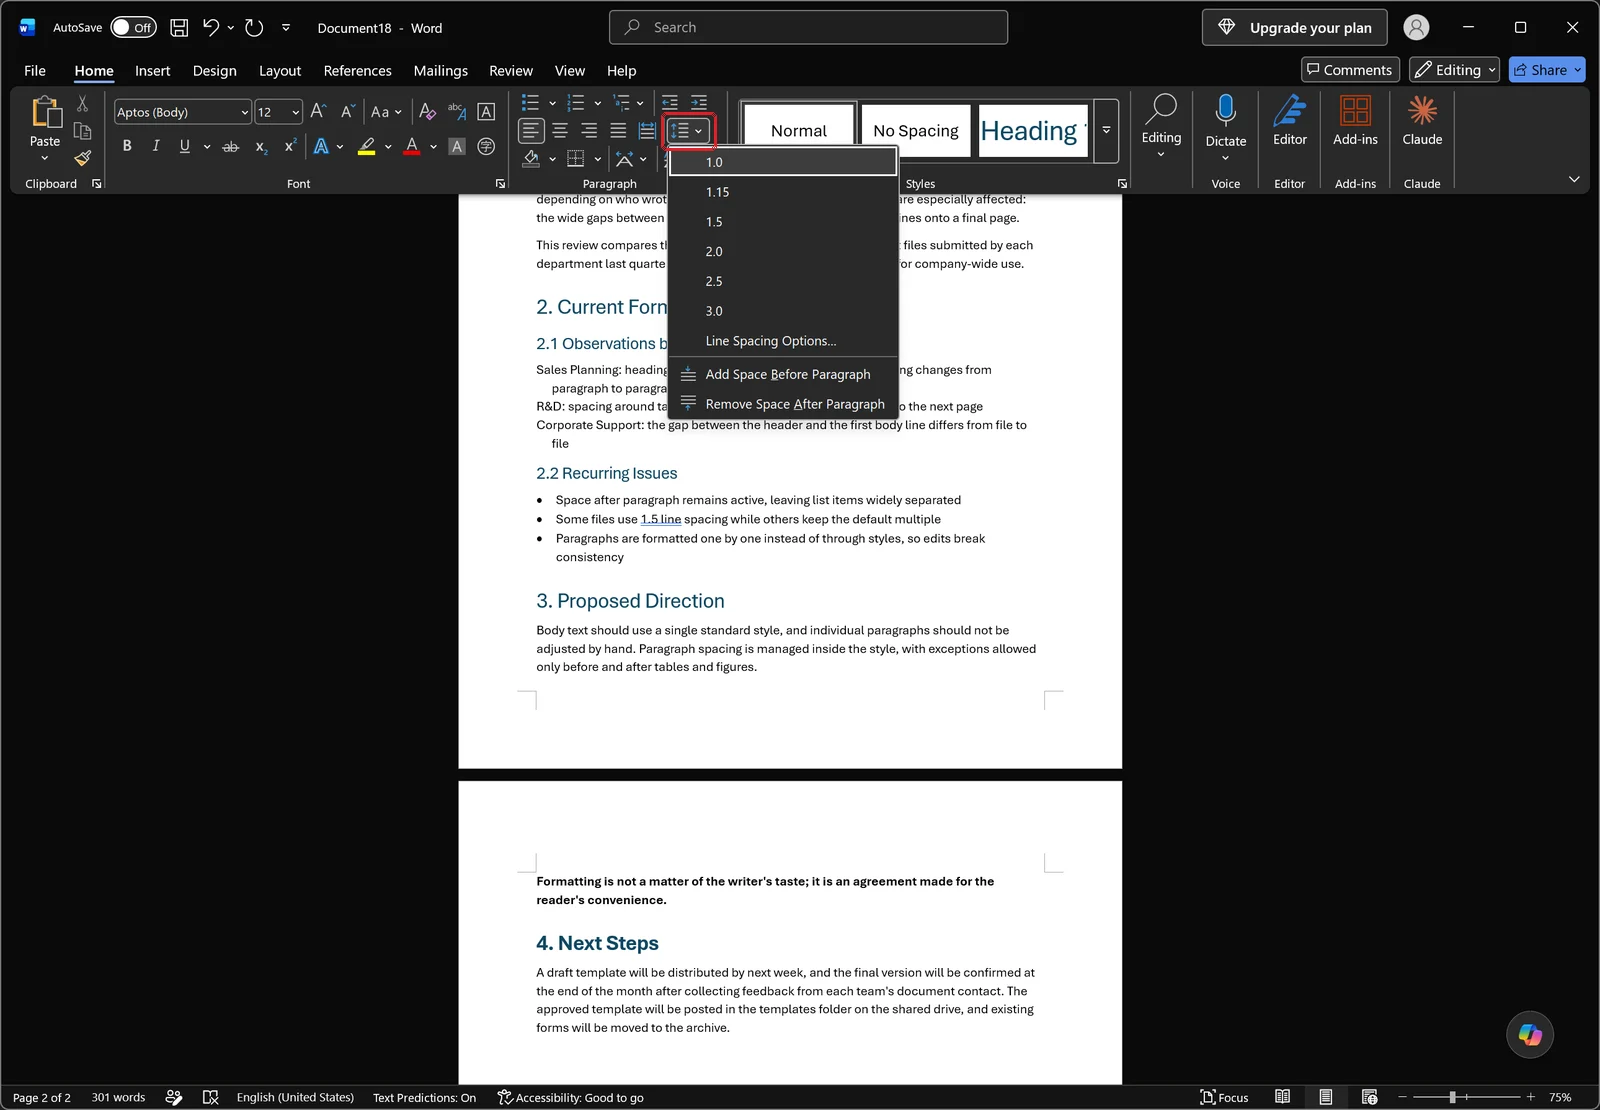
These numbers are multiples, not fixed distances. They scale with the font size, so 1.5 on 10pt body text and 1.5 on 14pt body text produce visibly different line gaps. That is convenient when you want spacing to follow the type size automatically. If you need the gap to stay put no matter what the font does, use the fixed option covered in the next section.
Keyboard shortcuts
The three common values have shortcuts: Ctrl+1 for single, Ctrl+5 for 1.5 lines, and Ctrl+2 for double. If an assignment specifies 1.5 spacing throughout, Ctrl+A followed by Ctrl+5 is the entire job.
Clear the paragraph gaps in the same pass
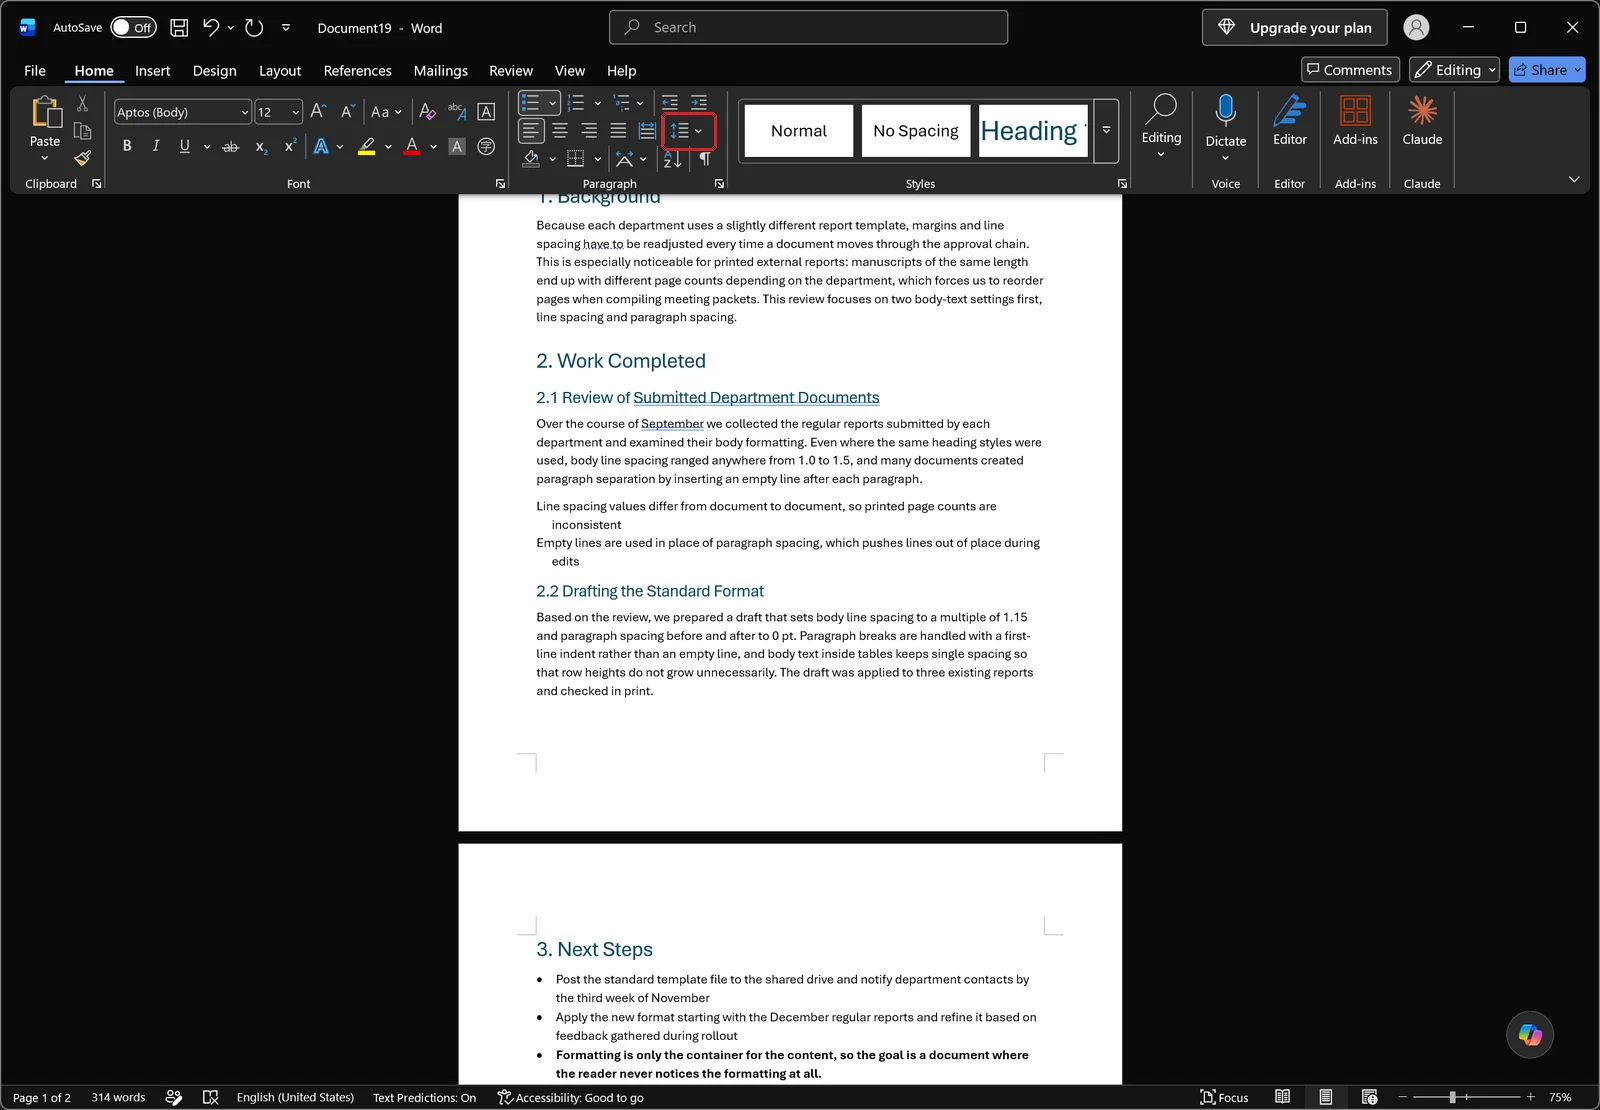
The lower part of that same dropdown handles space before and after paragraphs. After picking a line spacing value, click the command that removes space after the paragraph — otherwise the gap between paragraphs survives. Below is the result with both applied: the lines run continuously even where one paragraph ends and the next starts.
Set an Exact Value in the Paragraph Dialog
Multiple, Exactly, and At least
When the value you need is not in the dropdown, or a spec demands points rather than multiples, open the Paragraph dialog with the small launcher arrow at the bottom-right of the Paragraph group on the Home tab. The Indents and Spacing tab holds alignment, indentation, the Spacing Before/After boxes, the Line spacing dropdown with its At value box, and a live preview at the bottom.
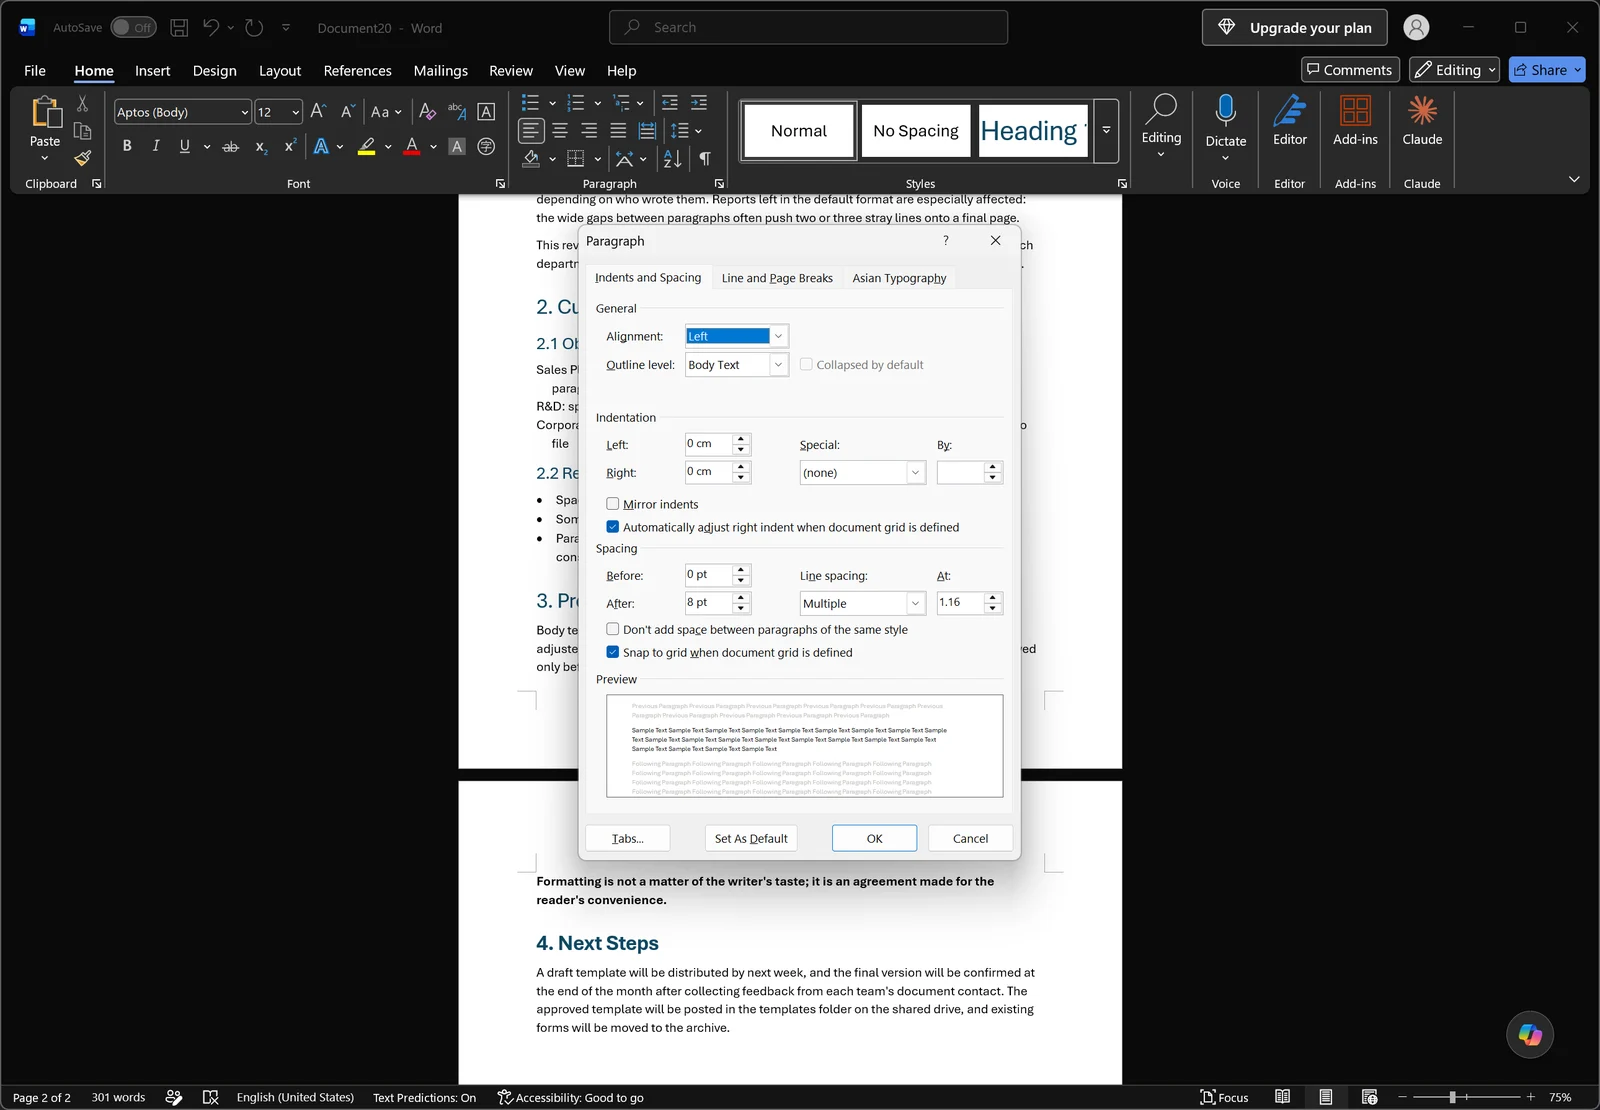
In the Line spacing dropdown, Multiple scales with the font size, Exactly nails the spacing to the point value you type regardless of font size, and At least treats your value as a floor and grows automatically when a large character or an inline image needs the room.
Locking spacing to a point value like 16pt
If a print spec says "body line spacing 16pt," choose Exactly and type 16 in the At box. Be careful going too low: when the fixed value is smaller than the font size, the tops of characters on the line above get clipped. In practice, somewhere between 1.2 and 1.6 times the font size is safe — roughly 13pt to 16pt for 10pt body text.
Typing in-between values like 1.3 or 1.7
Values missing from the dropdown are perfectly valid. Leave Line spacing on Multiple and type 1.3 or 1.7 into the At box. When you are slightly over a page limit, dropping 1.5 to 1.3 often reclaims a full page on its own. Watch the preview area at the bottom of the dialog before you click OK so you can see how much the lines actually close up.
👉 Excel Print on One Page: Fit a Wide Table Using Page Layout
Remove the Space Before and After Paragraphs
Document-wide: Paragraph Spacing on the Design tab
To clear paragraph gaps across the whole document in one move, use the Paragraph Spacing button on the Design tab. The dropdown lists built-in sets such as Default, No Paragraph Space, Compact, Tight, Open, Relaxed, and Double, and the choice applies to the entire document immediately.
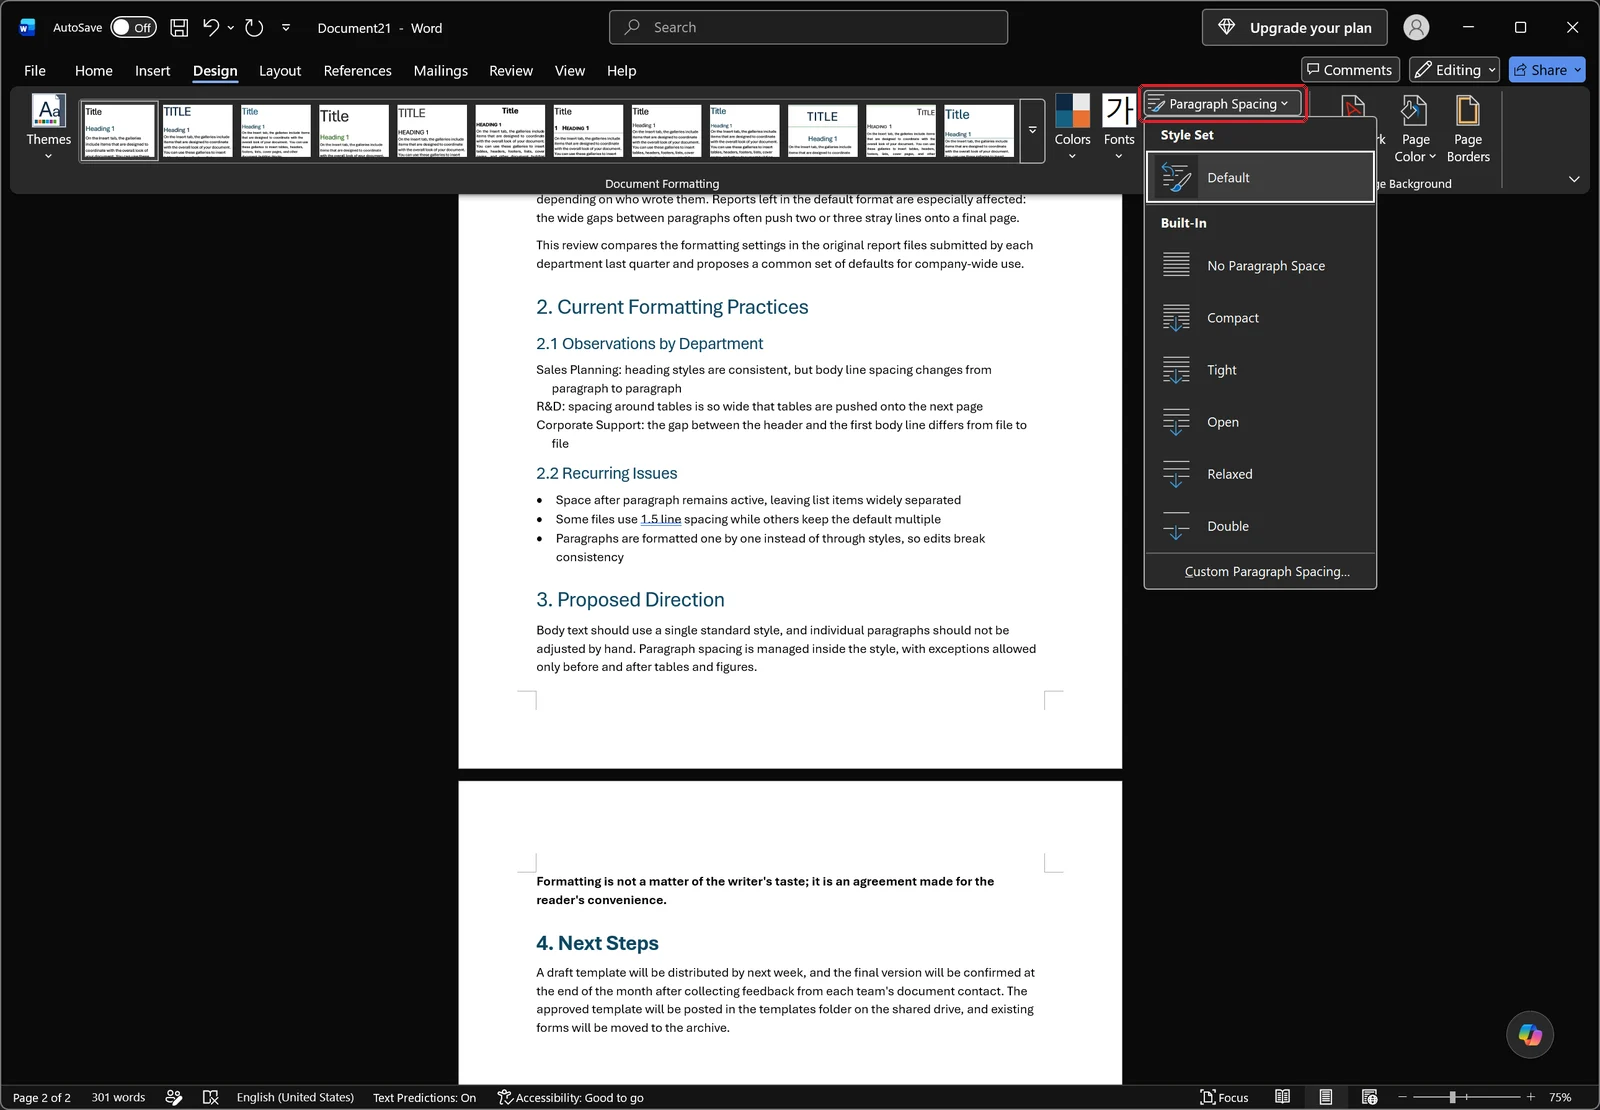
Pick No Paragraph Space to eliminate the gap completely. If you would rather shrink it than delete it, Compact or Tight tends to read better than zero, especially in longer documents.
Individual paragraphs: type 0 on the Layout tab
For a handful of paragraphs, select them and type 0 into the Spacing Before and After boxes on the Layout tab. This is the right tool when one block — a pull quote, a table caption — needs to behave differently from the surrounding body text.
Keep gaps only where the style changes
The Indents and Spacing tab of the Paragraph dialog has a checkbox for not adding space between paragraphs of the same style. Turn it on and consecutive body paragraphs sit flush against each other, while the gap survives at the points where the style changes, such as body text following a heading. Leaving 6pt to 12pt of Before spacing on heading paragraphs keeps the document structure readable even with tight body text.
Apply It Everywhere at Once with Styles
Modify the Normal style to change all body text
Instead of formatting paragraph by paragraph, edit the style: every paragraph using it updates at the same time. The Styles gallery on the Home tab lists Normal, No Spacing, Heading 1, Heading 2, and the rest.
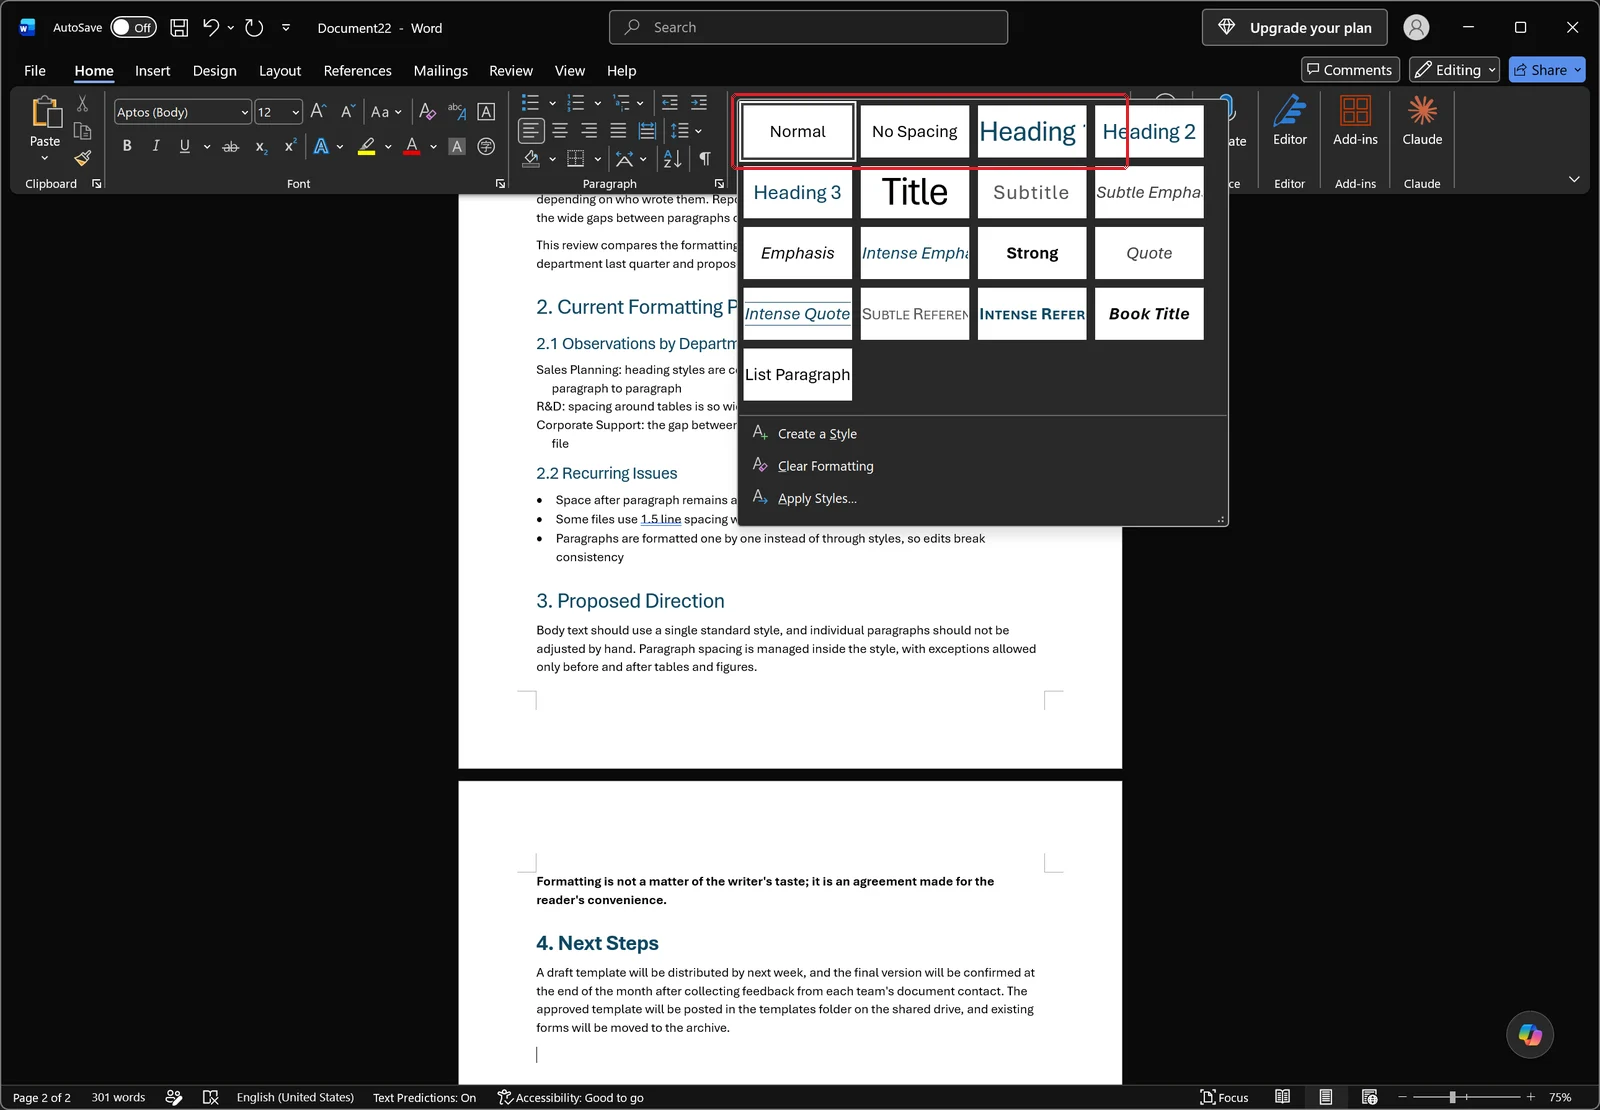
Almost all body text uses Normal. Right-click Normal, choose Modify, then click the Format button at the bottom-left and pick Paragraph — the same Paragraph dialog from earlier opens. Set line spacing and Spacing Before/After there, click OK, and the entire body of the document falls into line.
Swap the whole look with a style set
If you want heading sizes and fonts to change along with the spacing, use the style set gallery on the Design tab. Each thumbnail previews how titles and body text are spaced relative to one another, so you can compare complete combinations rather than tuning one value at a time.
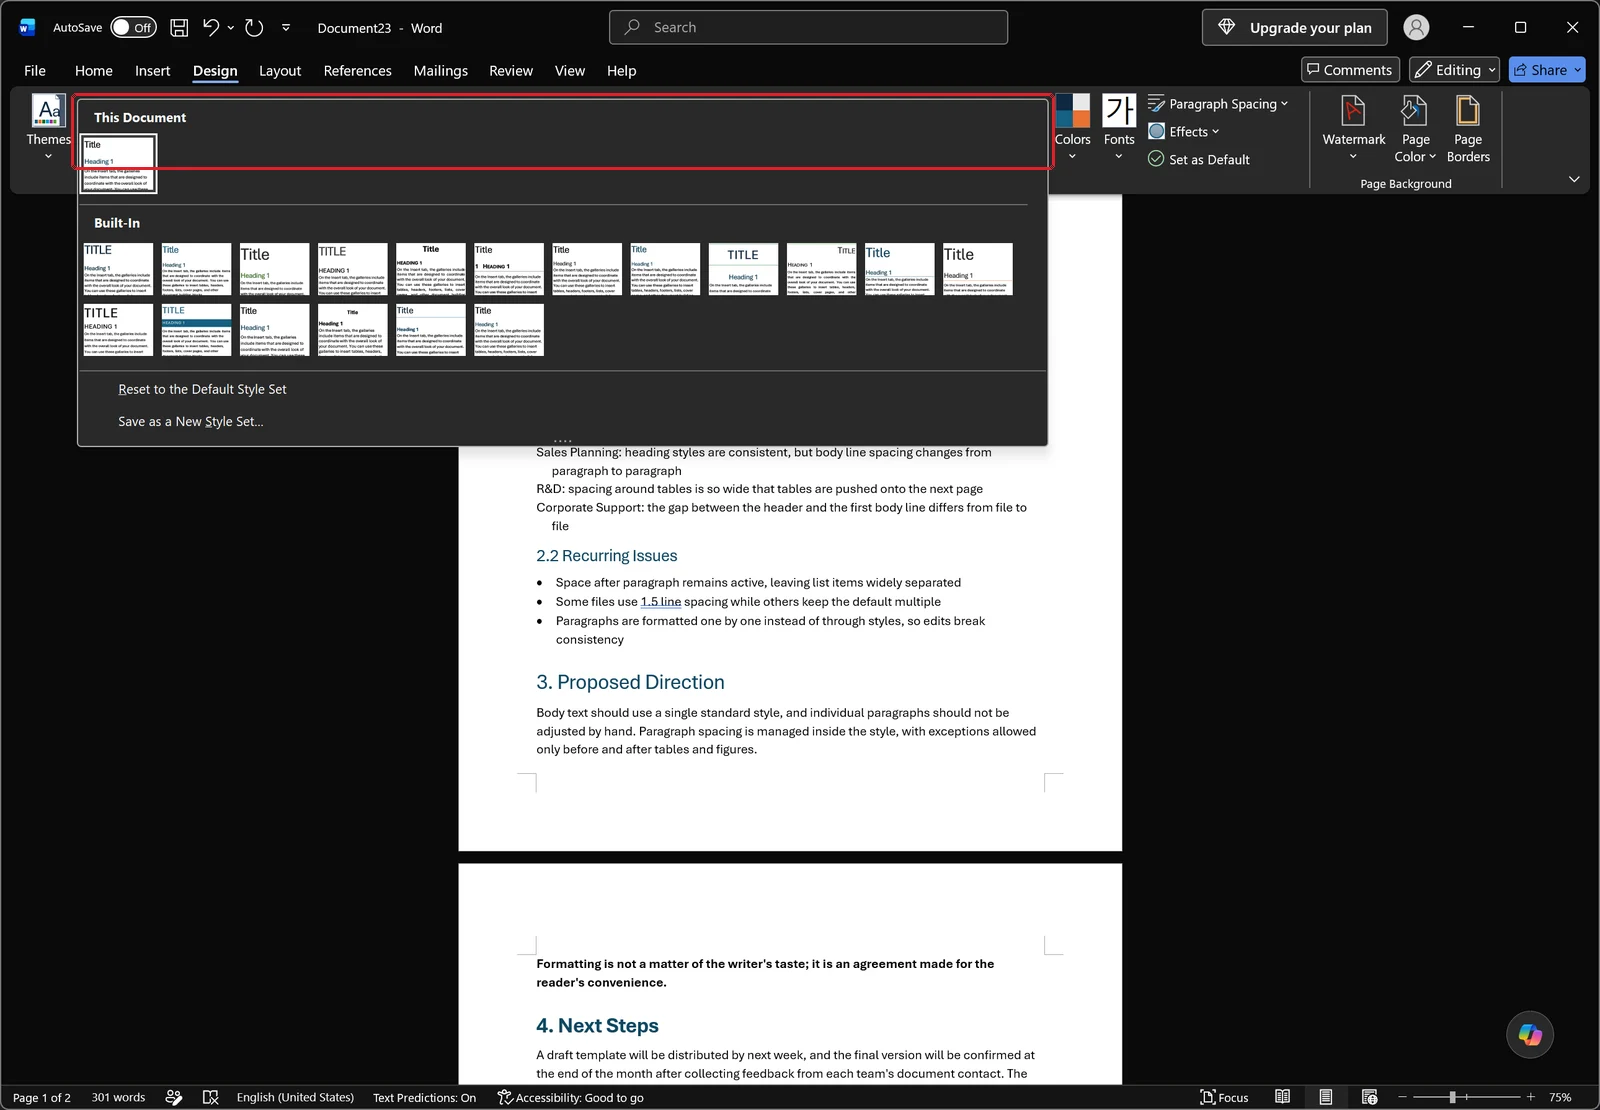
Carry the settings into new documents
To avoid redoing this every time, select the option for new documents based on this template at the bottom of the Modify Style dialog before clicking OK. New documents then start with your line spacing and paragraph spacing already in place. The Design tab also has a command for making the current document's formatting the default.
Five Things to Check When Spacing Won't Tighten
A style is overriding your direct formatting
Sometimes the value defined in a style reasserts itself over the formatting you applied by hand. Click the dialog launcher in the Styles group on the Home tab and the Styles task pane opens on the right, listing every style the document currently uses.
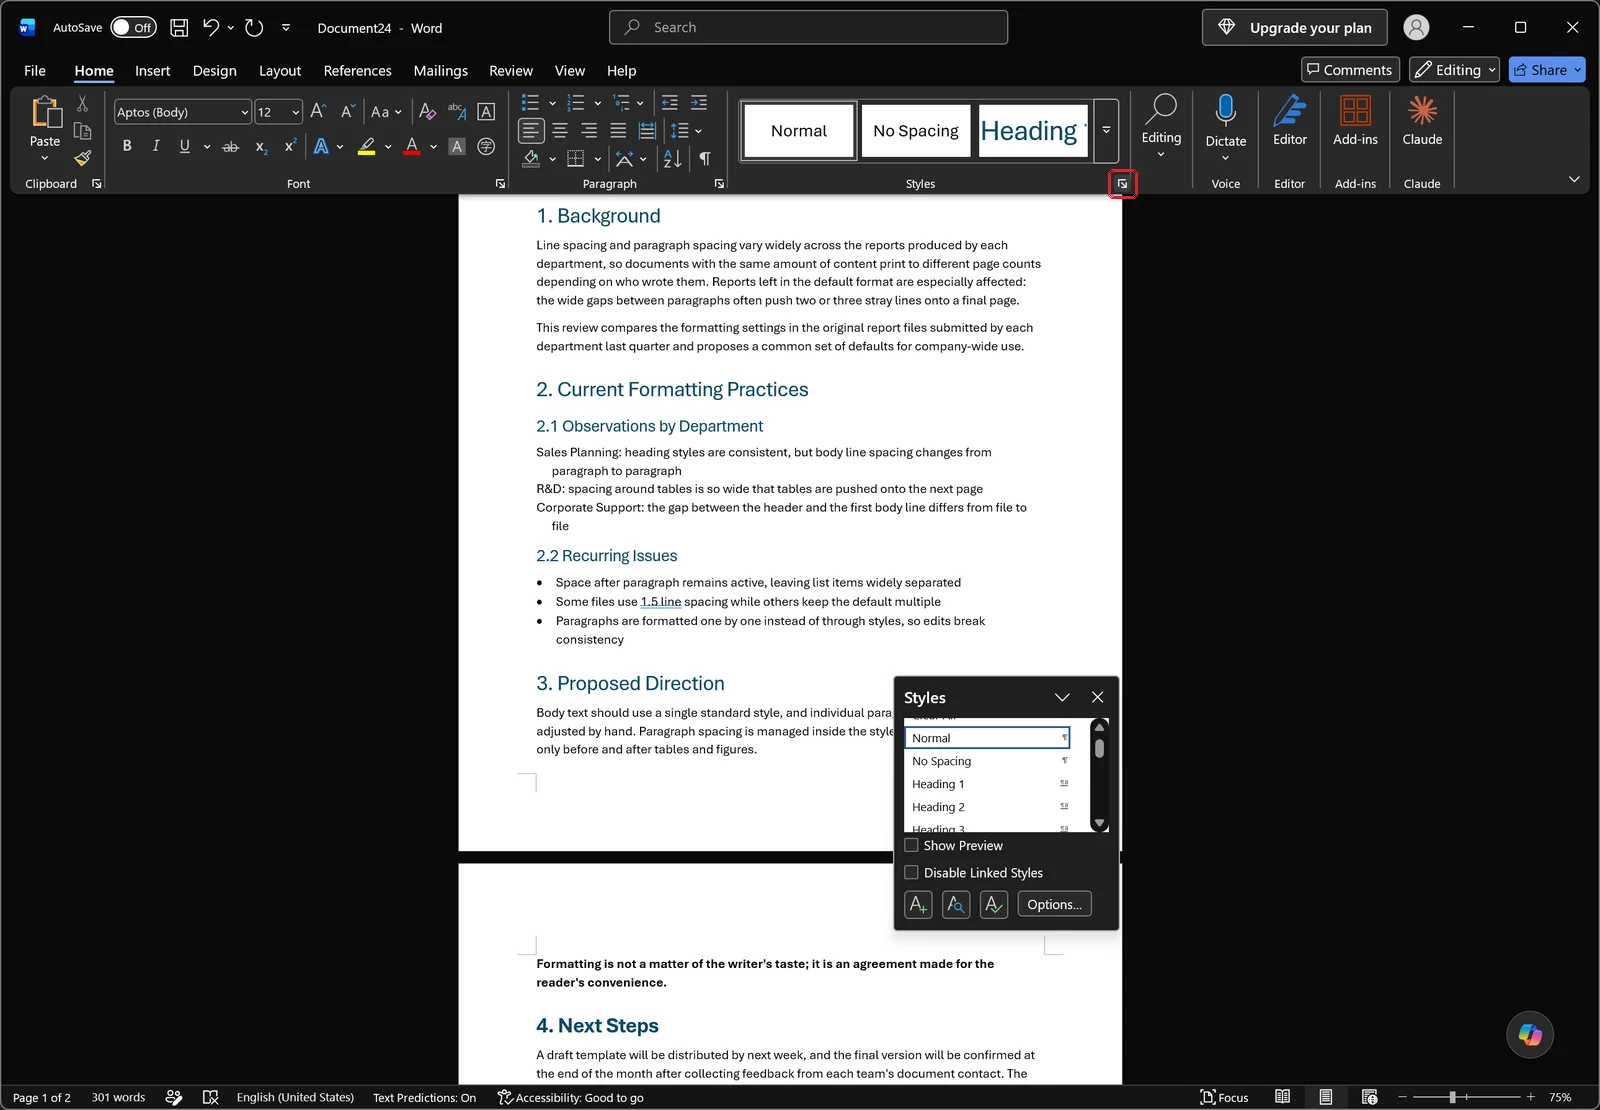
Find the style causing the problem and modify it there. Fixing the style once is considerably cleaner than reformatting individual paragraphs and hoping they stay put.
Font size or character spacing is forcing the lines apart
With line spacing set to a multiple, bigger type means bigger line gaps by definition. If the lines refuse to close no matter how low you push the value, check the font size first. The Font dialog shows the font, font style, and size lists with a preview, and the Advanced tab next to it controls character spacing.
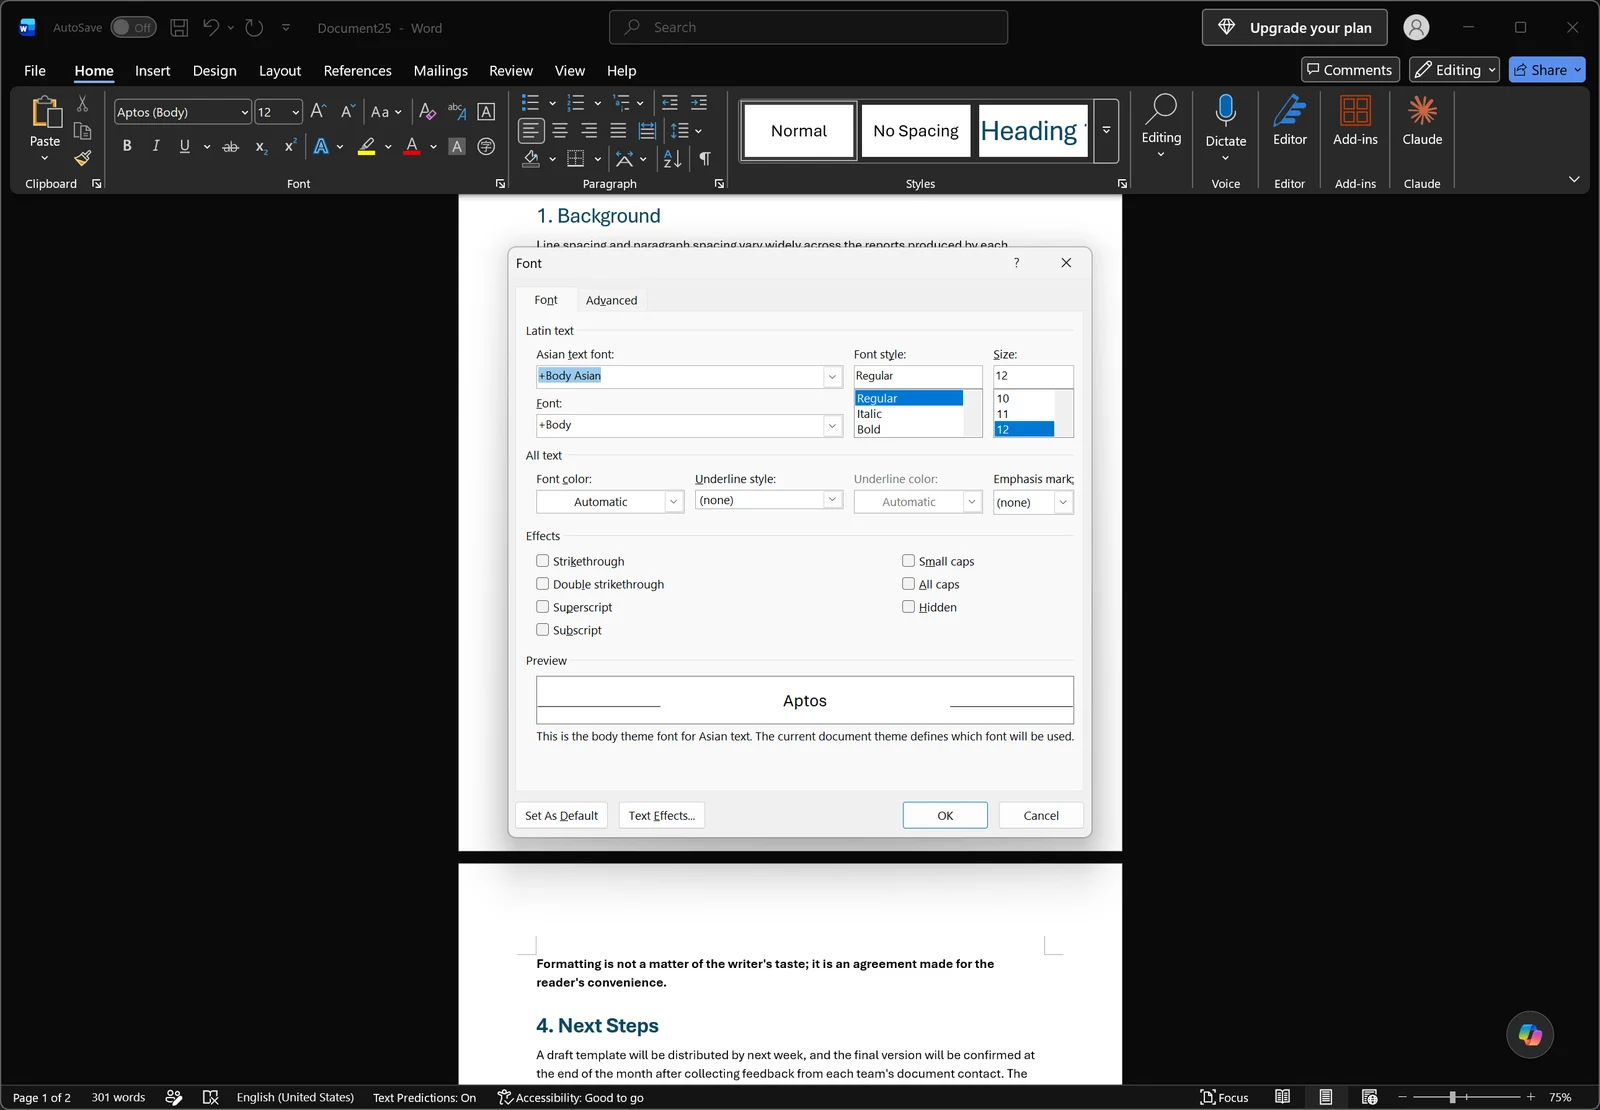
The document grid, plus tables and lists
If your Word installation has East Asian language support enabled, the Paragraph dialog gains an Asian Typography tab containing a checkbox that snaps text to the document grid. While that option is on, lines are placed according to the page's grid rather than your spacing value, so lowering the number changes nothing. Clear the checkbox and test again. Separately, text inside tables and bulleted or numbered lists counts as its own set of paragraphs, so select those and repeat the same steps.
Pasted content brought its original formatting along
Paragraphs copied from a web page or another document arrive carrying their source formatting. If one section has spacing that stubbornly differs from everything around it, select it and press Ctrl+Shift+N to apply the Normal style, or use Clear All Formatting on the Home tab, then set your values again from a clean slate.
Double-check what was actually selected
The most common culprit of all is scope. Changing a value with only the cursor placed in a paragraph affects that one paragraph. For a document-wide change, press Ctrl+A first — and confirm you handled headers, footers, and table text separately.
👉 How to Mail Merge from Excel to Word: Letters, Labels, and Envelopes Step by Step
Line Spacing in Word: Frequently Asked Questions
Q. How do I set 1.5 line spacing?
Select the paragraphs, then either pick 1.5 from the line spacing button on the Home tab or press Ctrl+5. If a submission spec explicitly requires 1.5 and you want it recorded as an exact value, open the Paragraph dialog, set Line spacing to Multiple, and type 1.5 in the At box.
Q. Can I use a value like 1.3 that isn't in the list?
Yes. The Home tab dropdown does not offer it, but in the Paragraph dialog you can set Line spacing to Multiple and type 1.3 into the At box. To lock it in points instead, choose Exactly and enter a number such as 16.
Q. I set line spacing to 1.0 and the gaps between paragraphs are still wide.
That is the space after the paragraph, which defaults to 8pt. Fix it any of three ways: set the Spacing After box on the Layout tab to 0, choose No Paragraph Space from Paragraph Spacing on the Design tab, or use the remove-space-after-paragraph command at the bottom of the line spacing dropdown.
Q. I used Exactly and now the tops of my letters are cut off.
That happens when the fixed value is smaller than the font size. Raise it to roughly 1.2–1.6 times the font size — 13pt to 16pt for 10pt text — or switch the dropdown to At least, which grows automatically when a line needs more room and prevents clipping.
Cleaning up document formatting with inline AI
Everything above is quick once you know which dialog holds which value. The slower scenario is a stack of reports from different departments that all need to match one spec, because that means opening each file, setting the selection, and repeating the same clicks over and over. inline AI reads the Word document already open on your PC and applies formatting you describe in plain language, such as "set body line spacing to 1.3, spacing after paragraphs to 0pt, and 12pt before headings." Processing happens on your own computer, so the document files are never uploaded anywhere.
See what an agent could take over at your company in a 30-minute call.