Learn
Mix Landscape and Portrait Pages in Word: Rotate One Page Only

To mix landscape and portrait pages in Word, you have to split the document before you change anything on the Layout tab. That is the part almost everyone skips. Orientation is not stored on a page, it is stored on a section, so clicking Landscape with a single-section document does exactly what you would expect from Word's point of view and exactly what you did not want: it rotates all of it.
This guide starts with what a section actually is, then walks through two ways to rotate one page only, how to tidy up the margins, headers, and page numbers around it, and what to check when the result still comes out wrong.
The sample file throughout is a Q3 Production Line Equipment Inspection Report, an ordinary portrait document with a title block, a section 1 overview, and a 1.1 scope subsection.
Why Changing Orientation Rotates the Entire Document
Orientation Belongs to a Section, Not a Page
Orientation, paper size, margins, headers, and footers are all stored per section in Word. None of them attach to an individual page. They attach to the section that page happens to live in, which is why every page in that section changes at once no matter where your cursor was sitting.
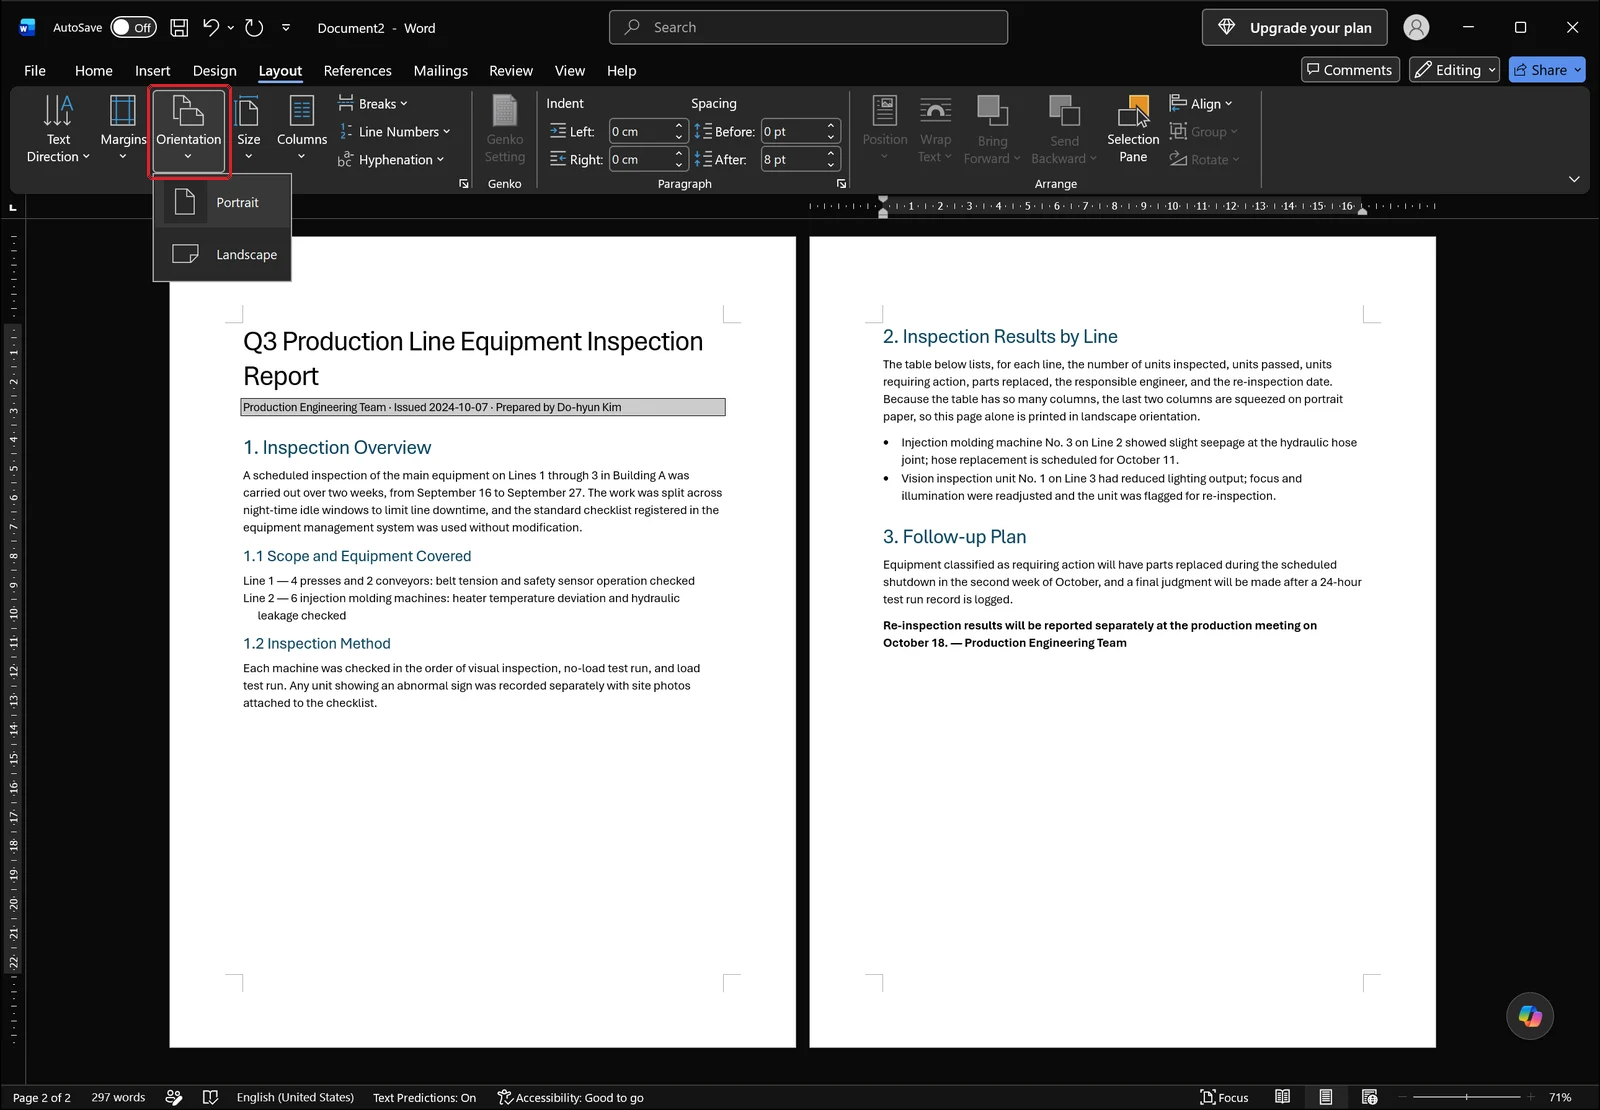
The Orientation dropdown offers exactly two entries, Portrait and Landscape, each with a small page icon. Choosing Landscape here is not the mistake. The scope that choice applies to is the problem, and sections are what define that scope.
A New Document Is One Single Section
A file you just created, or a report someone emailed you, almost always has one section covering page 1 through the last page. Pick Landscape in that state and section 1 goes landscape, which to your eyes is the whole document rotating.
Page Breaks and Section Breaks Are Not the Same Thing
A page break, the kind you get with Ctrl+Enter, pushes the following content onto the next sheet and nothing more. It does not create a new section. Your page count goes up, but the container that holds page setup is still a single one, so there is no way to give individual pages different orientations. Splitting orientation requires a section break, full stop.
The fastest way to see how many sections you actually have is Draft view, on the View tab.
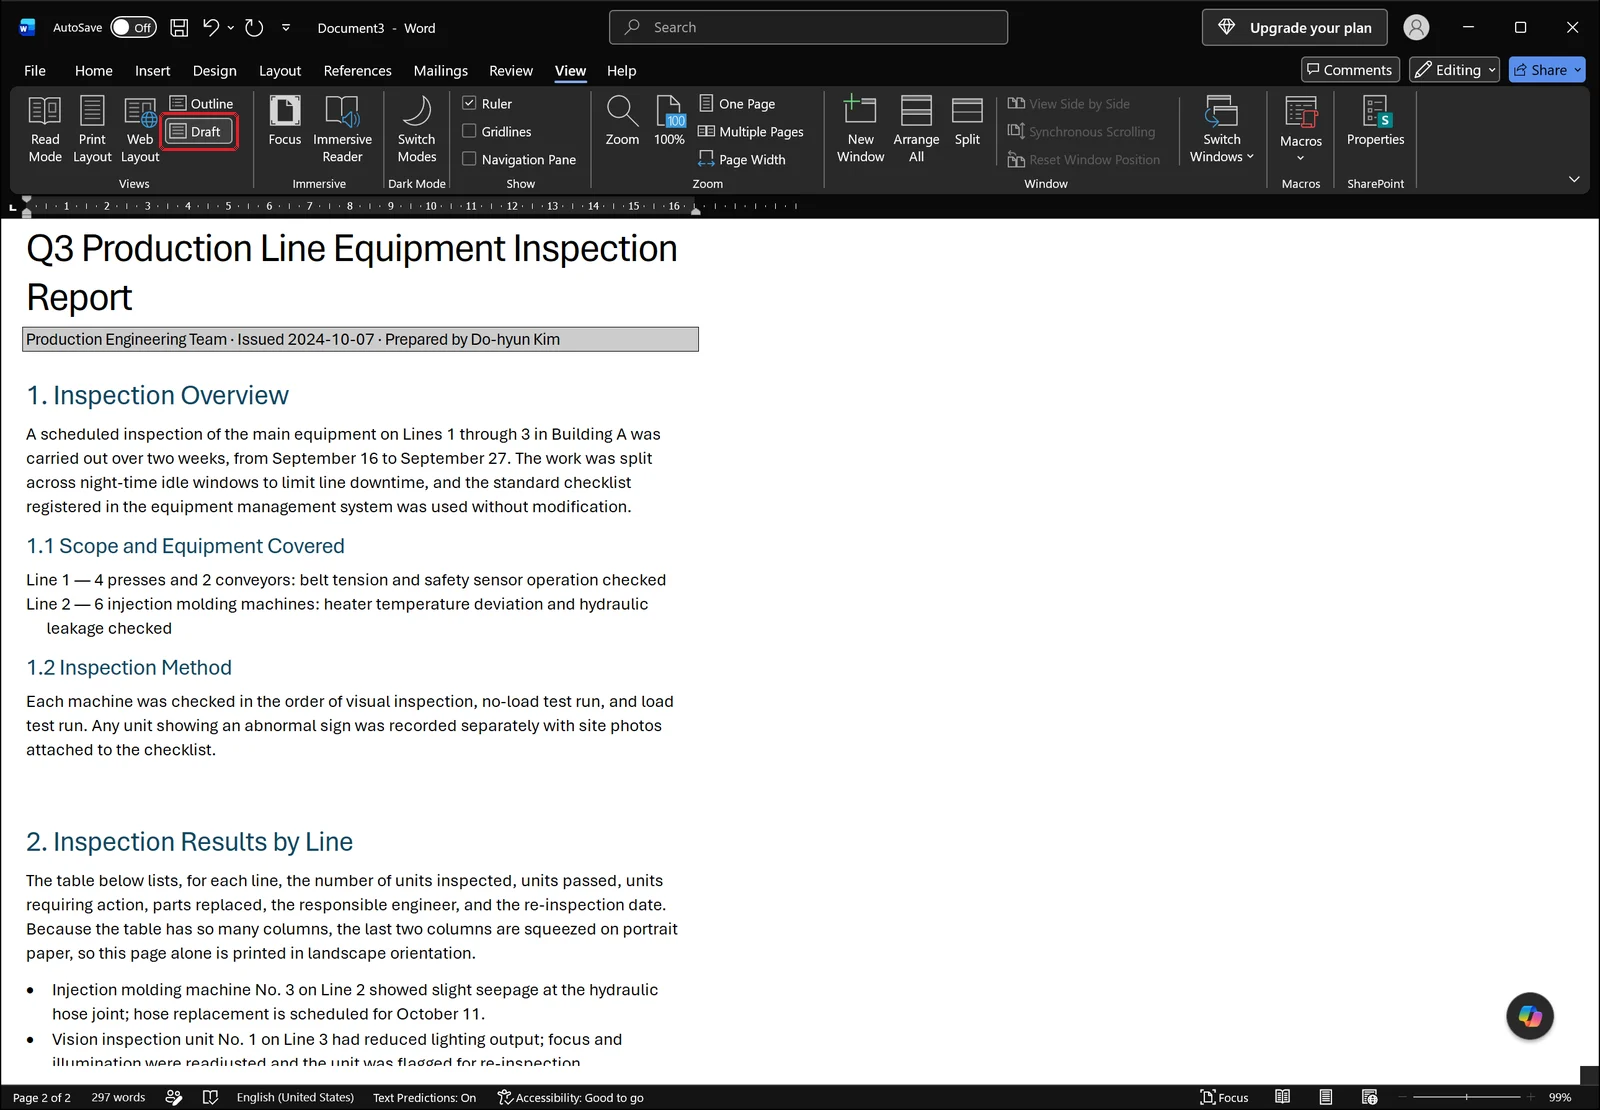
In Draft, page edges and margins disappear and the text runs continuously, so any break in the file would show up as a labeled line. Here the document area holds nothing but continuous body text: the title, then 1. Inspection Overview, 1.1 Scope and Equipment Covered, 1.2 Inspection Method, and 2. Inspection Results by Line, with plain empty whitespace between the sentence ending in "attached to the checklist." and the next heading. No labeled break line of any kind is drawn on screen, which is what you would expect from a document that is one single section. Change orientation now and of course everything turns.
Before You Start: Make Sections and Pages Visible
Pin Down the Target Pages First
Decide which content needs to be landscape before you insert anything. Turn on the Navigation Pane from the View tab and a pane opens on the left.
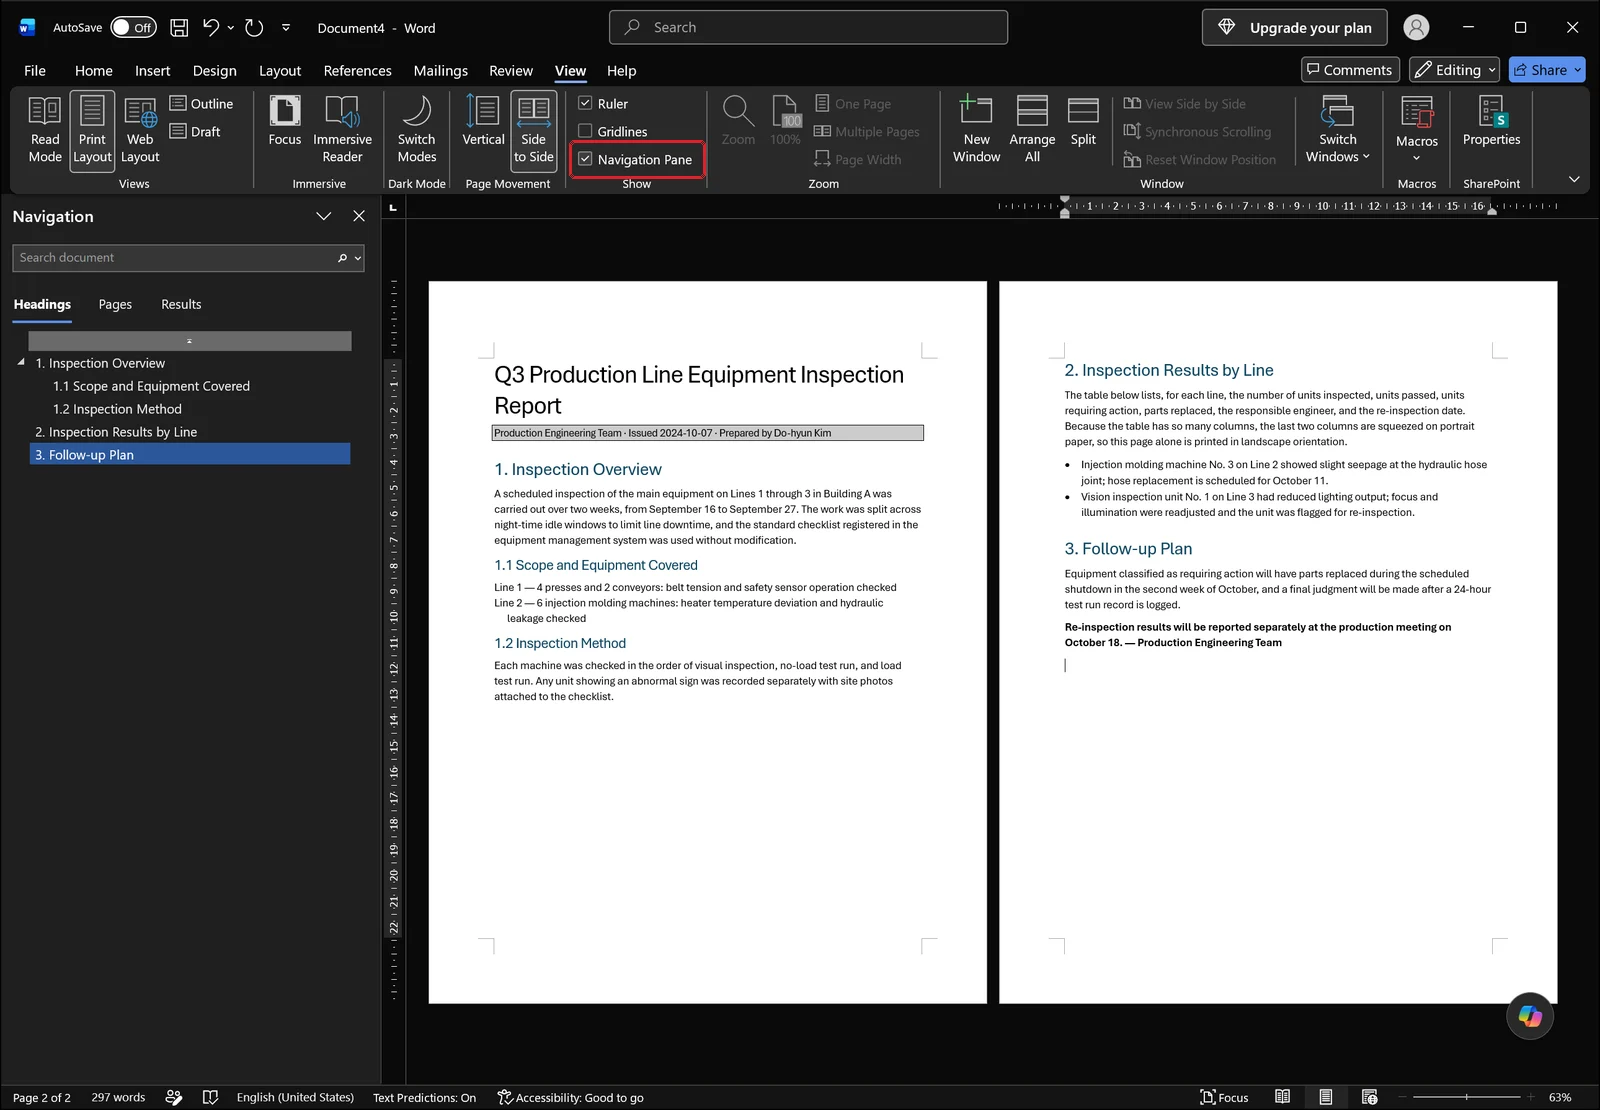
The pane gives you a search box plus headings, pages, and results tabs. Scan the heading list and note where the block you want to rotate begins and where it ends. Doing this first means you will not be guessing about cursor placement later.
Turn On Formatting Marks
Section breaks are only visible when formatting marks are displayed. Open the Home tab and click the show/hide formatting marks button (¶) in the Paragraph group, or press Ctrl+Shift+8.
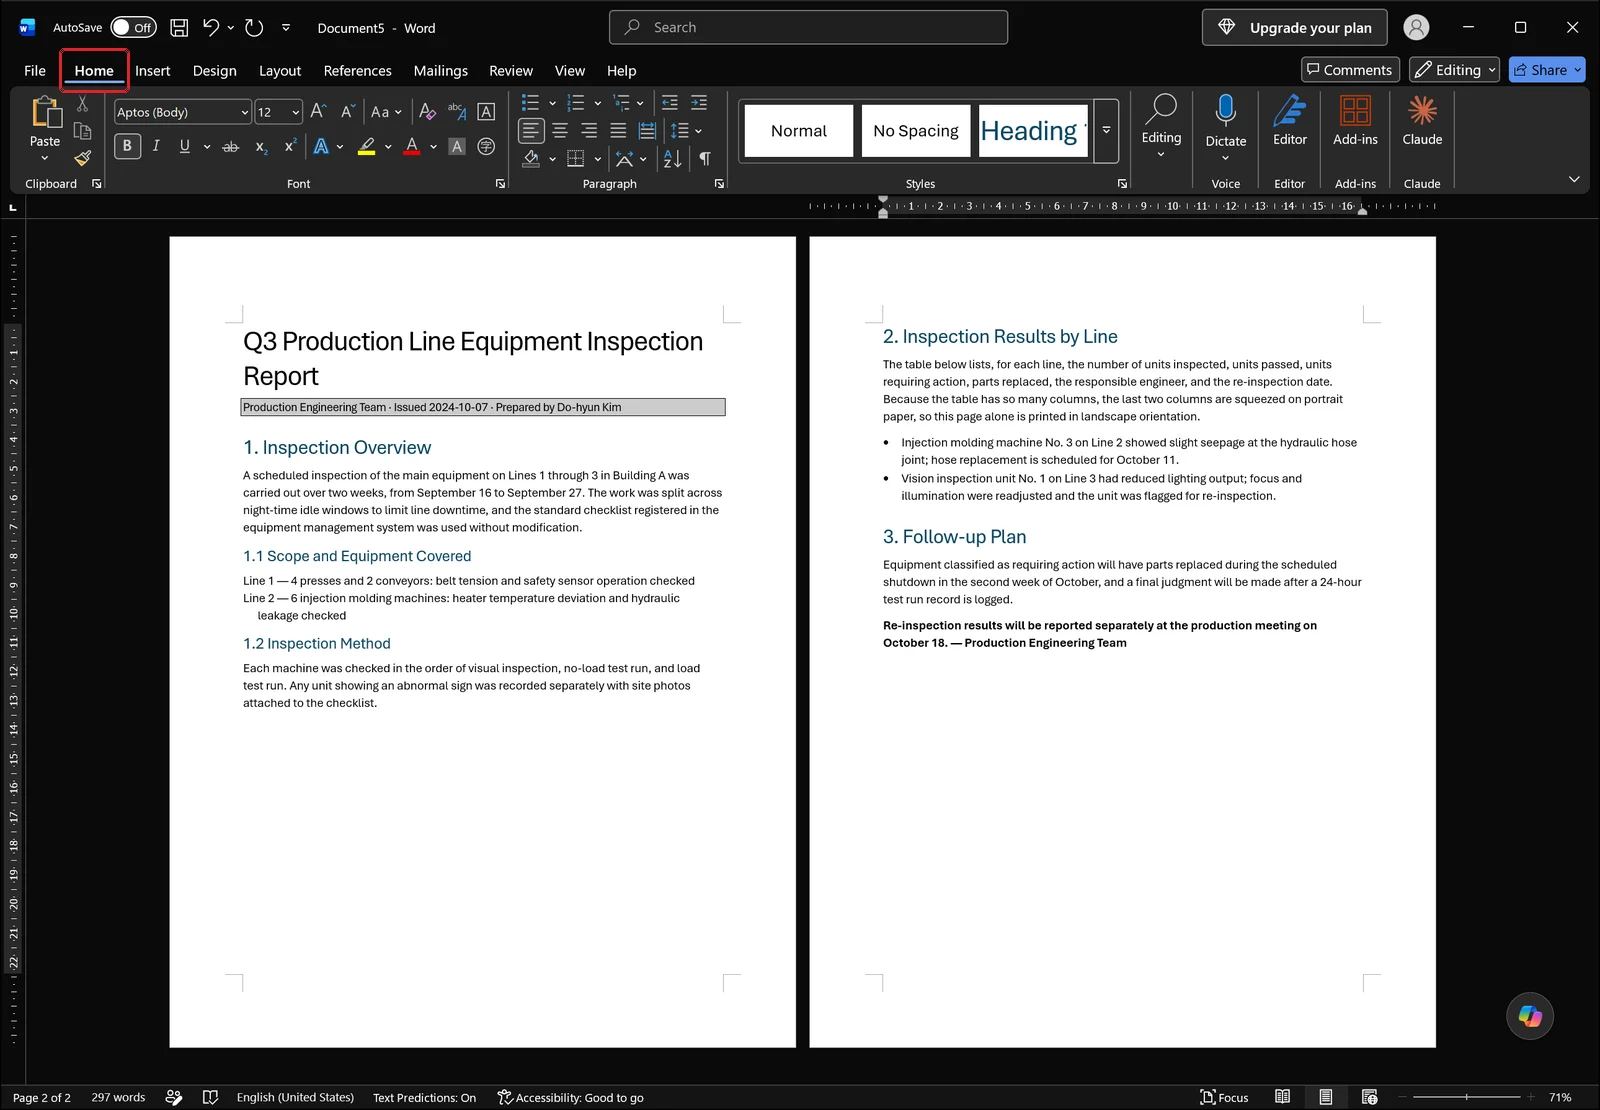
With marks on, paragraph symbols and every break appear inline, so you can trace exactly which break landed where. The same button turns them back off when you are done.
The Three-Step Shape of the Job
Boiled down: decide where the landscape block starts and ends, put a section break at each end, then change orientation with the cursor inside the middle section. If a table or image straddles two pages, inserting a break will shift content, so set your start and end points on clean paragraph boundaries.
The Standard Method: Section Breaks, Then Orientation
Step 1: Insert a Section Break Before the Landscape Block
Put the cursor immediately before the first character of the content you want rotated, then open the Breaks dropdown on the Layout tab.
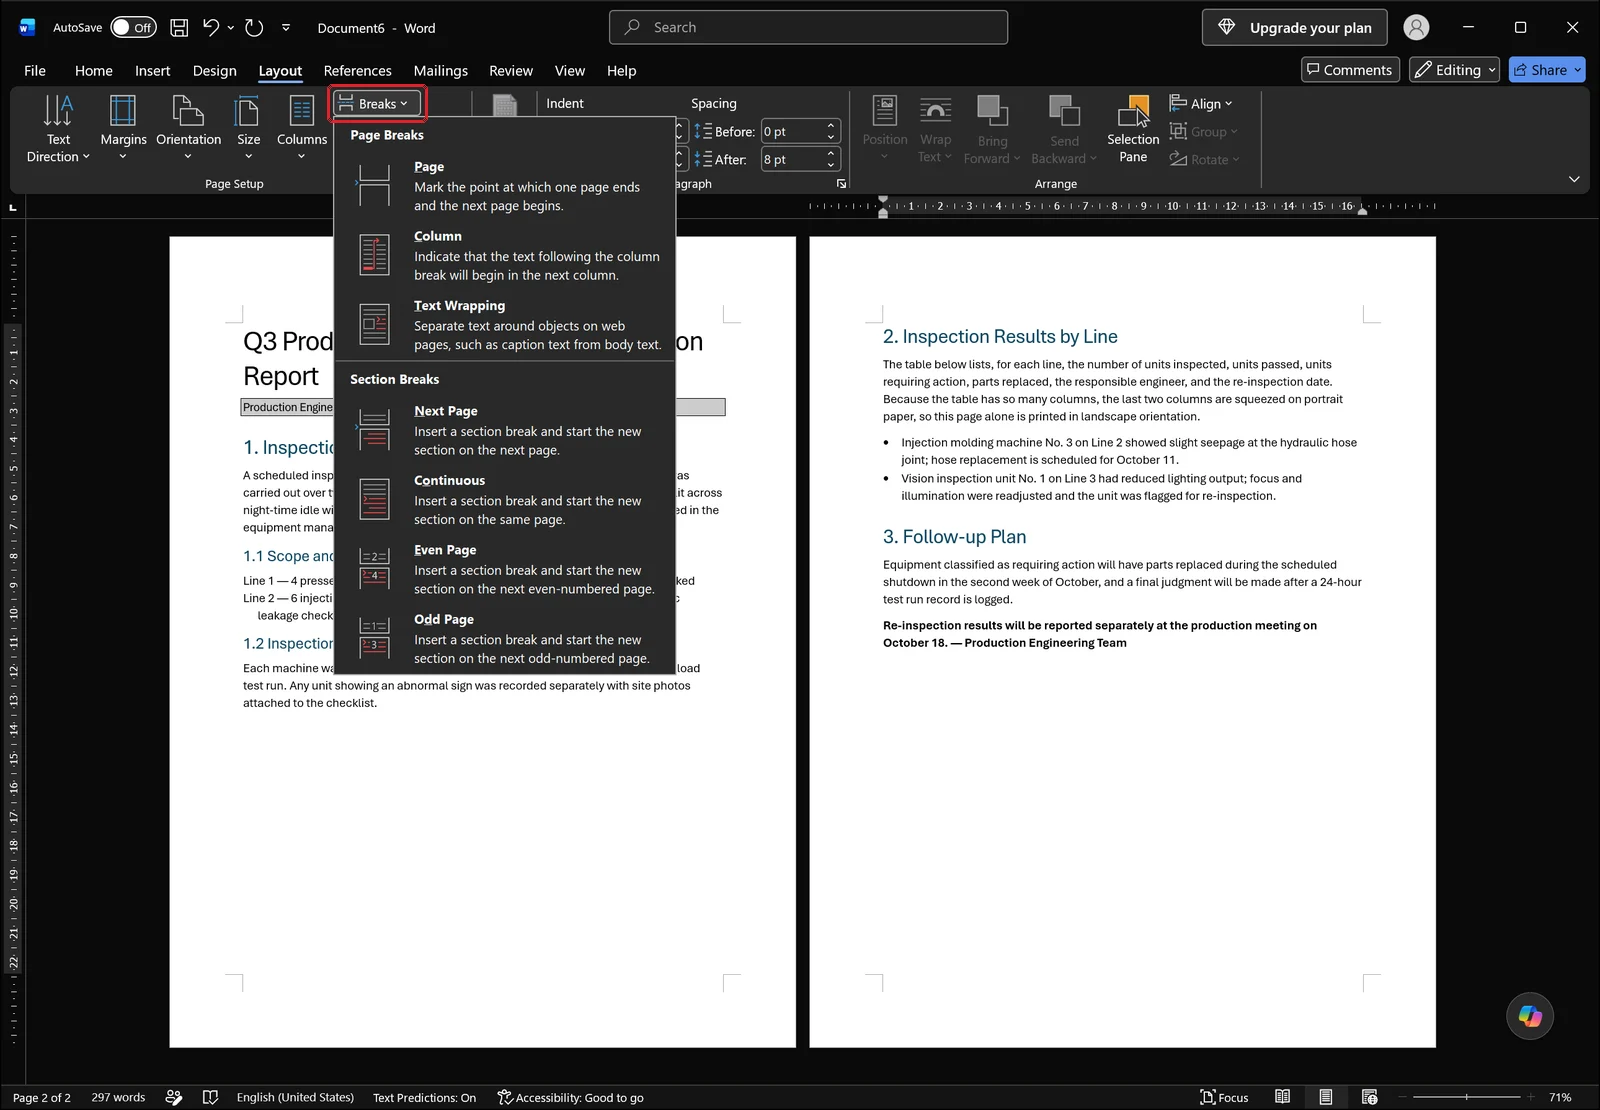
The menu splits into two groups. The upper group holds page breaks (Page, Column, Text Wrapping) and the lower group holds section breaks (Next Page, Continuous, Even Page, Odd Page). Choose Next Page from the section break group. Picking Page from the upper group reproduces the exact symptom described above, so check which group you are clicking in.
Step 2: Insert Another One Where the Block Ends
Move the cursor to the start of the content that follows the landscape block and insert Next Page again the same way. The document now has three sections: the portrait part before, the block you are about to rotate, and the portrait part after. Skip this step and everything after your first break turns landscape too.
Step 3: Change Orientation Inside the Middle Section
Click anywhere inside the middle section, open Orientation on the Layout tab, and pick Landscape. The sections on either side stay portrait and only the middle one rotates.
Step 4: Verify
Switch to Draft to confirm both section breaks are where you meant them to be, then go back to Print Layout and check that the pages before and after the landscape page are still portrait. One thing worth knowing: rotating the page does not widen your table. You still have to select the table and autofit it to the window, or adjust column widths manually, before it fills the new page width.
👉 Delete a Blank Page in Word: Why Backspace Won't Work
Skipping Manual Breaks: The Apply To Dropdown
Opening the Page Setup Dialog
There is a route where Word inserts the section breaks for you. Click the small dialog launcher at the bottom-right corner of the Page Setup group on the Layout tab.
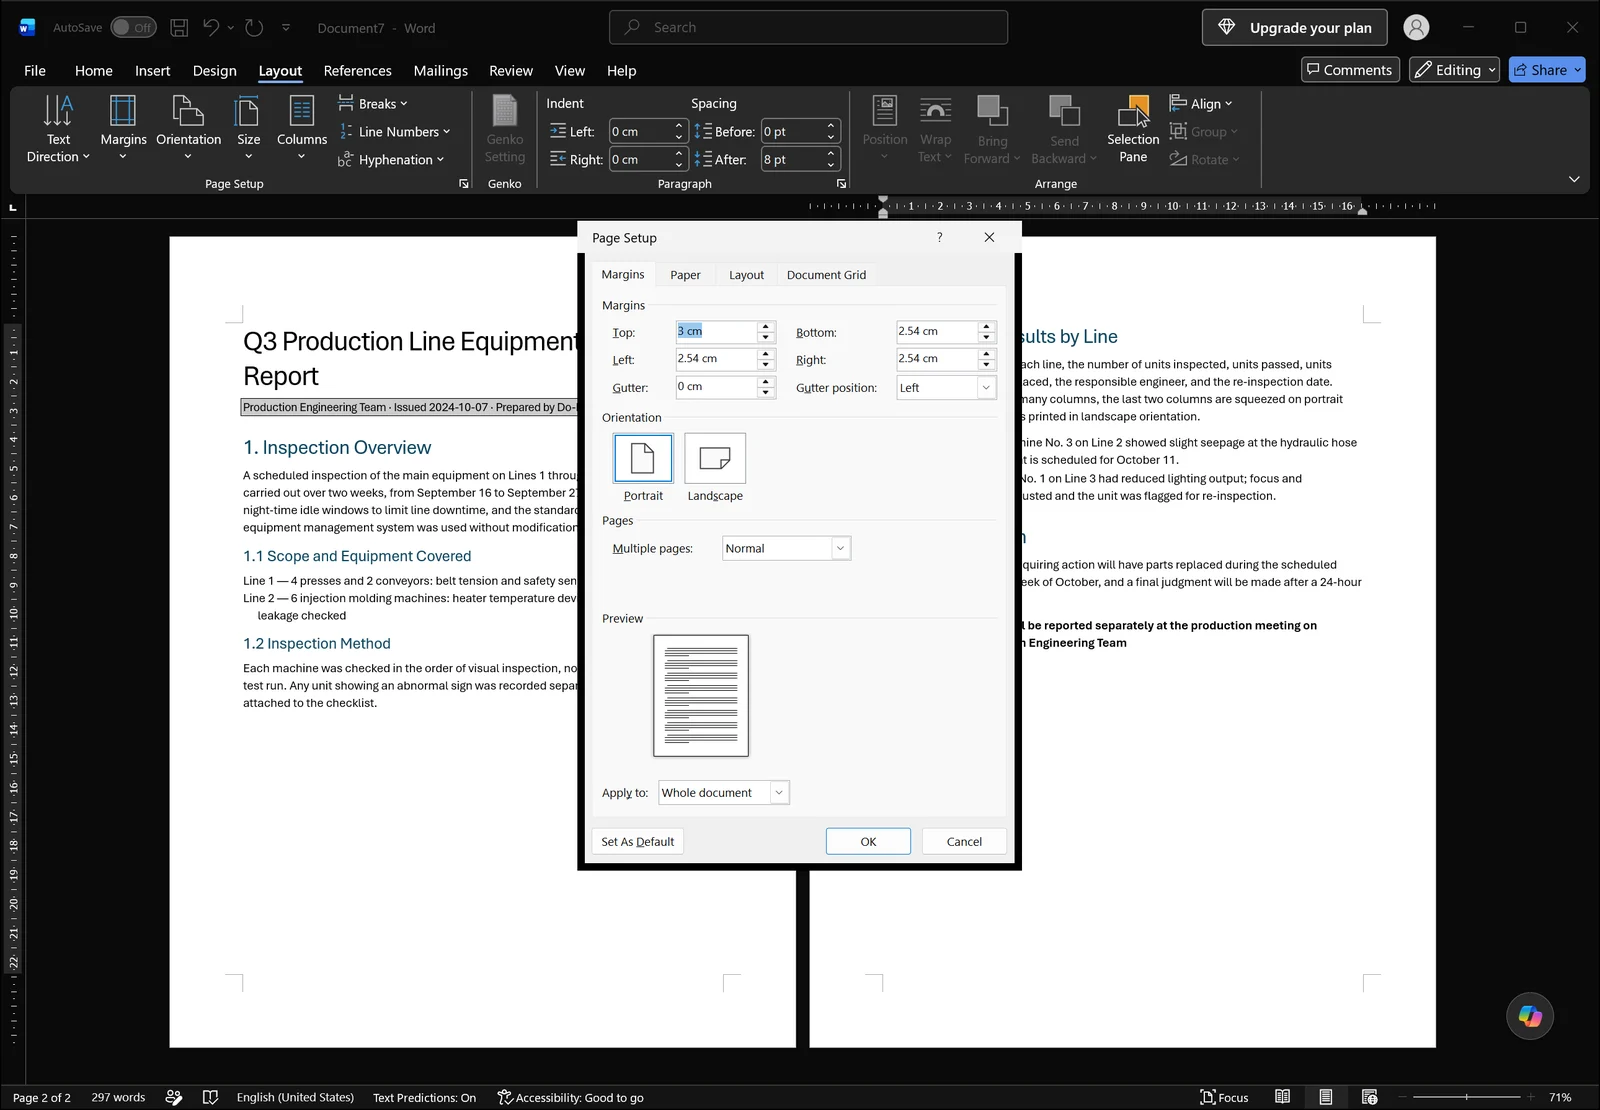
The dialog has Margins, Paper, Layout, and Document Grid tabs. Orientation sits on the Margins tab alongside the top, bottom, left, and right margin boxes, and at the very bottom is the Apply to dropdown. That dropdown is the whole point, because the Orientation button on the ribbon does not offer it.
What the Apply To Choices Mean
Open Apply to and you get Whole document, This section, and This point forward.
- Whole document produces the behavior you have been fighting: every page turns.
- This section limits the change to the section the cursor is in.
- This point forward inserts a section break at the cursor automatically and applies the new orientation from there to the end of the file.
If you want the document landscape from some point in the middle all the way to the end, This point forward is a one-step answer.
Rotating Only the Selected Text
Select the paragraph or table you want moved to a landscape page first, then open the Page Setup dialog. A Selected text entry appears in the Apply to list. Set Orientation to Landscape with that selected, and Word drops section breaks before and after the selection and splits that block onto its own landscape page. For a single rotated page, this is the least hands-on method available.
Paper Size and Margins Follow the Same Rule
The same dialog opens from the More Paper Sizes command at the bottom of the Size gallery.
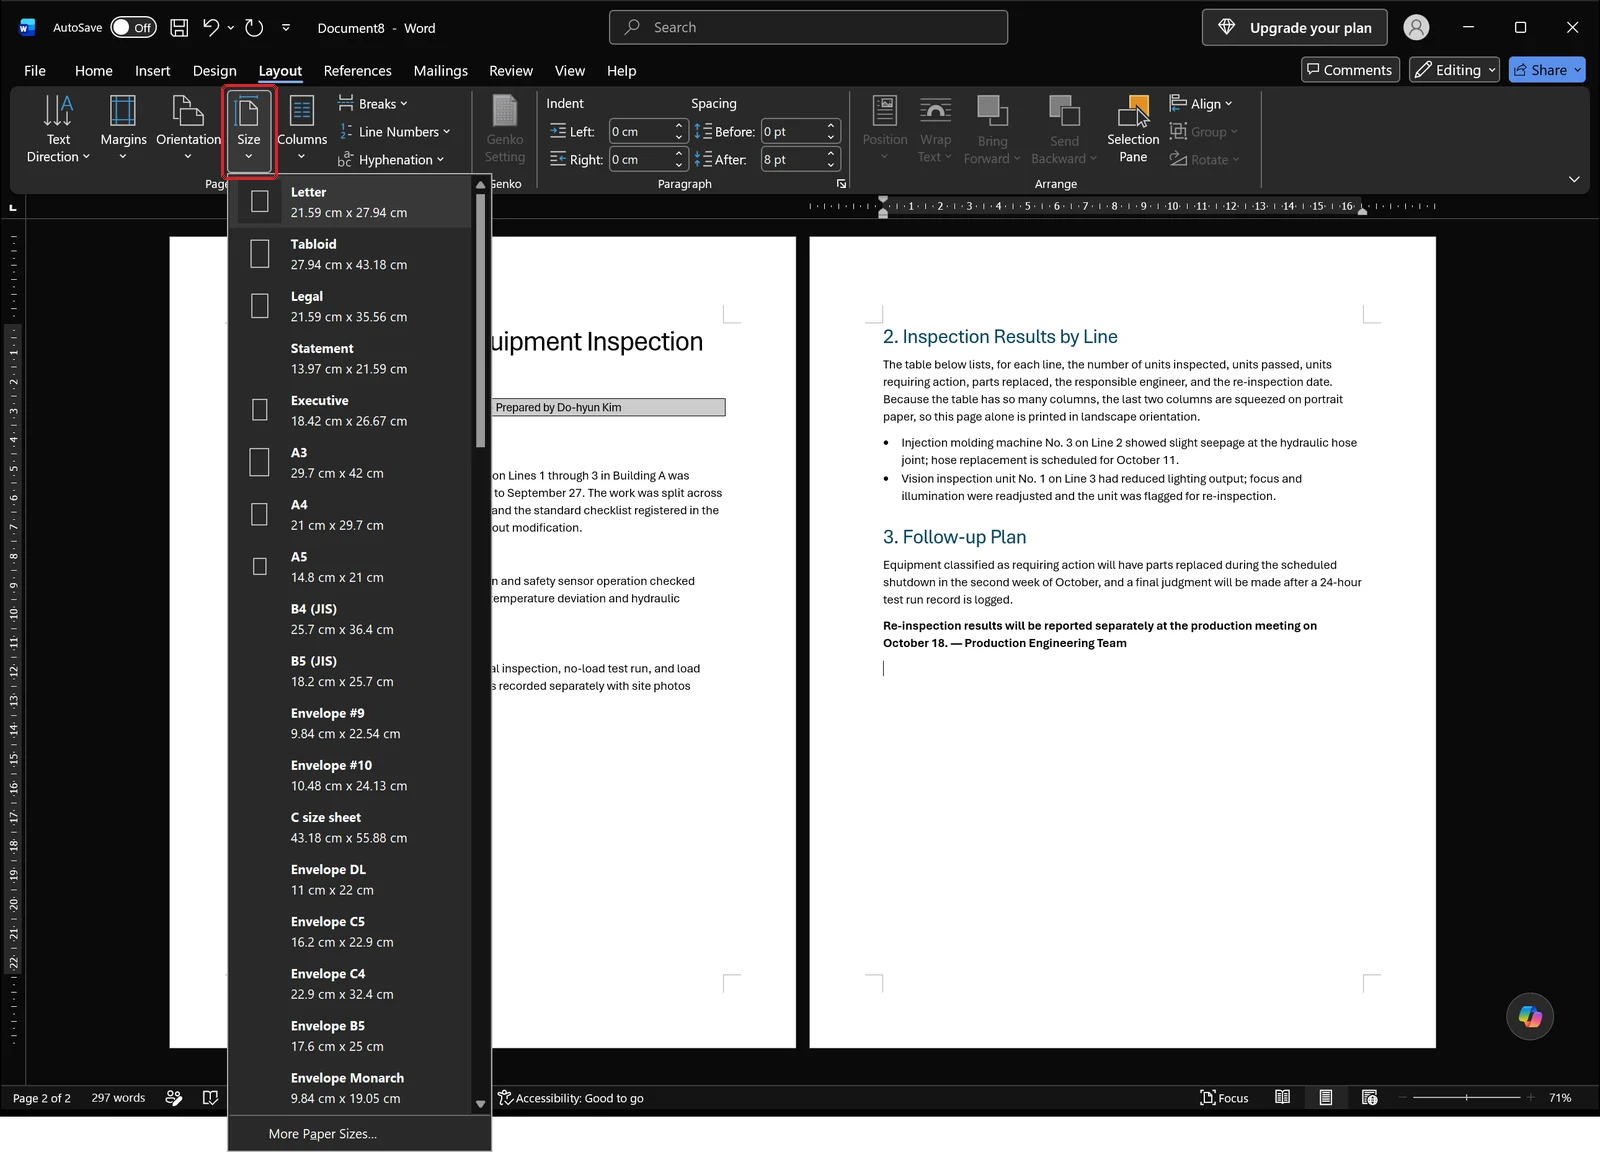
Paper size is a section-level setting too, so switching one page to A3 follows the identical procedure. Picking a size straight from the gallery applies it to the current section; if you need to control the range yourself, open More Paper Sizes and set Apply to in the dialog.
Cleaning Up Around the Landscape Page
Reset Margins Per Section
Rotating a page widens it left to right and shortens it top to bottom. Margins that looked right on a portrait page often feel cramped once the page turns, so adjust that section on its own.
Open the Margins gallery on the Layout tab. It lists six presets, Normal, Narrow, Moderate, Wide, Mirrored, and Office 2003 Default, each with its margin values, plus a Custom Margins command at the bottom. Note that the Mirrored preset reports Inside and Outside values instead of Left and Right, since it is built for two-sided binding. Place the cursor inside the section you want to change, pick Narrow, and the text width in that section opens up. To type exact values, use Custom Margins to open Page Setup, which is where the Apply to setting lives.
Break the Header and Footer Link
When you create a new section, its header and footer stay linked to the previous section by default. If a logo or document number that was positioned for a portrait page now sits in the wrong place on the landscape page, double-click the header area to enter editing mode, turn off Link to Previous, and adjust that section independently.
When Page Numbers Restart at 1
After adding sections, the landscape page sometimes starts numbering again from 1. Rather than typing a start number into Page Number Format, choose Continue from previous section and the numbering picks up where the earlier section left off.
One Final Look
When the edits are done, zoom out until a full page fits on screen and inspect the landscape page as a whole. This is the step that catches a table clipped at the right edge or a header overlapping the body text.
👉 How to Change Line Spacing in Word: 1.5, Exact pt, and Fixes
Troubleshooting Checklist
| Symptom | Cause | Fix |
|---|---|---|
| Everything still rotates after inserting a break | A page break was inserted instead of a section break | Reinsert using Next Page from the section break group in Breaks |
| The wrong page turned landscape | The cursor was still in the previous section | Check the current section position in Draft view, then reapply |
| Sections exist but the whole file changed | Apply to was left on Whole document | Undo with Ctrl+Z and set Apply to This section |
| Every page after the landscape one is landscape | No closing section break | Add a section break where the landscape block ends |
| Deleting a break merged the orientations | The section break stores the preceding section's page setup | Undo with Ctrl+Z, or rebuild the section and set orientation again |
Mistaking a Page Break for a Section Break
This is by far the most common error. The Insert tab has its own Page Break command, and it is easy to click that one and believe you have created a section.
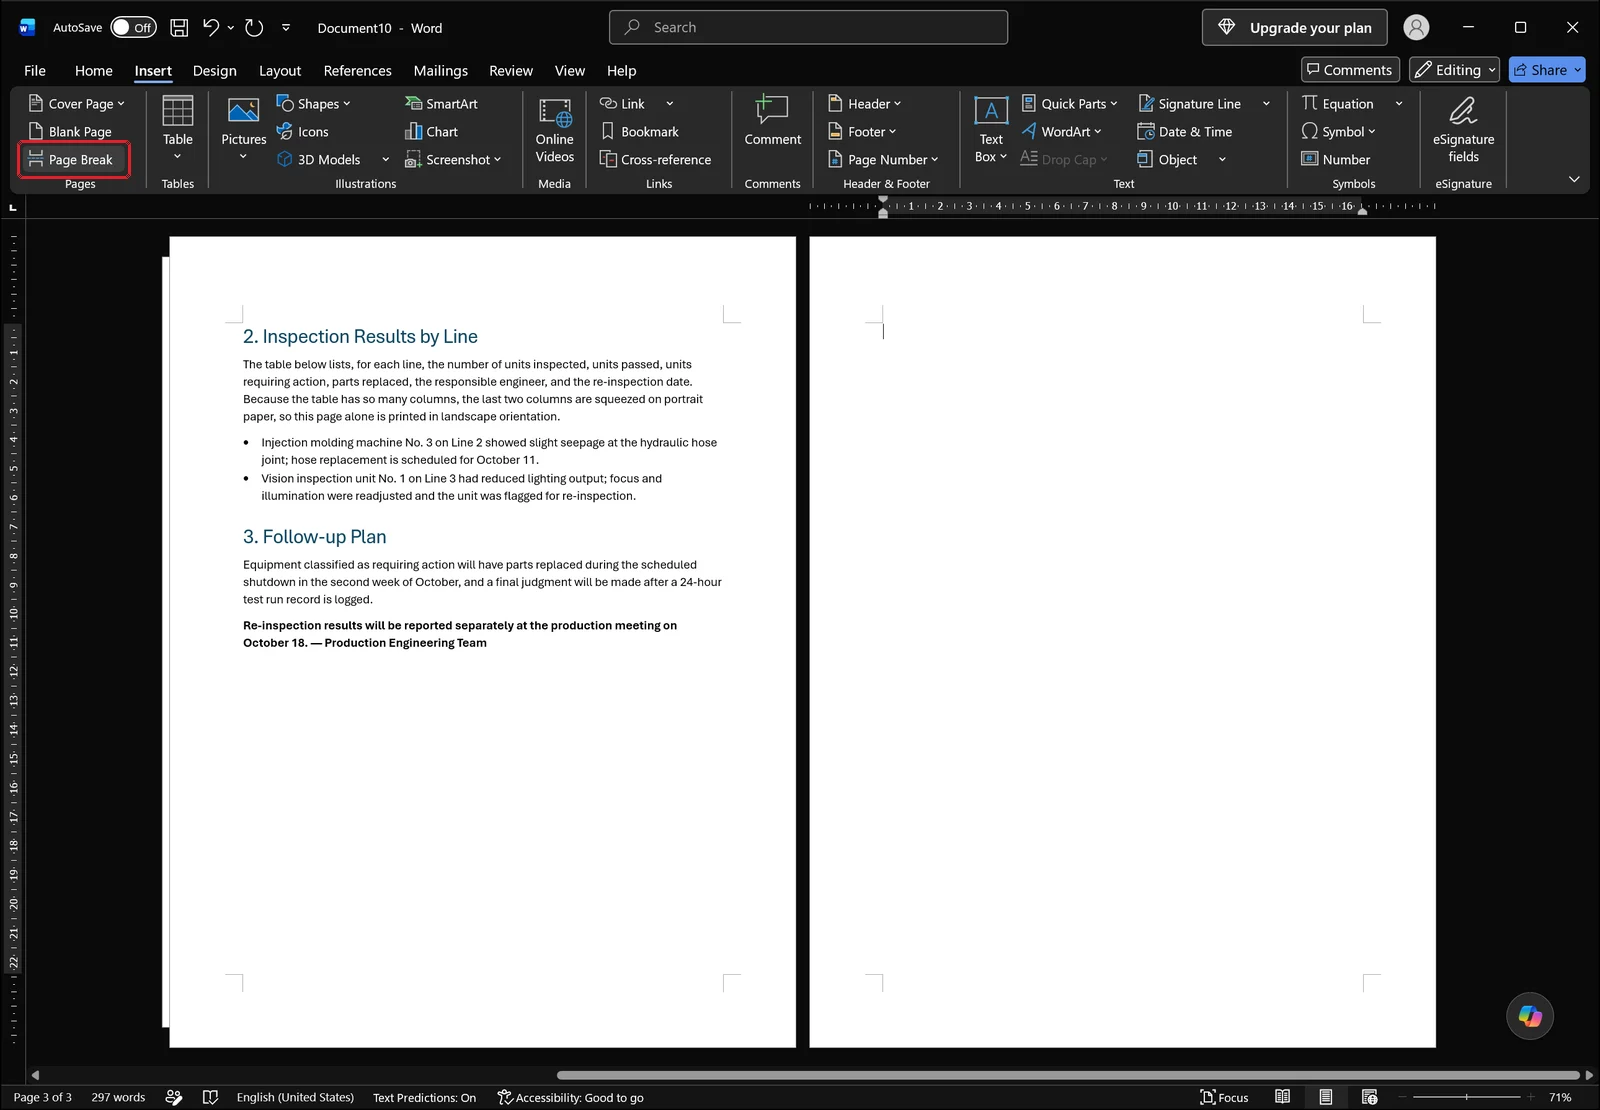
The command pushes the insertion point onto the next sheet, and that new page belongs to the same section as the one before it. In the screenshot the right-hand page is completely empty: 2. Inspection Results by Line, 3. Follow-up Plan, and the closing bold line about reporting re-inspection results at the October 18 production meeting all stay on the left page, and only the insertion point, sitting at the top-left margin of the new page, has moved. That empty page is still a portrait page in the original section. To split orientation you need the section break group under Breaks on the Layout tab; the Layout tab label is readable in the ribbon, but the Breaks command itself is not visible in this screenshot because the Insert tab is the active tab.
Why Deleting a Section Break Merges Orientations
A section break marker carries the page setup of the section that precedes it. Delete the marker and the two sections merge, adopting the settings of the later section, so a page that was landscape appears to flip back to portrait. Undoing with Ctrl+Z is faster than deleting and rebuilding the orientation from scratch.
Final Check in the Navigation Pane
Once the edits are finished, reopen the Navigation Pane and run through the document as a whole.
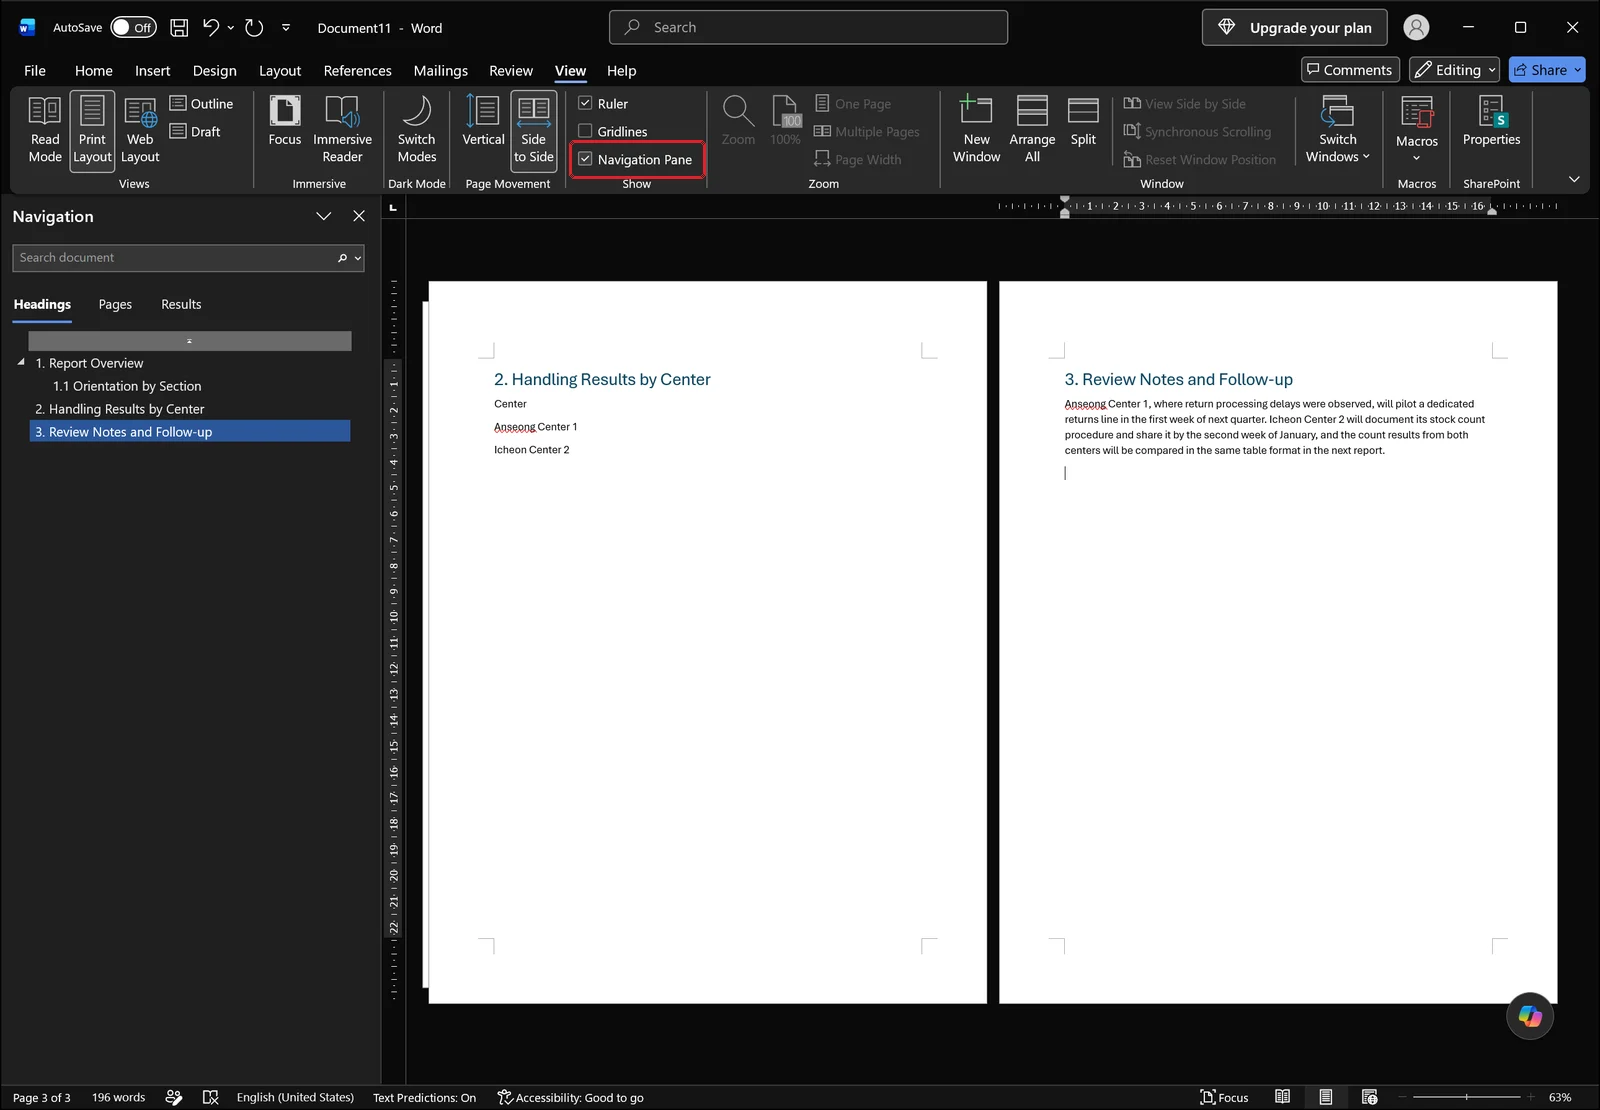
With the headings tab active you get the report outline in order: 1. Report Overview, 1.1 Orientation by Section, 2. Handling Results by Center, and 3. Review Notes and Follow-up, while the sheets visible beside the pane are all portrait. Switch to the pages tab, which is not shown in this screenshot, and that outline is replaced by page thumbnails you can scan top to bottom, comparing at a glance which sheets are landscape and which are portrait. Running this check once before printing is usually enough to stop a misoriented page from reaching the printer.
FAQ: Mixing Page Orientations in Word
Q. Do I always have to create a section to make one page landscape?
A section is always involved, yes, but you do not have to insert the break yourself. Select the paragraph or table you want rotated, open the Page Setup dialog, set Orientation to Landscape, and leave Apply to on Selected text. Word inserts the section breaks before and after for you.
Q. How do I make the document landscape from the middle to the end?
Place the cursor at the point where the change should start, open the Page Setup dialog, choose Landscape, and set Apply to to This point forward. A section break appears at the cursor and only the pages after it turn landscape.
Q. I deleted a section break and my landscape page went back to portrait.
That is expected. The break marker holds the preceding section's page setup, so removing it merges the two sections under the later section's settings. Undo with Ctrl+Z, or reinsert the section break and set the orientation once more.
Q. I switched to landscape but the table is still cut off.
Changing orientation does not change the table's width. Select the table and autofit it to the window, or set column widths manually. If it still does not fit, narrow the left and right margins for that section.
Managing section settings with inline AI
The steps above are a handful of clicks when there are only one or two landscape pages. The work grows quickly in a report with several appendices and a dozen or more sections, where you end up checking orientation, margins, and header links section by section, and repeating the entire pass for every file in the folder.
inline AI is a desktop AI you install on your PC. It opens Word and Excel files directly, reads how a document is divided into sections along with each section's page setup, and edits them against the rules you give it. Ask in plain language, for example to set only the sections containing tables to landscape with narrow margins and leave the rest portrait, and it applies the change and saves the file.
Everything runs on your own machine, so internal reports and confidential documents never get uploaded to an outside server.
See what an agent could take over at your company in a 30-minute call.