Learn
Word Page Borders: Whole Document, One Page, or Remove

Two settings decide almost everything about Word page borders: the Apply to list and the Options button. Get those wrong and you see the classic symptoms - a border meant for the cover page spreads across all 40 pages, the bottom line disappears when you print, or you remove the border and it stays on three pages anyway. None of those are bugs. They are what happens when a border is stored per section and measured from the wrong reference point.
This guide covers where the command actually lives, how to border the whole document, how to restrict a border to a single page with section breaks, how to control the spacing, and how to remove borders cleanly when they refuse to go.
Where Page Borders Live (and How They Differ from Home Tab Borders)
The Page Borders command sits on the Design tab
The command that draws a line around the page is on the Design tab of the ribbon. Plenty of people hunt for it on Layout and give up. The split is consistent: margins and paper orientation belong to Layout, while things that change how the page itself looks - watermark, page color, borders - belong to Design.
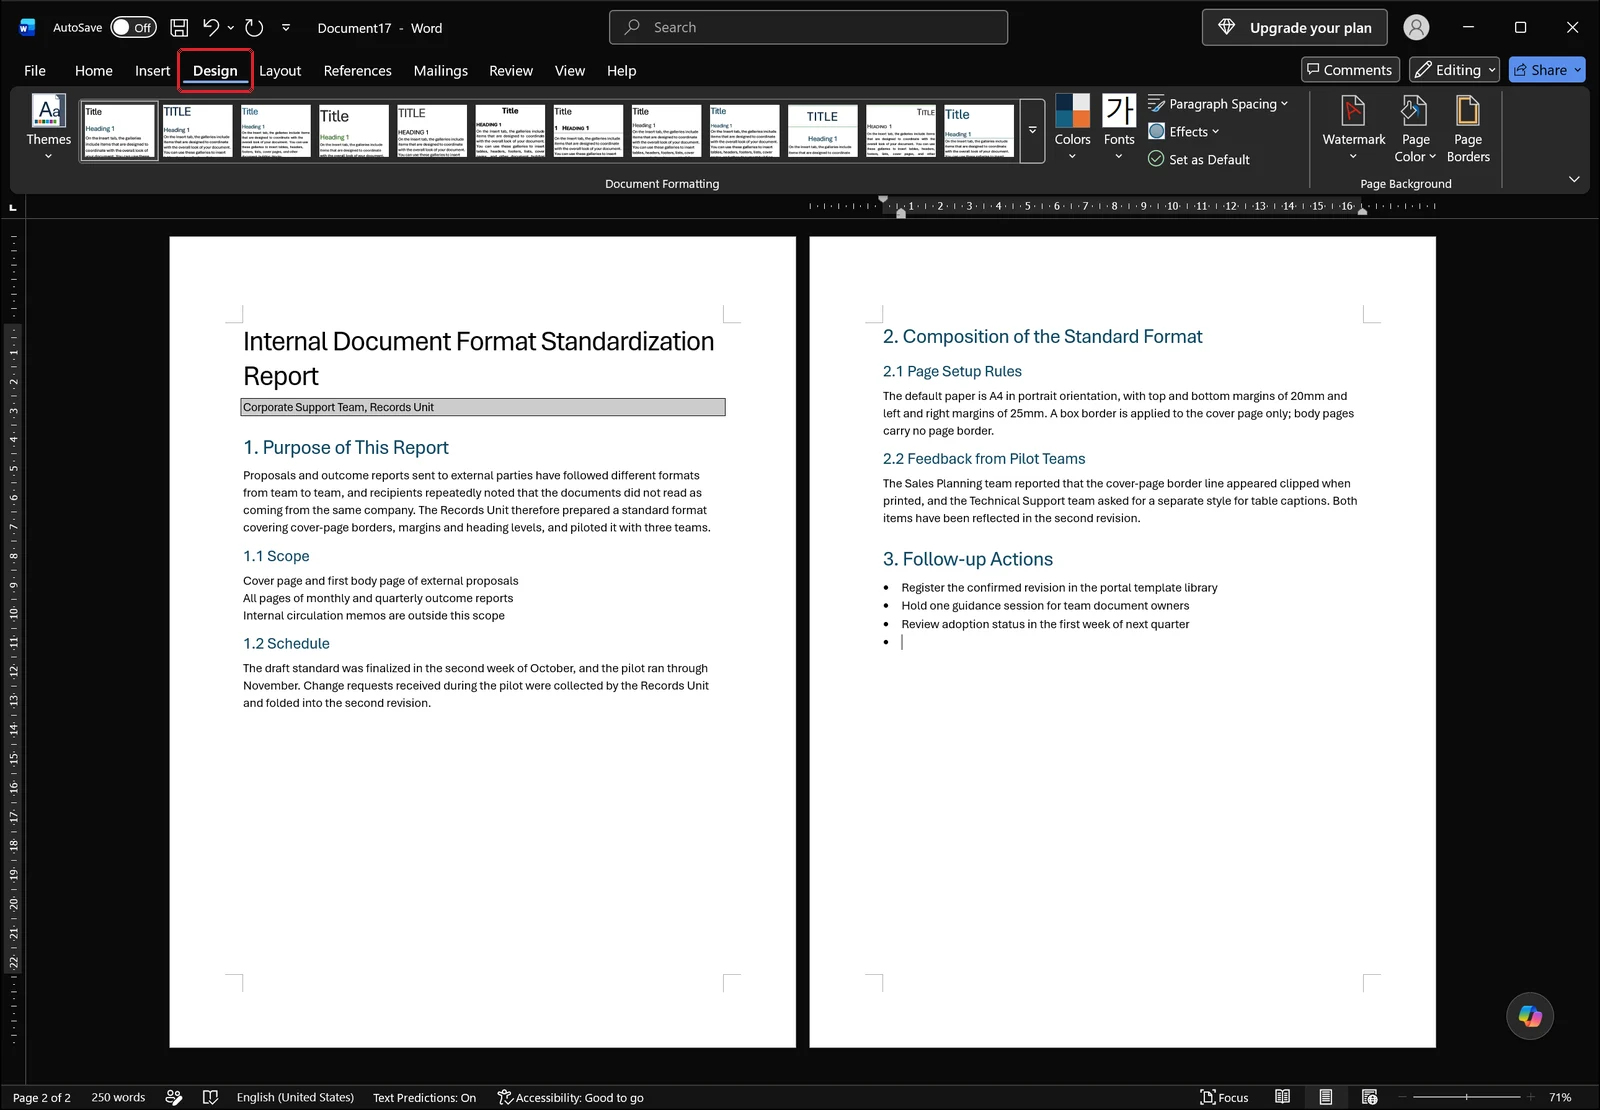
Open Design and you get the document formatting style sets on the left, with colors, fonts and paragraph spacing beside them. At the far right end sits the page background group.
That is where you click Page Borders..., next to Watermark and Page Color. The position is the same in Word 2016 and later and in Microsoft 365. Clicking it does not draw anything immediately - a dialog opens first so you can choose the values.
The Home tab borders apply to paragraphs and tables
The Home tab also carries a borders control, in the unlabeled block between the Font and Styles groups, which is where the confusion starts. That one draws lines around the paragraph your cursor is in, or around the table cells you selected. It never touches the page edge.
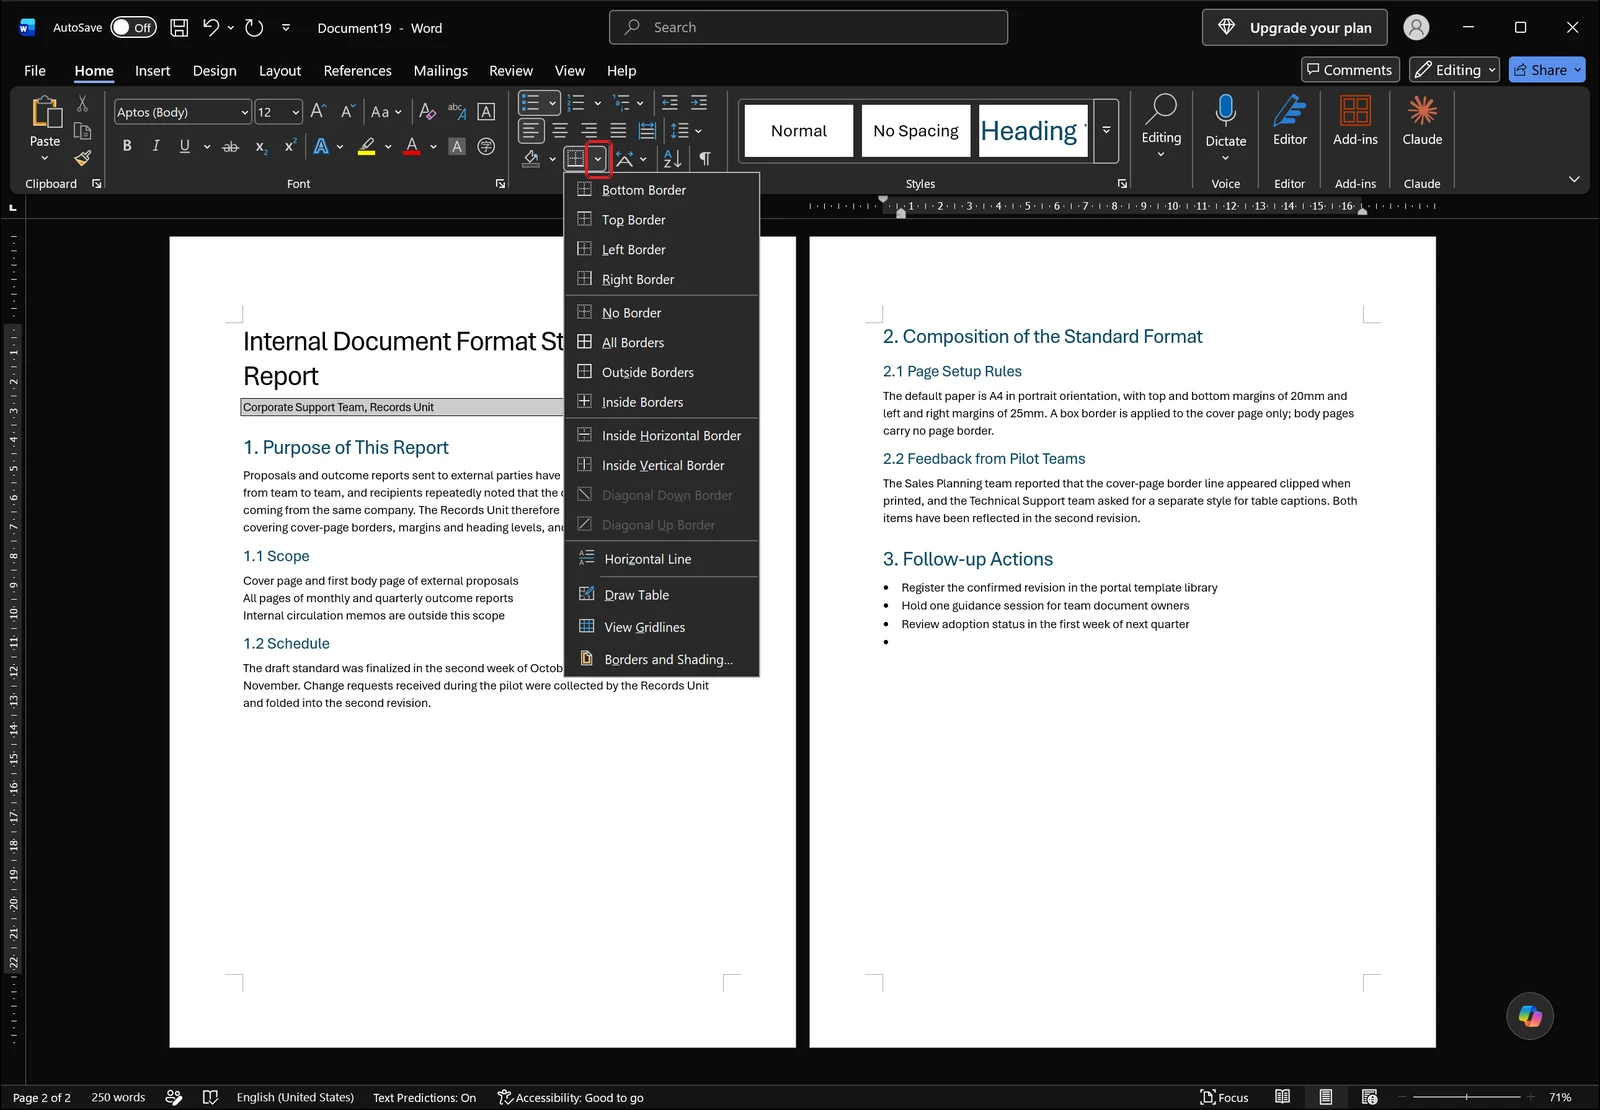
Click the small drop-down arrow beside the Borders button and you get a list of individual edges: Bottom Border, Top Border, Left Border, Right Border, No Border, All Borders, Outside Borders, Inside Borders, Inside Horizontal Border and Inside Vertical Border, with Diagonal Down Border and Diagonal Up Border greyed out, followed by Horizontal Line, Draw Table and View Gridlines. At the bottom of that list is Borders and Shading.... It opens the same dialog you get from the Design tab, but it opens on the paragraph tab, so you have to switch to Page Border yourself.
The dialog has three tabs, and they behave differently
Borders and Shading is split into Borders, Page Border and Shading. They look nearly identical, which is why people set a style on the first tab, click OK, and wonder why nothing appeared around the page. The tabs also carry different entries in the Apply to list at the bottom: the paragraph tab offers Paragraph and Text, while Page Border offers Whole document and section-level choices. Always confirm which tab is active before you touch Style or Width.
Adding a Page Border to the Whole Document in Three Steps
Step 1: Open Page Borders from the Design tab
Cursor position does not matter for this one. Click Page Borders... on the Design tab and the dialog opens over the document.
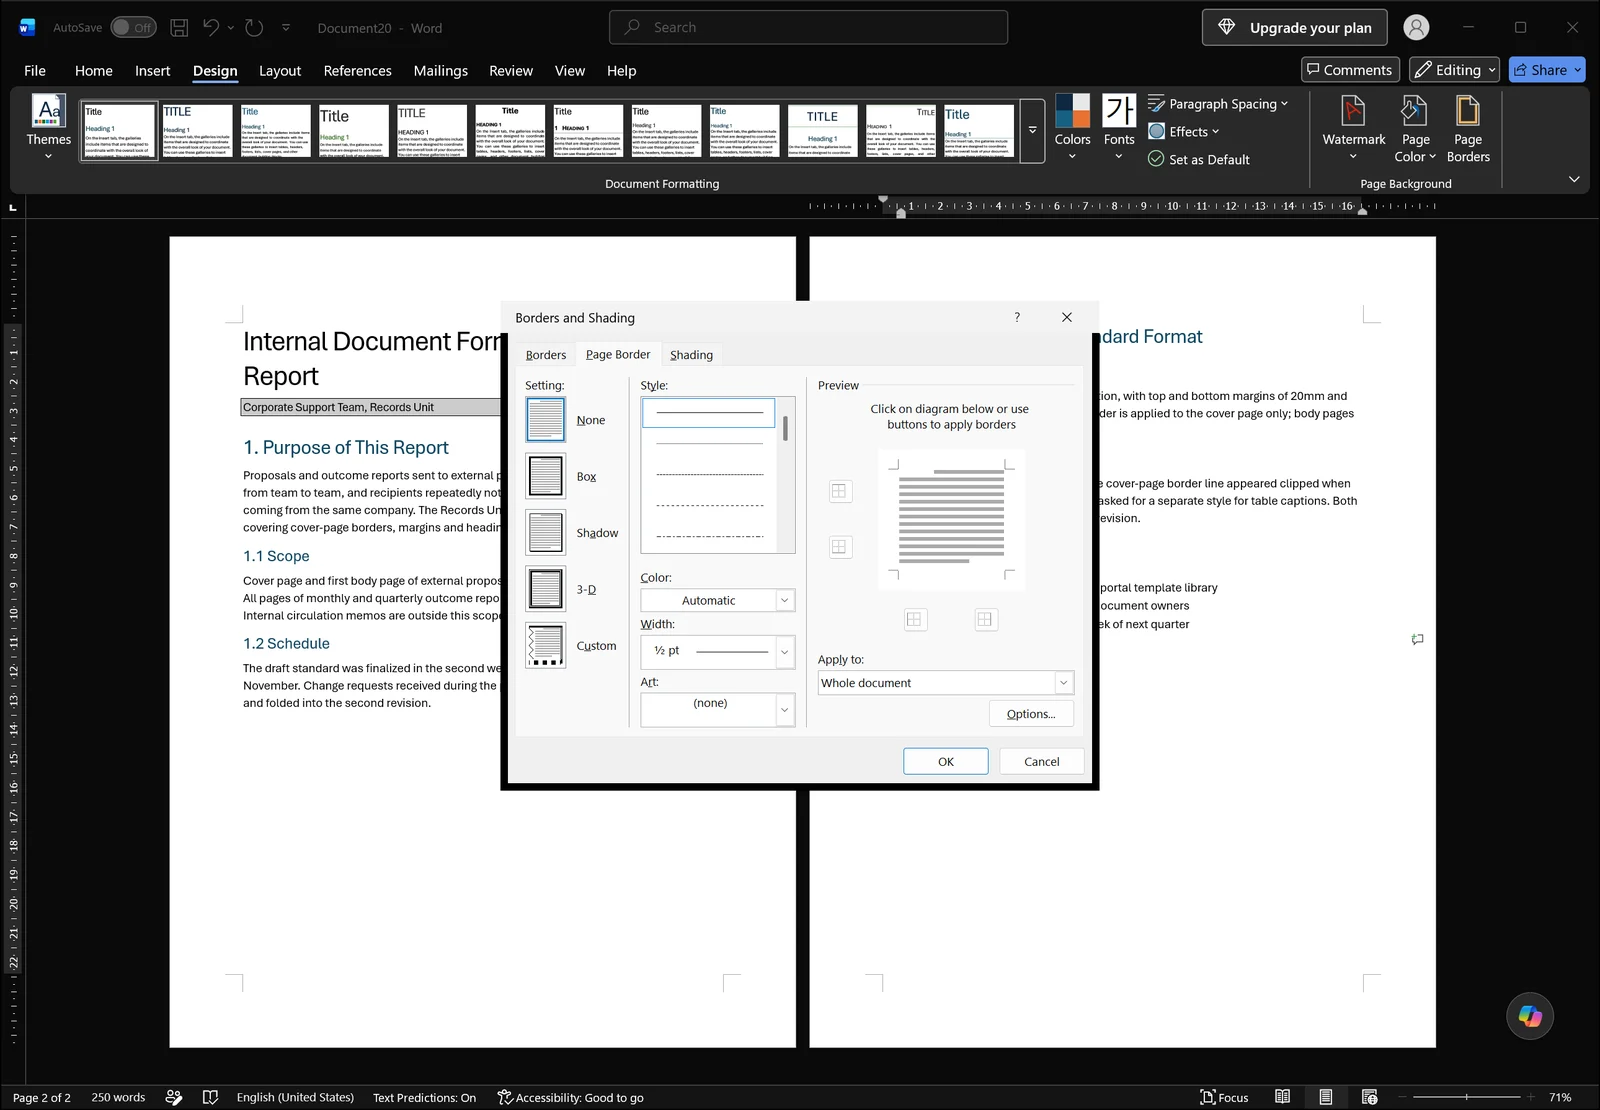
On the left is the Setting list: None, Box, Shadow, 3-D, Custom. In the middle are Style, Color and Width, plus an Art dropdown that starts at (none). On the right is the preview area with a button on each side. Along the bottom you get the Apply to dropdown and the Options button. Everything from here is mouse work inside the dialog, so this screenshot is as far as the ribbon takes you.
Step 2: Choose the setting, line style, color and width
Start with Box on the left. It puts the same line on all four sides and is the format almost every business document wants. Shadow and 3-D add depth effects that look heavy on a report, and Custom is for when you want a different line on each side - a rule under the header only, for example.
Then pick a line from Style (solid, dashed, double) and set Color and Width. Width runs from ¼ pt to 6 pt. For working documents, a solid line at 1 to 1.5 pt is the safe range. Anything past 3 pt looks fine on screen and feels claustrophobic on paper.
Order matters more than you would expect. If you change Width or Color after choosing the setting, the preview sometimes looks like it ignored you. Check the preview area after each change to confirm all four sides are drawn at the weight you picked, and if a side did not update, click that side's button beside the preview to toggle it back on.
Step 3: Set Apply to as Whole document and click OK
Leave the Apply to dropdown on Whole document and click OK to put the same border on every page. If your file has only one section, that is usually the default anyway. Remember where this dropdown is, though - it becomes the whole game as soon as you want a border on one page only.
Verify the result across pages
Do not judge the result from a single page. On the View tab, in the Zoom group, click Multiple Pages to put two or more pages on screen at once. If those zoom commands look dimmed, switch the Page Movement setting back to Vertical first.
Side by side, it takes a second to see whether every page got the same treatment, or whether one page picked up a different line weight because it belongs to a different section.
👉 Word Header and Footer: Different First Page and Sections
Bordering Only the Cover Page with Section Breaks
A page break is not a section break
Page border settings are stored per section, not per page. So if you want a line around exactly one page, that page has to sit in its own section.
The page break you insert with Ctrl+Enter only pushes content onto the next sheet. It does not create a section. If the only thing between your cover and the body is a page break, the entire file is still one section, and whatever you choose in Apply to, the border lands on every page.
Insert a Next Page section break from the Layout tab
Put the cursor at the very start of the page after the cover, then click Breaks on the Layout tab.
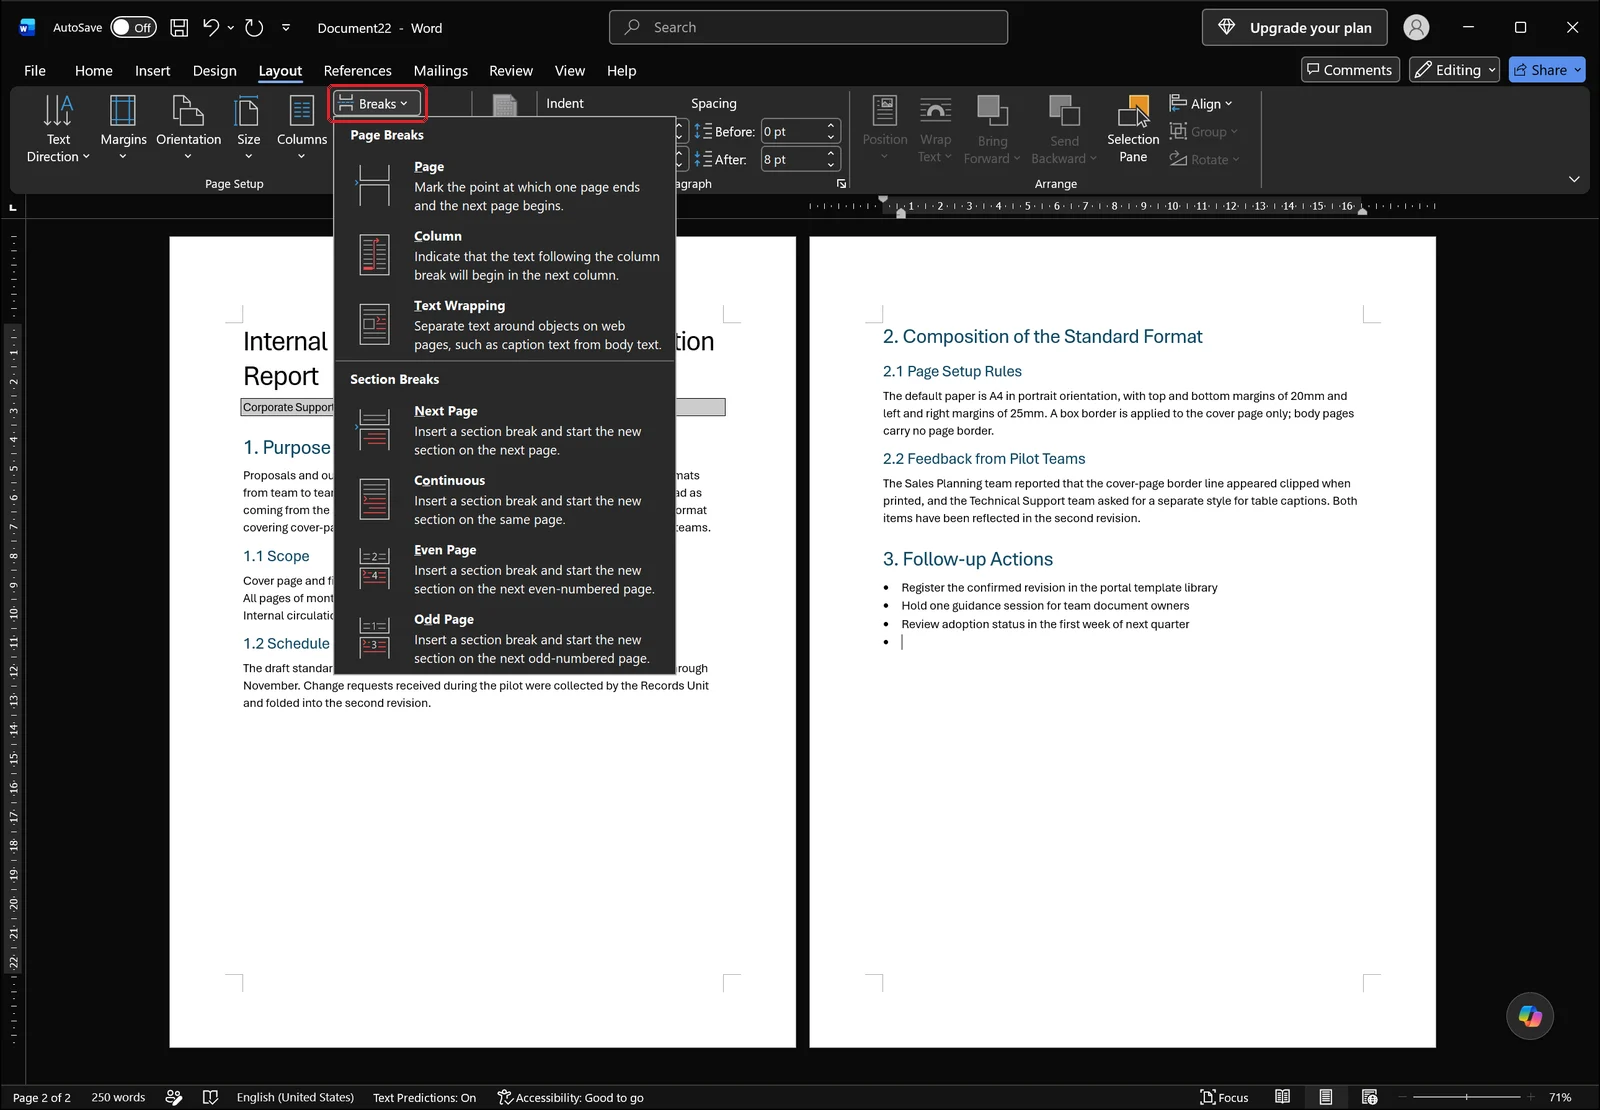
The list is split into two groups: Page Breaks at the top (Page, Column, Text Wrapping) and Section Breaks below (Next Page, Continuous, Even Page, Odd Page). Choose Next Page and Word splits the document into two sections at that point. For a cover page, one break is enough. To isolate a single page in the middle of a document, you need one break before it and one after.
Set Apply to as This section
With the sections in place, click into the cover page and open Page Borders... again from the Design tab. Choose your line style and width, change Apply to from Whole document to This section, and click OK. The border now stops at the section boundary.
The dropdown also offers This section - First page only and This section - All except first page. If a section runs several pages and you only want the first one framed, the first option saves you a break. If you want everything except the opening page bordered, use the second. Between them, you can often avoid chopping the document into more sections than you need.
Confirm where the section boundaries actually are
When a border spreads further than expected, the section boundary is usually not where you think it is. The Page Setup dialog is one quick sanity check.
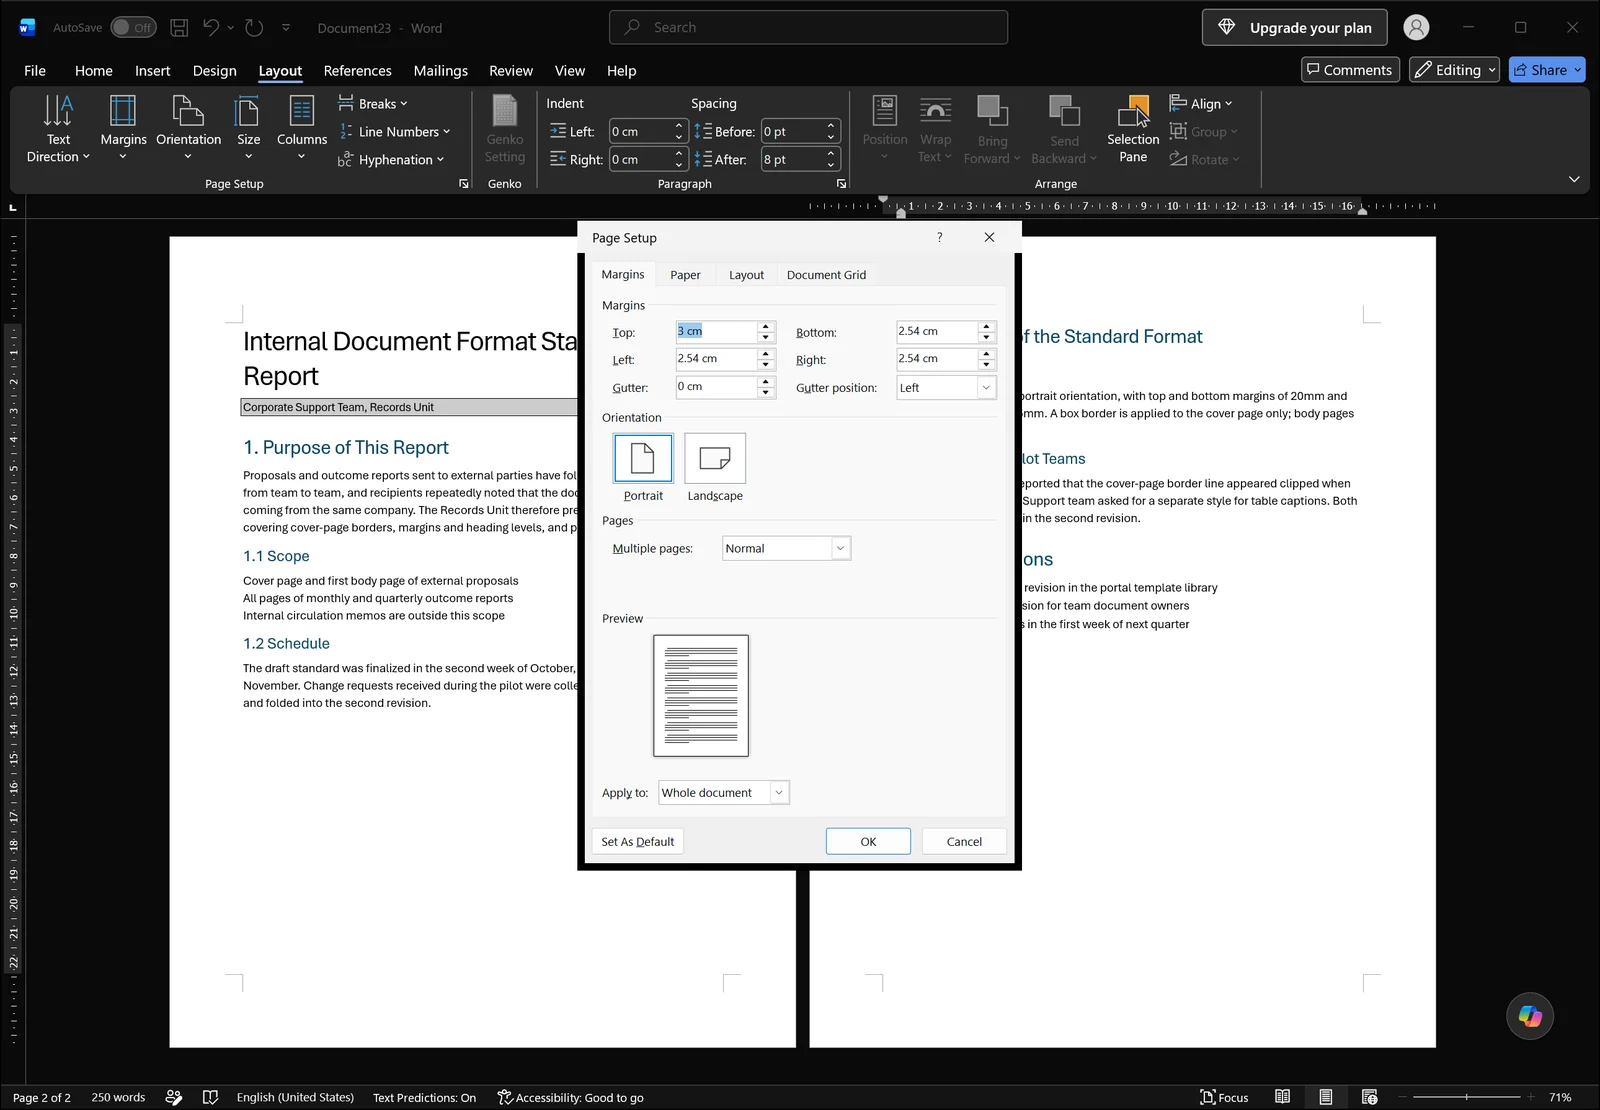
This dialog has its own Apply to dropdown at the bottom. Closed, it only shows the current value, so open it and read the entries. If This section appears in the list, the document is already divided into multiple sections. If you only see Whole document and This point forward, there is just one section. For the exact line a break sits on, the Draft view trick further down is faster.
Adjusting Border Spacing and Polishing the Cover
Measure from: Edge of page or Text
If the border crowds the text or hugs the paper edge, click Options in the lower right of the dialog. The Measure from setting is what does the work. With Edge of page, a larger value pulls the line further inward from the paper edge. With Text, the distance is calculated from the body text area instead.
Measuring from text means the border moves whenever you change the document margins, which is convenient for files whose layout is still in flux. For covers that need a consistent distance from the paper edge no matter what, measuring from the edge of the page is more predictable.
How much spacing is safe
You can set top, bottom, left and right distances independently, and the values cap at 31 pt. Leave the default of 24 pt and home or office printers will occasionally clip the bottom or right line, because most printers have a non-printable strip around all four edges of the sheet. Measuring from the edge of the page with values around 15 to 20 pt keeps the line comfortably inside that strip.
Header and footer display options
The Options dialog also has checkboxes for surrounding the header, surrounding the footer, and always displaying paragraph borders in front. Turning these on or off decides whether the border wraps the header and footer areas or only the body. If a page number has ended up outside the frame, or is sitting right on top of the line, this is the first place to look.
Margins, page color and cover pages
Sometimes the border spacing is not the problem - the document margins themselves are too tight. Widening them from the Layout tab gives a cleaner result than fighting with border offsets.
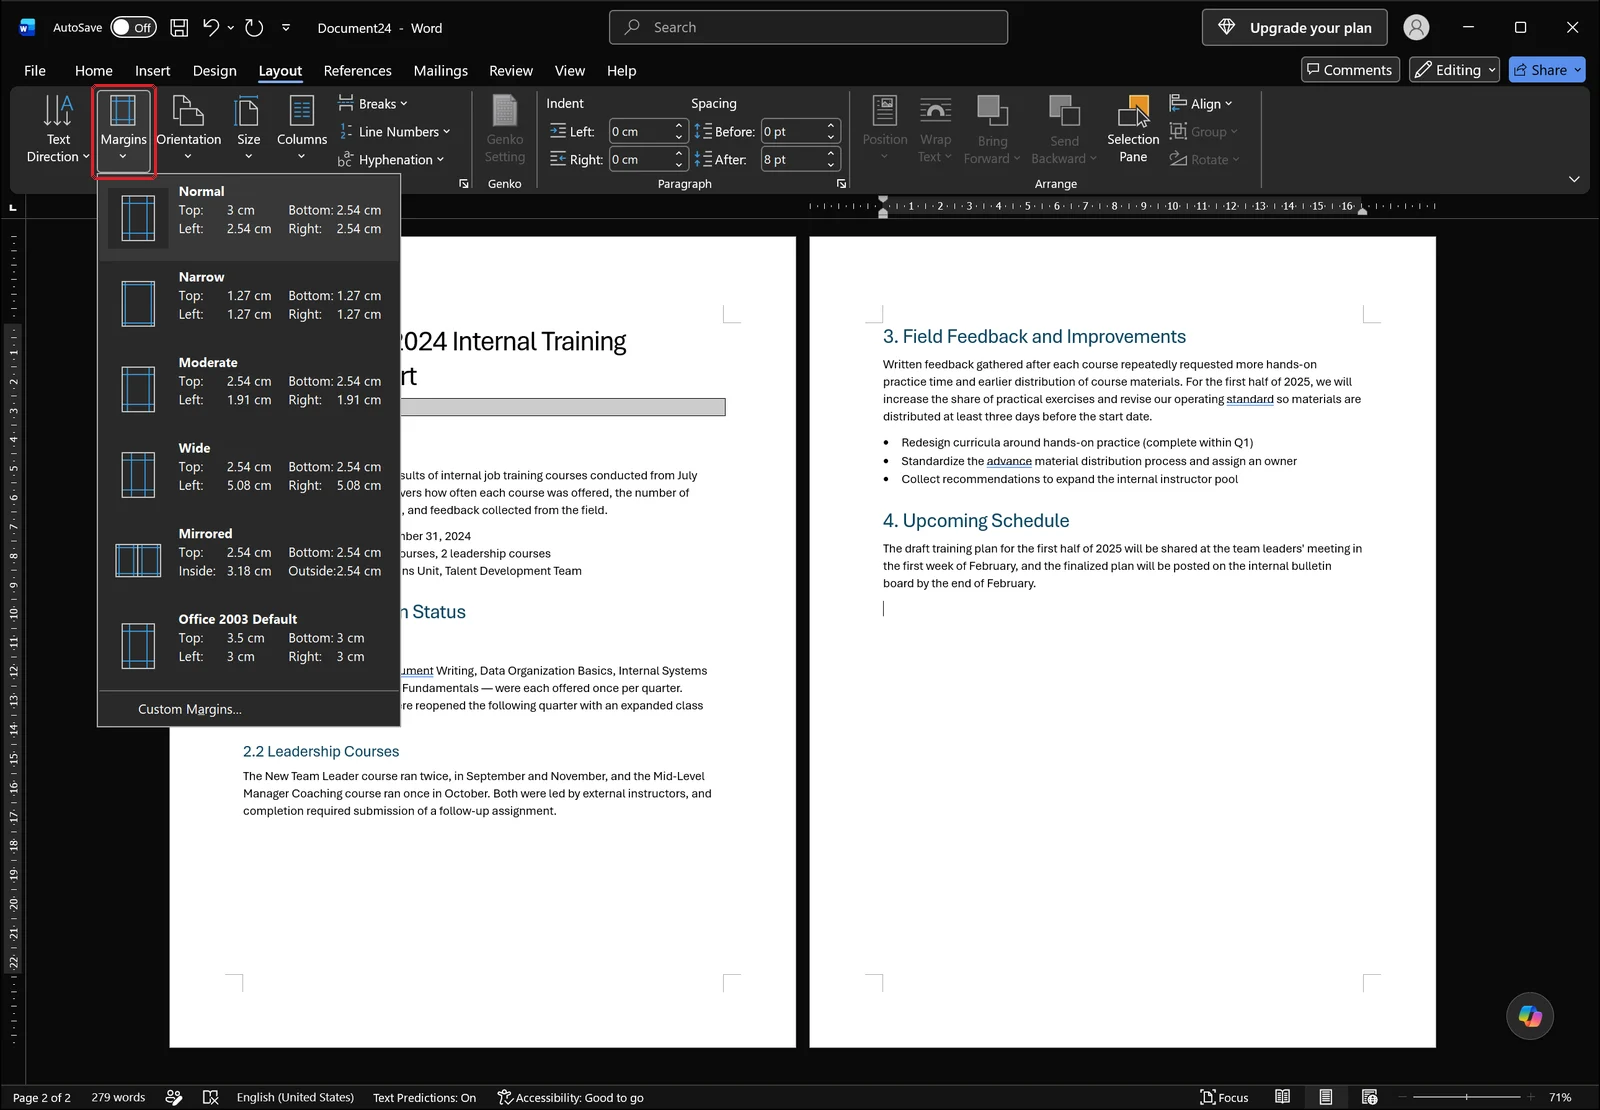
Click Margins and the gallery lists preset combinations such as Normal, Narrow, Moderate and Wide with their top, bottom, left and right values, so you can see at a glance what the current document uses. If none of them match what you need, Custom Margins at the bottom lets you type exact figures.
To add color behind a cover, use Page Color on the Design tab.
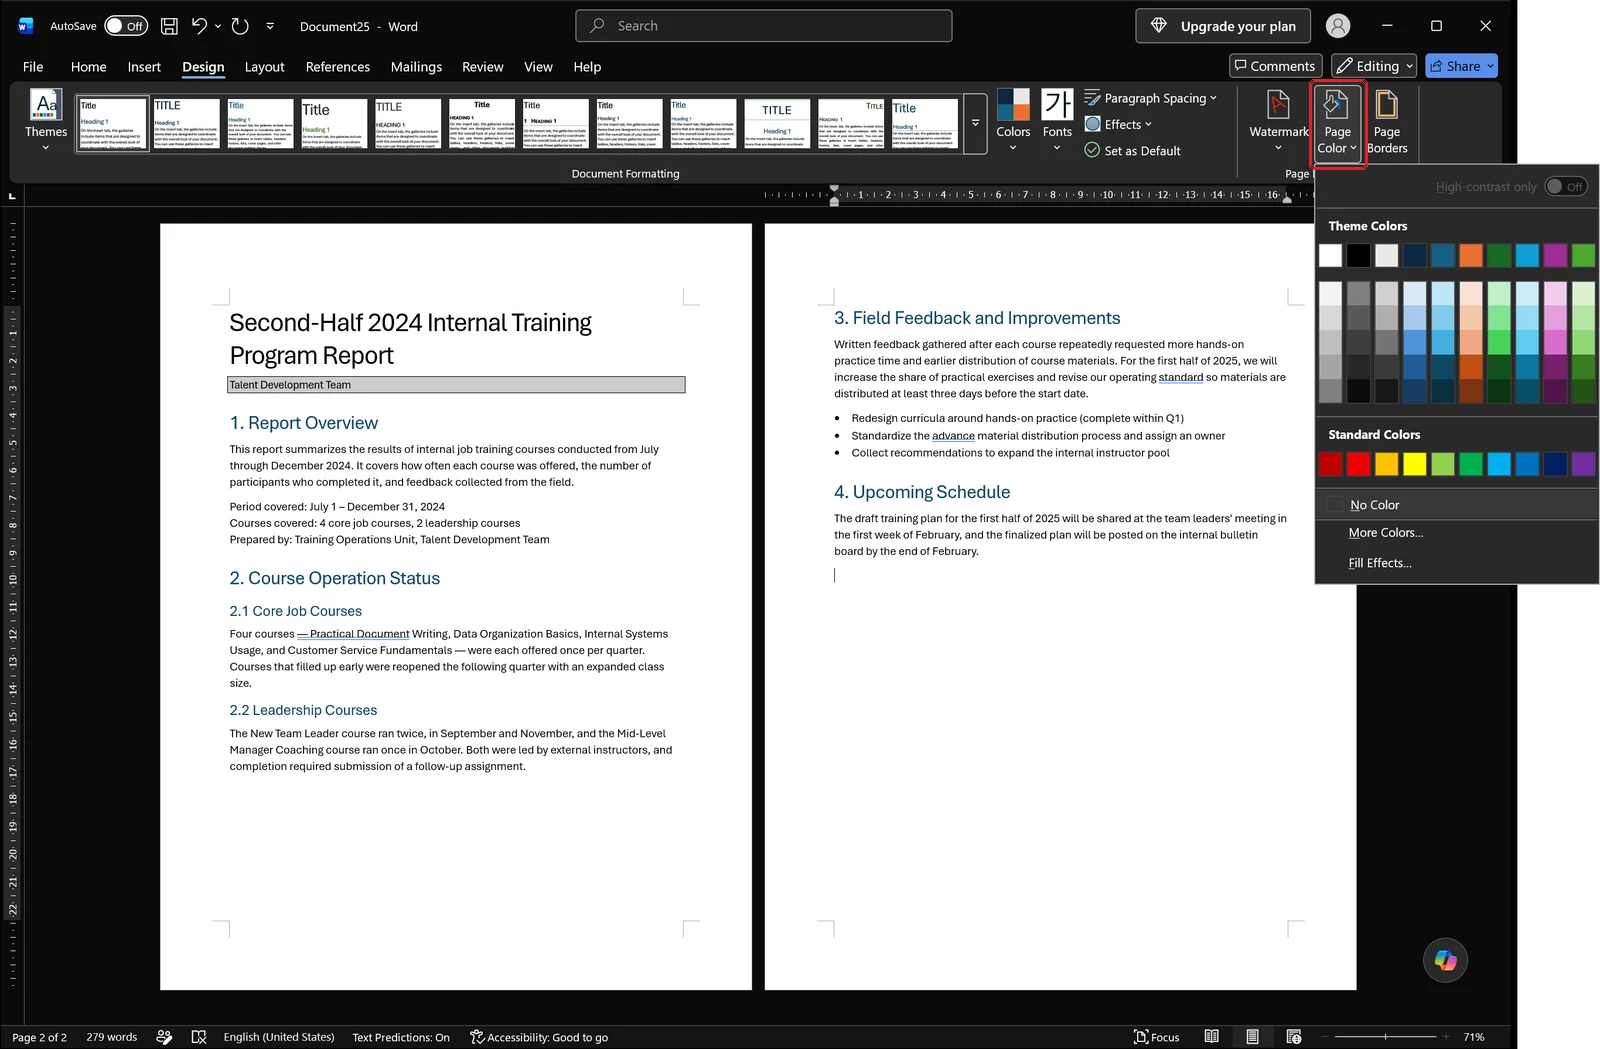
Pick a very light tint from the theme color grid and the border line stays visible while the page reads as a cover. Two caveats: page color is not stored per section, so it applies to the entire document, and by default it does not print.
If building a cover layout from scratch feels like more work than it is worth, the Insert tab has a gallery of them.
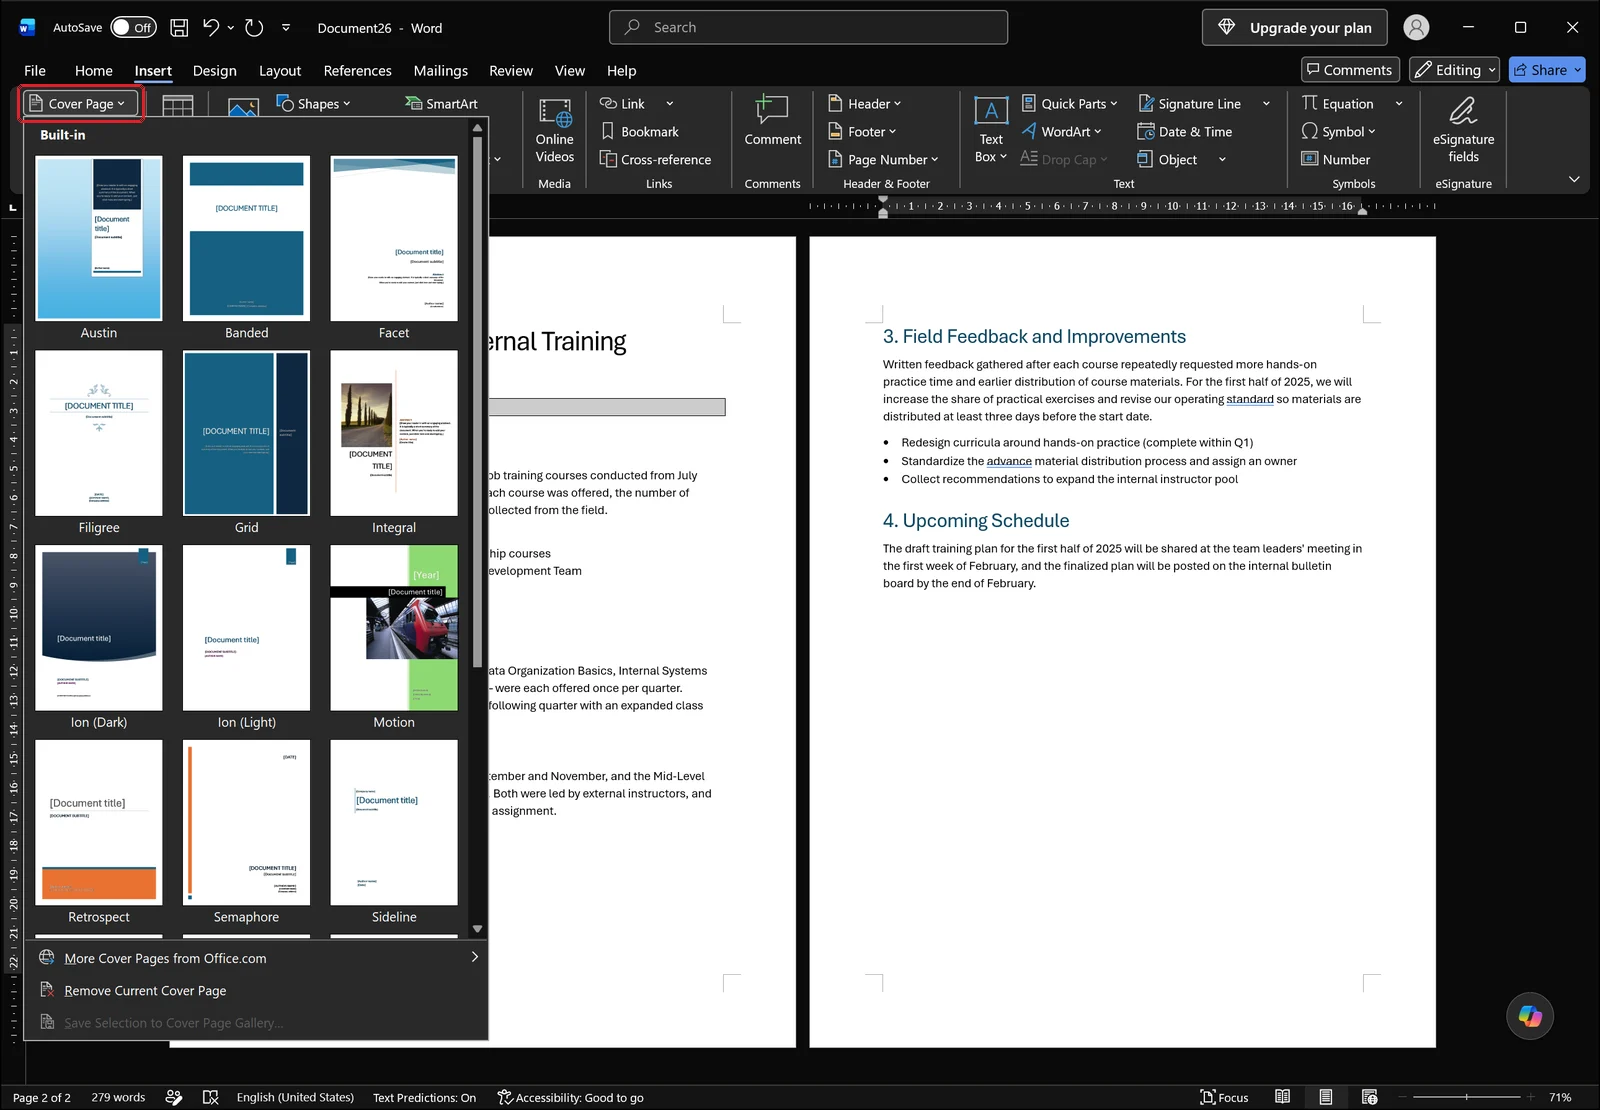
Click Cover Page, pick a thumbnail, and Word drops a formatted page at the front of the document with placeholders for the title, subtitle and author. Add the section border from the previous section on top of it and you have a document where only the cover is framed. If the inserted cover brings fonts and shading you did not want, clearing formatting in Word is the quickest way to reset it.
Removing Page Borders and Fixing Borders That Do Not Show
Set the Setting list to None
Removal happens in the same dialog. Open Page Borders... from the Design tab, choose None in the Setting list, set Apply to to the range you want cleared, and click OK. To strip the border from everything, Apply to has to be Whole document.
Borders left on a few pages means sections
If a border survives on a handful of pages, those pages belong to a different section whose setting was never changed. Click inside one of the surviving pages and repeat the removal with None and Apply to set to This section. With three sections, you may be doing this three times.
The fastest way to see where the boundaries are is the View tab. Switch to Draft and the page edges disappear, leaving the text running continuously.
If the border is invisible on screen, check the view mode first
Draft view does not draw page edges at all, and Web Layout behaves the same way. A perfectly good page border simply will not appear in either mode. So when you are sure you clicked OK and nothing changed, check the view before you start deleting anything.
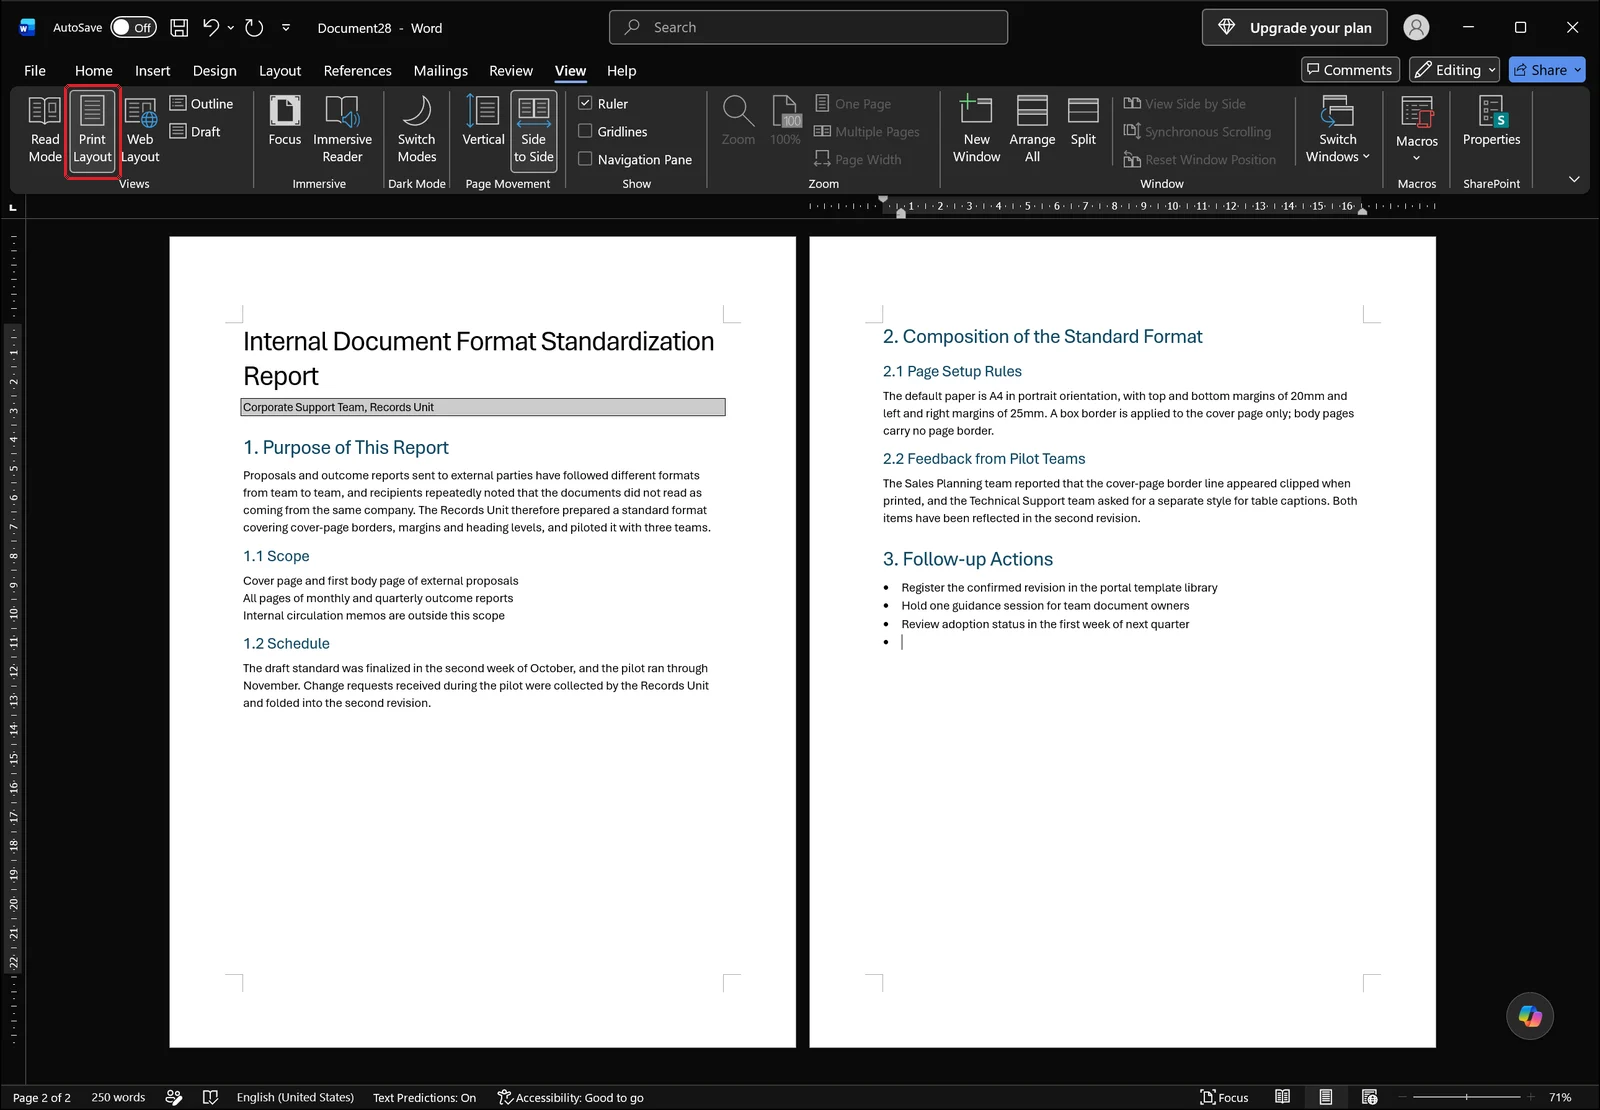
Click Print Layout on the View tab and the page edges and margins come back, which is the only state where the border looks the way it will print.
When only some sides get cut off in print
All four sides look fine on screen, then the printed page comes out missing the bottom or right line. That is the printer's non-printable area again. Open Options, set Measure from to Edge of page, and raise the spacing to roughly 15 to 20 pt, or switch the measurement to Text. If it still clips, add the shrink-to-fit paper size option in the print settings.
Undo several steps at once
For a border you just applied, Ctrl+Z is the fastest fix. To walk back several steps, use the quick access toolbar at the top left.
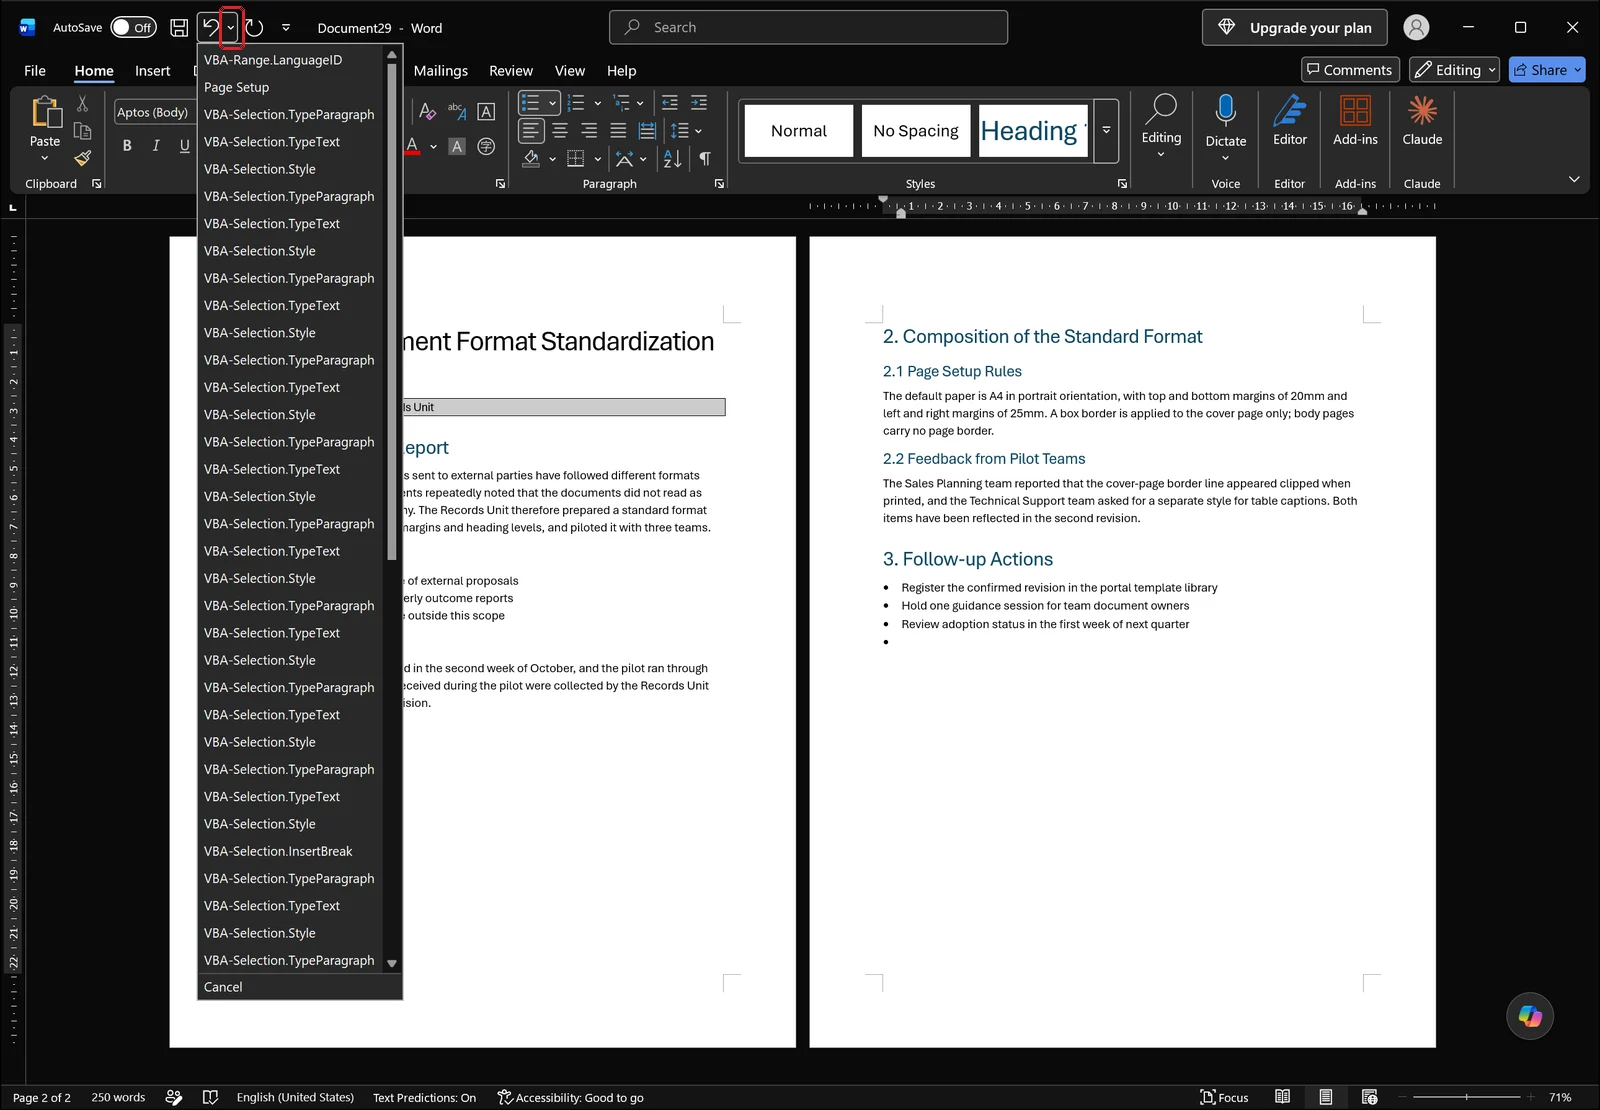
Click the small drop-down arrow immediately to the right of the Undo arrow and recent actions are listed in order, newest at the top. Steps produced by macros appear under their internal VBA names rather than the friendly labels you normally see. Drag down to a point in the list and everything above it is undone together. Note the limitation: undo is strictly sequential from the most recent action, so you cannot cherry-pick one step from the middle.
👉 Mix Landscape and Portrait Pages in Word: Rotate One Page Only
Frequently Asked Questions
Q. How do I put a border on exactly one page?
Insert a Next Page section break both before and after that page from Layout > Breaks, click inside the page, then open the page border dialog and set Apply to to This section. For a cover page at the front of the document, a single break after it is enough. A Ctrl+Enter page break will not work here - it does not create a section, so the border spreads across the whole file no matter what Apply to says.
Q. The bottom or right border gets cut off when I print.
Every printer has a strip along the paper edge it cannot print on. In the dialog, click Options, set Measure from to Edge of page, and raise the top, bottom, left and right values to around 15 to 20 pt so the line moves inward. Switching Measure from to Text also works. If that still is not enough room, widen the document margins themselves from Layout > Margins.
Q. I removed the border but it is still on some pages.
The document is split into sections and the border setting is stored separately for each one. Click into a page that still has the line, reopen the page border dialog, choose None in the Setting list, set Apply to to This section, and click OK. If you are not sure how many sections exist, switch to Draft on the View tab and count the section break markers first.
Q. What is the difference between Page Borders on Design and Borders on Home?
The Home tab control draws lines around the paragraph containing the cursor or around selected table cells. Page Borders... on the Design tab applies to the page - more precisely, to the section. Both routes eventually open the same Borders and Shading dialog, but they open on different tabs, so if you came from Home you must switch to Page Border before setting anything.
Q. Does the same method work for pictures and shapes?
No. Select the object and use the outline color and weight controls on the format tab that appears for it. The page border dialog has no effect on objects, so to put a line around a photo, use the object's own formatting.
Standardizing document formatting with inline AI
Everything above works fine when you are polishing one file by hand. It gets tedious when a folder of reports from different teams all have to end up on the same standard, because you repeat the same routine per file: find the section boundaries, choose the setting, set Apply to, check the print spacing.
inline AI is a local AI agent that opens and edits the Word and Excel files already on your computer. Ask it in plain language - "put a 1 pt solid border on the cover page only and leave the body sections alone" - and it reads the document structure and applies the formatting to that section. Files are processed on your own machine rather than uploaded to a cloud service, so internal reports and client proposals stay where they are.
See what an agent could take over at your company in a 30-minute call.