Learn
Align Text Vertically in PowerPoint: Fix Text Stuck at the Top

To align text vertically in PowerPoint, you are not moving the text at all — you are telling the shape where the block of text should sit between its top and bottom edges. That distinction matters, because the usual workarounds make things worse: pressing Enter a few times to push lines down breaks the moment you edit one sentence, and shrinking the box to fake it collapses as soon as the wording changes.
This guide covers what the Align Text control actually does, what to check before you center anything, how to set vertical and horizontal alignment, and what to do when centering still looks wrong.
What Vertical Alignment Actually Changes
Align Text and Horizontal Alignment Are Two Different Commands
The Paragraph group on the Home tab holds two kinds of alignment that look similar and do completely different jobs. Align Text offers Top, Middle and Bottom, and it positions the whole block of text inside a shape or placeholder. The left, center, right and justify buttons work line by line, deciding where each line sits horizontally.
Neither one substitutes for the other. You can click center alignment as many times as you like and the text will still hug the top of the box.
Why Text Looks Glued to the Top
The default vertical alignment for a text box is Top. If the box is taller than the text needs, every bit of leftover space collects underneath, so two or three lines naturally sit against the top edge. Nothing is broken — the box is doing exactly what it was set to do.
A gap below the text that is far larger than the gap above it is the classic signature of a box still set to Top.
Where to Find It on the Home Tab
Vertical alignment is a property of the shape, not of the characters, so applying it with the shape selected updates every paragraph inside the box at once.
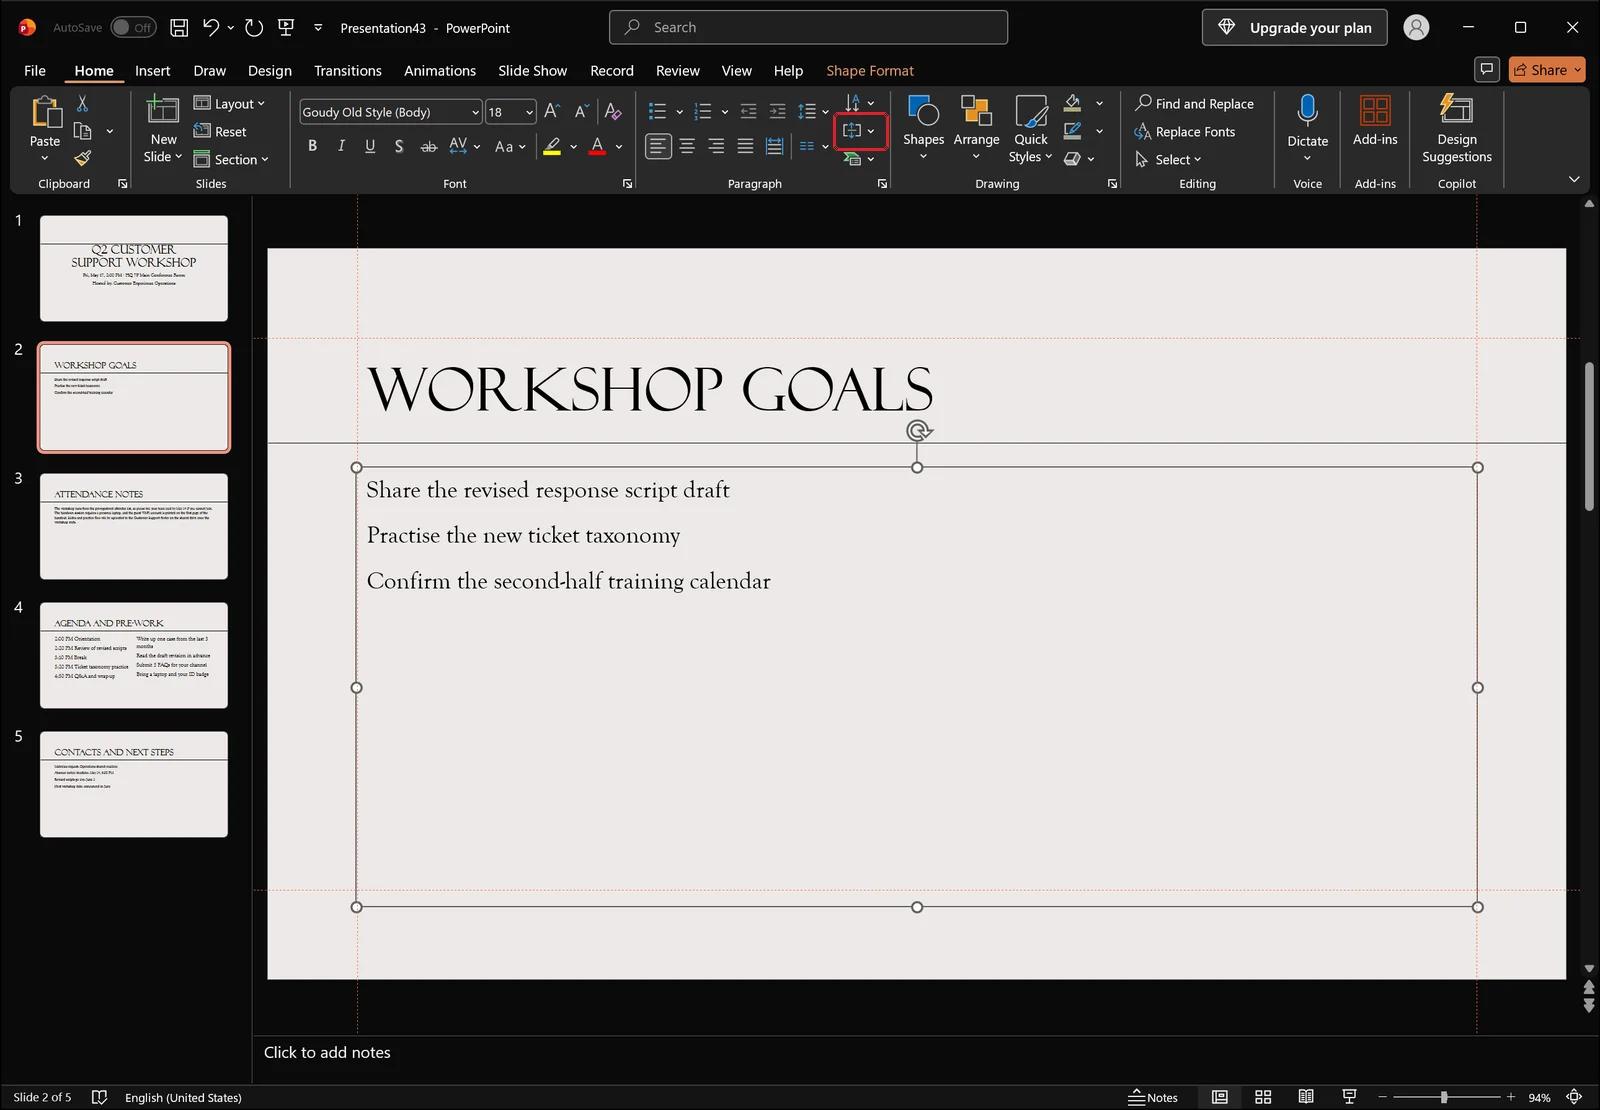
In the Paragraph group, look at the right-hand column next to line spacing and text direction. The button marked there is Align Text, and that is the one that controls the vertical position.
Two Things to Check Before You Center
Are You in the Text or on the Object?
Clicking inside a box so the cursor blinks between characters is not the same state as clicking the border so the selection handles appear. Because vertical alignment applies to the shape, selecting the object itself is the more reliable way to apply it.
If boxes overlap, or a background shape keeps grabbing the click, use the Select menu at the right end of the Home tab.
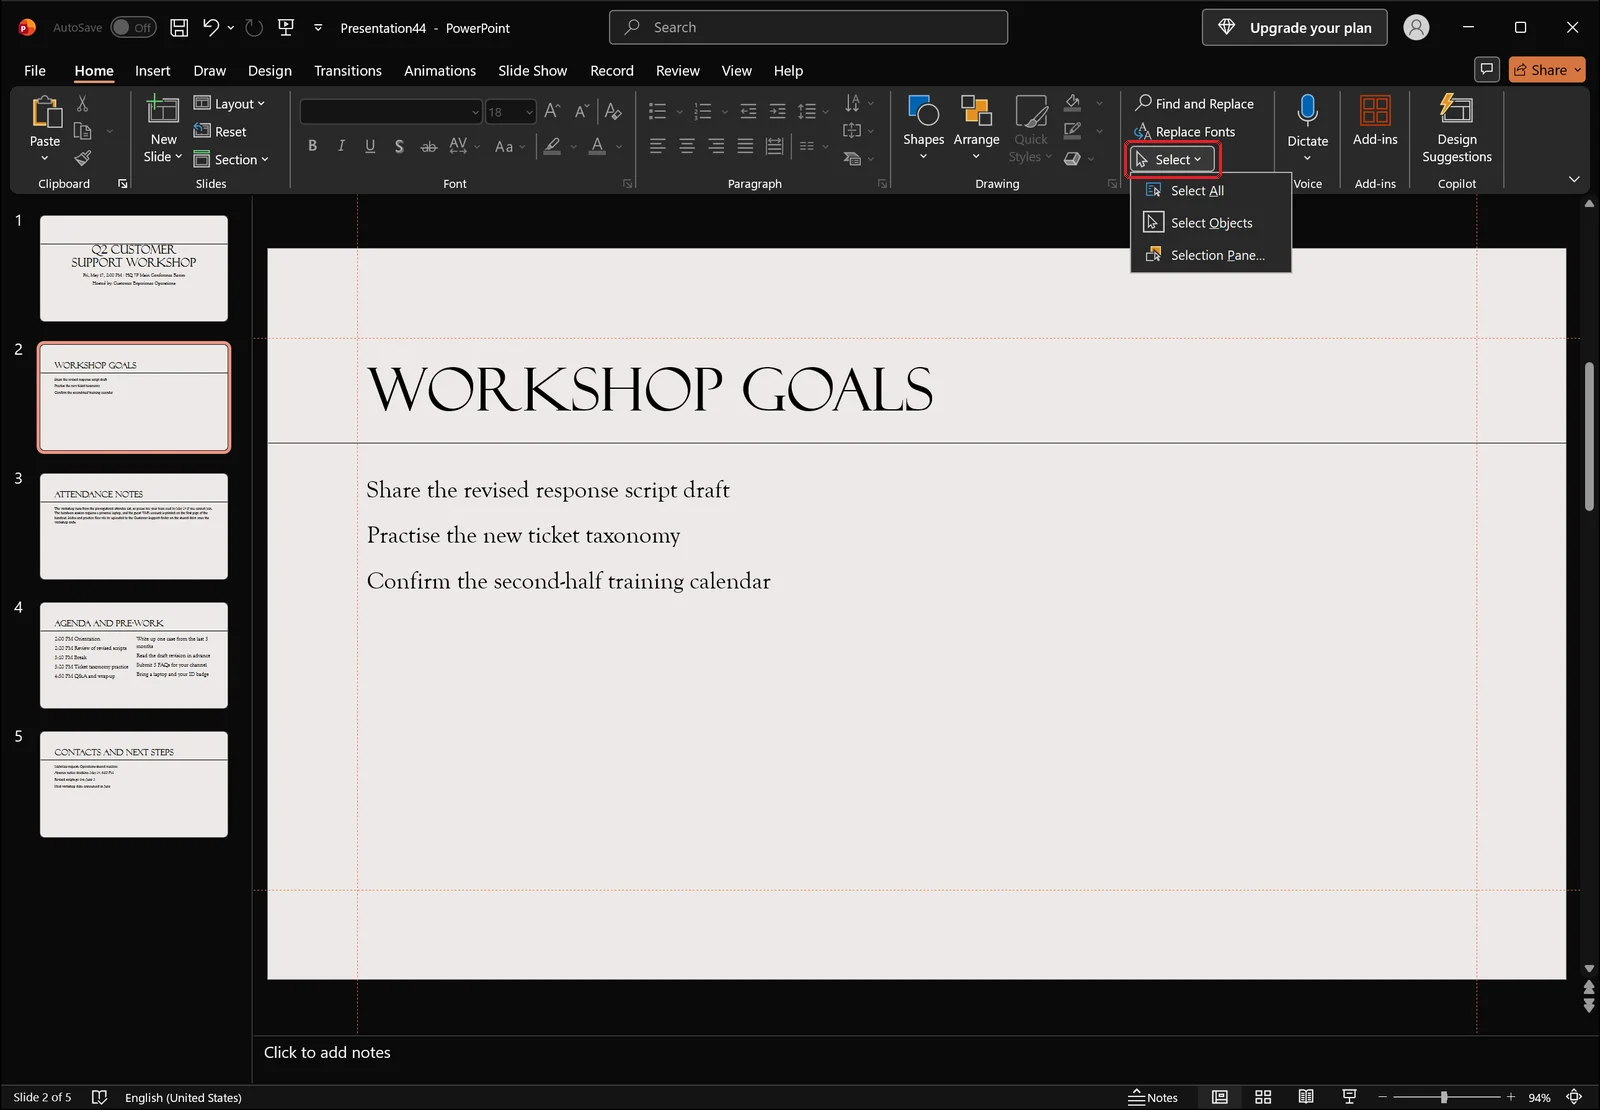
Opening the selection pane lists every object on the slide down the right side of the window, so you can click a name and pick exactly the text box you want instead of hunting for its border.
Turn On Guides to See the Real Center
There is an important distinction here: centered inside the box and centered on the slide are two separate problems. Setting vertical alignment to Middle does nothing about a box that is itself parked in the upper third of the slide.
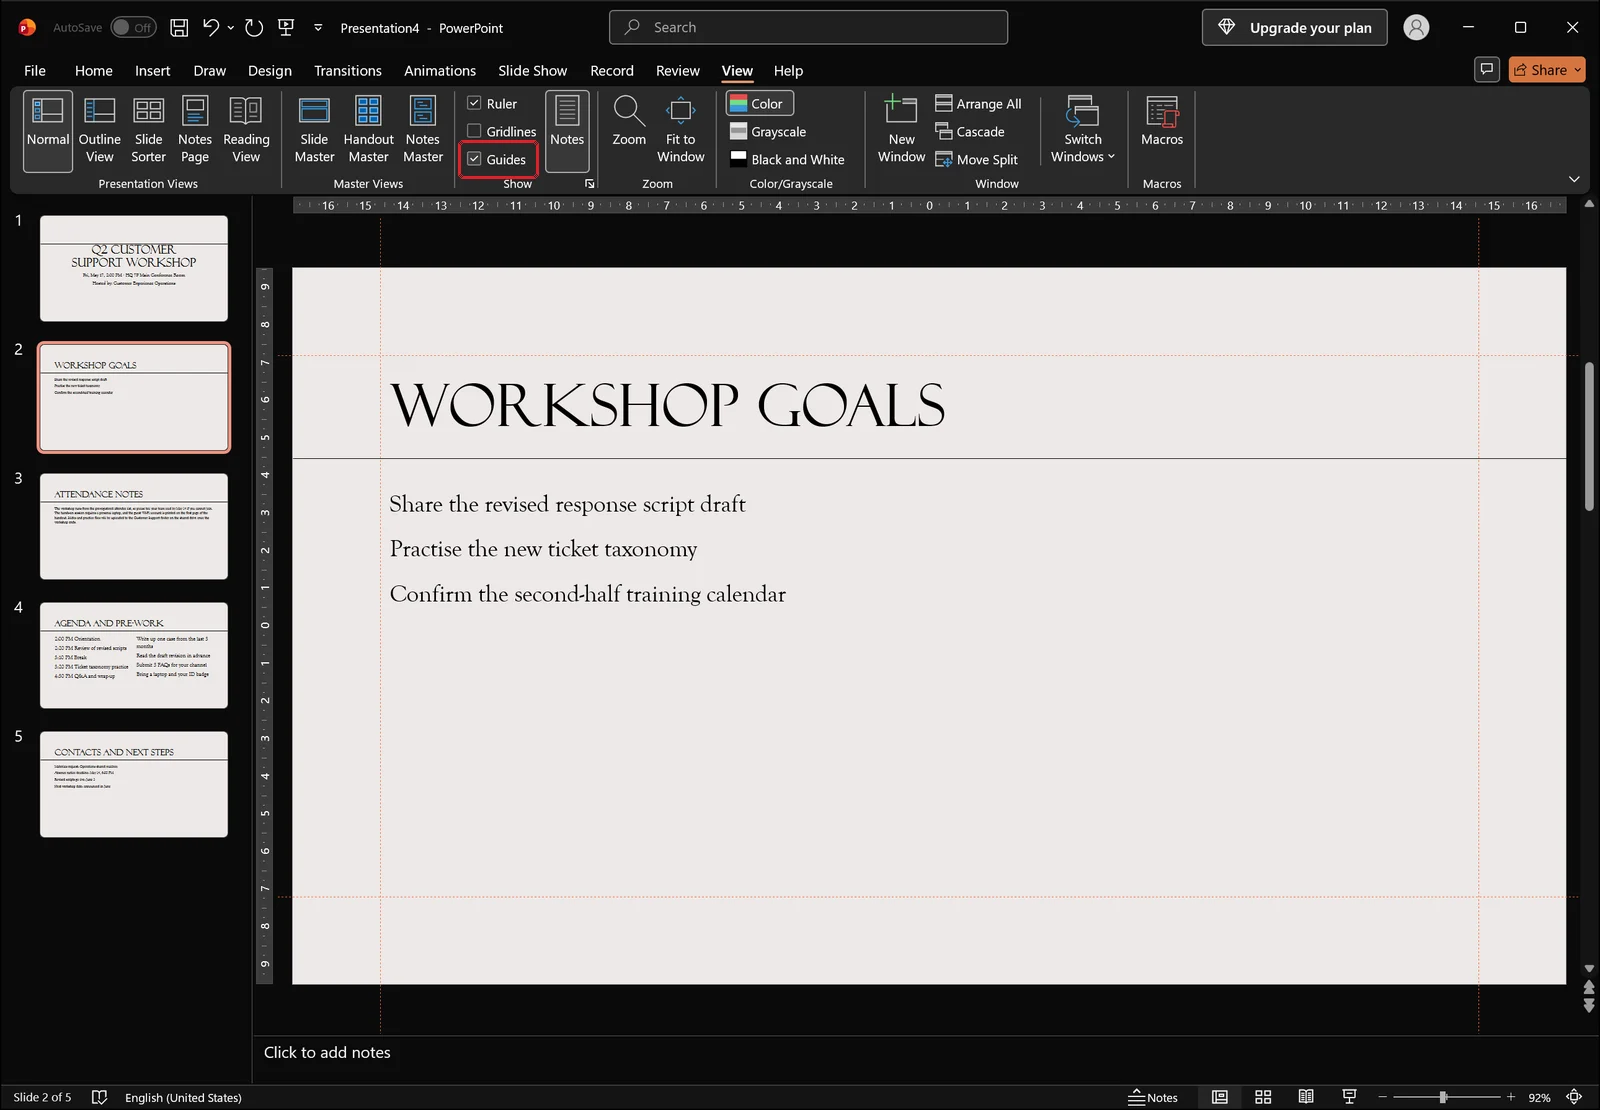
On the View tab, tick Guides in the Show group and dashed horizontal and vertical lines appear over the slide. Compare the distance from the box to the guides on each side and it becomes obvious whether the box is drifting. If you want a true center reference, drag a guide until it sits at the 0 mark on the ruler.
Check Internal Margins and Autofit
Every shape carries its own internal margin values between the text and the shape border. If the top margin is much larger than the bottom, Middle alignment will still look low. Autofit, which shrinks the font when text overflows, can also change where lines land. Both settings live together in the Format Shape pane under Text Options, covered below.
How to Center Text Vertically in a Text Box
Home Tab › Align Text › Middle
Select the shape, then click the Align Text button in the Paragraph group on the Home tab.
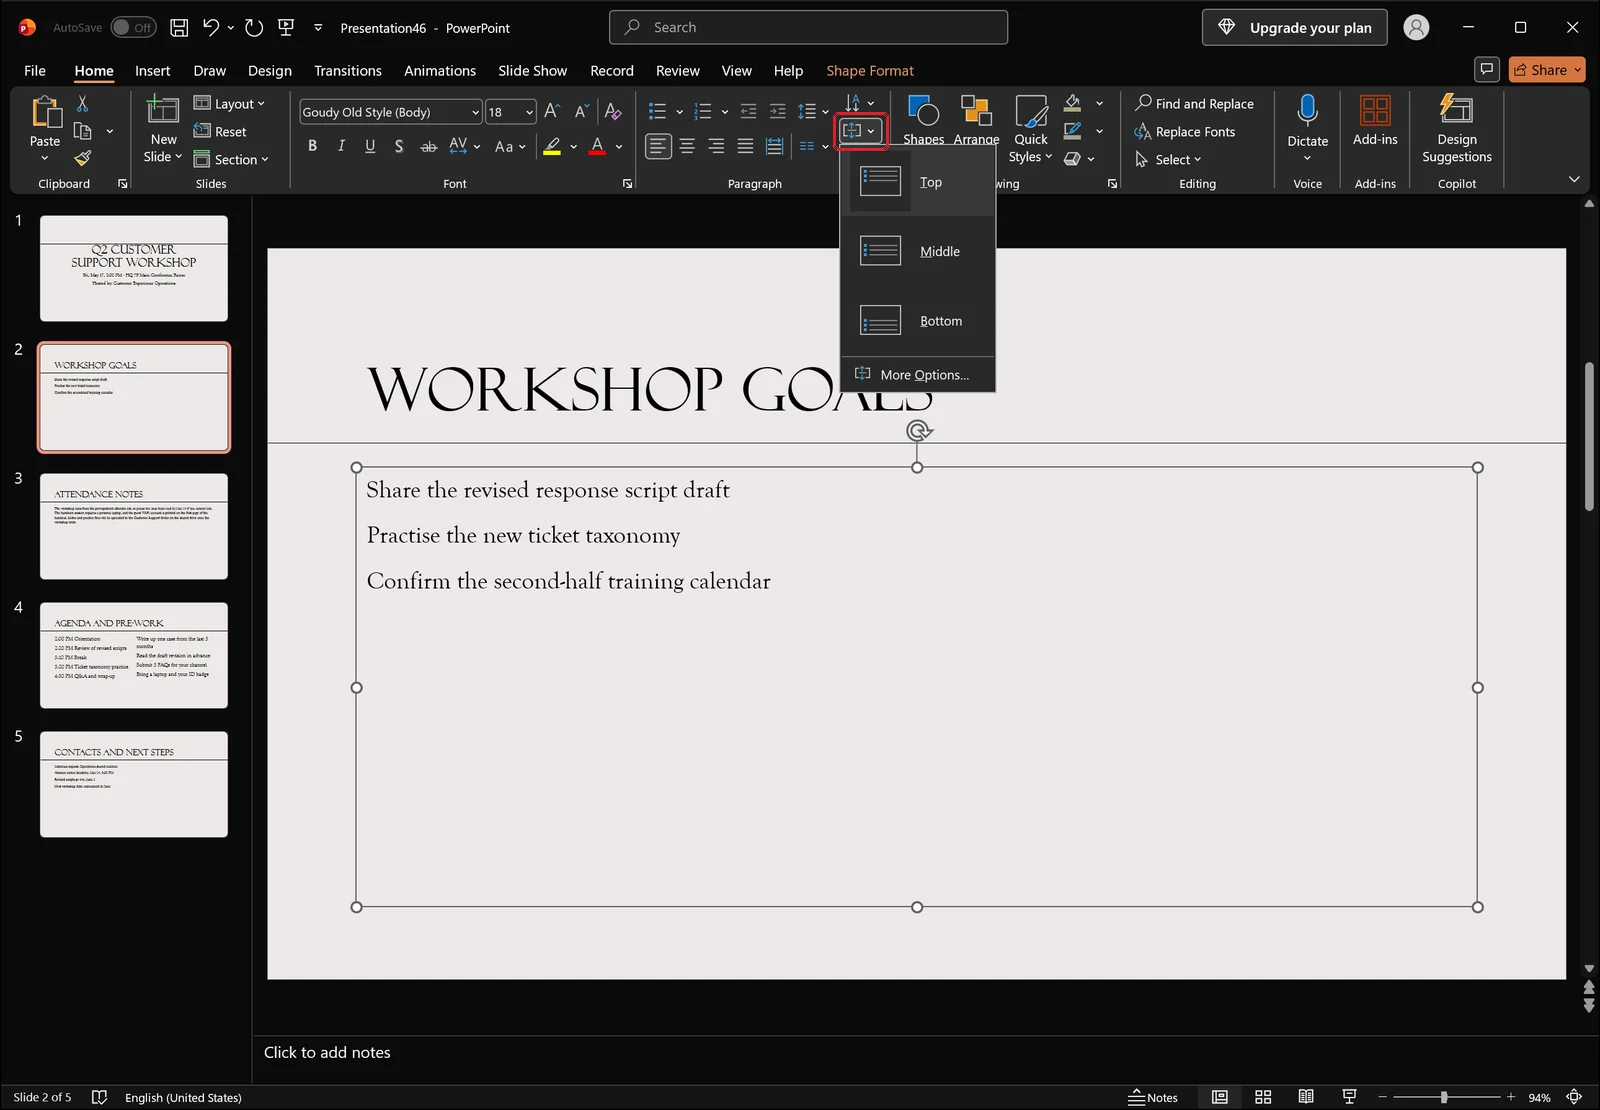
The dropdown lists Top, Middle and Bottom, plus a More Options command that jumps straight to the detailed settings. Choose Middle and you are done — every paragraph in the box moves to the vertical center in one click.
Confirming It Applied
The check is simple: the space above the text and the space below it should look roughly equal. If the shape has no visible border, select the object so the handles show and compare against those. If the text still leans one way, the culprit is usually an uneven internal margin or leftover paragraph spacing rather than the alignment setting.
Adjusting Alignment and Margins in the Format Shape Pane
When you need precise values instead of one of three presets, right-click the shape and choose Format Shape. The pane docks to the right of the window.
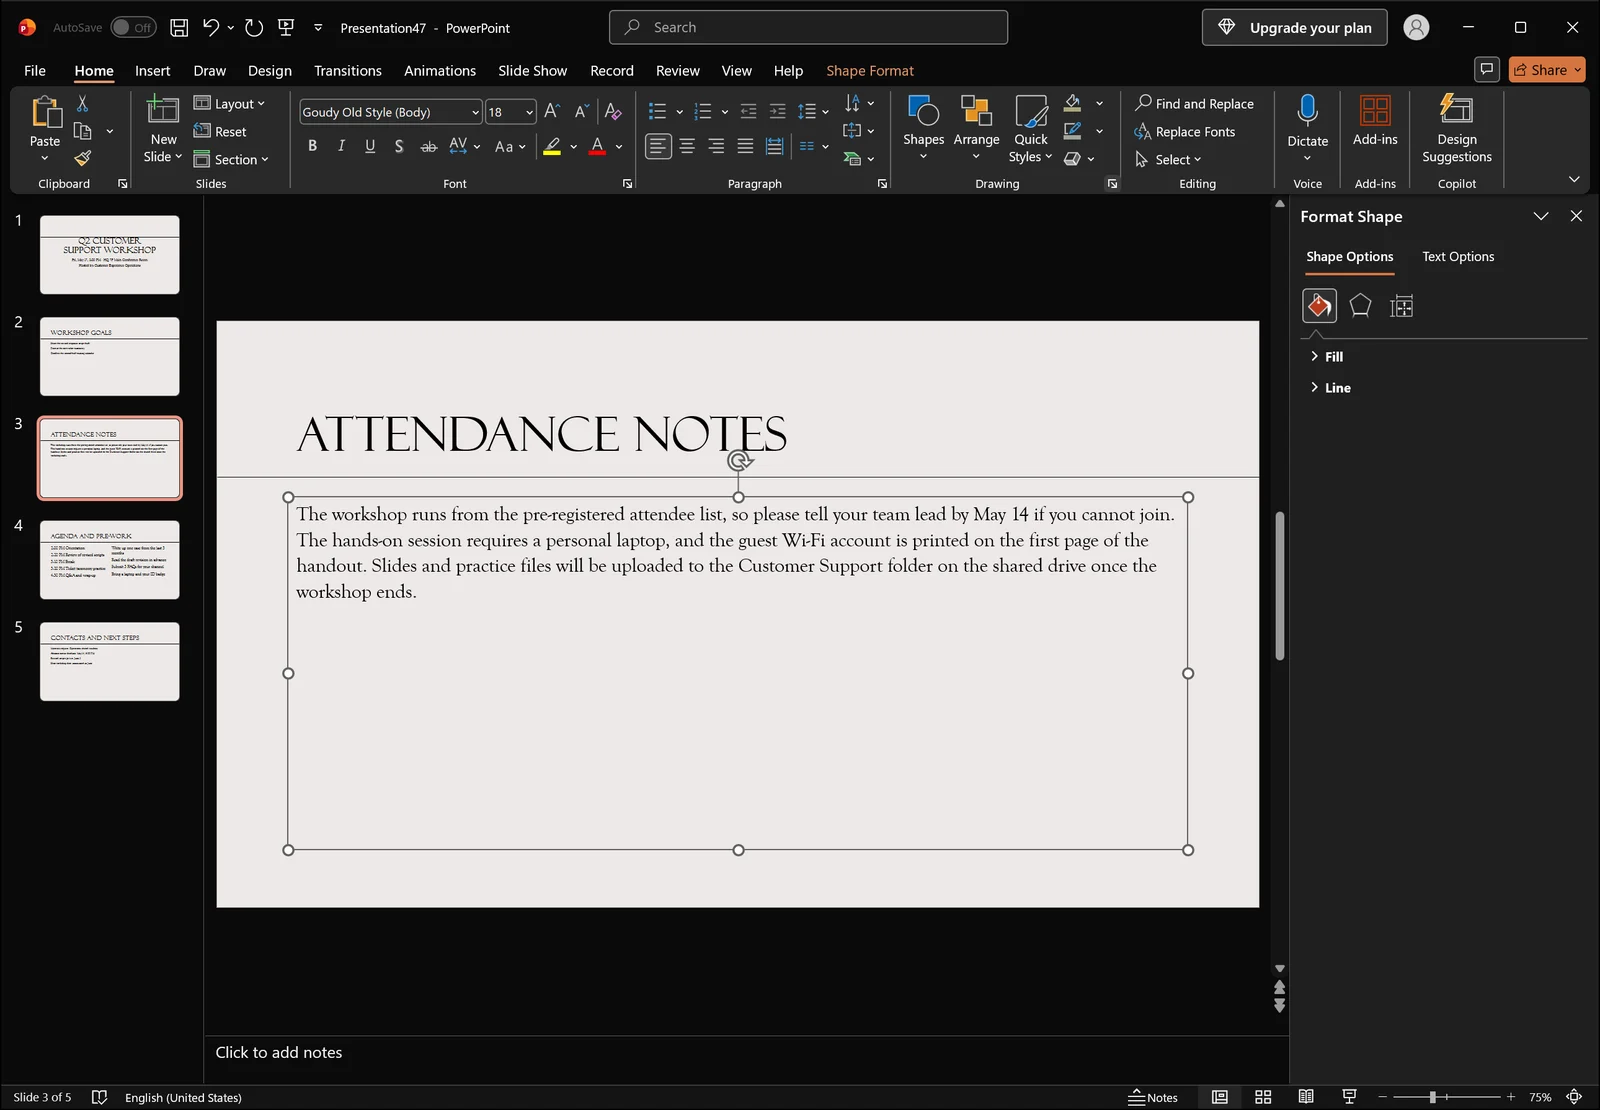
As the shot shows, the pane opens on the Shape Options tab, where the only sections listed are the collapsed Fill and Line ones. Click across to the Text Options tab sitting next to it and expand the text box section to reach vertical alignment, autofit, and the top, bottom, left and right internal margins. When several values need adjusting, this is far quicker than going back to the ribbon for each one.
Getting There from the Keyboard
There is no dedicated shortcut for vertical alignment. Pressing Alt once puts key tips on the ribbon, so you can walk to Align Text without touching the mouse. If you have several boxes to fix, hold Shift, click each one, then choose Middle a single time and all of them update together.
One caveat: if space-after or line spacing is set generously, text can still read as slightly high after you center it. Those values are handled in the Paragraph dialog in the next section.
👉 Turn Off Autofit Text in PowerPoint: Stop Fonts Shrinking
Horizontal Alignment and Justification
Centering Left to Right with Ctrl+E
Once the vertical position is settled, it is worth checking the horizontal one in the same pass. The Paragraph group holds left, center, right and justify buttons side by side.
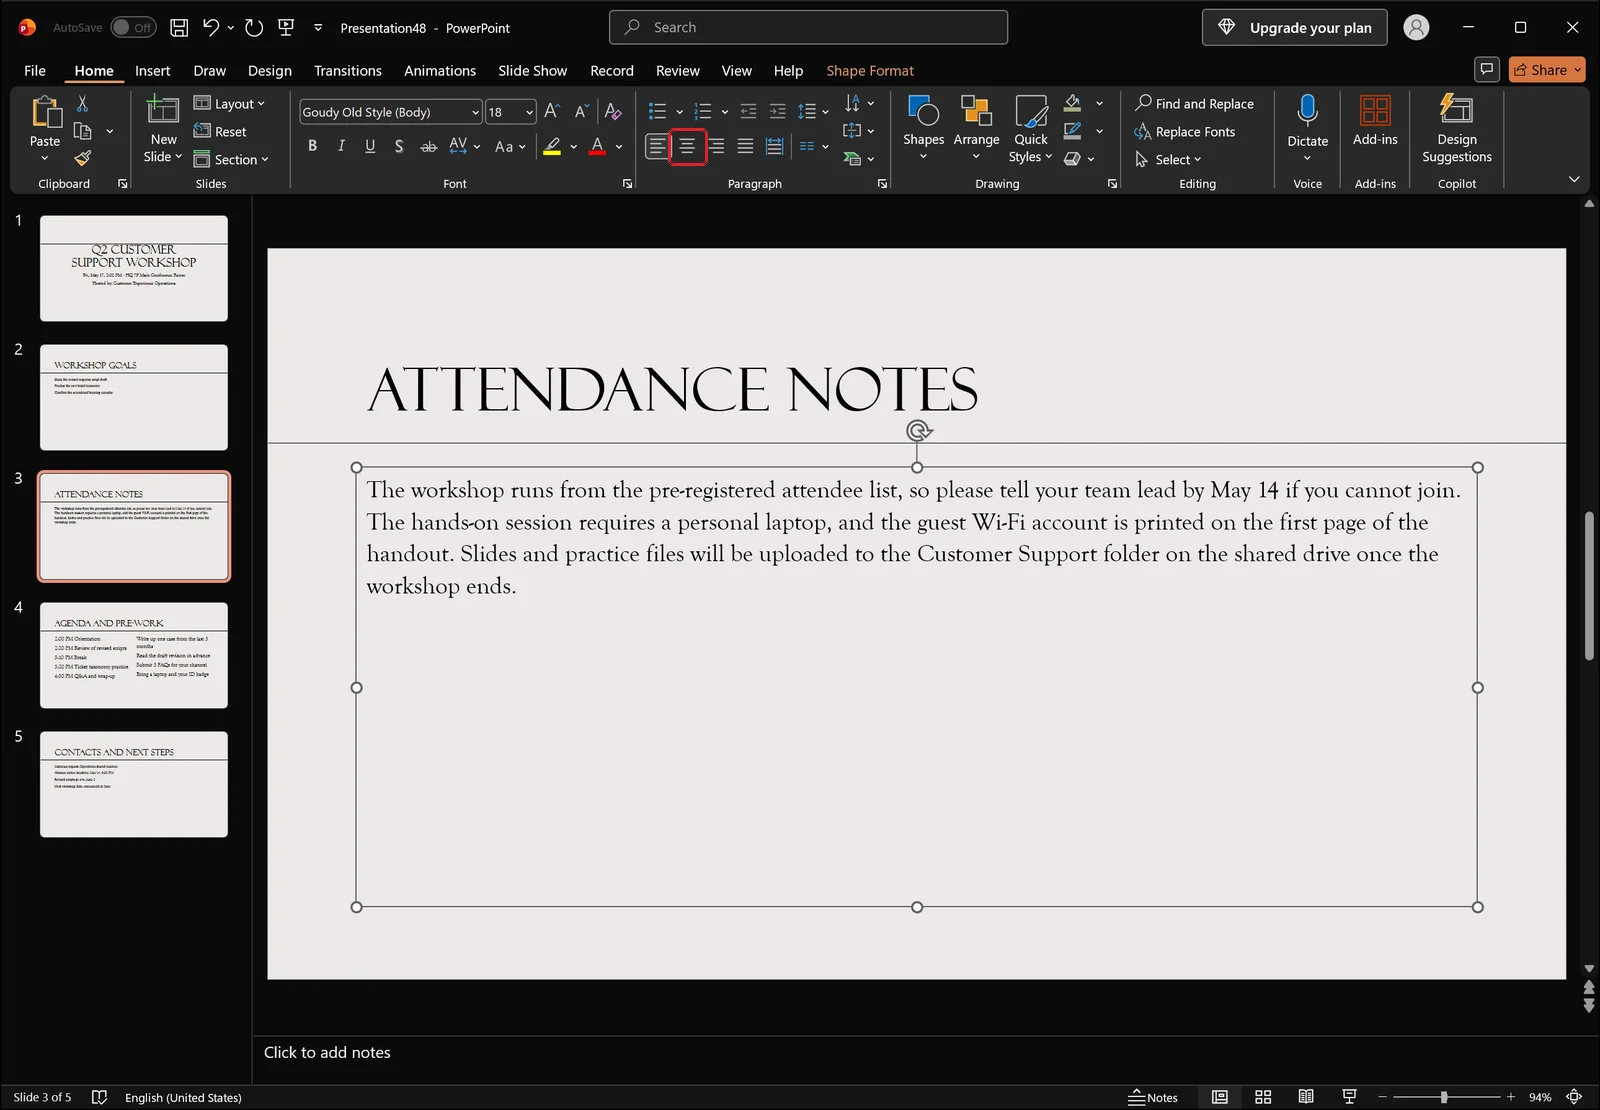
The shortcuts are Ctrl+L for left, Ctrl+E for Center, Ctrl+R for right and Ctrl+J for justify. Cover titles and short labels usually read best centered.
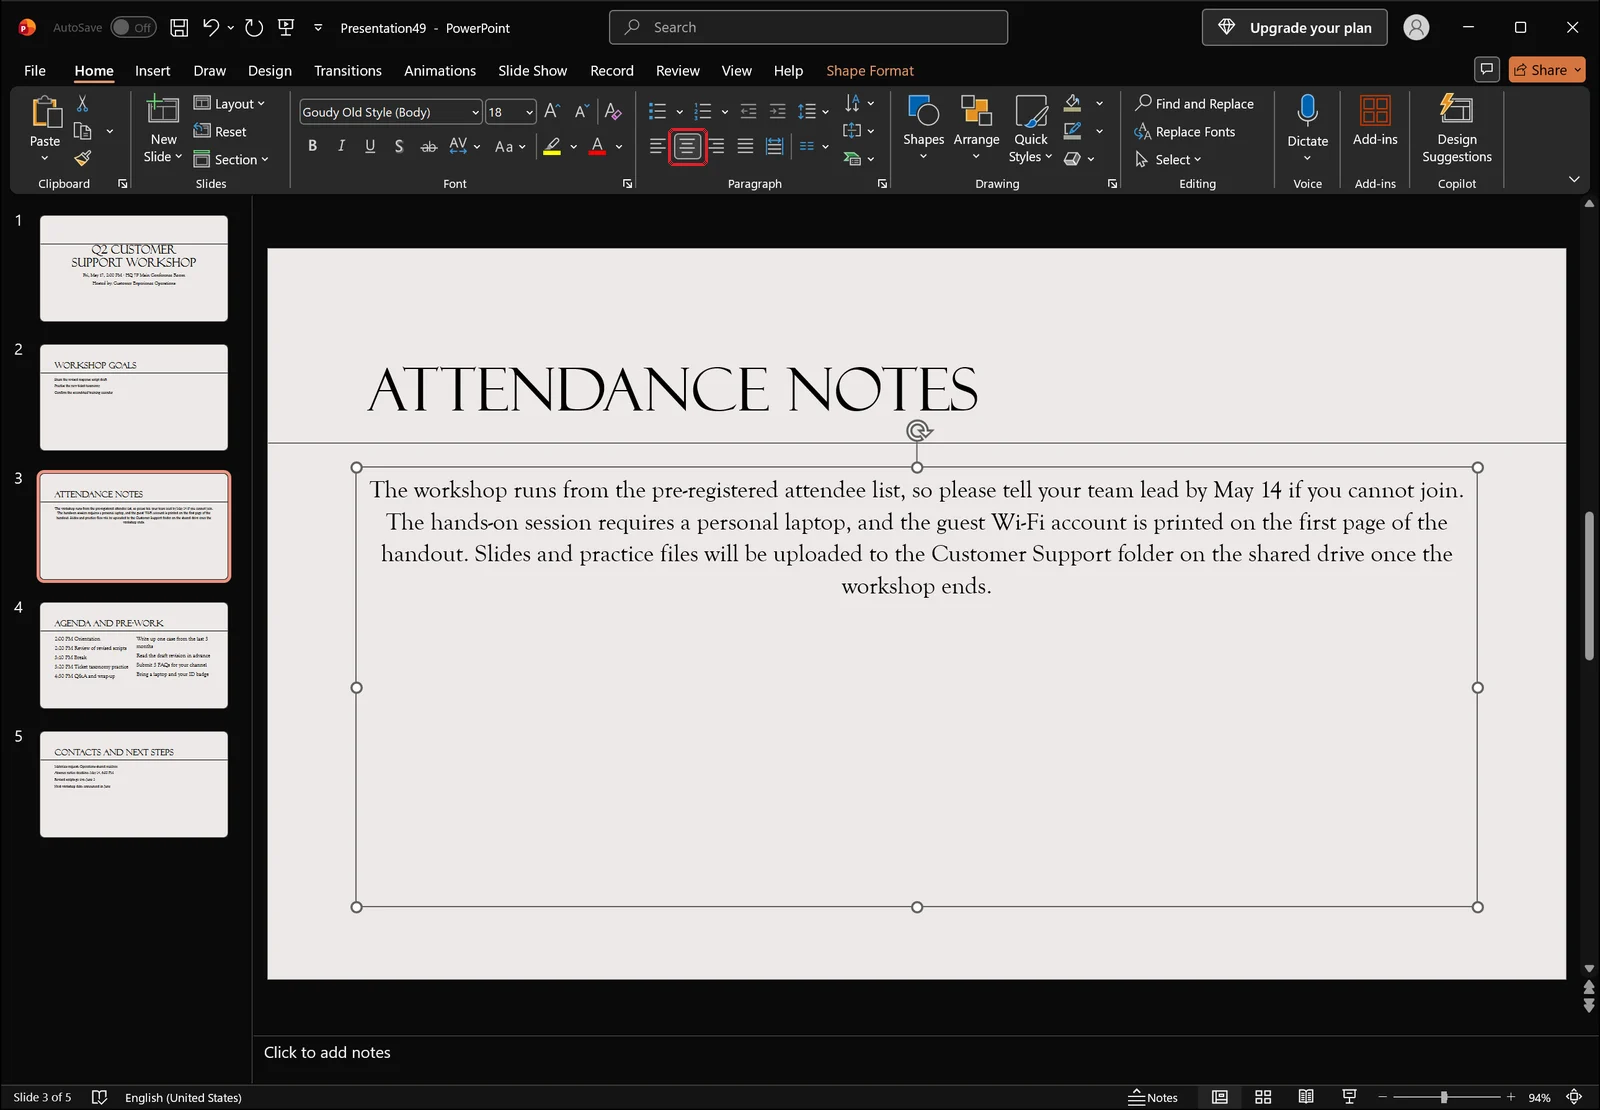
Note what happens with a paragraph whose lines already fill the box width: only the final short line visibly shifts. Centering is most noticeable on labels and headings with just a few words. Set Align Text to Middle and horizontal alignment to Center together, and a short label lands in the exact middle of its box.
When Justify Is the Right Choice
Justify stretches each line so the right edge lines up flush with the right side of the box. It suits multi-line explanatory paragraphs and body copy that reads as a block.
The trade-off is that the last line stays left-aligned, and in a narrow box you can end up with lines where the word spacing opens up awkwardly. Applying justify to a title or a one-line label tends to look worse than leaving it alone.
Setting Alignment and Spacing Together
To handle alignment and spacing in one place, click the small arrow at the bottom-right corner of the Paragraph group to open the Paragraph dialog.
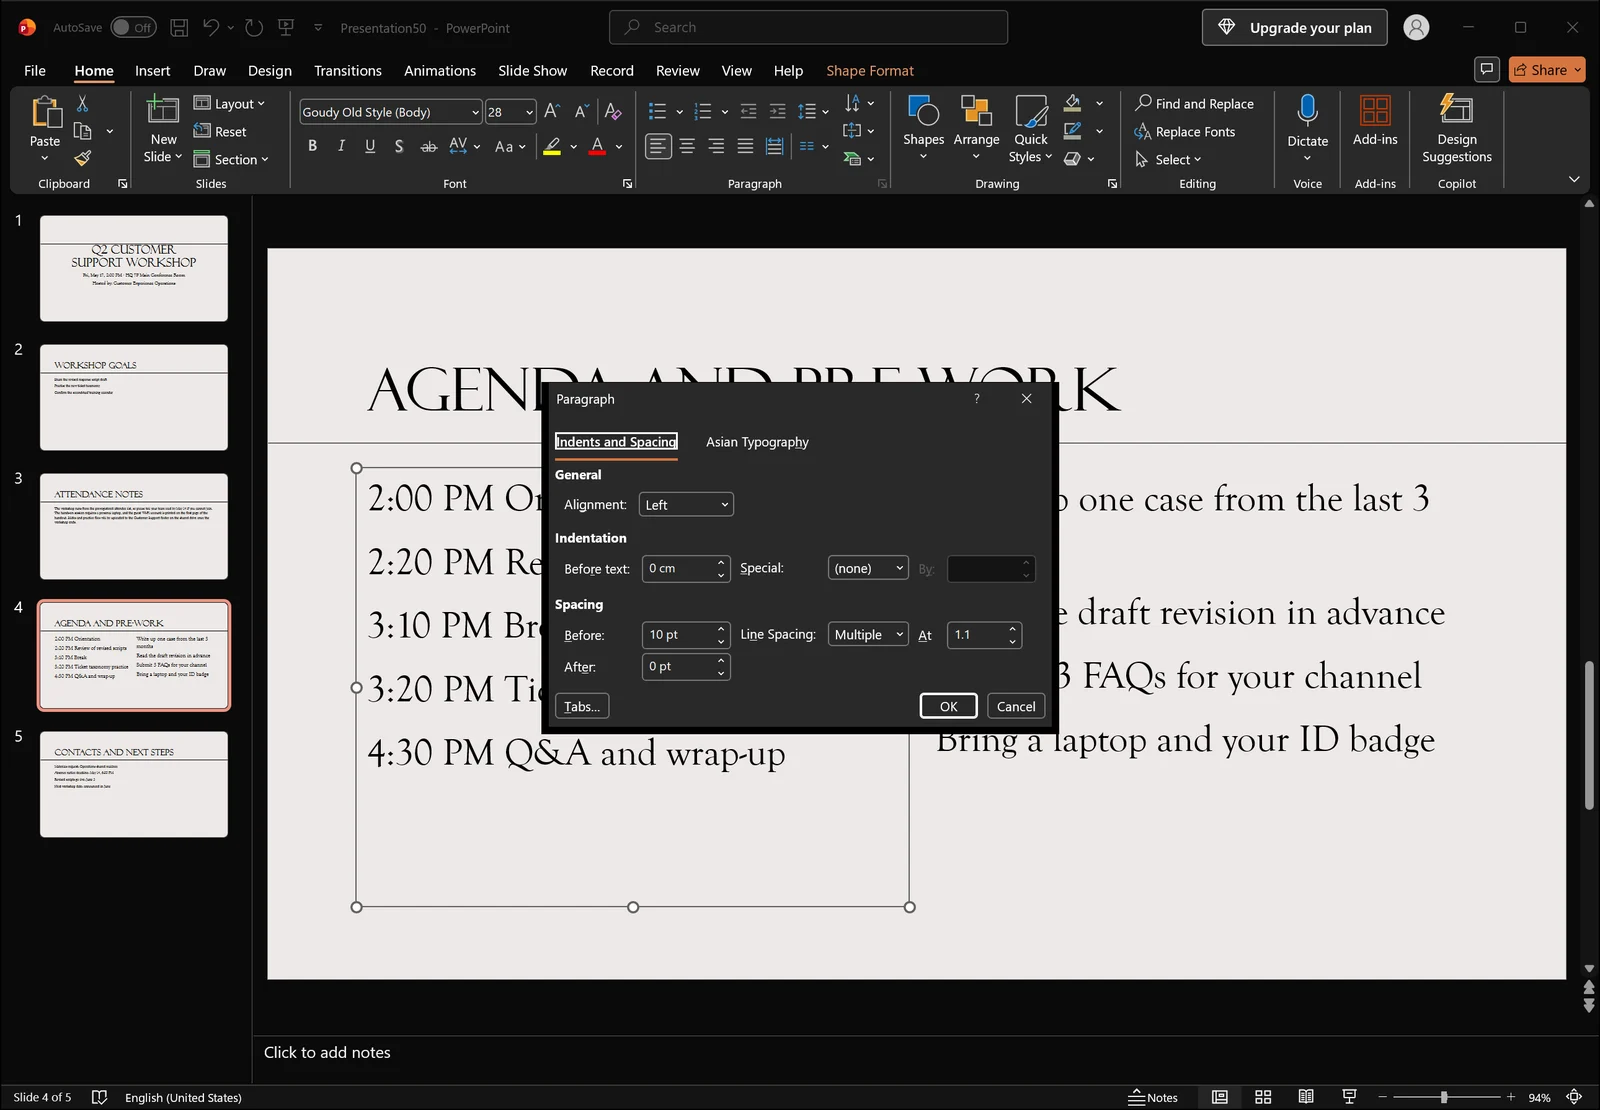
The Indents and Spacing tab gives you the Alignment dropdown, indentation including first-line and hanging options, and Before, After and Line Spacing in the spacing area. If text still looks high after you set Middle, this is where to set the Before and After values back to 0 and see whether that fixes it.
Justified vs. Distributed
The Alignment dropdown in this dialog contains more options than the ribbon buttons do, including Distributed. Justify leaves the last line alone; Distributed spreads the last line out too, stretching the spacing until it fills the full width. That is handy for making a set of two- or three-word labels occupy the same width, but it makes ordinary body paragraphs look stretched and airy.
👉 Character Spacing in PowerPoint: Tighten Titles by Exact pt
When Centering Still Does Not Look Right
The Placeholder Has Drifted from the Layout
If titles sit at a different height on every slide, the problem is usually placeholder position rather than an alignment setting. A placeholder that got nudged with the mouse or resized during editing no longer matches what the layout defines.
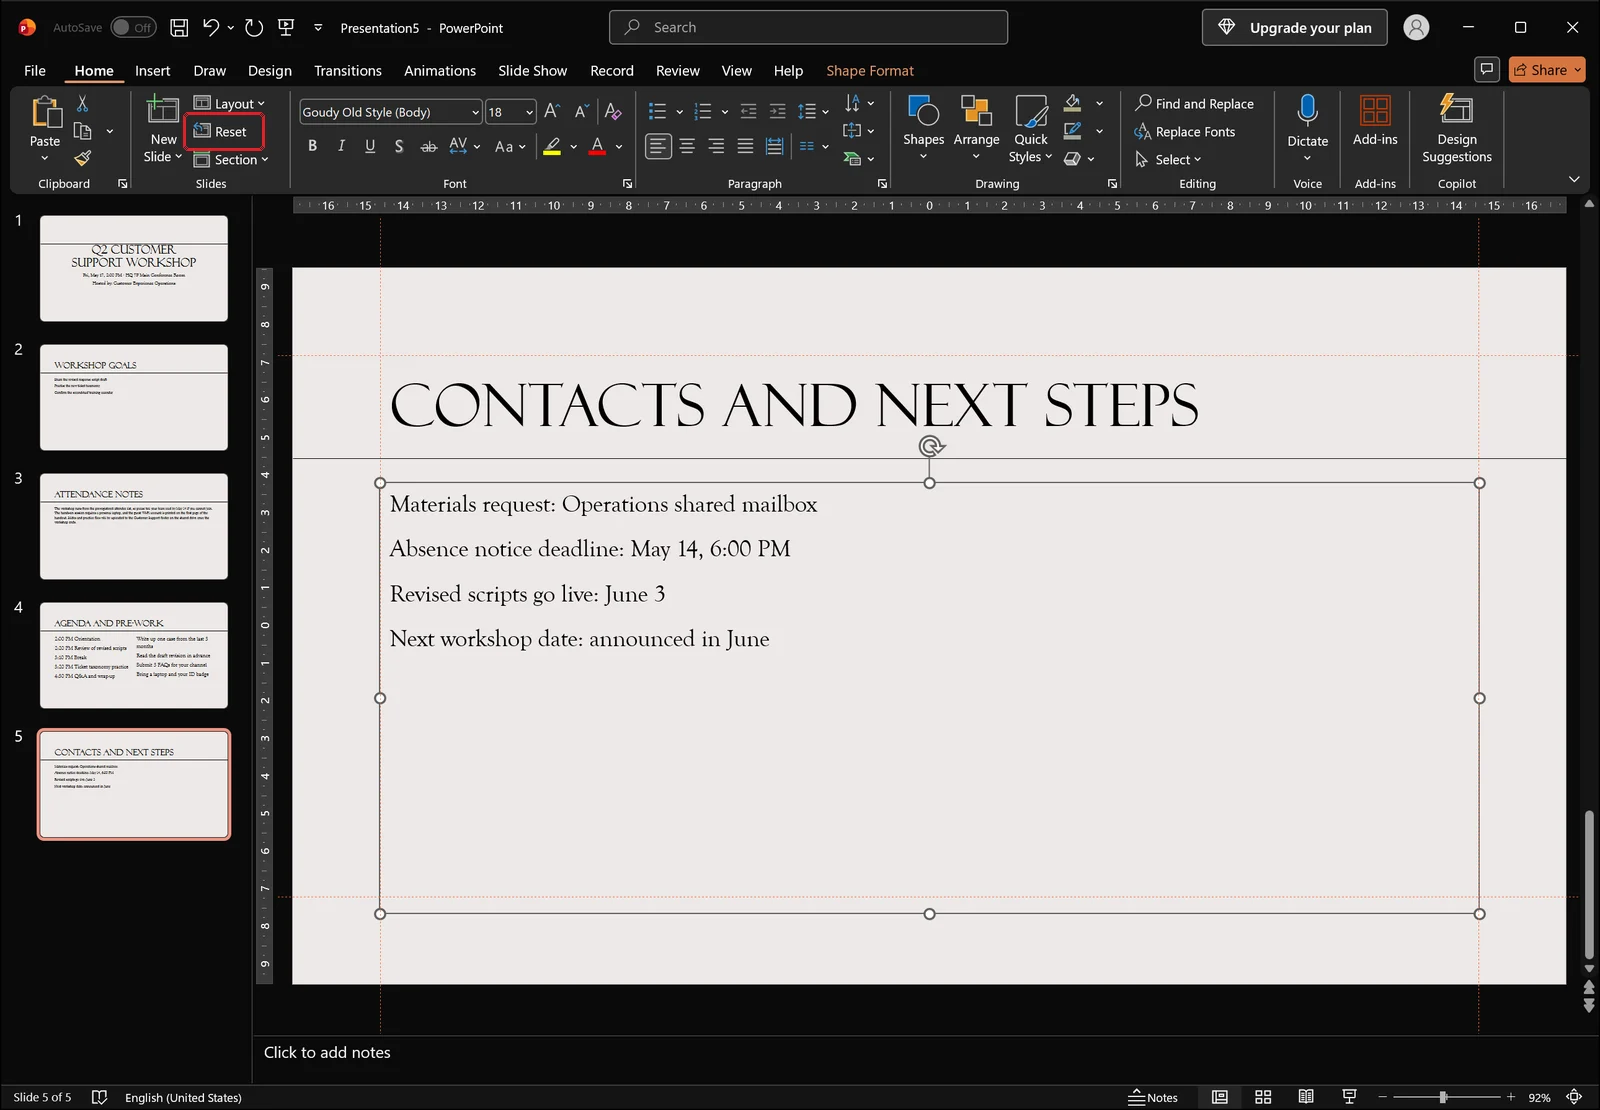
The fix is Reset, in the Slides group on the Home tab. Select the placeholder you want to restore first — the screenshot above shows the state just before clicking, with the offset placeholder selected and its handles visible.
Reset Puts It Back
Reset returns a placeholder's position, size and formatting to the values defined by the layout.
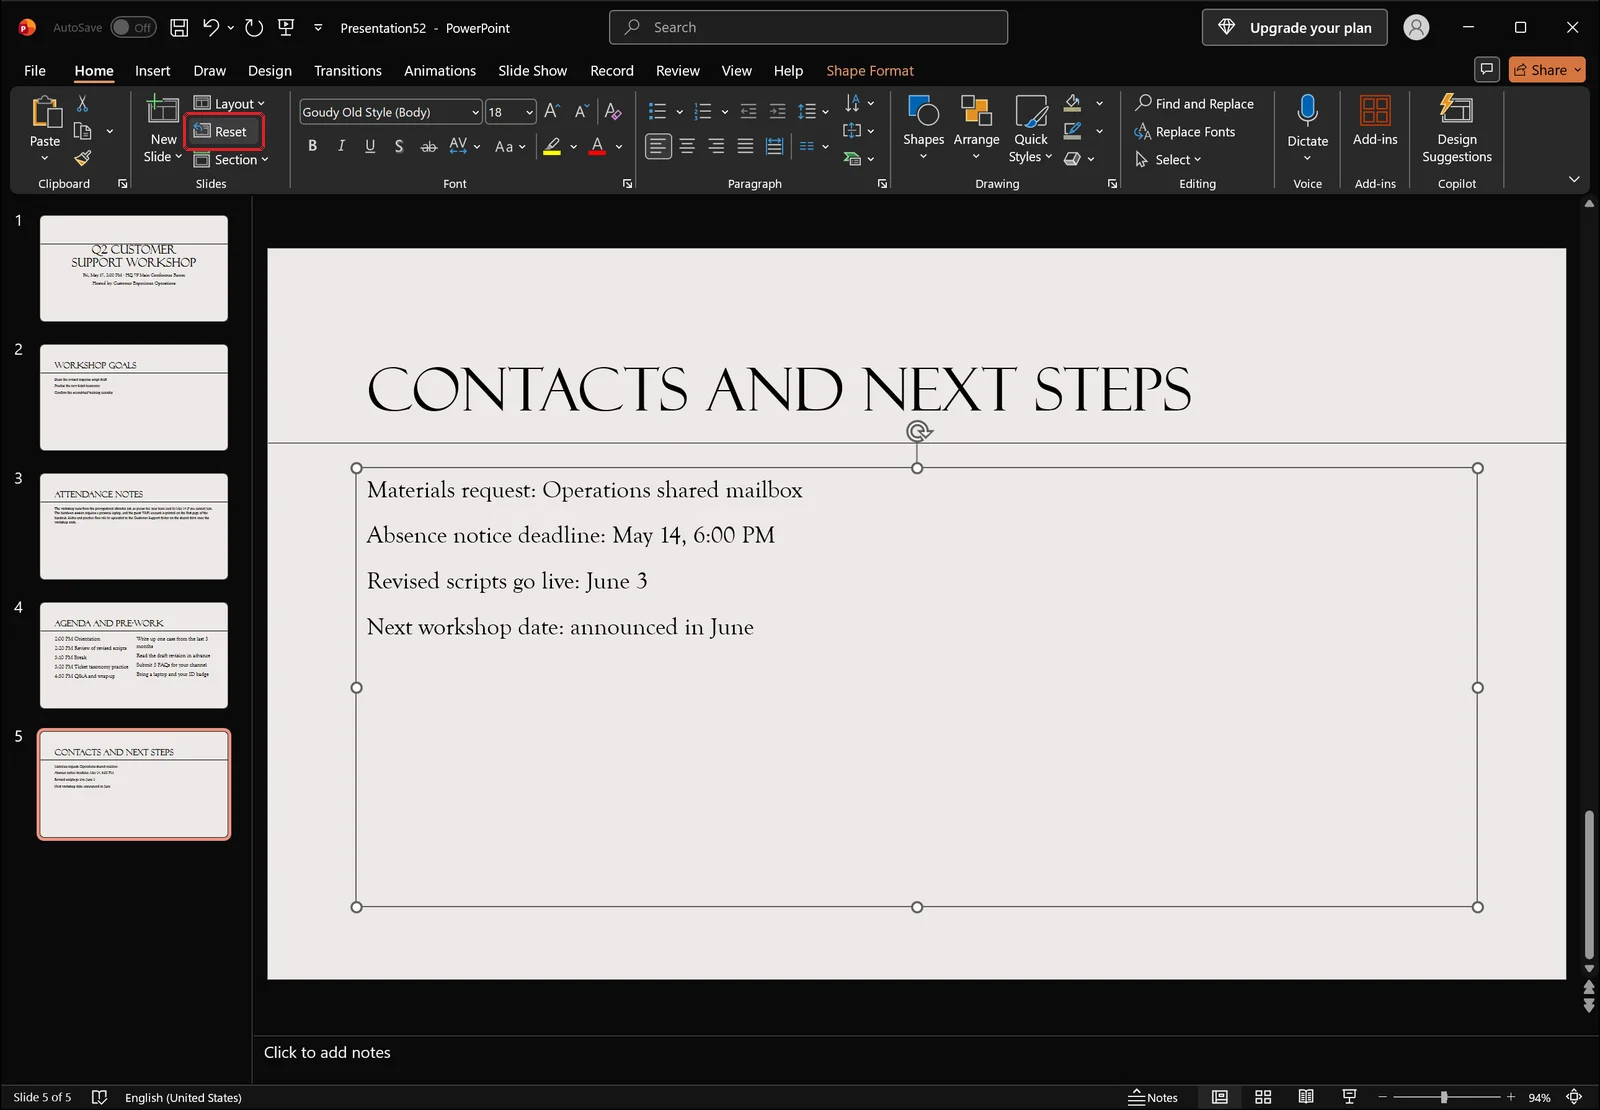
The shot above is again the moment before the click: look for the labels Home, Slides and Reset to find the button. Manual adjustments you made on purpose get reverted along with the accidental ones, so if the result is not what you wanted, Ctrl+Z undoes it immediately. For lining up title heights across a run of slides, this is the fastest tool available.
Autofit, Internal Margins, or Line Spacing
If Middle is applied and the result still looks off, check three things in order. First, whether autofit is on and shrinking the font, which changes how the block sits. Second, whether the top and bottom internal margins hold different values. Third, whether paragraph spacing or line spacing is set high. The first two are in the Format Shape pane under Text Options; the third is in the Paragraph dialog.
The Text Is in a Table Cell, Not a Shape
Text typed into a table behaves differently from text in a shape. With the cursor in a cell, the Home tab's Align Text button may be greyed out — vertical alignment for cells lives on the table's Layout tab instead. Align Text is also unavailable when a picture or a grouped object is selected.
Applying the Same Alignment Across Boxes and Slides
Copying the Formatting to Other Boxes
When the same alignment has to reach box after box, setting each one individually is wasted effort. Get one box exactly right, then copy its formatting to the rest — in the shot below the starting point is slide 1, the title slide reading "Account Onboarding Cards", with its subtitle box selected.
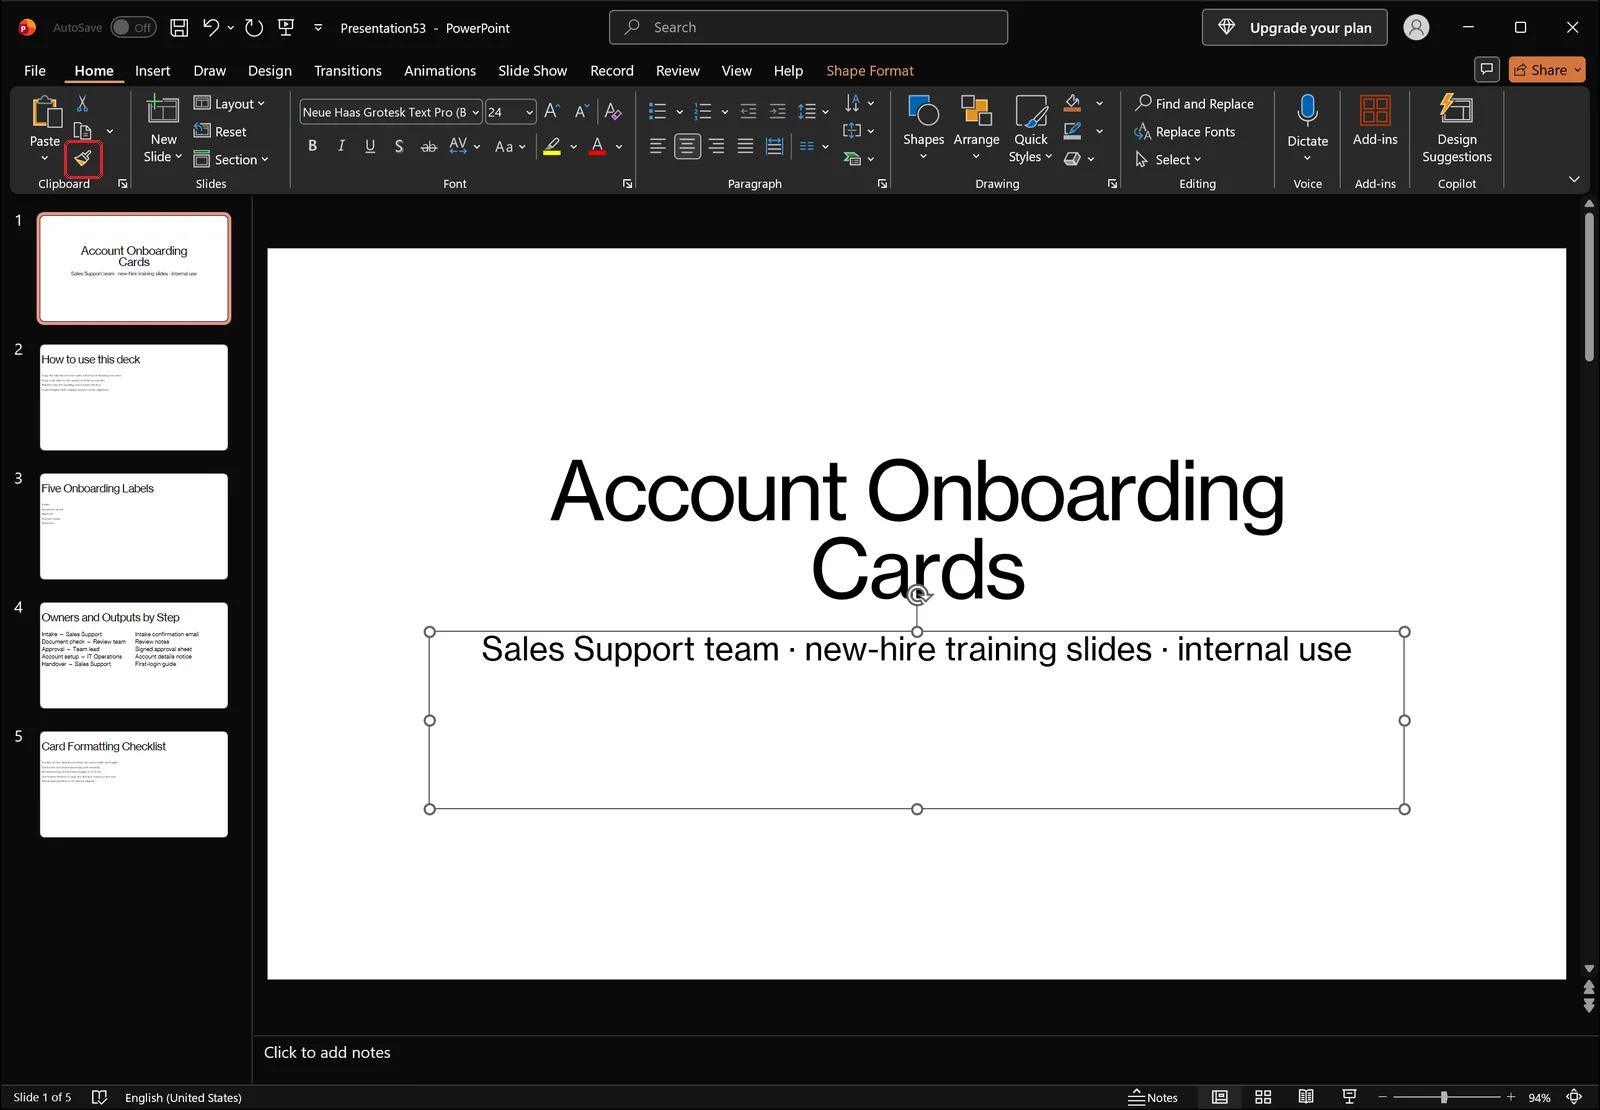
Select the box you have already formatted, then click Format Painter — the paintbrush icon just below Paste in the Clipboard group at the left end of the ribbon. The icon shows no text label of its own, so hover over it to confirm the name; in the shot it is the one ringed in red. Click the box you want to update next. Double-clicking the button locks it on so you can work through the remaining boxes one after another; press Esc when you are finished.
Multi-Select with Shift
When all you need is the same value everywhere, holding Shift and clicking each box in turn is simpler. Select them all, choose Middle from Align Text once, and every selected box updates at the same time.
Setting the Default in Slide Master
To make the rule apply across the whole deck, open Slide Master from the View tab, select the placeholder on the relevant layout, set Align Text to Middle, and close master view. Slides using that layout will follow the new setting from then on. Slides you already reformatted by hand need a click of Reset before they pick up the master value.
PowerPoint Text Alignment FAQ
Q. Is there a shortcut for vertical centering?
No, vertical alignment has no dedicated shortcut. The quickest routes are pressing Alt to bring up key tips and walking to Align Text on the Home tab, or leaving the Format Shape pane open and changing the value there. Horizontal alignment does have shortcuts: Ctrl+L, Ctrl+E, Ctrl+R and Ctrl+J.
Q. The Align Text button is greyed out. Why?
It only becomes active when a shape or placeholder that can hold text is selected. It stays disabled if a picture is selected, if several objects are grouped, if the cursor is inside a table cell, or if nothing on the slide is selected at all. For table text, use the vertical alignment controls on the table's Layout tab.
Q. I set Middle, but the text still looks slightly high.
That usually means the top and bottom internal margins differ, or space-after and line spacing are still applied. Match the top and bottom margins in Format Shape, set the Before and After spacing to 0 in the Paragraph dialog, and the text will look genuinely centered.
Q. Can I make titles sit at the same height on every slide at once?
Start by clicking Reset on each slide to snap placeholders back to their layout positions. If heights still differ afterwards, the slides are probably using different layouts. Fixing the title placeholder position and Align Text setting on that layout in Slide Master brings all of them onto the same baseline.
Cleaning Up Slide Formatting with inline AI
Everything above assumes you are selecting each box yourself and checking its settings one at a time. Once a deck runs past thirty slides with label boxes scattered across them, simply finding which boxes were left on Top alignment becomes the slow part of the job.
inline AI reads the PowerPoint file already open on your PC, so you can write the request in plain language — for example, asking it to set vertical alignment to Middle for the label boxes on slides 3 through 12 — and it locates those objects and applies the formatting. You can also ask it to report which slides have placeholders sitting away from their layout positions.
It runs on your own machine rather than uploading the file anywhere, so it works the same on internal decks and client proposals that are not allowed to leave the company.
See what an agent could take over at your company in a 30-minute call.