Learn
PowerPoint Bullets and Numbering: Fix Spacing and List Levels

Tapping the spacebar to close the gap between a bullet and its text is not a fix. PowerPoint bullets and numbering are controlled by indent values stored on the paragraph, not by space characters, so the moment a line wraps to a second row the text falls out of alignment again. Lines whose bullets sit at slightly different positions are usually the same problem, or a case of mixed list levels. This guide walks through where the bullet and numbering controls live, how to type exact indent values, how to change list levels and restart numbering, and how to apply one consistent spacing rule to an entire deck.
Where PowerPoint Bullets and Numbering Live
The Bullets and Numbering buttons in the Paragraph group
Bullets and numbers attach to a paragraph, not to individual characters. That means they apply to whichever paragraph the cursor sits in, or to every line in a placeholder if you click the object's border and select the whole thing. When you are cleaning up an entire list, selecting the object is far quicker than clicking through lines one at a time.
The Bullets button in the Home tab's Paragraph group is a toggle: click it once to turn bullets on, click it again to turn them off.
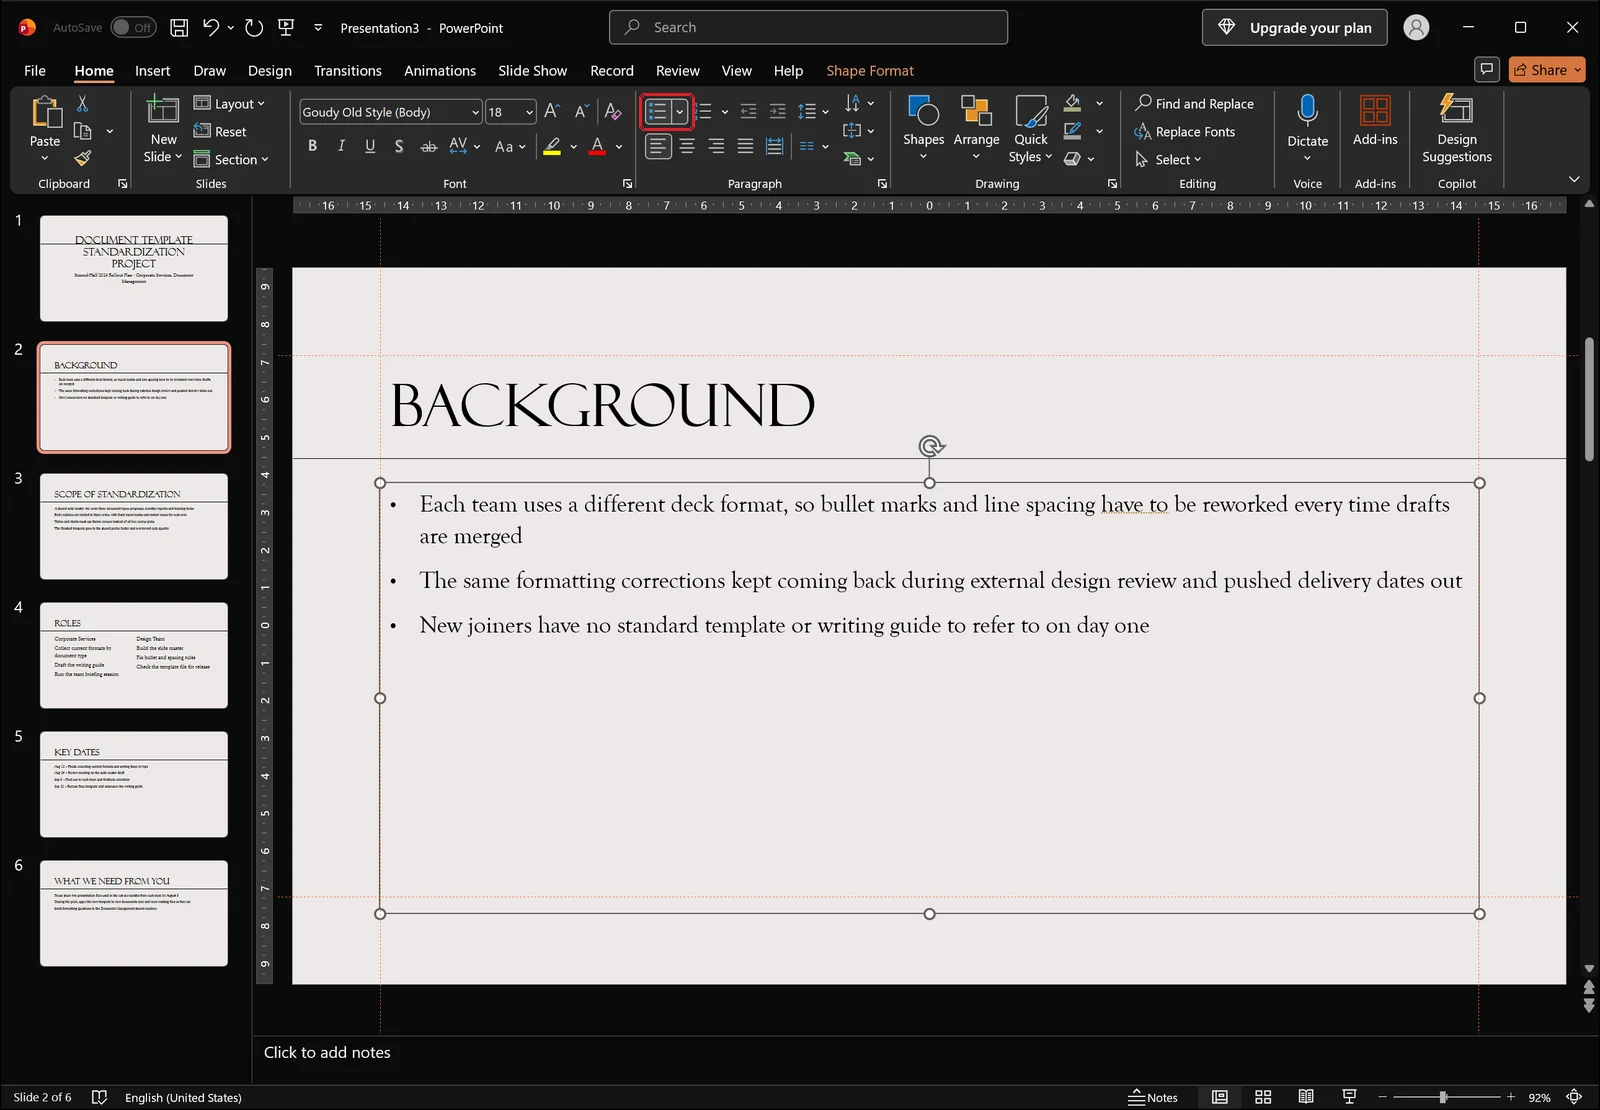
The bullet gallery and the None option
To change the bullet character itself, click the More Options arrow next to the Bullets button. The gallery shows thumbnails for filled round bullets, hollow circles, small filled squares, hollow squares, diamond marks, arrowheads and check marks, with a None tile at the top left and a Bullets and Numbering... command at the bottom. Choosing None removes the mark only.
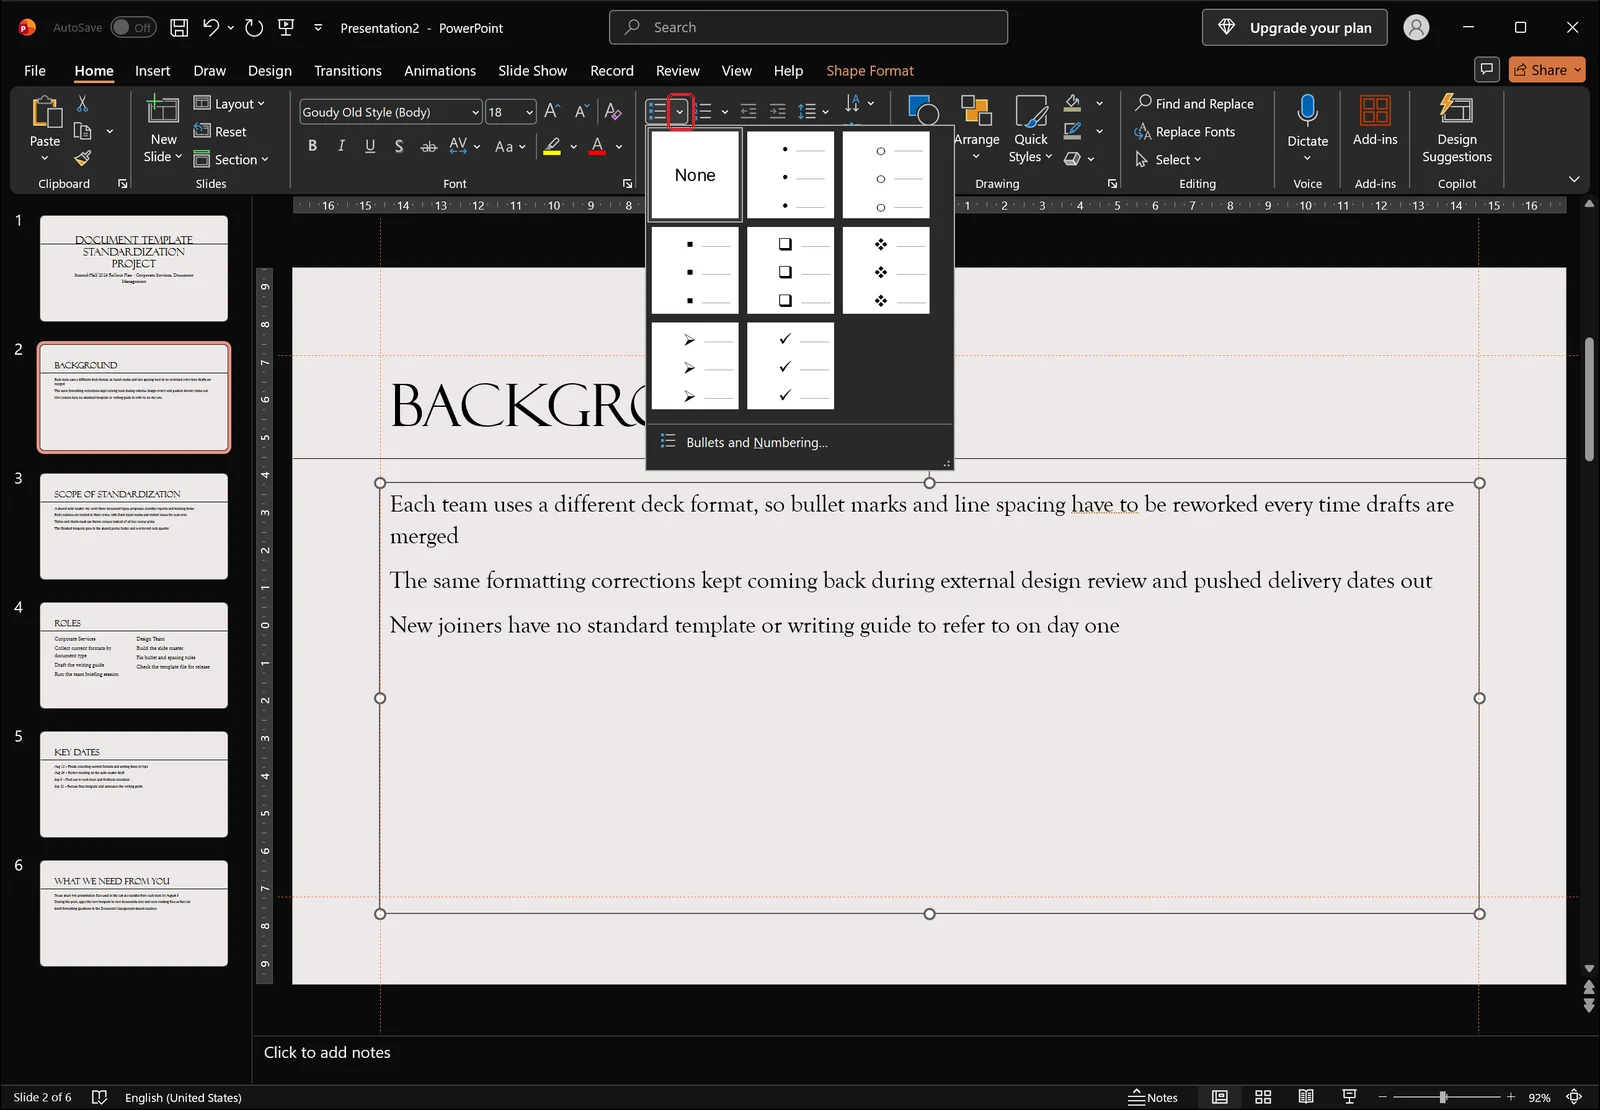
Body placeholders already have a bullet defined for each list level by the layout, which is why text usually arrives with a bullet attached the first time you type into a slide. Changing that default is covered in the last section of this guide.
One thing to watch with numbered lists
For items that have a genuine order, open the More Options arrow beside Numbering and pick a format. The gallery offers 1. 2. 3., 1) 2) 3), I. II. III., A. B. C., a) b) c), a. b. c. and i. ii. iii., plus a None entry and a Bullets and Numbering... command at the bottom.
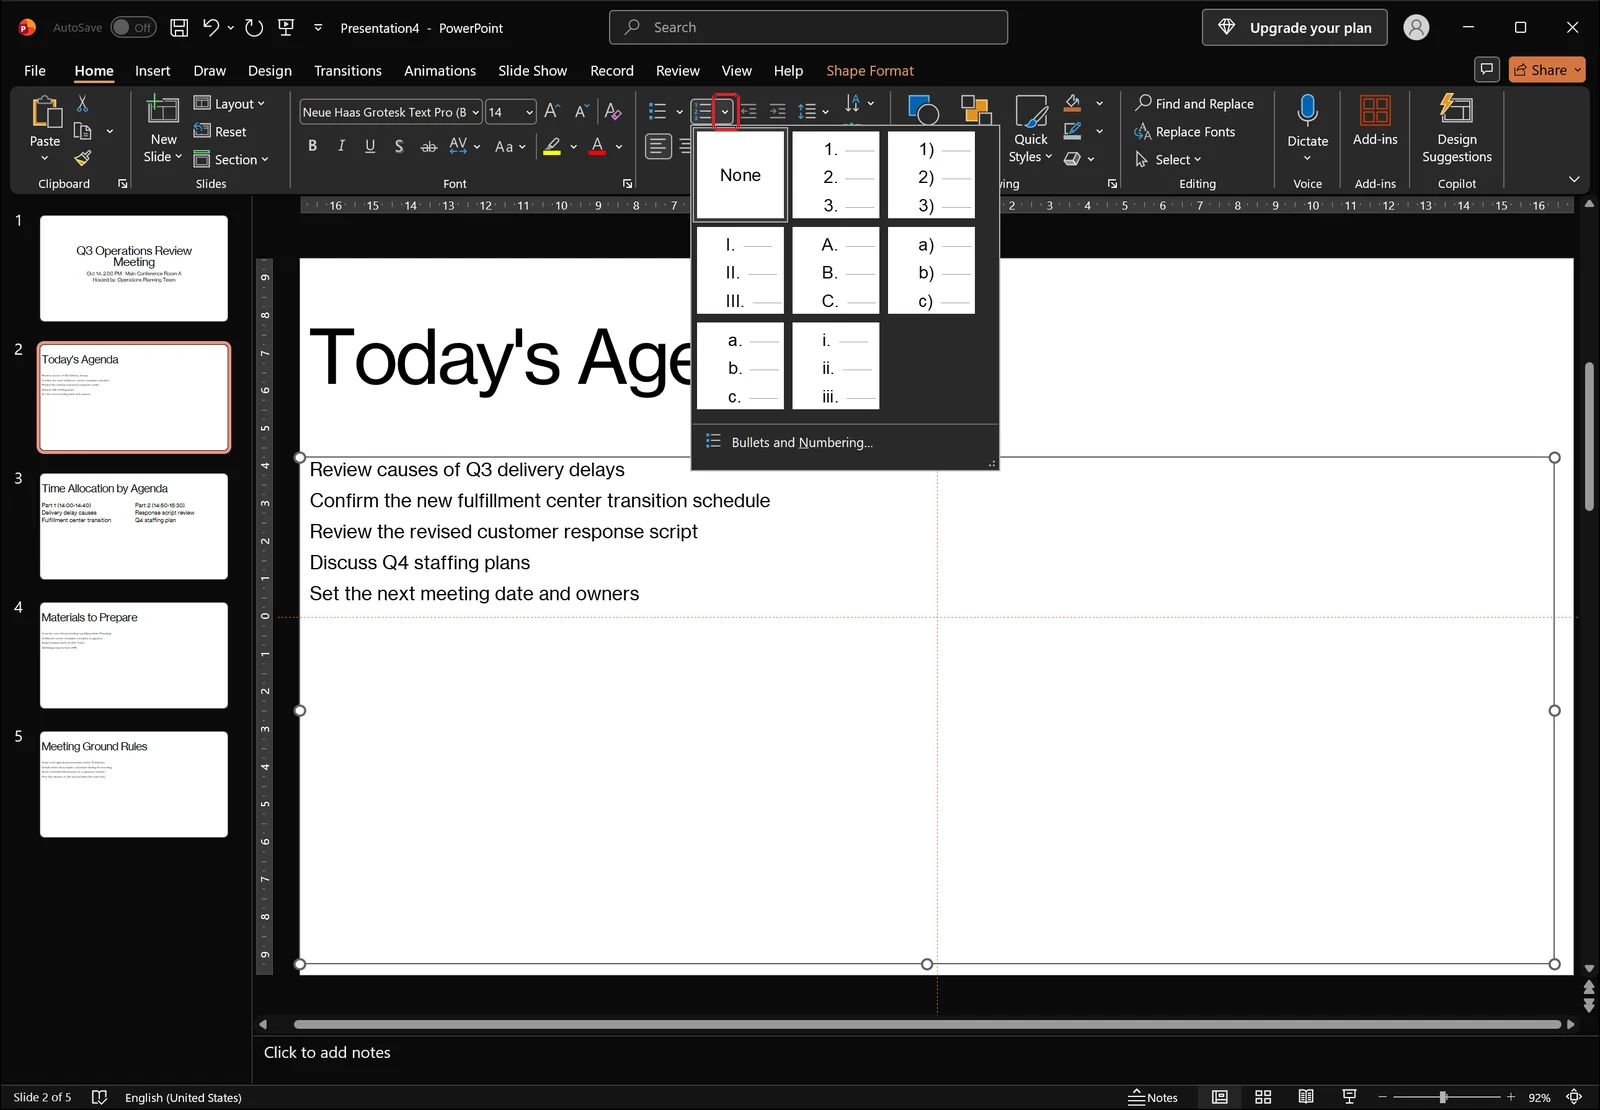
The catch is that numbering is counted per text box. Split an agenda across two side-by-side text boxes and the right-hand box restarts at 1 instead of continuing. To keep one running sequence, either keep the list inside a single placeholder or set a start number manually, which is covered further down.
Two Things to Check Before You Touch Any Spacing
Turn the ruler on from the View tab
Before you change values, you need to see the current state. On the View tab, tick Ruler and a horizontal ruler appears above the slide editing area with a vertical ruler down its left side. The indent markers only show up once the cursor is inside a text object in editing mode.
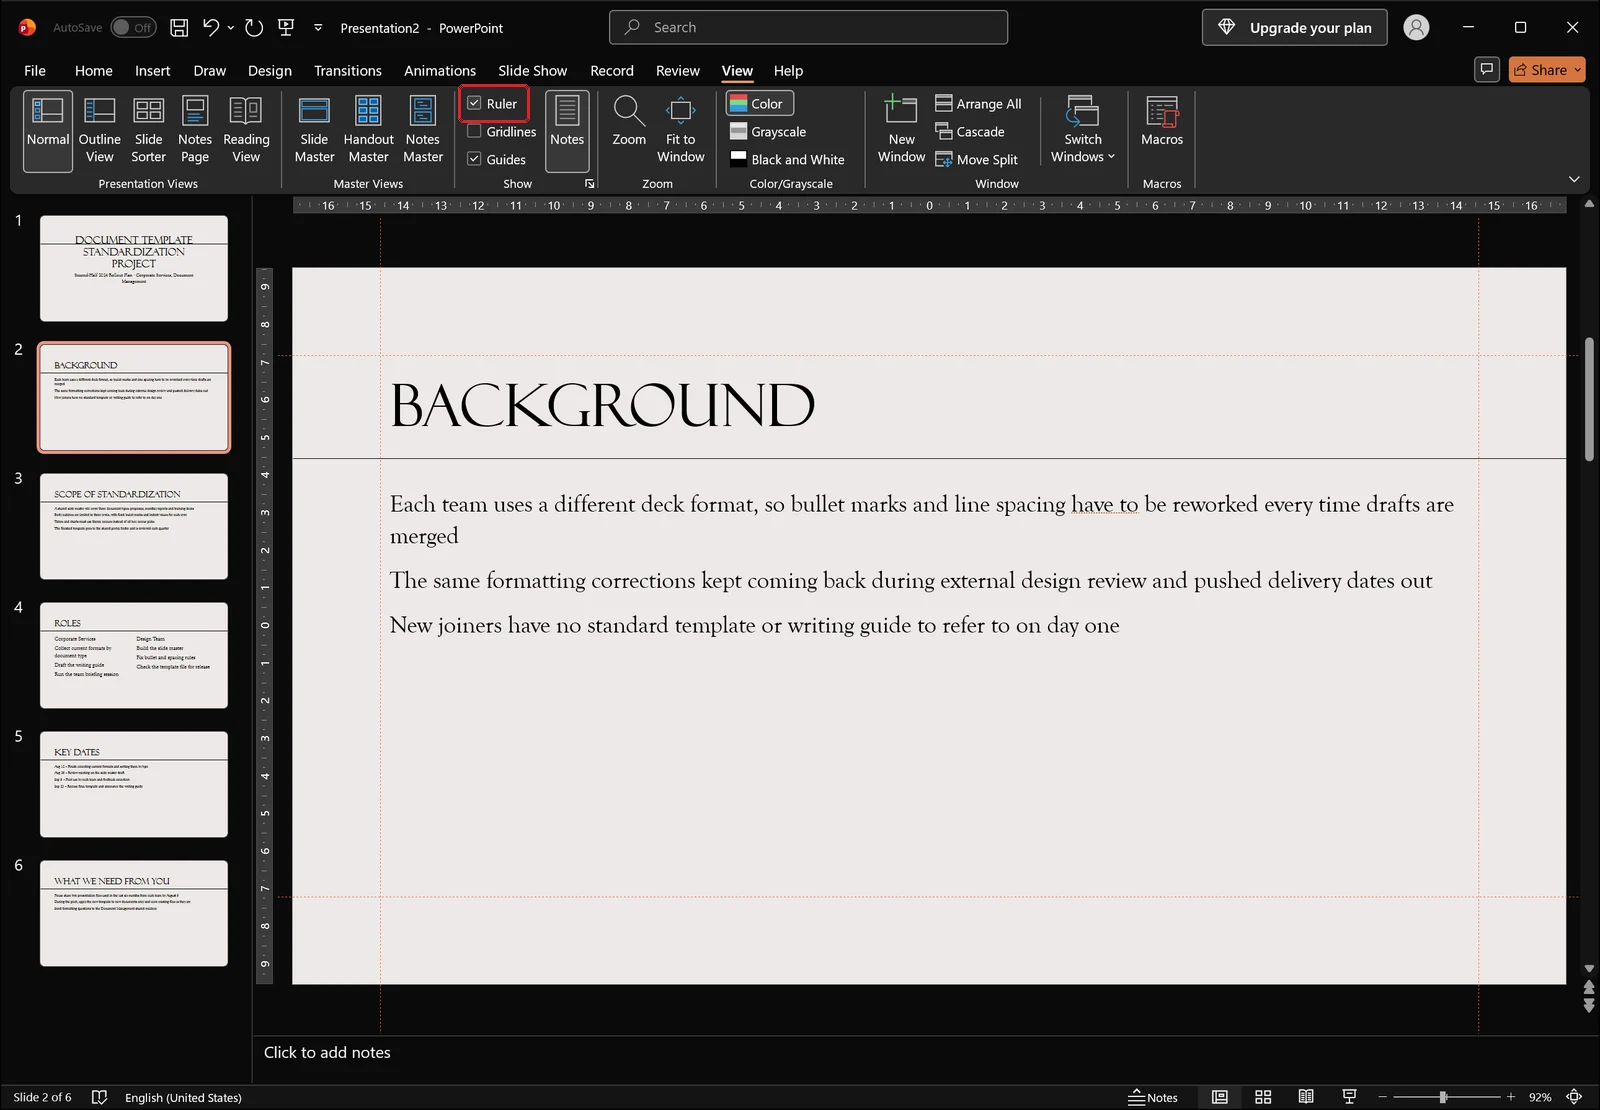
Reading the first-line and hanging markers
With a text object in edit mode, three markers sit at the left end of the ruler. The upper triangle is where the first line starts, which is where the bullet is drawn. The lower triangle is the hanging indent, the point where the text begins. The rectangle beneath them moves both markers together and shifts the whole paragraph left or right.
If the gap between the bullet and the text looks too wide, that simply means the two triangles are far apart. Once you think of that distance as the gap, everything that follows gets much simpler. The units shown on the ruler and in the dialog follow your system's regional settings, so if you see inches where you expected centimetres, check your Windows settings rather than the presentation.
Use Outline View to spot mixed list levels
When bullets sit at different positions from line to line, the cause is more often a level problem than a value problem. Switch to Outline View on the View tab and the left pane lists every slide title with its body lines indented by level, so a line that has slipped one step deeper is immediately obvious.
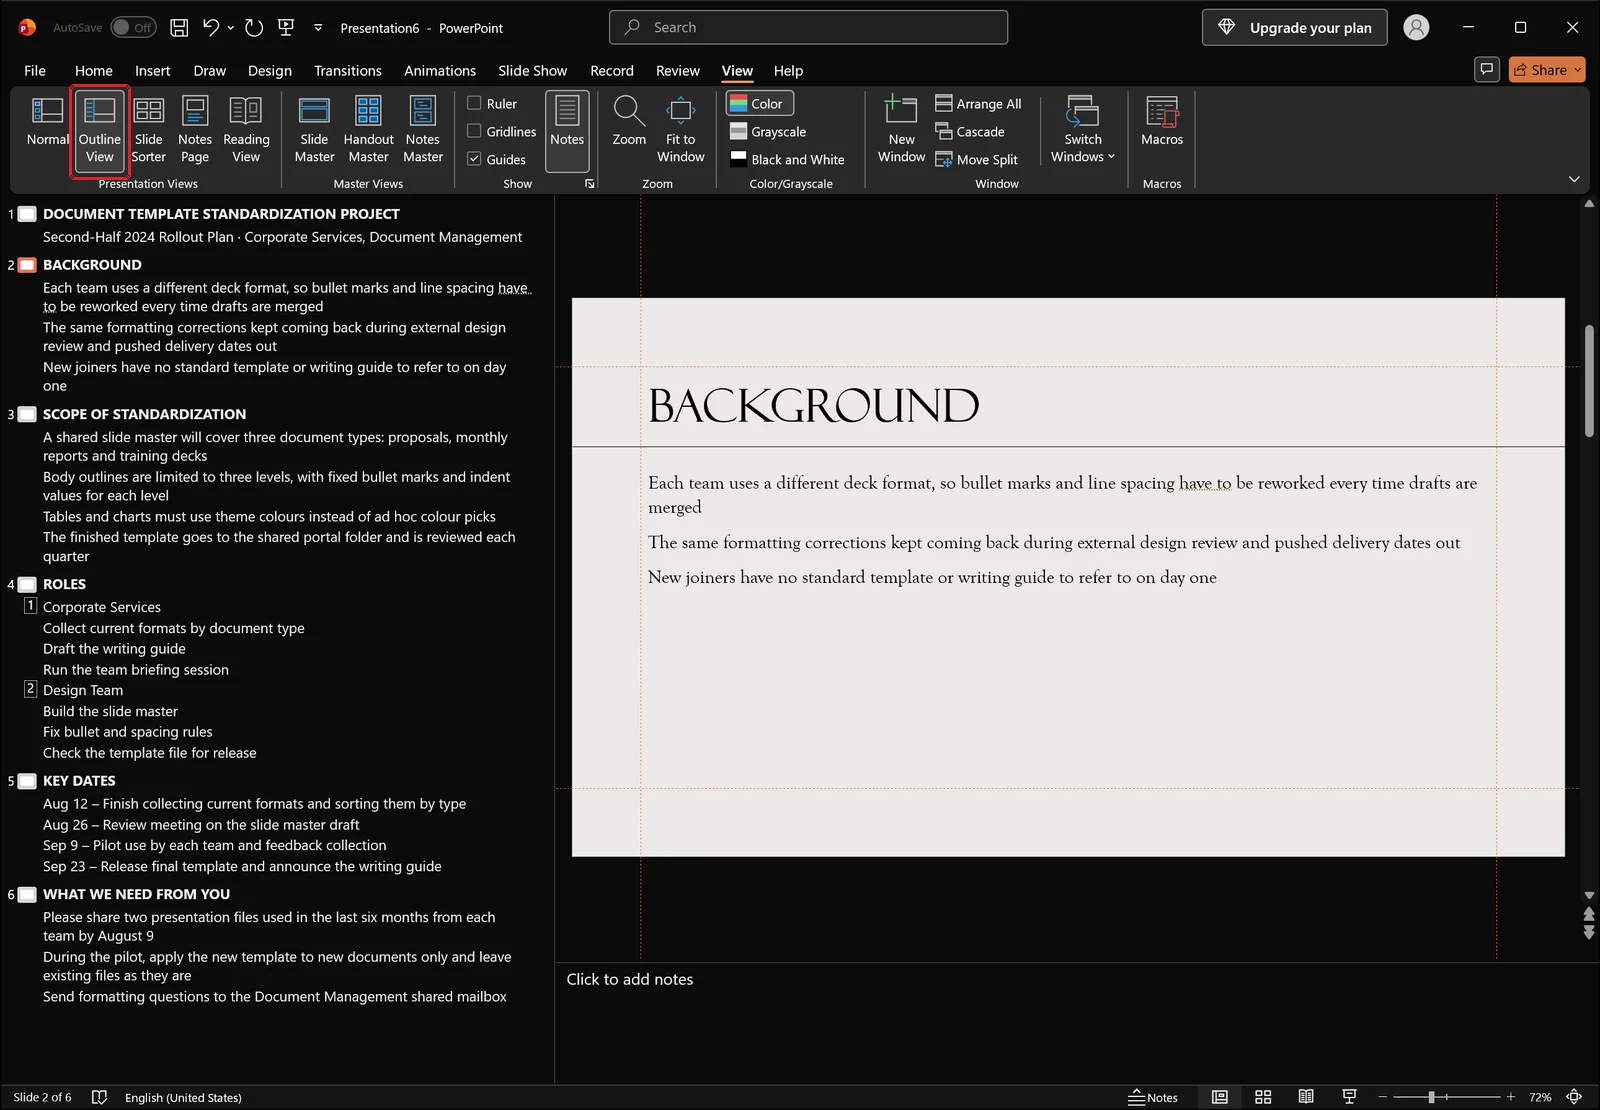
Fix the stray lines so every item sits at the same level first, then adjust whatever gap remains with numeric values. That order is much faster than the reverse.
Setting the Gap Between Bullet and Text in the Paragraph Dialog
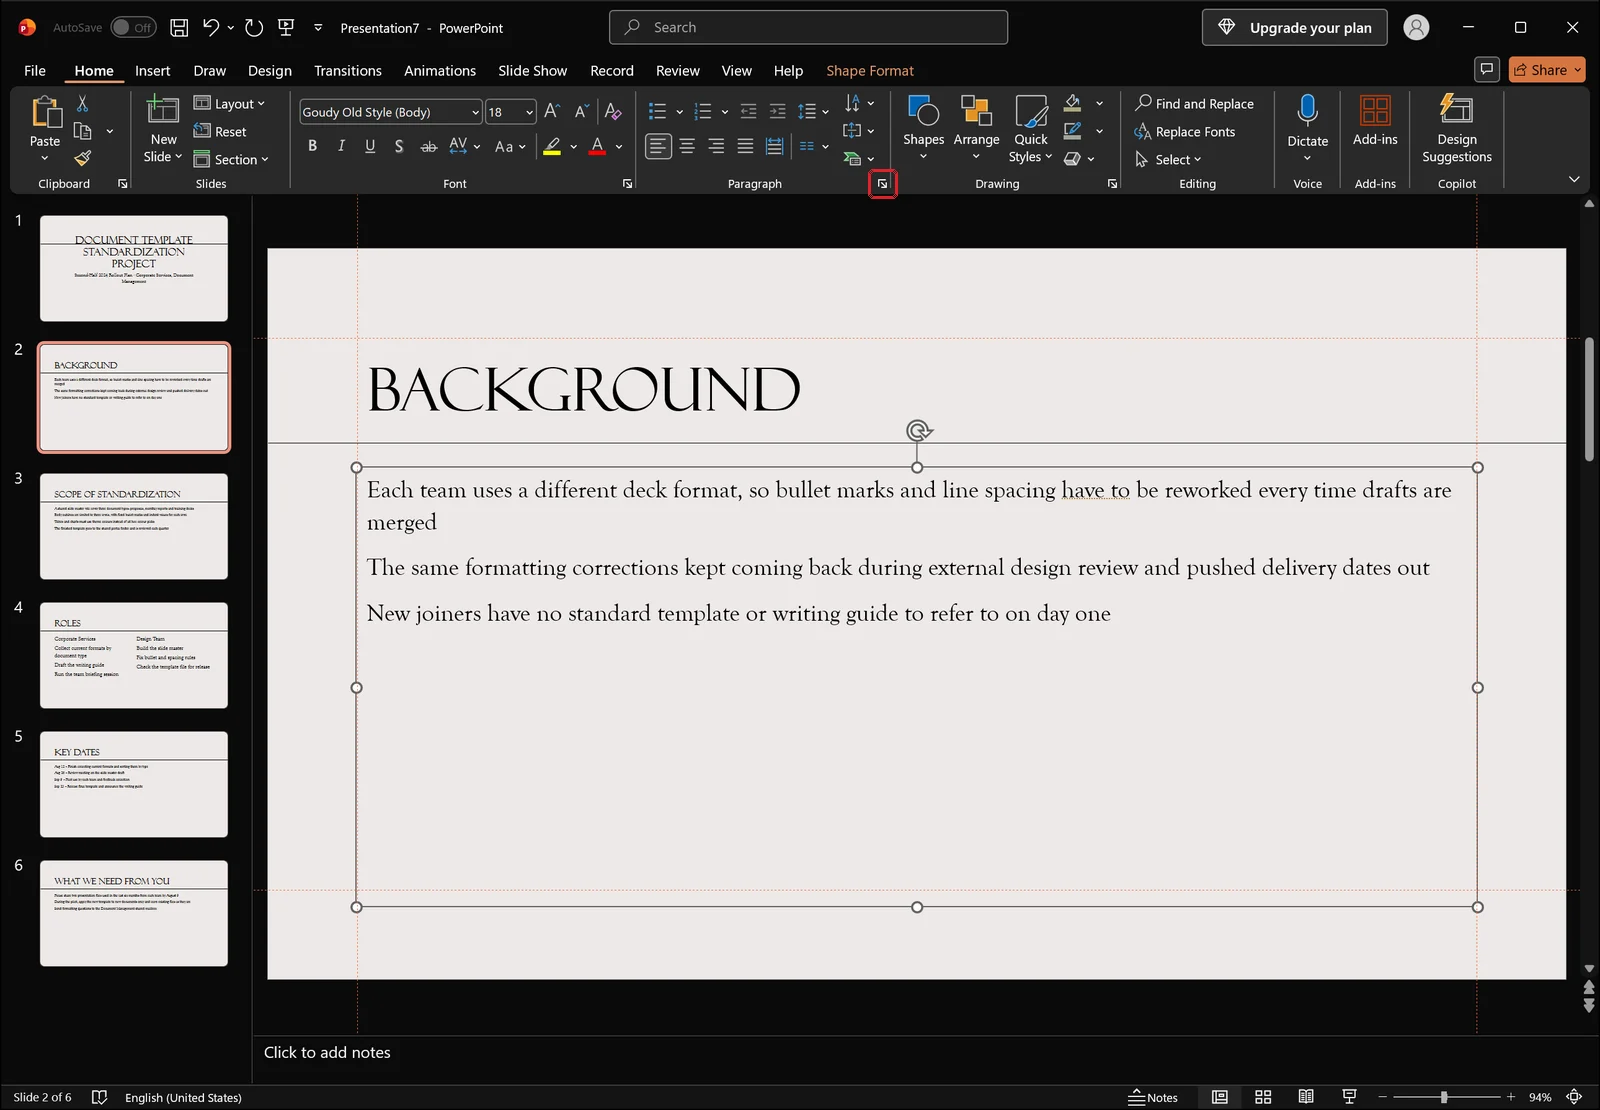
Opening the dialog from the Paragraph group
If the levels are consistent and the spacing still looks wrong, type the values in directly. Put the cursor in the target paragraph or select the text object, then click the small dialog launcher arrow, labelled Paragraph..., in the bottom-right corner of the Paragraph group on the Home tab.
Before text and the hanging indent value
The dialog collects alignment, indentation and spacing on a single tab. In the indentation area, Before text sets how far the paragraph sits from the left edge of the placeholder, and the Special dropdown next to it is where you choose Hanging; the number you enter in the By box is the distance between the bullet and the text. While Special is set to (none), the By box stays greyed out and cannot be edited.
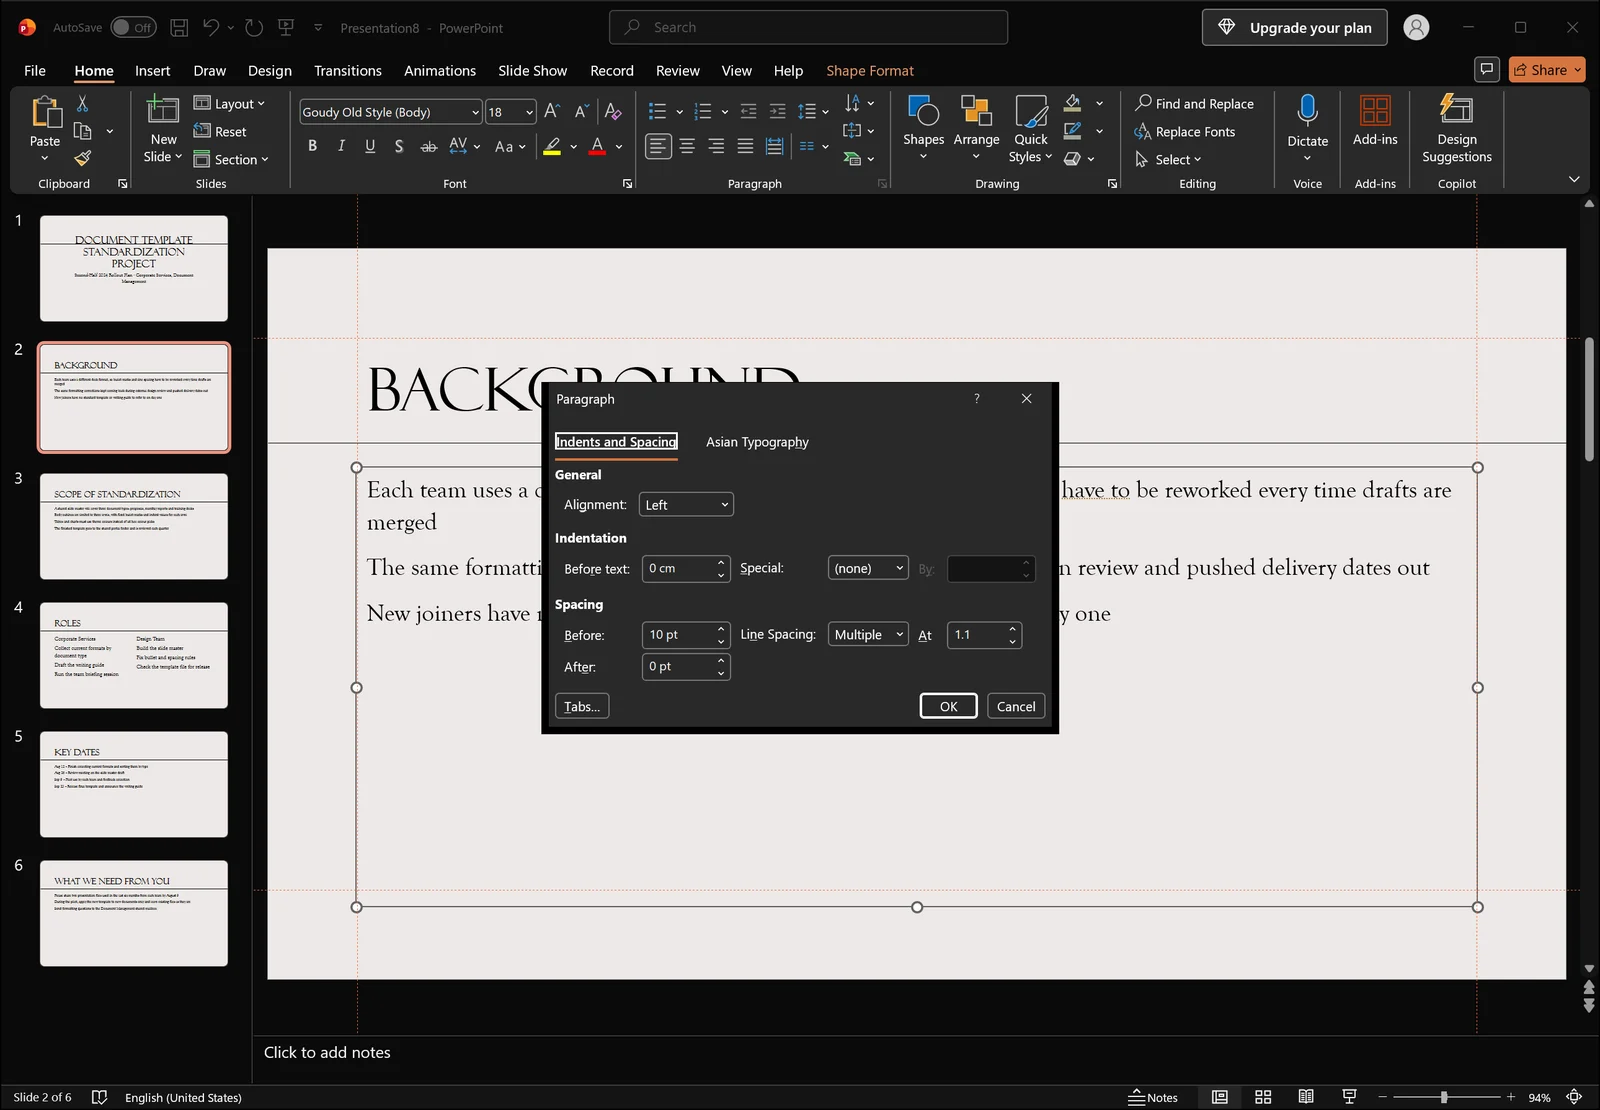
Put simply: the bullet is drawn at the Before text position, and the text starts to the right of it by the hanging value. The second line of a wrapped item starts at that same point, so once the hanging value is right, a long sentence no longer breaks the left edge of your list.
Sensible values and how to apply them in one pass
For body text between 18 and 24 pt, a hanging indent of roughly 0.6–0.9 cm (about 0.25–0.35 in) works well. Larger type means a larger bullet, so give it a little more room as the font grows. Dragging the ruler markers with the mouse tends to land on awkward values like 0.63 cm, so when lines have to match across several slides, type the number into the dialog instead.
Scope matters just as much. Change a value with only one line selected and only that paragraph moves, so to unify a whole list, click the text box border to select the object before entering values. If two or more list levels are mixed inside the same placeholder, set each level separately in two passes; the result is cleaner than trying to force one value onto everything.
Demoting, Promoting, and Restarting Numbers
Tab, Shift+Tab, and the ribbon buttons
Place the cursor at the very start of a line and press Tab to demote it one level, or Shift+Tab to promote it. Press Tab in the middle of a line and you get a tab character instead of a level change, so check the cursor position first.
On the ribbon, Increase Indent in the Paragraph group does the same job. The list moves one level inward and the bullet changes to the mark defined for that deeper level.
To reverse it, click Decrease Indent beside it and the list steps back out toward the left edge of the placeholder.
Why each level carries its own bullet and spacing
Every list level has its own bullet character, font size and indent values defined for it. That is why demoting a line changes the mark and the spacing at the same time. The complaint "one line in this list sits further in than the rest" almost always means that line is at a different level, and the fix is Shift+Tab, not a new indent value.
The opposite case, where the level is the same but the spacing differs, means a manual indent has been applied to that one paragraph. Entering matching numbers in the Paragraph dialog from the previous section clears it up.
Restarting numbering at 1
Turn a list into a numbered list and each line gets 1, 2, 3 automatically, in the order the paragraphs appear.
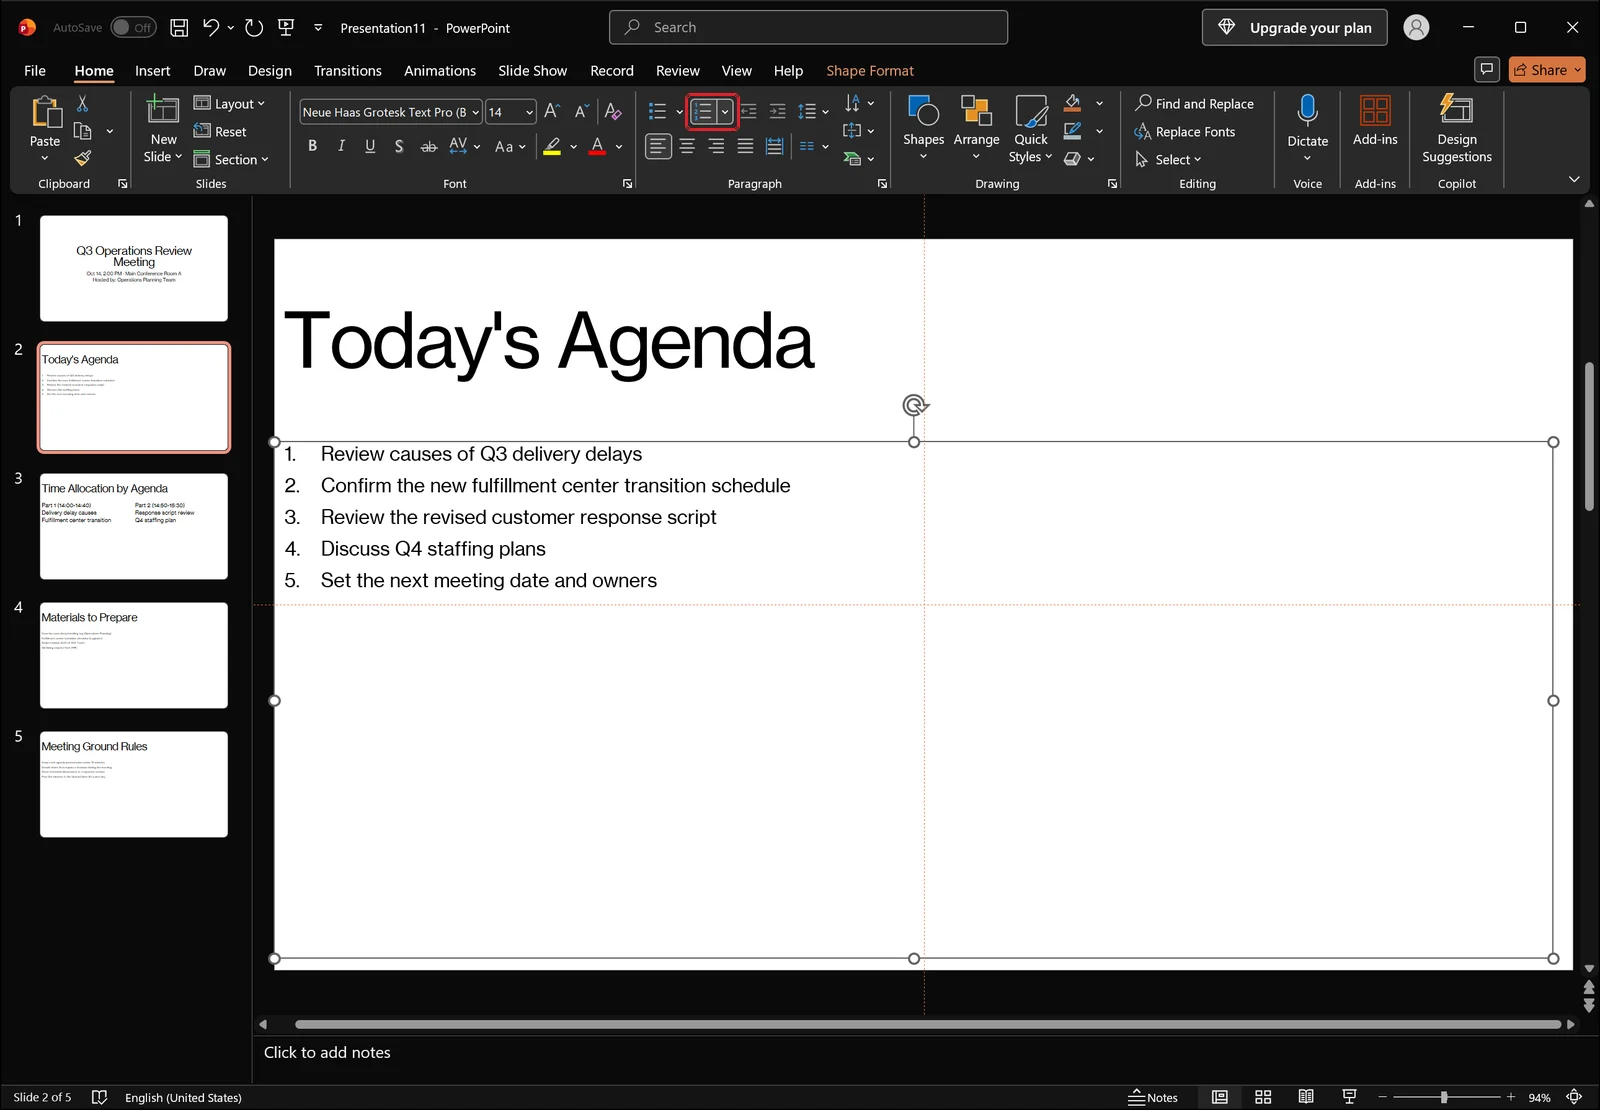
If the sequence does not start where you want, click the More Options arrow beside Numbering and open the Bullets and Numbering... command at the bottom of the gallery. Set the start number to 1 and the list renumbers from the beginning. To continue a sequence from a previous slide, enter the next number in that same box.
Line Spacing and Paragraph Spacing
Unify row spacing from the line spacing gallery
If the indents match but the gaps between items still look uneven, line spacing is the next place to look. Click Line Spacing in the Paragraph group and you get preset values such as 1.0, 1.5, 2.0, 2.5 and 3.0, along with a Line Spacing Options... command.
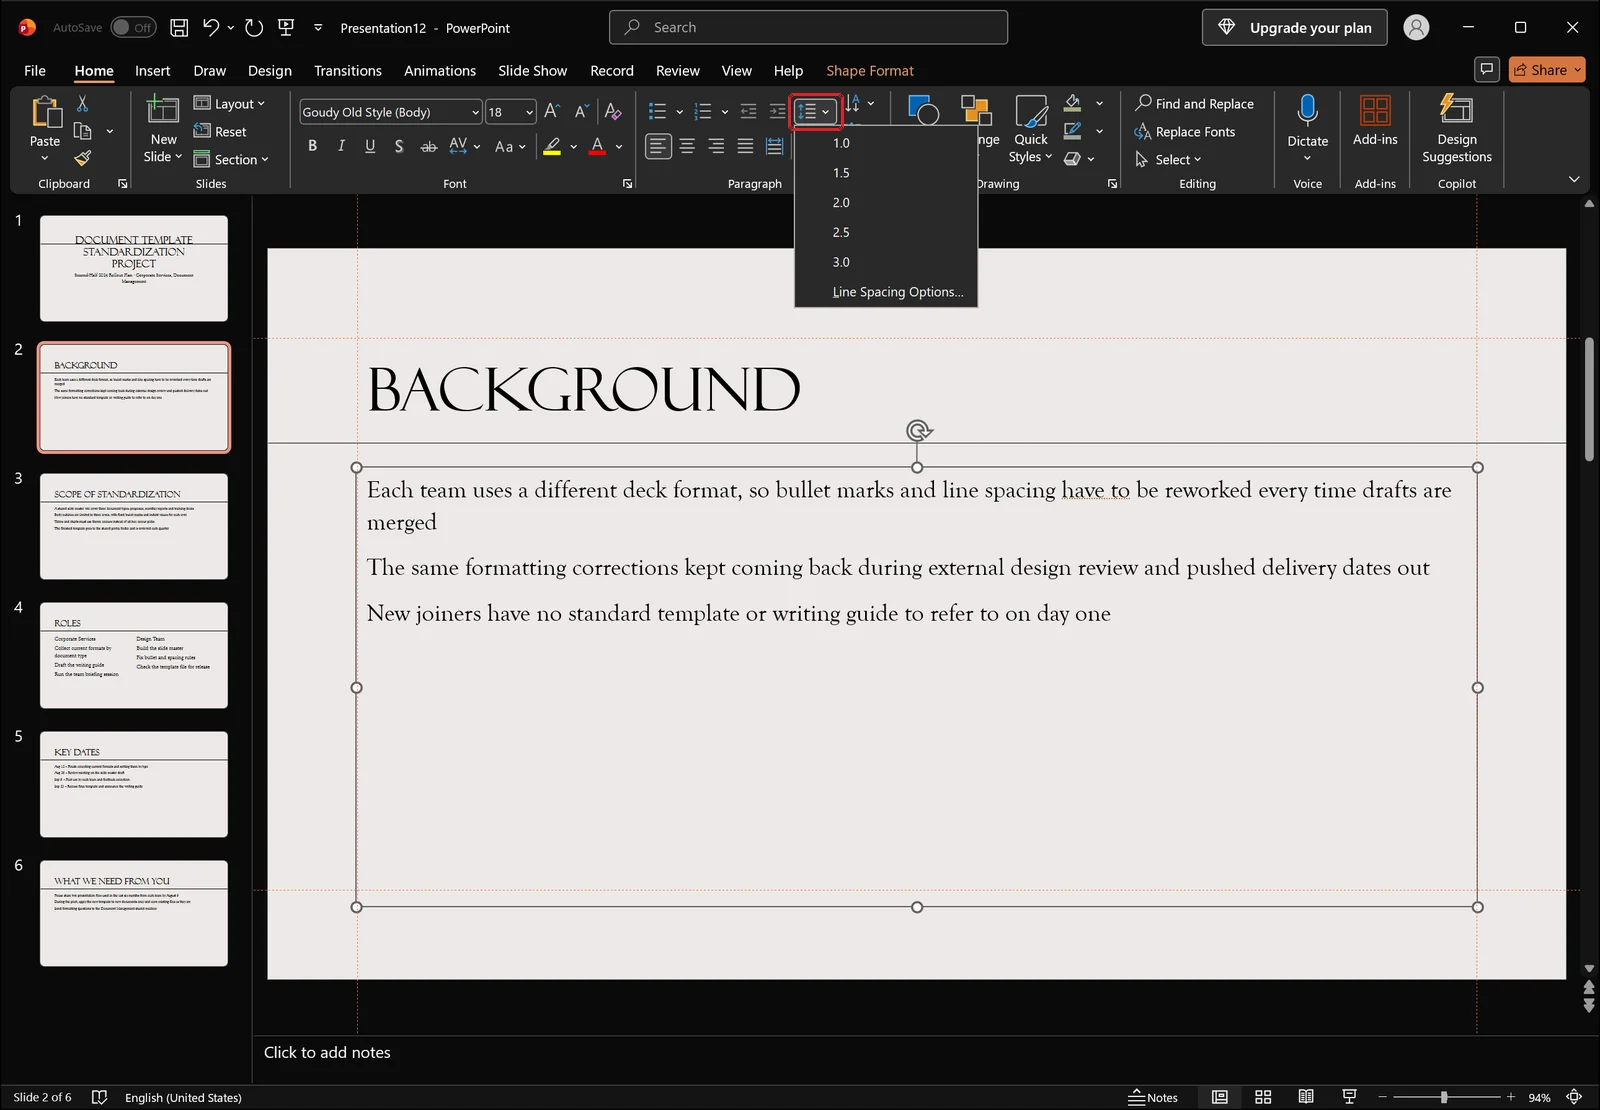
Select the whole list and apply a single value, and rows that were drifting apart snap into a consistent rhythm.
Space before and after, instead of empty lines
When you only want a little air between items, avoid pressing Enter to insert blank lines. Blank paragraphs pick up bullets of their own, and the spacing collapses again the moment you edit the text. Set Before or After in the spacing area of the Paragraph dialog to somewhere around 6–12 pt and you get the same visual result without the empty rows, and because the value lives on the paragraph, it survives later edits.
Once the bullet position, the text start column and the gap between items all use the same values, the list reads as a single aligned block, and wrapped items line up neatly under the first line.
When autofit quietly shrinks your spacing
If spacing looks different from slide to slide despite identical settings, suspect the placeholder's autofit behaviour. When text threatens to overflow, PowerPoint shrinks the font size and line spacing on its own, so the text-heavy slides end up tighter than the rest. If your numbers are right but the results keep varying, turn autofit off and adjust the placeholder size or the amount of text instead.
👉 Turn Off Autofit Text in PowerPoint: Stop Fonts Shrinking
Removing Bullets and Applying One Rule to Every Slide
The bullet goes, the indent stays
Click the Bullets button again, or choose None in the gallery, and the mark disappears. The indent values stay exactly where they were, so the text still starts inset even though nothing is drawn in front of it. If you want the text flush against the left edge, set both the Before text and hanging values to 0 in the Paragraph dialog.
Resetting with Clear Formatting
When enough small edits have piled up that you no longer know what to fix first, select the text and use Clear Formatting in the Font group on the Home tab to reset it.
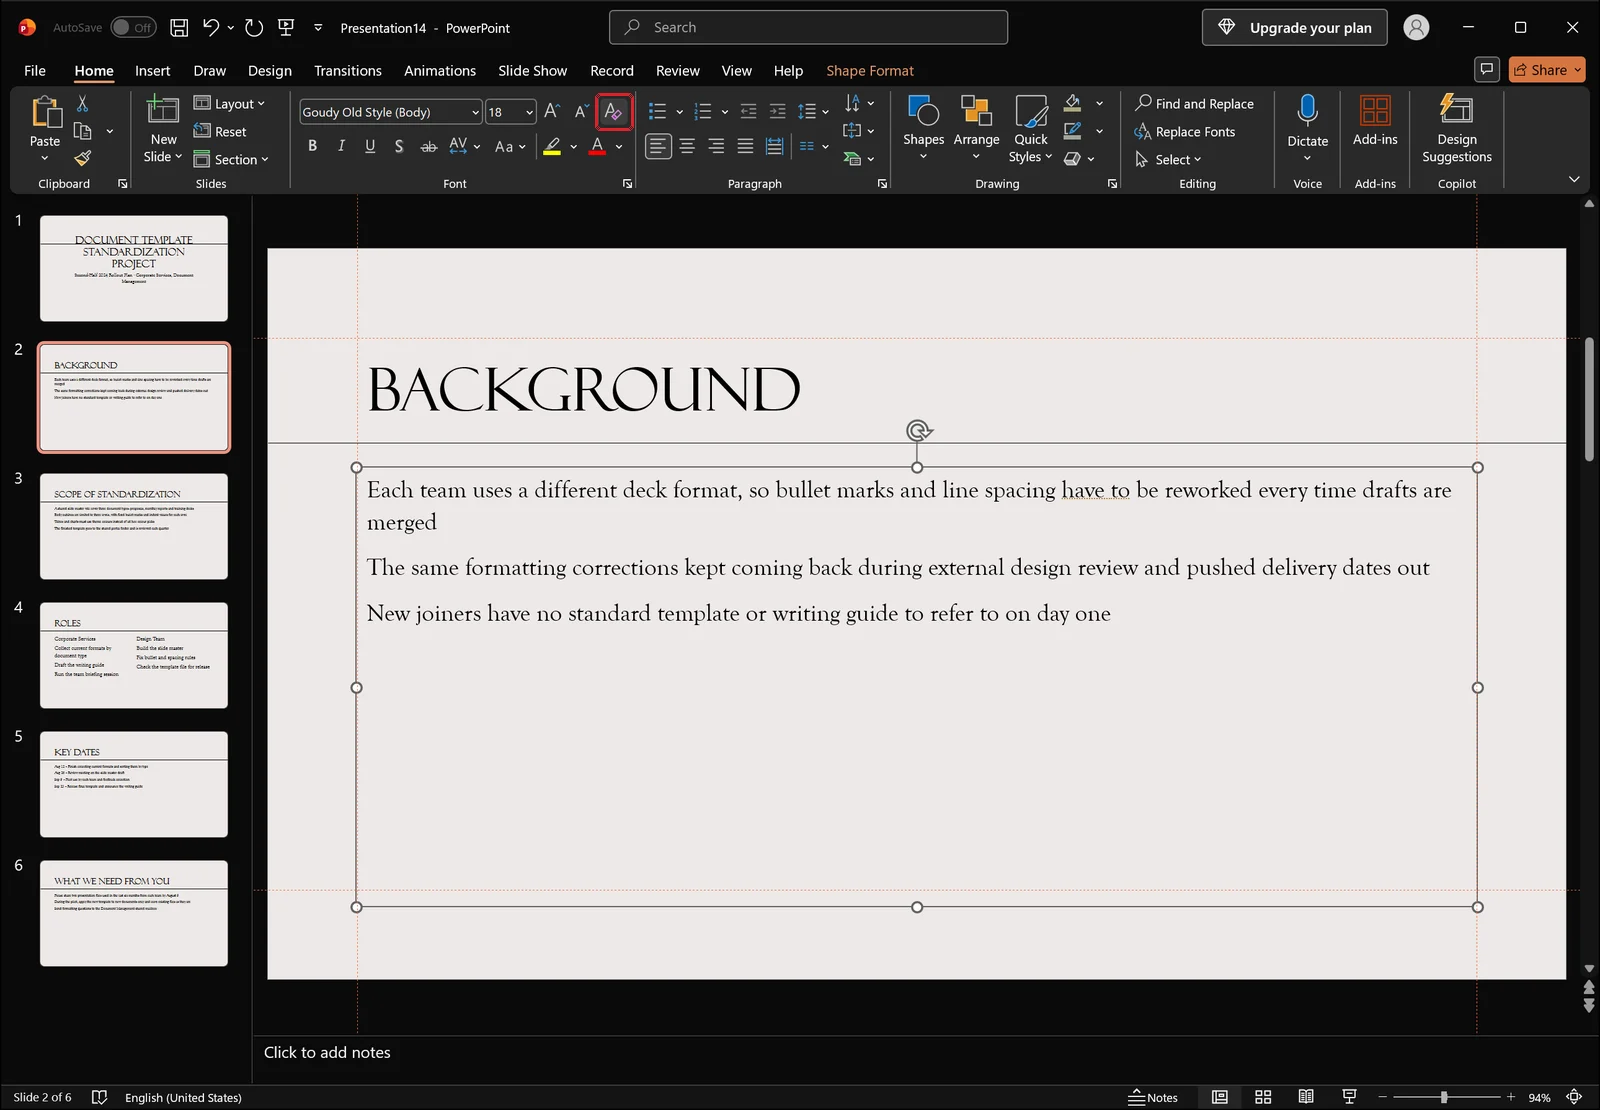
This command does more than clear spacing settings; it also strips font size, colour and bold styling. If parts of the slide are deliberately styled, select only the list before applying it.
Unify every level from the Slide Master
On a deck of thirty or forty slides, fixing placeholders one at a time never ends. Switch to Slide Master on the View tab and the left pane lists the master slide and its child layout thumbnails, while the editing area displays a title placeholder and a body placeholder containing a sample line for each list level.
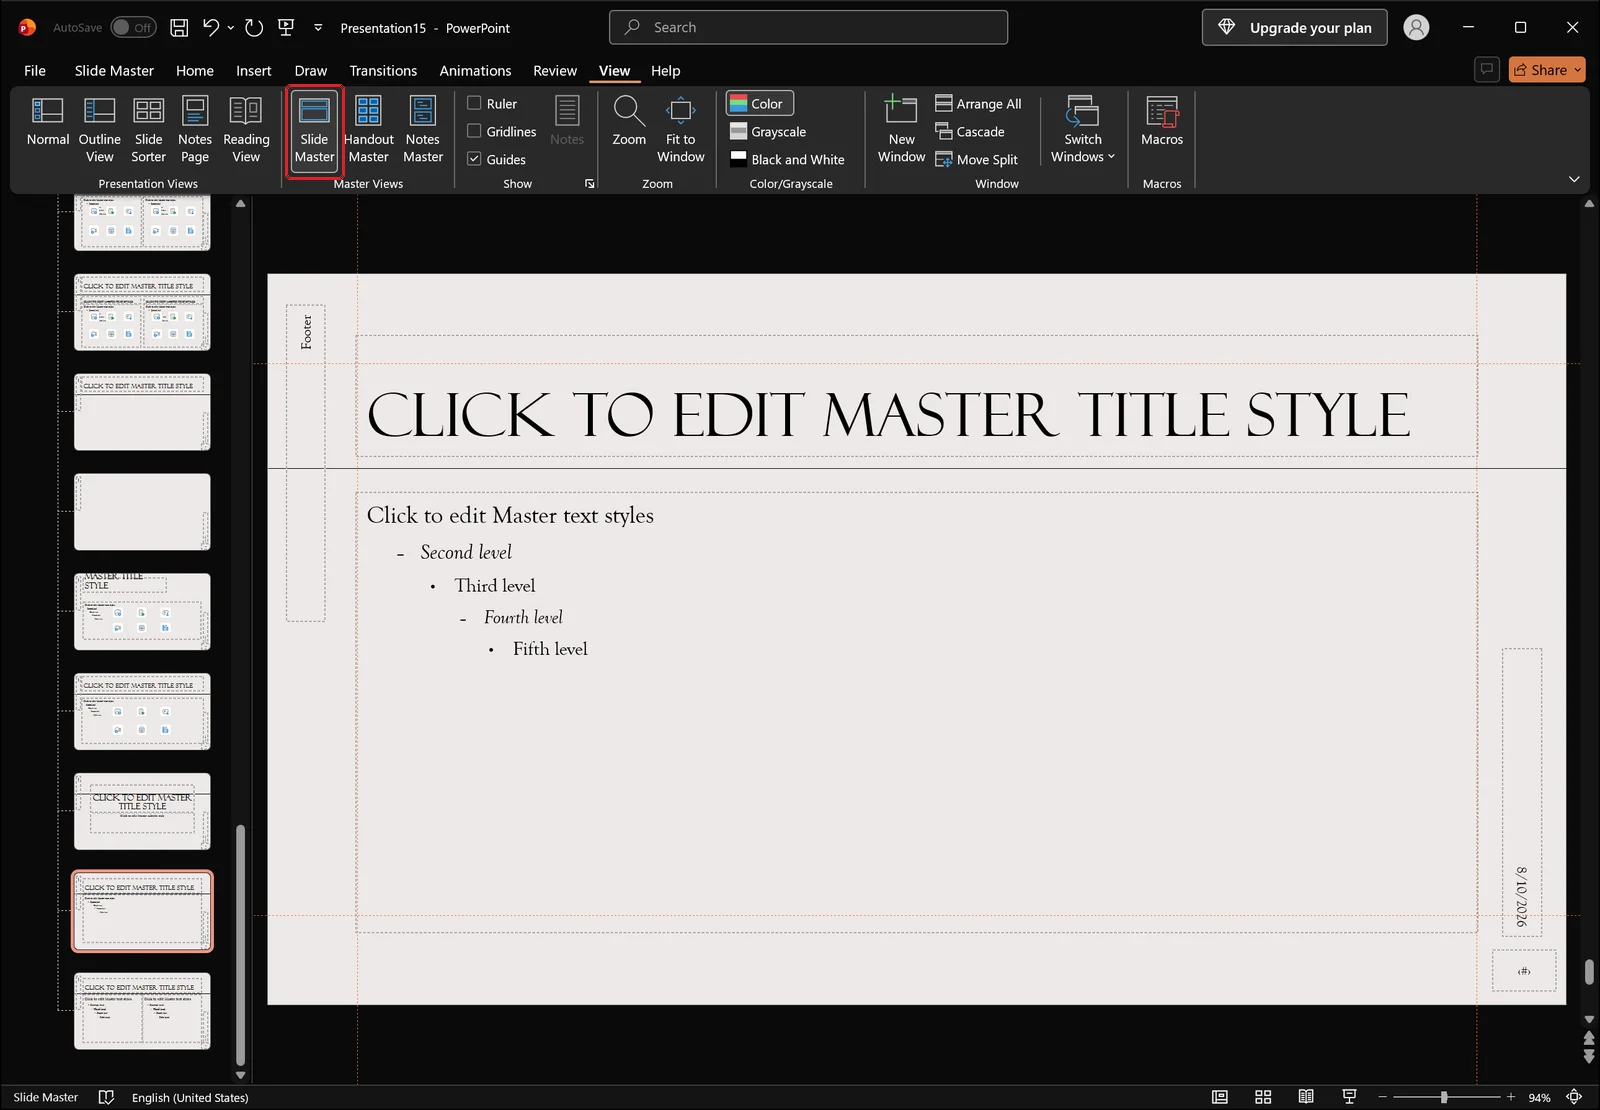
Put the cursor on each level's line, set the bullet, indent and line spacing once, and every slide built on that master picks up the change. Slides where someone already overrode the values by hand may not follow along. In that case, close master view, select the affected slide, and use Reset in the Slides group on the Home tab to restore the placeholders to the layout definition before checking again.
👉 How to Use Slide Master in PowerPoint: Format Every Slide
Frequently Asked Questions
Q. What is the shortcut for demoting a list level in PowerPoint?
Put the cursor at the very start of the line and press Tab to move down one level, or Shift+Tab to move up one. Pressing Tab mid-line inserts a tab character and leaves the level unchanged, so the cursor position matters. Increase Indent and Decrease Indent in the Home tab's Paragraph group do the same thing.
Q. How much space should there be between a bullet and its text?
With body text at 18–24 pt, a hanging indent of about 0.6–0.9 cm (roughly 0.25–0.35 in) reads well. Keep the Before text and hanging values in the same range and wrapped items will start their second line exactly under the first. Typing the number into the Paragraph dialog is more reliable than dragging ruler markers when you need lines to match across slides.
Q. How do I restart numbering at 1?
Click the More Options arrow next to Numbering, open the Bullets and Numbering... command at the bottom of the gallery, and set the start number to 1. Numbering is counted per text box, so moving a list into a separate placeholder also restarts it at 1 without any extra setting.
Q. Can I remove the bullets but keep the text where it is?
Yes. Clicking Bullets again or choosing None in the gallery removes the mark and leaves the indent values intact, which is exactly what you want if the alignment should stay. If you also want the text pushed to the left edge, set the Before text and hanging values to 0 in the Paragraph dialog.
Tidying up slide list formatting with inline AI
Everything above is reliable once you know which box each number goes in, but on a thirty-slide deck assembled from several contributors' files, just finding the lines that are out of step takes a while. Editing the master helps, and paragraphs that were changed by hand on individual slides still sit outside it.
inline AI handles that kind of repetitive cleanup on the document itself. It reads the open PowerPoint file, finds lines whose list level is inconsistent with the rest, and when you ask for something like "make the body list hanging indent 0.8 cm everywhere," it applies matching indent and spacing values to those paragraphs. The file is opened and edited on your own machine, so internal presentation material never has to be uploaded anywhere.
See what an agent could take over at your company in a 30-minute call.